Devices
From the Devices view, you can access a comprehensive set of functionalities to manage and interact with your devices.
Here, you can select a device, authenticate to it, and perform various management actions, such as changing or unblocking the PIN.
Open ActivClient and insert your token A physical device, such as a smart card or USB key, that securely stores certificates, cryptographic keys and credentials used for authentication, digital signing, and encryption tasks.. The Devices view opens by default.
-
Connected devices are shown as tiles.
-
A device's content is fully loaded when its ID is displayed under the device's name.

Actions Available From the Devices View
The actions available from the Devices view depend on the token type and its configuration.
Notably, fewer options are available for managed devices Smart cards, USB keys, or other security devices administered and controlled through a management platform or system, typically used for secure authentication, encryption, or access control in enterprise environments..
Selecting a Device
If multiple devices are connected, you can select the desired device by clicking its tile in the Devices view.
You can also select a device from any view via the token selector in the right of the title bar.

Authenticating to a Device
Authenticate to a selected device from any view by clicking the authentication button in the right of the title bar.

- A closed red lock
 symbol indicates that the PIN hasn't been entered, and the device is locked.
 - Upon entering the PIN, the symbol changes to an open lock and turns blue
 , indicating successful authentication.
This authentication applies to future actions performed with the device, although some actions may still require the PIN for confirmation.
If you do not authenticate to a token using the authentication button, some operations will prompt for authentication automatically.
Change PIN
To change the PIN for any connected token:
-
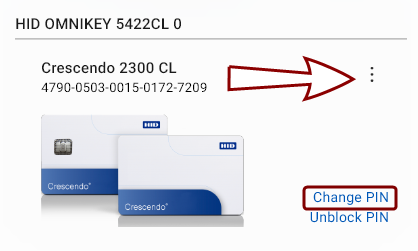
Click the Change PIN action link in the device's interface in the Devices view, or
-
Click the kebab menu button
 in the top-right corner of that token's interface. (You do not need to have the token selected to perform this action.)
A simple Change PIN dialog will open:

When setting a new PIN, the policy regulating PIN entry is displayed in a bubble above the New PIN field:

Unblock PIN
This action enables you to reset the PIN in case it is forgotten.
To unblock the PIN for any connected token:
-
Click the Unblock PIN action link in the token's interface in the Devices view, or
-
Click the kebab menu
button in the top-right corner of that token's interface. (You do not need to have the token selected to perform this action.)


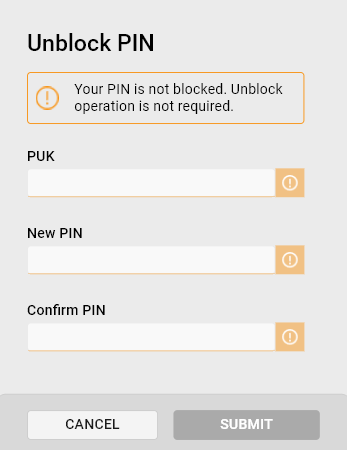
Unblocking the PIN:
- Use the available authentication data to unblock the token:
- Insert the new PIN and confirm by entering it into the Confirm PIN field.
- Click Submit to change the PIN.

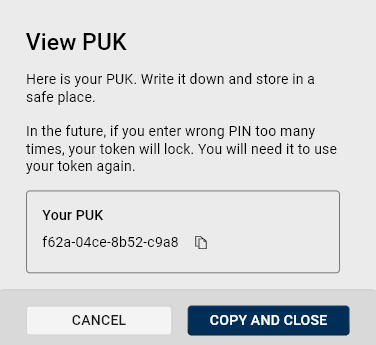
View PUK
If you enter the wrong PIN too many times, your token will lock and a PUK PIN Unblock Key. A code used to reset the personal identification number (PIN) in devices after they have been locked due to multiple incorrect PIN entries. is required to unlock it. Make sure you copy and store your PUK in a safe place.
To view the PUK:
-
Navigate to the Devices view and click the kebab menu button
in the top-right corner of the token's interface. (You do not need to have the token selected to perform this action.) -
Select View PUK.
-
The current PUK will be displayed, allowing you to copy it.
Retrieve Pairing Code
This ActivClient Console feature allows you to retrieve a token's pairing code, which is used for enabling full contactless use of dual-interface PIV cards and keys. For more information, see Enabling Contactless Use of PIV Tokens With VCI Support.
To retrieve a token's pairing code:
-
Insert the token into a contact reader.
-
In the Devices view, click the kebab menu button
on the token's tile. -
Select Retrieve Pairing Code.
-
Authenticate with your PIN.
A dialog will be displayed, allowing you to:
-
Copy the pairing code to the clipboard.
-
Cache the pairing code. This allows the token to be used in contactless mode during the current session.
Clear Cache
For enhanced performance, ActivClient internally caches the state of the connected tokens (including token properties, certificates, keys, OTP One-Time Password. A password that is valid for only one login session or transaction, used to provide an additional layer of security.s, etc.).
This action clears the ActivClient caches for the selected token. This is particularly useful in rare instances when the device's internal state (cache), as recorded by ActivClient, becomes invalid due to external programs communicating with the device or because of an internal error. The Clear Cache functionality is designed to resolve such inconsistencies by reloading the device state.
To clear a token's caches:
-
Navigate to the Devices view and click the kebab menu button
in the top-right corner of the token's interface. -
Click Clear Cache.
-
The caches for the selected token will be cleared.
Recycle Device
This action resets the token configuration to its original state, as it was when it left manufacturing.
Recycling a Token
To recycle a token:
-
Navigate to the Devices view.
-
Click the kebab menu button
in the top-right corner of the token's interface. -
Select Recycle Device.
-
Authenticate to confirm this action.
The token will be reset to factory settings. To start using the token, you have to personalize it.
Personalizing a Token
If a token is in factory settings without a PIN set (e.g., after being recycled), you must personalize it before you can start using it.
To personalize a token:
-
Click the Personalize link on the token tile in the Devices view.
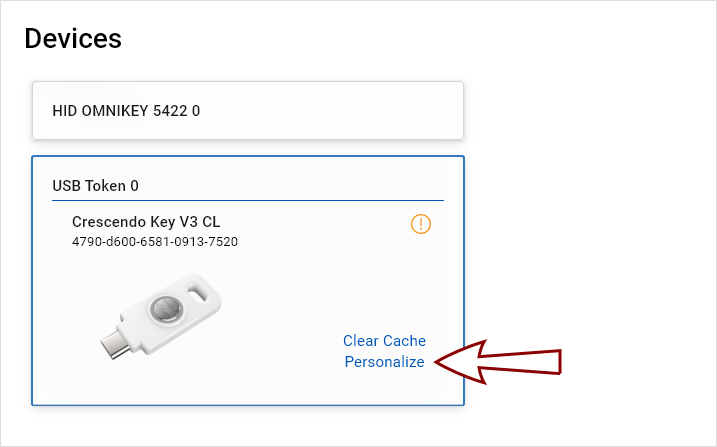 Tip! If the token was modified outside of ActivClient, click Clear Cache before personalizing. This ensures that the application correctly detects the current token state and avoids issues caused by outdated cached data.
 -
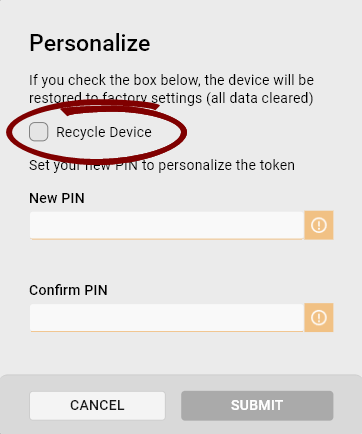
In the Personalize dialog:
-
If the token hasn't been recycled first, select the Recycle Device checkbox to make sure all data is erased from the token.
-
Set the PIN.
-
-
Click Submit.
-
The PIN will be set and a PIN unlock code (PUK) will be generated.
 Important: To avoid permanently locking the token after too many incorrect PIN entries, it is strongly recommended to copy the PUK and store it in a safe place.Tip! For standalone devices, you can view the PUK later using the View PUK action, accessible through the kebab menu in the device's interface.
Update Firmware
This action enables you to update your Crescendo Key V3's firmware directly from within ActivClient.
Follow these steps to update the firmware used by your device:
-
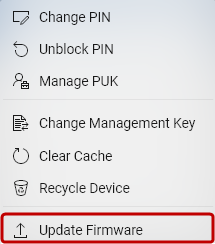
Navigate to the Devices view and click the kebab menu button
in the top-right corner of the token's interface. (You do not need to have the token selected to perform this action.) -
Select Update Firmware.
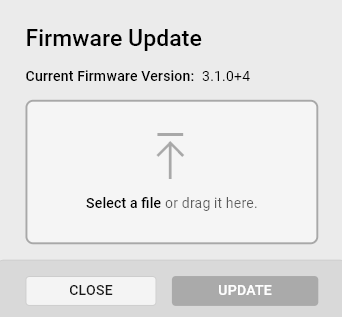
-
The Firmware Update dialog opens. Browse for the firmware file or drag and drop it into this dialog.
-
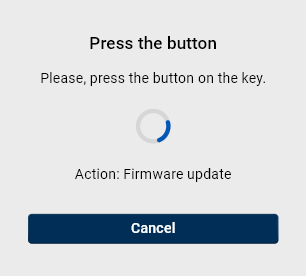
Click the Update button. A dialog opens, instructing you to press the button on your key.
-
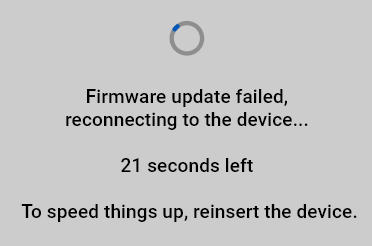
Once the button on the key is pressed, the device firmware starts updating. The key now enters bootloader mode—a special, low-level state that the device uses to safely receive and install new firmware.

-
After the firmware update completes, the key exits bootloader mode and reconnects to ActivClient.
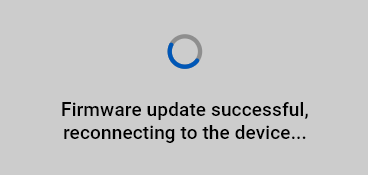
-
The firmware update is now complete.
See also:
Enabling Contactless Use of PIV Tokens With VCI Support