Add a ‘Conditional Send After’ attribute
For more information on conditional attribute values, contact HID Global technical support.
-
In the Dictionary Attributes list, select the attribute to be sent, then click >.

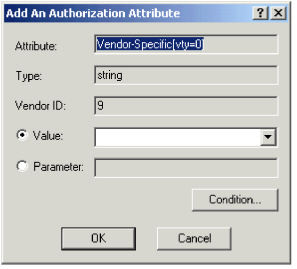
- Define the attribute’s Value or Parameter. Select one option only.
- Select Value to set the attribute to a value. If the attribute has fixed values, select a value from the drop-down list. Otherwise, enter a value.
-
Select Parameter for data specific to a user in the LDAP, such as the callback number or an assigned IP address retrieved by the LDAP query.
Enter a name for the parameter. You must be sure that you have retrieved this parameter through the LDAP query used for the group to which you want to apply this profile. See Create an LDAP Query and Create a Group Using LDAP Queries and Filters. -
Click Condition....

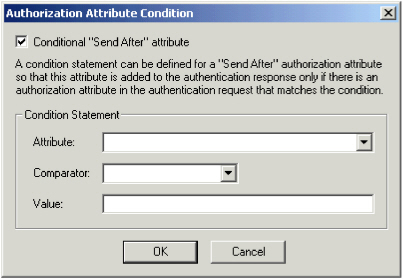
- To define the attribute as conditional, select Conditional "Send After" attribute.
- From the Attribute drop-down list, select the authentication request attribute to be checked.
-
Select the Comparator:
- Equal to - the received attribute value must be equal to the defined conditional value.
This comparator can be applied to all types of attributes. - Starting with - the received attribute value must start with the defined conditional value.
This comparator can only be applied to string and IP address attribute types.
- Equal to - the received attribute value must be equal to the defined conditional value.
-
Enter the Value to which the received attribute value is compared.
-
Click OK.

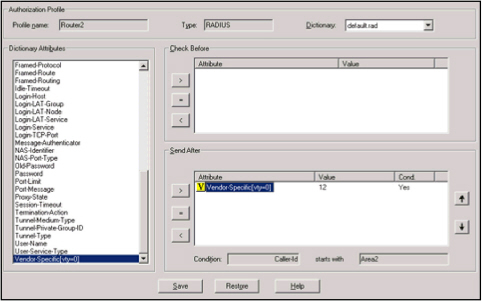
The attribute is displayed in the Send After section of the main attributes screen:
- With a "V" in front of it (if you defined a value) or with a "P" in front of it (if you defined a parameter).
- With "Yes" in the Cond. column to define the conditional status.
- The conditional settings for the attribute are displayed underneath.
-
To define the order in which the attributes are evaluated, use the
 and
and  buttons.
The attribute to be verified first must be at the top of the list.
- Click Save.


