Perform Advanced Diagnostics
The Advanced Diagnostics tool:
-
Helps administrators perform a thorough examination of your environment.
-
Provides information synthesized in one single report which you can send to your help desk.
-
To access the Advanced Diagnostics wizard, either:
-
On the ActivClient Agent icon
 in the Windows notification area, left or right-click and select Advanced Diagnostics.
 -
From the ActivClient User Console Standard toolbar, click the Advanced Diagnostics icon
 .
. -
From the ActivClient User Console Help menu, select Diagnose.
-
From the Start menu, go to the programs or apps directory, and select Advanced Diagnostics under ActivID ActivClient.
-
-
To generate a report, make sure you have inserted a smart card.
-
Click Diagnose.
-
If your smart card is in your reader, enter your PIN code at the prompt and click OK.

A single report is generated and stored in a log file which you can send to your help desk.
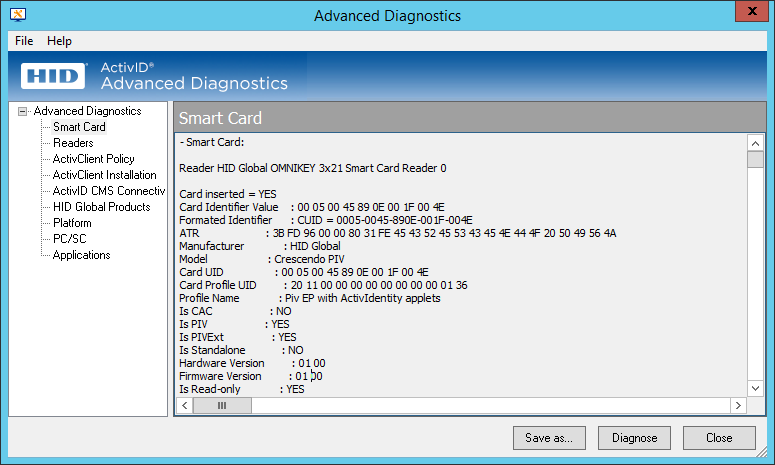
The generated report is displayed in eight categories which you can access by clicking on the corresponding nodes:
-
Smart Card
-
Readers
-
ActivClient Policy
-
ActivClient Installation
-
HID CMS Connectivity
-
HID Global Products
-
Platform
-
PC/SC
-
Applications
-
-
Select one of the eight categories you want to display.
-
To copy part of your report, select the required view, and select File and click Copy.
The content of the option you selected is copied to the clipboard and can be pasted into a file and location of your choice.
-
To save your report, select File and click Save as.
All the information is saved in a single log file.
-
If your administrator has enabled the option, you can email the report to your help desk by selecting File and then clicking Email.
Note: The destination email address might be pre-defined by your administrator.The report is saved as a log file and your default email application (for example, Outlook) opens with a new message.
The log file is then attached to the new mail message.
-
Add any additional information and send the message to your help desk.


