Using Active Directory Group Policy Objects on Microsoft Windows Server
You can use the Active Directory Group Policy to remotely set the configuration for a group of computers or users. The ActivClient Administrative Template files are installed with the Configuration Management component during ActivClient setup. They are then copied to the standard C:\Windows\PolicyDefinitions\ folder.
You can define the values of the ActivClient policies with the Active Directory Group Policy Editor. You can then push these values to all the ActivClient users in the domain.
The following ActivClient Administrative Template files are provided:
-
HIDGlobal.admx (and HIDGlobal.adml) that configures the root node under Administrative template under which all HIDGlobal settings are configured.
-
HIDGlobal.ActivClient.admx (and HIDGlobal.ActivClient.adml) that contains all settings related to ActivClient. This node is defined under HIDGlobal.
-
HIDGlobal.Logging.admx (and HIDGlobal.Logging.adml) that contains general logging settings defined as true policies. This node is defined under HIDGlobal.
-
HIDGlobal.AdvancedDiagnostics.admx (and HIDGlobal.AdvancedDiagnostics.adml) that contains settings related to the Advanced Diagnostics tool. This node is defined under HIDGlobal.
You can also customize the setup to install the modified policy settings during installation. For further information, see Customizing the ActivID ActivClient Setup.
To deploy ActivClient policies you must first load the ActivClient policies as a new Administrative Template. Then you need to make sure that only specified users receive the application.
-
You must have domain administration access rights to deploy the Group Policy.
-
The ActivClient Administrative template defines only ActivClient policies. It does not provide configuration values.
-
You can define custom configuration values with the Active Directory Group Policy Editor.
-
The Active Directory Group Policy Editor is an administrative tool of the Microsoft Windows Server.
Add the ActivClient Administrative Template and Create the Group Policy
-
If you did not install the ActivClient Configuration Management component on the machine, you must copy the template files from the distribution package:
-
Locate the ActivClient .admx template files in the \Admin\Configuration folder in your ActivClient distribution package and copy them to C:\Windows\PolicyDefinitions.
-
-
From the Start menu, go to Administrative Tools, and then select Group Policy Management.
-
In the console tree, right-click the domain or Organizational Unit that you want to configure, then select Create a GPO in this domain....
-
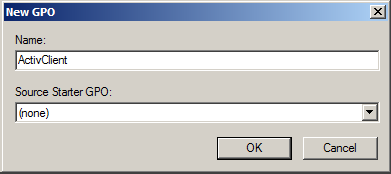
Create a Group Policy Object (GPO) called, for example, ActivClient, and click OK.
Configure the Policy Settings
-
To modify the policy settings, right-click on the group policy you just created and select Edit.
The Group Policy Management Editor opens.
-
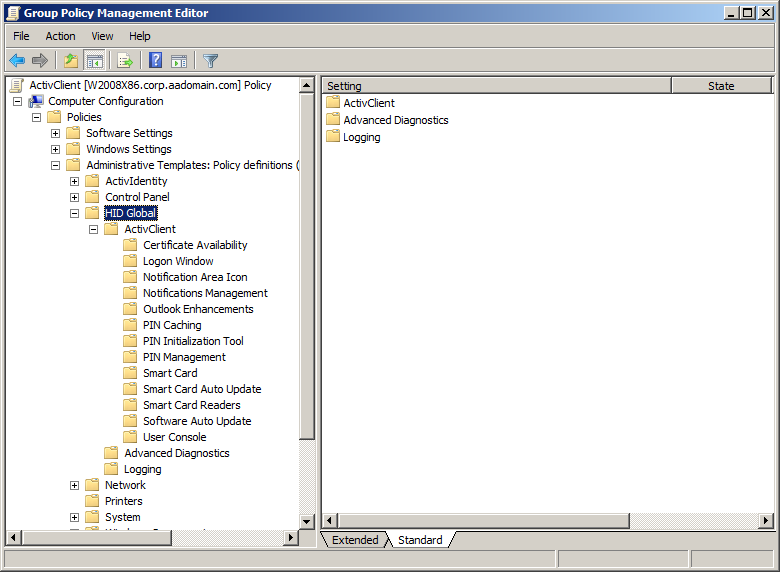
In the console tree, go to Computer Configuration>> Policies, and then Administrative Templates: Policy definitions.
-
Expand the HID Global directory to display the available ActivClient settings.
-
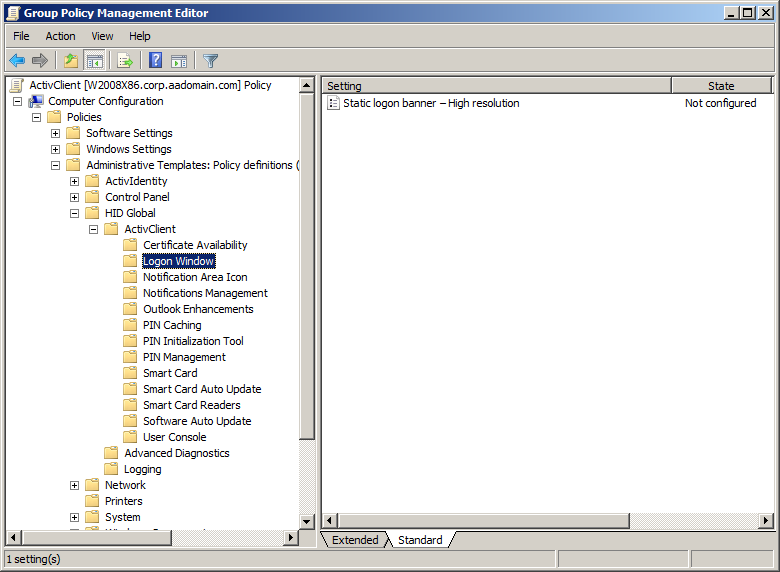
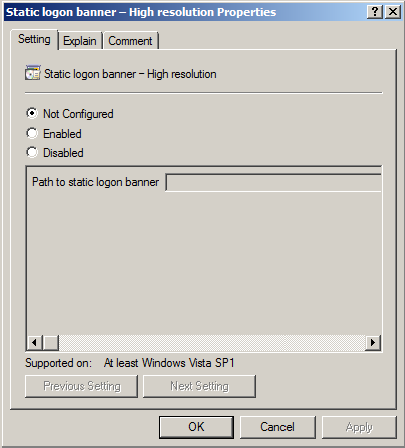
Double-click on a policy setting (for example, Static logon banner) to display the properties.
-
For settings that do not require a specific value (such as timeouts), you can set the status with the following options:
| Code | Level of Protection |
|---|---|
| Not Configured |
When the status is set to Not Configured and you click Apply, the setting is disabled and any previous values are cleared from the policy. New values are required when the setting is set to Enabled. |
| Enabled |
When the status is set to Enabled and you click Apply, the values you enter are stored in the policy. If the default value is used, the policy is empty. |
| Disabled | When the status is set to Disabled and you click Apply, the setting is disabled. Any values remain in the policy and are used when the setting is set to Enabled. |
-
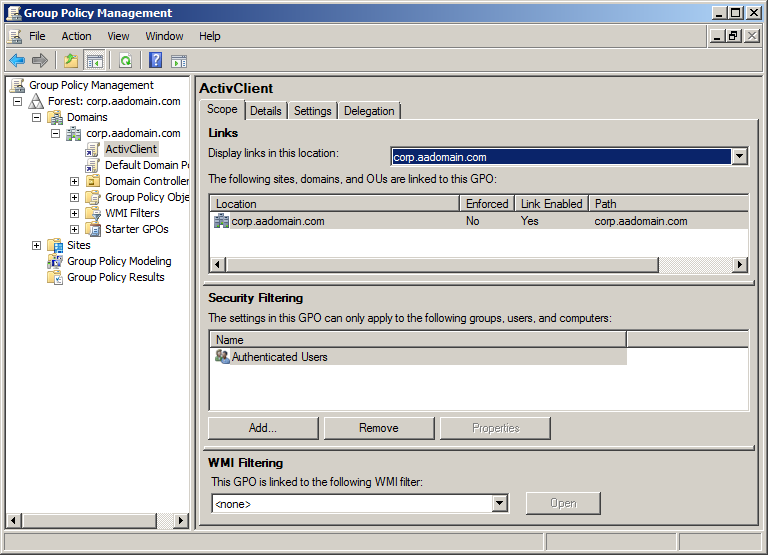
To apply the policy to specific users or group of users, return to the Group Policy Management console and double-click your group policy (in this example, ActivClient).
-
In the Security Filtering section, add the users and/or groups to which you want to apply this policy.
Customizing ActivClient Using the Microsoft Windows Local Computer Policy Editor
If your workstations are not managed centrally, you can customize ActivClient policies using the Windows Local Computer Policy editor.
The ActivClient Administrative Template files are installed with the Configuration Management component during ActivClient setup. They are then copied to the standard C:\Windows\PolicyDefinitions\ folder.
The following ActivClient Administrative Template files are provided:
-
HIDGlobal.admx (and HIDGlobal.adml) that configures the root node under Administrative template under which all HIDGlobal settings are configured.
-
HIDGlobal.ActivClient.admx (and HIDGlobal.ActivClient.adml) that contains all settings related to ActivClient. This node is defined under HIDGlobal.
-
HIDGlobal.Logging.admx (and HIDGlobal.Logging.adml) that contains general logging settings defined as true policies. This node is defined under HIDGlobal.
-
HIDGlobal.AdvancedDiagnostics.admx (and HIDGlobal.AdvancedDiagnostics.adml) that contains settings related to the Advanced Diagnostics tool. This node is defined under HIDGlobal.
-
Start the Microsoft Management Console (mmc.exe) and, from the File menu, click Add/Remove Snap-in.
-
Add the Group Policy Object Editor snap-in, select Local Computer, and click OK.
-
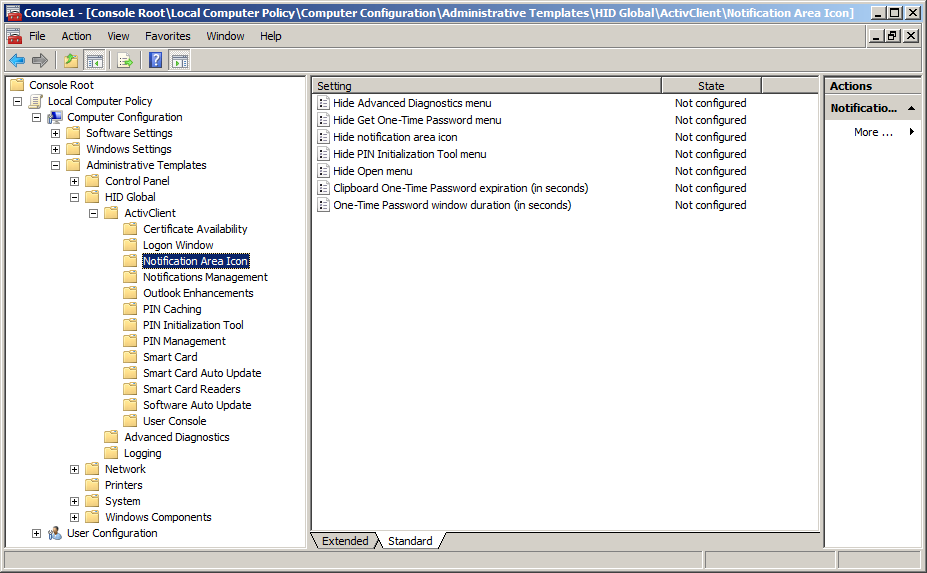
Under Computer Configuration, go to Administrative Templates, and then HID Global.
-
View and edit the ActivClient product settings (ActivClient, Advanced Diagnostics and Logging).
-
For settings that do not require a specific value (such as timeouts), you can set the status with the following options:
| Code | Level of Protection |
|---|---|
| Not Configured |
When the status is set to Not Configured and you click Apply, the setting is disabled and any previous values are cleared from the policy. New values are required when the setting is set to Enabled. |
| Enabled |
When the status is set to Enabled and you click Apply, the values you enter are stored in the policy. If the default value is used, the policy is empty. |
| Disabled | When the status is set to Disabled and you click Apply, the setting is disabled. Any values remain in the policy and are used when the setting is set to Enabled. |
-
You can also view and edit the relevant Microsoft settings.
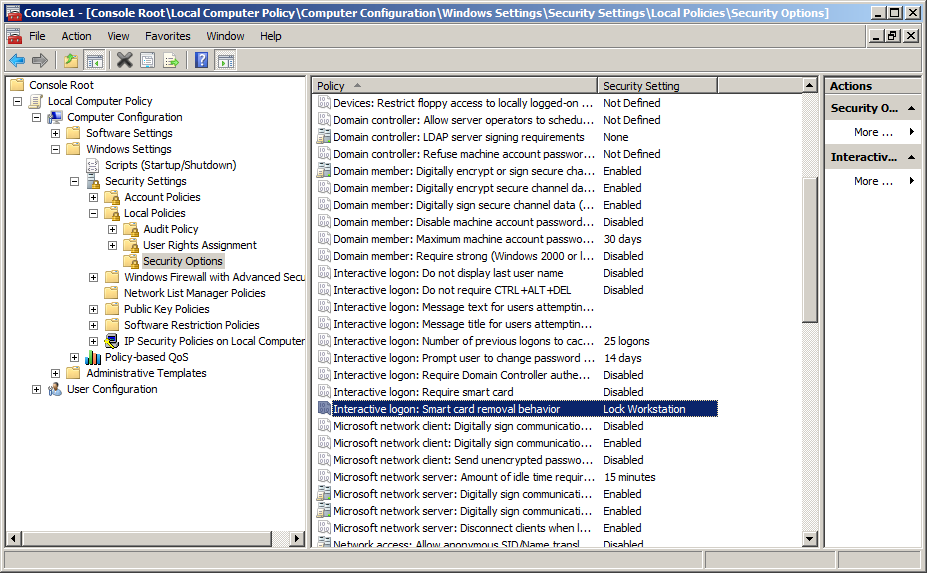
The following example illustrates the smart card removal behavior policy.
