Configure User Attributes
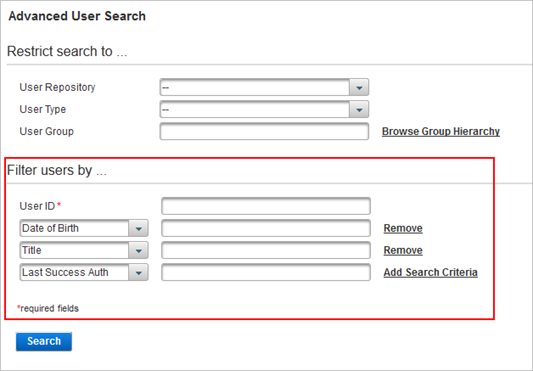
User Attributes are used in Help Desk operations to filter user search results. You can add and remove the attributes as search criteria.

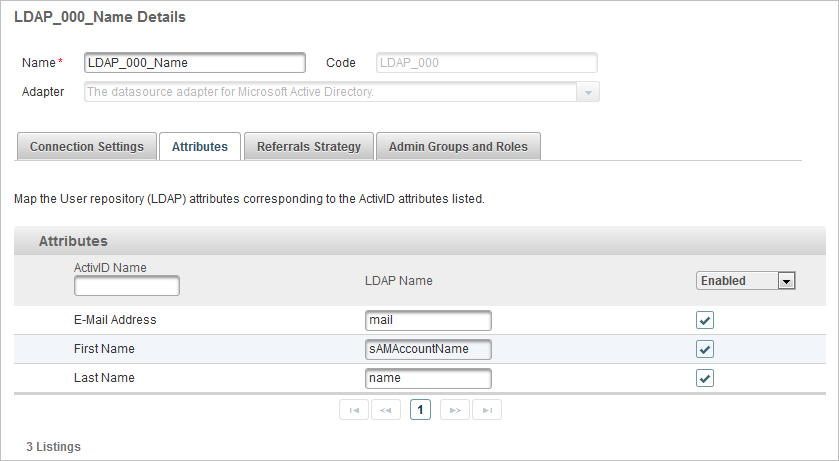
The attributes are mapped to the attributes in the selected User Repository.
You can create additional user attributes using the ActivID Management Console, which you then map to your repository attributes.
ActivID Appliance provides the following User Attributes:
- Address Line 1
- Address Line 2
- Address Line 3
- Address Line 4
- City
- Date of Birth
- First Name
- Last Name
- Last Success Auth
- Post code
- Title
- User Type
- Type of system
- E-Mail Address
- Mobile Phone Number
- Application Topic Identifier
- OPENID Applications claims
Create a User Attribute
-
Log on to the ActivID Management Console as an ActivID Administrator.
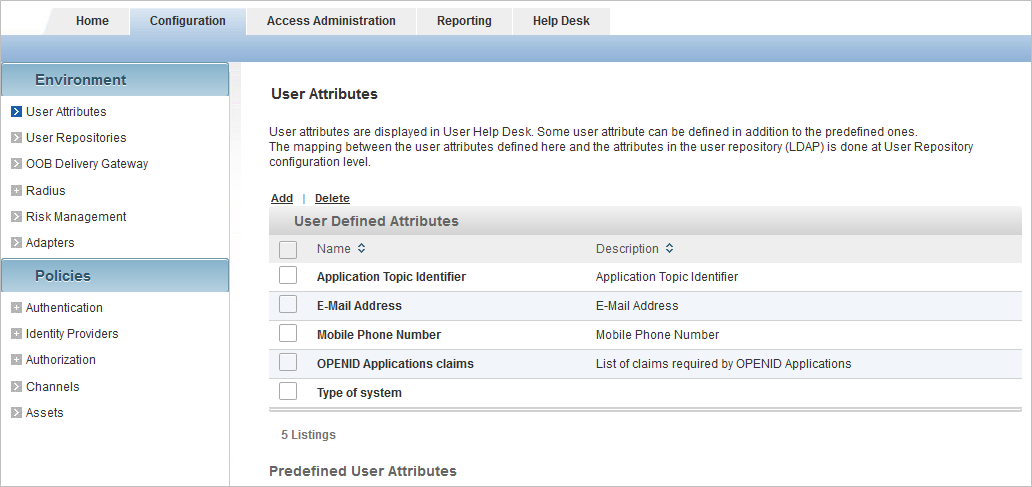
- Select the Configuration tab and, under Environment, select User Attributes.
-
Click Add.
-
Enter a Name for the attribute.
Note: It is recommended that the name be easily identifiable and correspond to the repository attribute to which it will be mapped. -
Edit the Code to identify the attribute.
The Code is pre-assigned. You can modify it but it must be unique, a minimum length of three characters and maximum length of 10 characters.
-
Optionally, enter an attribute Description.
-
Click Save.


Map a User Attribute to a Repository Attribute
You map the user attributes to those of your repository at the User Repository level.

Edit A User Attribute
-
Log on to the ActivID Management Console as an ActivID Administrator.
- Select the Configuration tab and, under Environment, select User Attributes.
- Click the Name of the attribute you want to edit.
- Edit the attribute settings as required.
- Click Save.

All the settings can be modified except the Code.
Delete a User Attribute
-
Log on to the ActivID Management Console as an ActivID Administrator.
- Select the Configuration tab and, under Environment, select User Attributes.
-
Select the check box of the attribute that you want to delete and click Delete.
-
When prompted, click Yes.


