Configure the ActivID Self-Service Portal Features
Verify the Self-Service Portal Direct User Permissions
The ActivID Self-Service Portal Direct User is configured by default with the required permissions to interface with ActivID Appliance.
To make sure the direct user has the required permissions:
- Log on to the ActivID Management Console as an ActivID Administrator and with the required permissions for the domain.
- Search for the user sys*.
- In the user details page, select the Permissions Inherited from Admin Group and User Role tab.
- Verify that the group is assigned the SSP System Administration Functions and SSP System Asset Management Functions permissions sets.
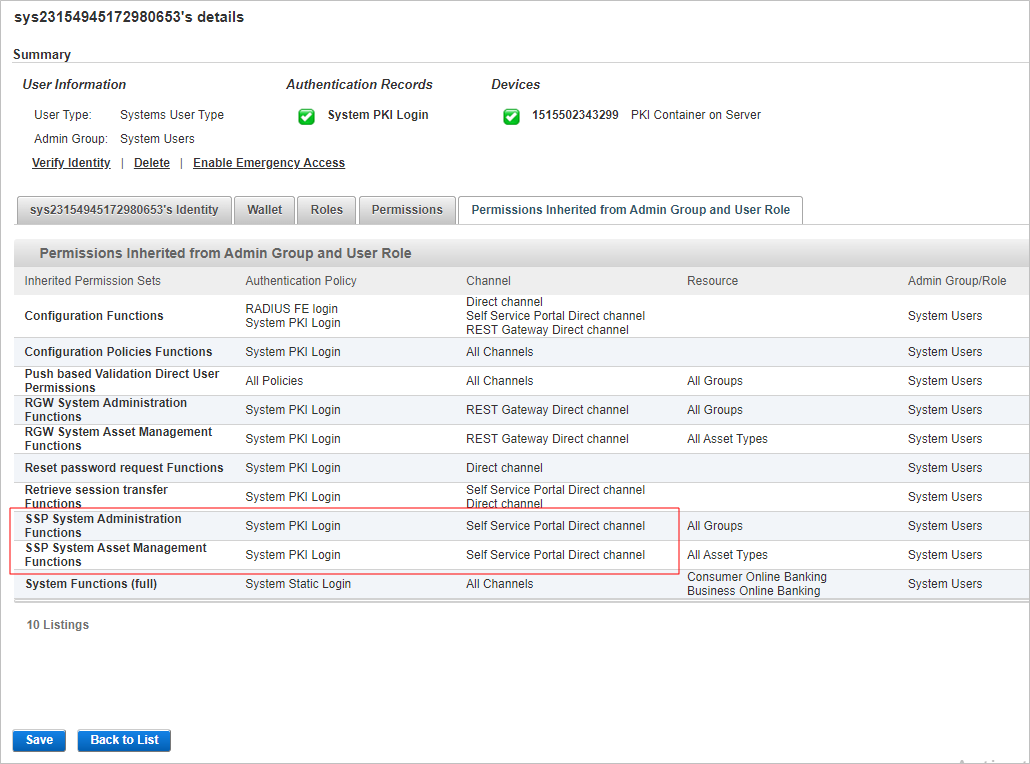
Both sets should also be assigned to the Self-Service Portal Direct channel.
Define the Available Portal Features
You can define the features available per security domain or group by configuring the Self Service Portal Access Permissions set.
This permission set is assigned to all end user groups in a security domain.
The available permissions are:
- Change Soft Pin using the SSP
- Discard User Device using the SSP
- Hardware Token Activation through SSP
- Problem Solving using the SSP
- Rename User Device using the SSP
- Renew User Device using the SSP
- Test User Devices through SSP
- User Personal Information displayed in SSP
- View User Device List in SSP
- Web Token Activation through SSP
- Update predefined permission set
- Update external permission set
Define the Features Per Domain
To define the features available to all domain users, enable or disable the permissions in the Self Service Portal Access Permissions permission set.
- Log on to the ActivID Management Console as an ActivID Administrator and with the required permissions for the domain.
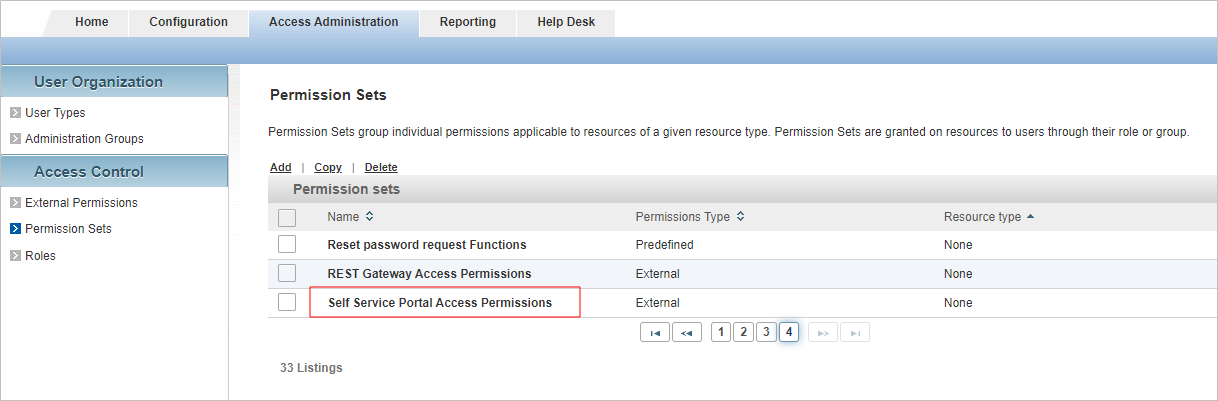
- In the Access Administration tab, under Access Control, select Permission Sets.
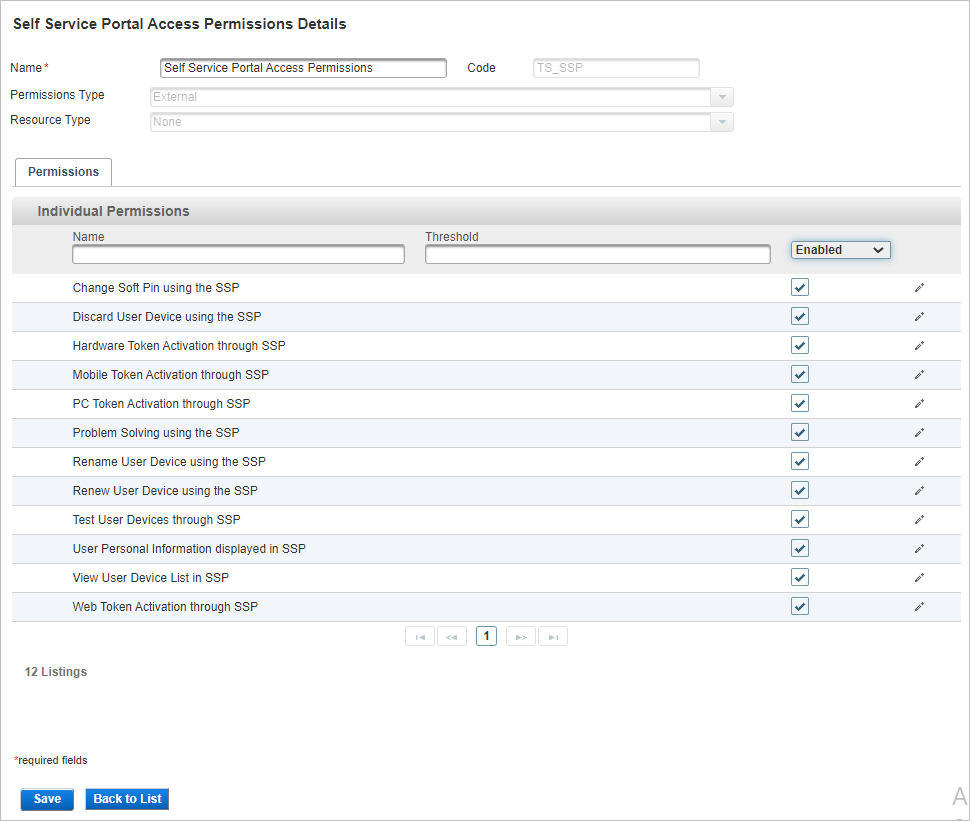
- To edit the portal permission set, click Self Service Portal Access Permissions.
- From the drop-down list, select Enabled and then select or clear the individual permissions as required.
- Click Save to apply the changes.
The modified permission set will apply to all groups in the domain, which are currently assigned the permission set.
When the users log on to the portal, only the features defined in the permission set will be available.
Define the Features Per Group
To define the features available per user group, make a copy of the Self Service Portal Access Permissions set and edit the copied set as required (enable or disable the permissions). Finally, assign the new permission set to the relevant group.
- Log on to the ActivID Management Console as an ActivID Administrator and with the required permissions for the domain.
- In the Access Administration tab, under Access Control, select Permission Sets.
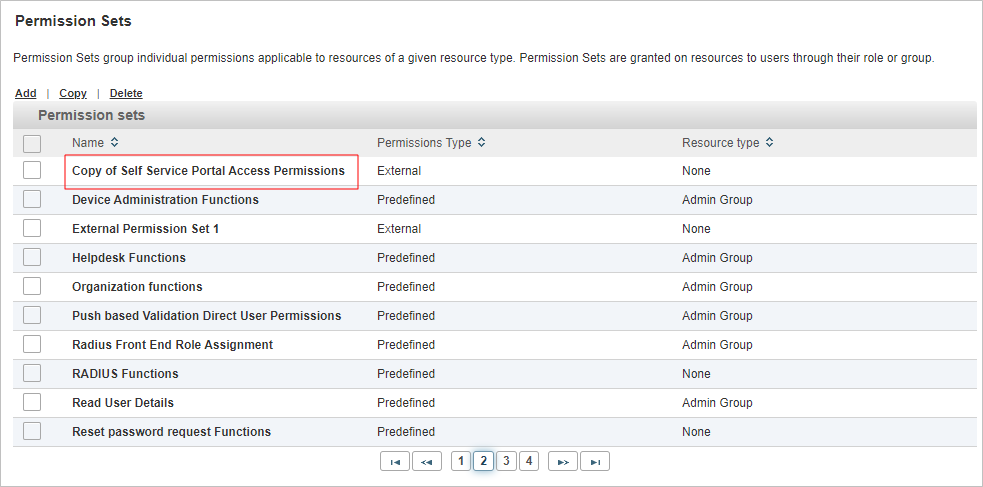
- Select the check box for Self Service Portal Access Permissions and click Copy.
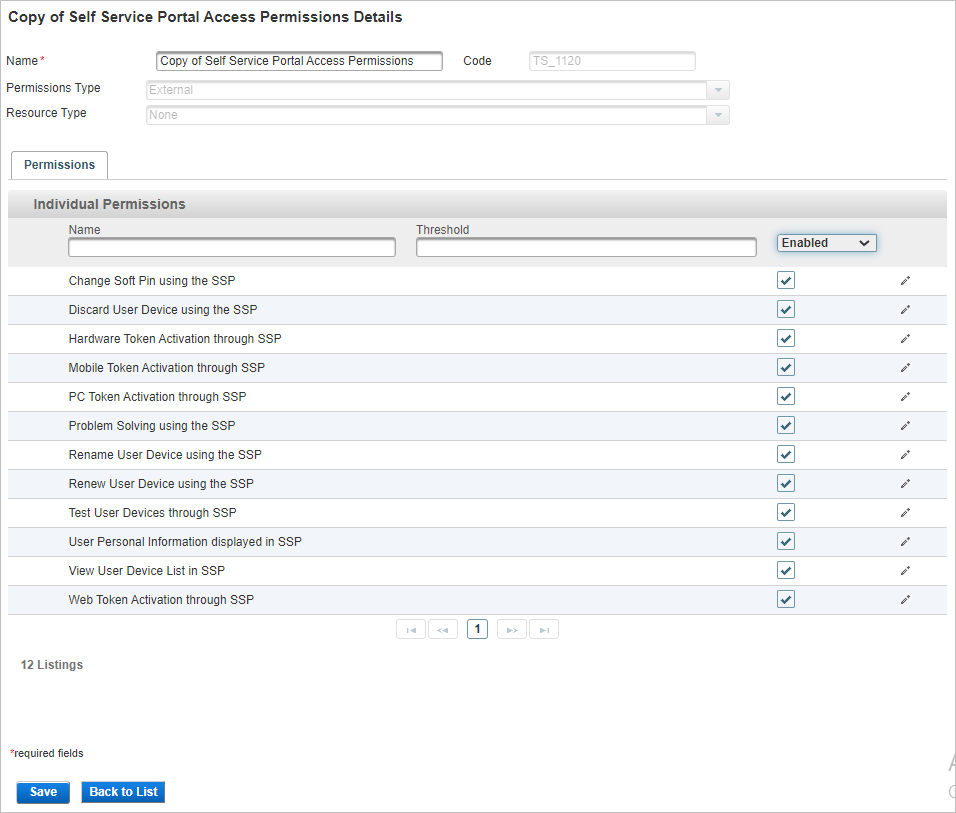
- To edit the new permission set, click Copy of Self Service Portal Access Permissions.
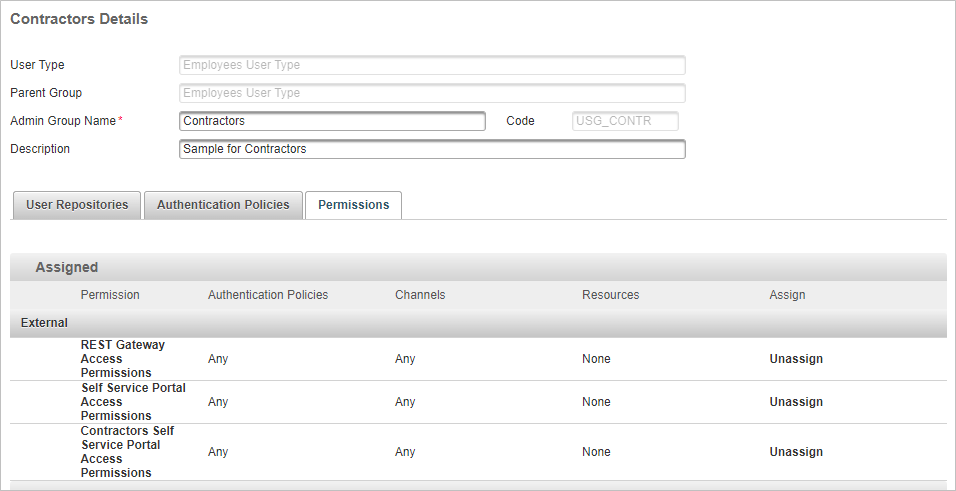
- Rename the permission set to make it easier to identify (for example, if the permission set will be assigned to contractors, you could rename it to Contractors – SSP Access Permissions).
- In the Enabled column, select or clear the individual permissions as required.
- Click Save to apply the changes.
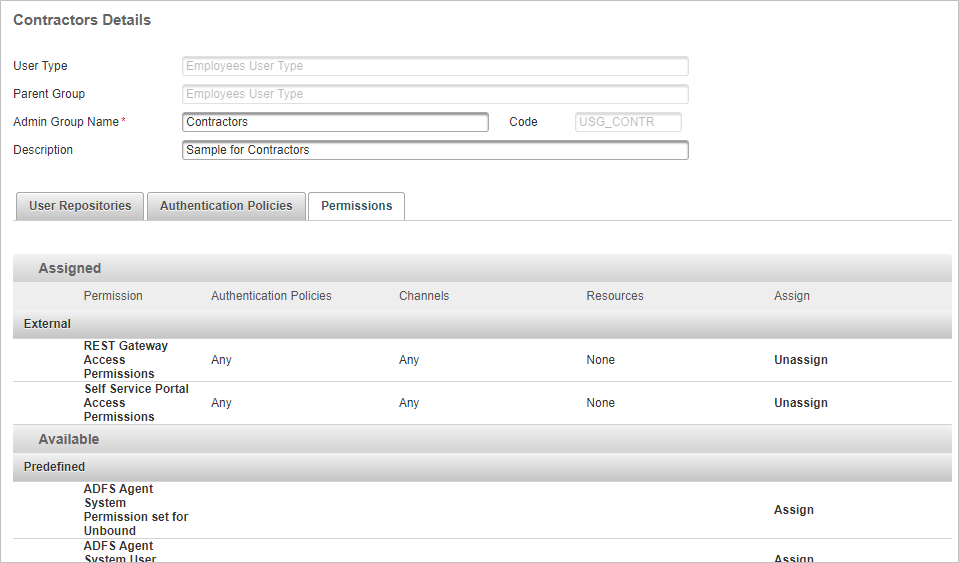
- Return to the Access Administration tab and, under User Organization, select Administration Groups.
- Select the group to which you want to assign the new permission set.
- Select the Permissions tab.
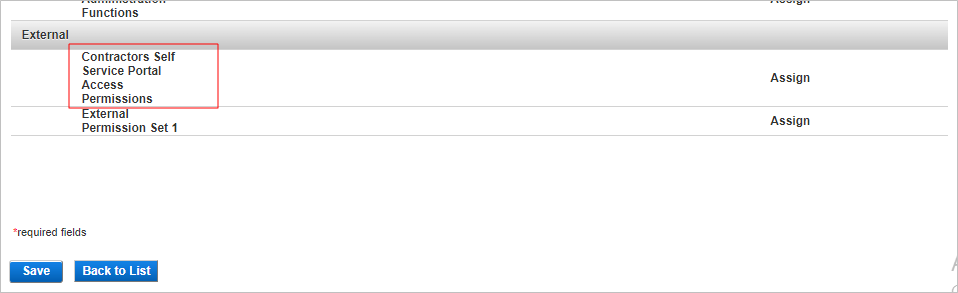
- In the Available list of permission sets that can be assigned, scroll down to the list of External permission sets.
- Click Assign for the new permission set (in this example, Contractors – SSP Access Permissions).
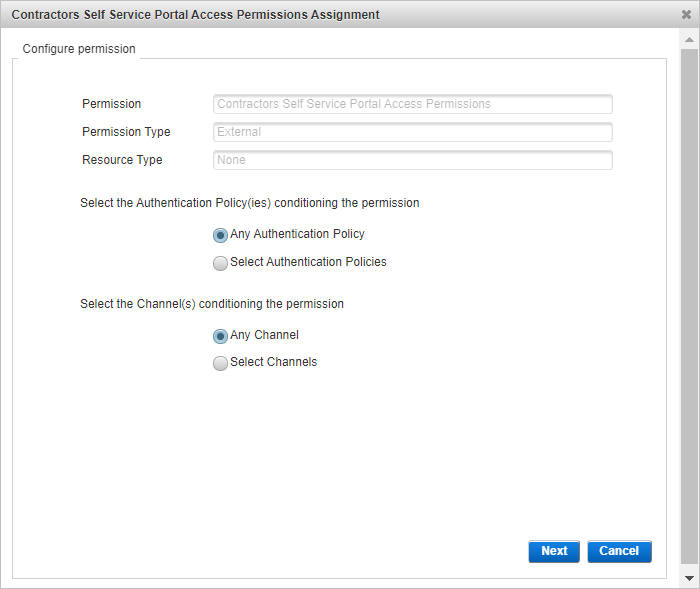
- Complete the assignment wizard by selecting the required Authentication Policies and Channels.
- If necessary, click Unassign to remove the original Self Service Portal Access Permissions permission set.
- Click Save.
Configure the Portal Settings
To customize the portal's settings:
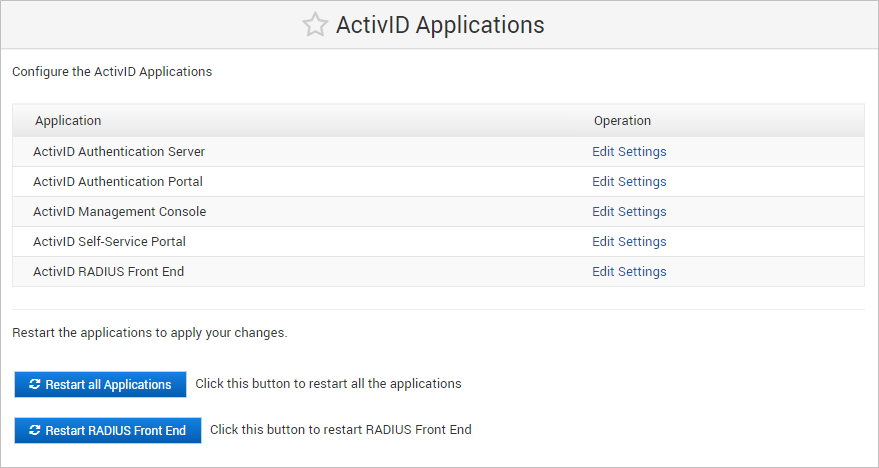
- Log on to the ActivID Console and, under Configuration in the left menu, select Applications.
- Click Edit Settings for the ActivID Self-Service Portal in the Applications list.
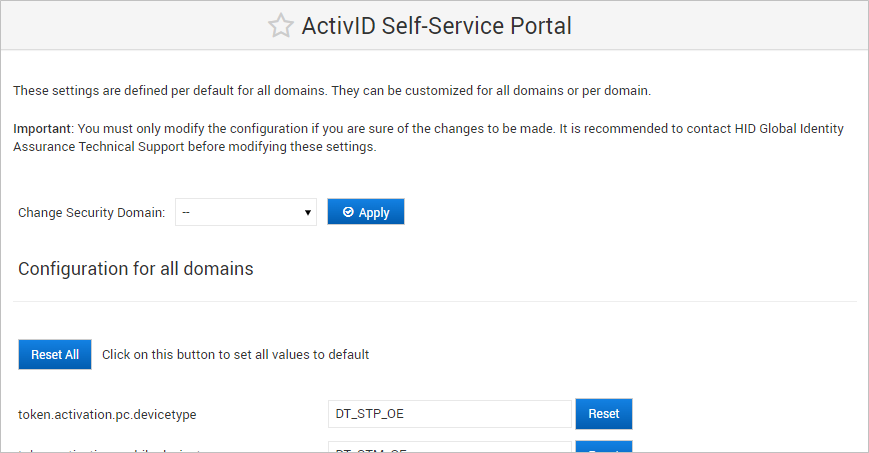
- To apply the configuration to a specific domain, select the domain from the Change Security Domain drop-down list and click Apply.
- To apply the configuration to all domains, leave the Change Security Domain drop-down list as --.
The ActivID Console loads the domain-specific configuration.

- Configure the portal settings as required:
- Configure the Token Activation Settings per Domain or All Domains
- Configure the Token Activation Settings per Admin Group
- Define the HTTP Session Timeout
- Define the Direct and Indirect Channels for the ActivID Self-Service Portal
- Define the Device Incident Status
- Define the Authentication Policy for Test Push Authentication
- When complete, click Save and restart the ActivID Self-Service Portal application to apply your changes.
Configure the Token Activation Settings per Domain or All Domains
The Token Activation settings are defined per default for all domains. They can be customized for all domains or per domain.
Alternatively, the Token Activation settings can also be customized per administration group.
By default, the activation settings are:
- Device type:
- The PC, and Mobile tokens will be activated using the PC Soft Token OATH Event (DT_STP_OE) and Mobile Smart Phone Soft Token OATH Event device types (DT_STM_OE) respectively.
- The HID Approve app will be activated using the Mobile push based Validation device type (DT_TDSV4).
- The FIDO passkeys will be activated using the FIDO device device type (DT_FIDO).
- Authentication policies:
The default policies varies according to the User’s Administration Group (that is, Employee One-Time Password authentication policy will be used to create the authenticator when the device is activated for users in the Full Time Employees Admin Group).
- You must only modify the configuration files if you are sure of the changes to be made. It is recommended to contact HID Global Technical Support before modifying these files.
- To configure the device types and authentication policy applied at activation, edit the following settings:
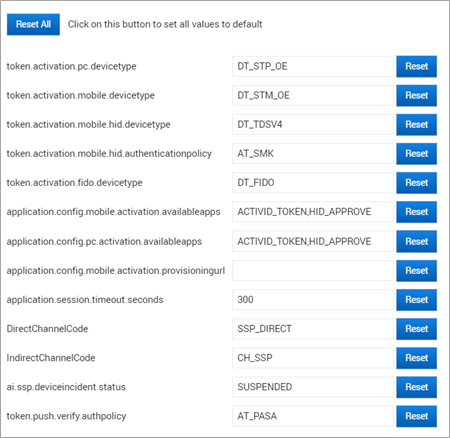
- token.activation.pc.devicetype=DT_STP_OE
- token.activation.mobile.devicetype=DT_STM_OE
- token.activation.mobile.hid.devicetype=DT_TDSV4
- token.activation.mobile.hid.authenticationpolicy=AT_SMK
- token.activation.fido.devicetype=DT_FIDO
- For Mobile Soft Token activation on mobile devices and PC Soft Token activation on PCs, you can also define the list of available applications (for example, to prevent the activation of one specific application):
- For Mobile Soft Tokens, edit the application.config.mobile.activation.availableapps setting.
- For PC Soft Tokens, edit the application.config.pc.activation.availableapps setting.
For both settings, the possible values are ACTIVID_TOKEN and/or HID_APPROVE
For example, application.config.pc.activation.availableapps=ACTIVID_TOKEN,HID_APPROVE
Note: If you define only one type of application, the ActivID Self-Service Portal will directly display the activation workflow for that application and the user will not be prompted to select either ActivID Token or HID Approve. - For HID Approve activation, you can define a customized provisioning URL by editing the application.config.mobile.activation.provisioningurl setting.
By default, the setting is empty and the value is computed with local information (server name and port in the HTTP request).
The required format is <server_name>:<server_port>
- If a proxy is configured in front of ActivID Appliance, enter the proxy server URL
- If the portal is installed on an ActivID Appliance front-end, enter the back-end URL
Configure the Token Activation Settings per Admin Group
You can define the device type and authentication policy used to create the authentication record during activation for each group.
- The Administration Group settings will override the default settings.
- Alternatively, the Token Activation settings can also be customized per domain or for all domains.
- Log on to the ActivID Management Console as an ActivID Administrator.
- In the Access Administration tab, under User Organization, select Administration Groups.
- Select the group for which you want to define activation settings.
- In the group's Details page, select the Authentication Policies tab.
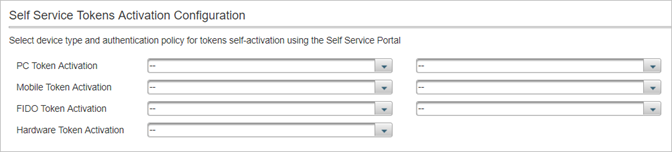
- Go to the Self-Service Tokens Activation Configuration section.
- For each activation option, select the:
- Device type for each type of token
- Authentication policy from the list of polices compatible with the device type selected for the type of device
To disable an activation option for the group, leave the settings empty or clear the selected configuration.
- If One-Time Password authentication policies are not available for your User Type, the lists will remain empty. You must define such a policy to be able to activate the tokens.
- Click Save.
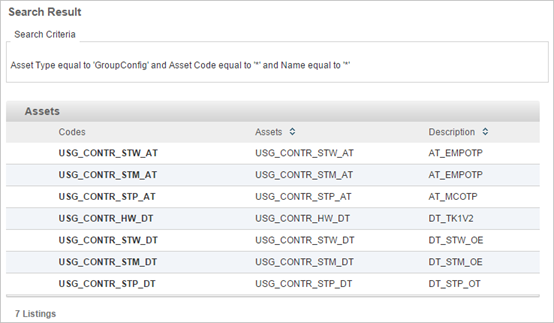
- These assets must not be deleted after they are created (as it will delete the settings)
- Such assets will not be created if the settings are left to default values (meaning no specific device type is selected for the Admin Group)
Define the HTTP Session Timeout
You can define the HTTP session timeout is seconds (by default, this is 300 seconds).
application.session.timeout.seconds=300
Define the Direct and Indirect Channels for the ActivID Self-Service Portal
You can define the direct and indirect channels for the ActivID Self-Service Portal (by default, these are SSP_DIRECT and CH_SSP respectively).
DirectChannelCode=SSP_DIRECT
IndirectChannelCode=CH_SSP
Define the Device Incident Status
You can define the status that should be set for the device when the user reports a device incident (by default, this is SUSPENDED).
When a user reports a device as lost using the ActivID Self-Service Portal, the device is set to an inactive state. This means that, if the device is recovered, it can be used for authentication again after the Help Desk has reactivated it.
ai.ssp.deviceincident.status=SUSPENDED
If you want to change the default state, it is recommended that you change the value to select a state that:
- Is inactive
- Can be transited from any of the other states
- Exists for all device types
Define the Authentication Policy for Test Push Authentication
You can define the authentication policy used to test the push notifications (by default, the policy is AT_PASA).
token.push.verify.authpolicy=AT_PASA


