Customize the ActivID Appliance Design
You can customize the look and feel of the ActivID portals to meet any branding and/or language requirements.
Customize the Labels and Images
You can customize the language of the labels and the images of the ActivID Authentication Portal, the Management Console and the Self-Service Portal, as well as the Mobile Application (that is, HID Approve).
You cannot customize the ActivID Management Console per domain.
You cannot customize the ActivID Appliance RADIUS Front End.
You can also customize the styles and layout of the ActivID Authentication Portal by modifying the stylesheet.
You must convert non-ASCII language files to ASCII encoding before adding them to the customization package.
To convert non-ASCII language files, you can use Java tools such as native2ascii. The following is an example for a Hindi authentication portal language file (where encoding is one of the original files):
native2ascii.exe -encoding UTF-8 ac-4tress-portal_hi.properties
If you want to make changes to the language file, you must convert the file and paste the changes to the ActivID Appliance Customization package.
For information on supported encodings, go to http://docs.oracle.com/javase/8/docs/technotes/guides/intl/encoding.doc.html.
-
In the customization package, locate the branding files for the application that you want to customize.
For example, to customize the ActivID Self-Service Portal labels, you need the SelfServicePortal/branding/default/ssp/ac-4tress-ssp_en.properties file.
-
Make a copy of the required files on your local disk and open them for editing.
-
Update the labels files and images that will override the default files and values as required.
To customize images, determine the dimensions of the original image and prepare your new image with the same dimensions.
-
If you have not previously customized your deployment, manually create the _common_ and/or domain-specific folders using the default folder as a template.
-
Copy the updated files to the relevant folder in the customization package:
- <ApplicationFolder>/branding/_common_/<application> for a customization common to all domains.
- <ApplicationFolder>/branding/<DOMAIN_NAME>/<application> for a domain-specific customization (for the Authentication Portal and Self-Service Portal only).
- AuthenticationPortal/DOMAIN1/ap/ac-4tress-portal_en.properties
- AuthenticationPortal/DOMAIN1/ap/img/<all image files>
- SelfServicePortal/DOMAIN1/ssp/ac-4tress-ssp_en.properties
- SelfServicePortal/DOMAIN1/ssp/ac-4tress-ssp_fr.properties
- SelfServicePortal/DOMAIN1/ssp/img/<all image files>
For example, if you want to add specific customization (branding and language) for “DOMAIN1” for the ActivID Authentication Portal and ActivID Self-Service Portal, including new images, then the following files should be added:
-
When the new files are ready, archive them all into a new zipped package and upload it.
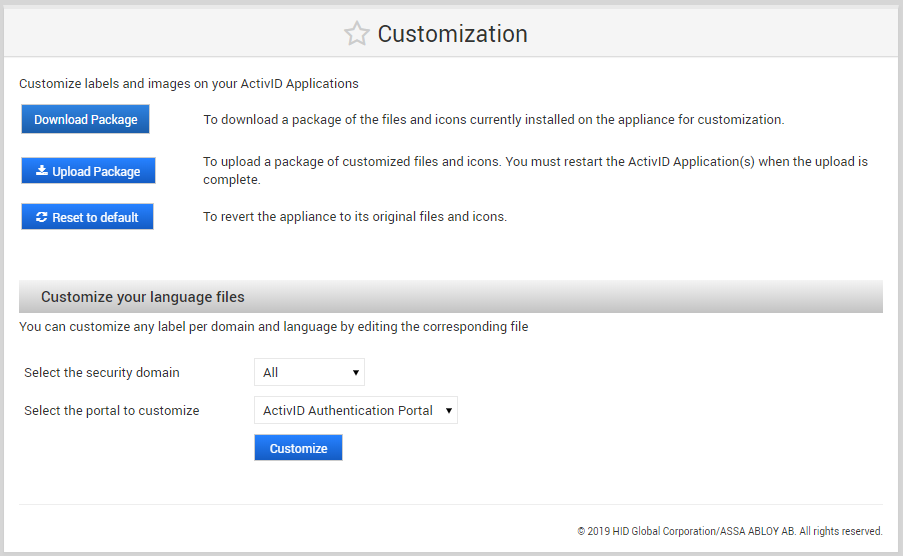
Reset to the Default Labels and Icons
-
If you want to revert to the original English property files, click Reset to default. This deletes any uploaded customization package.
The default values are restored and all the customizations of the selected file are permanently deleted. The default values are those provided by the latest update installation, either service pack or hot fix.

-
If you want to reset the values for a specific domain, select the required domain from the list. To reset all the domains, select All.
-
Click Reset to confirm the reset.
-
Under Configuration in the left-hand menu, select Applications and click Restart all Applications.
Note: This is required to apply the design configuration.
Localizing the Portals
You can localize the language of all the ActivID portals, except the ActivID Console.
- You can customize the label and language for each domain by editing the corresponding files.
- You can customize the label and language per portal.
You must convert non-ASCII language files to ASCII encoding before adding them to the customization package.
To convert non-ASCII language files, you can use Java tools such as native2ascii. The following is an example for a Hindi authentication portal language file (where encoding is one of the original files):
native2ascii.exe -encoding UTF-8 ac-4tress-portal_hi.properties
If you want to make changes to the language file, you must convert the file and paste the changes to the ActivID Appliance Customization package.
For information on supported encodings, go to http://docs.oracle.com/javase/8/docs/technotes/guides/intl/encoding.doc.html.
Add a New Language File
To add label files for a new language:
-
In the downloaded customization package, locate the English properties file(s) for the portal(s) that you want to localize.
-
Then edit the properties by translating the English labels.
-
Add the translated files to the customization package and upload it.
-
View the new language in the list.
-
Once the new files are uploaded and the applications restarted, the languages are added to the ActivID Console language list. If the browser settings on the machine used to access the portal correspond to one of the installed languages, the portal is displayed according to this language. Otherwise, the portal is displayed in the default language (English).
For each file, make a copy and rename the file by replacing the “en” letters with the two letters representing the language as per the two-letter ISO 639-1 codes.
For example, ac-4tress-ssp_en.properties becomes ac-4tress-ssp_fr.properties for the French translation.
For the full list of language codes, refer to the ISO 639 standards.
If you need to use several languages for your installation (for example, switching from one language to another), contact HID Global Technical Support for assistance.
Edit a Language File
You can directly edit the installed language files using the ActivID Console, without downloading the Customization package.
-
Log on to the ActivID Console and, under Configuration, select Customization.
-
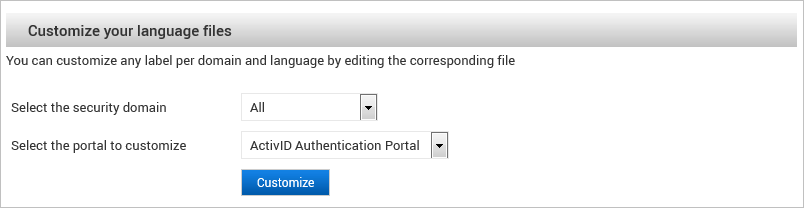
Go to the Customize your language files section.
-
You can either customize the labels to be used for all domains (by default), or customize the labels for a specific security domain.
-
To view/edit the default label files for all the domains, select the All from the drop-down list.
-
To view/edit the label files for a specific domain, select the required domain from the drop-down list.
-
-
Select the Portal to customize and click Customize.
-
If necessary, select the Language file to customize and click Load File.
-
Make the required modifications.
-
Click Save to save your customization.

By default, the English language file is loaded and displayed.
The content of the language label file is displayed in ASCII only. For non-ASCII languages, verify the appropriate conversions.
Customize the Design of the Authentication Portal
- You have downloaded a reference customization package.
Before implementing your customization, it is recommended that you use browser-based developer tools to analyze the stylesheet elements and visualize your customization options.
For example, in Google Chrome, either press F12 or right-click on the page and select Inspect, or from the browser menu, select More tools and then Developer tools.

You can customize the design of the ActivID Authentication Portal by modifying the portal’s stylesheet (.css) is included in the customization package.
The default CSS file is named theme.css, and is located in the /AuthenticationPortal/branding/default/ap/css folder of the customization package.
Do NOT modify the default stylesheet. Instead, use it as a template and add your customization to a copy of the default file.
You must have a good working knowledge of editing CSS files.
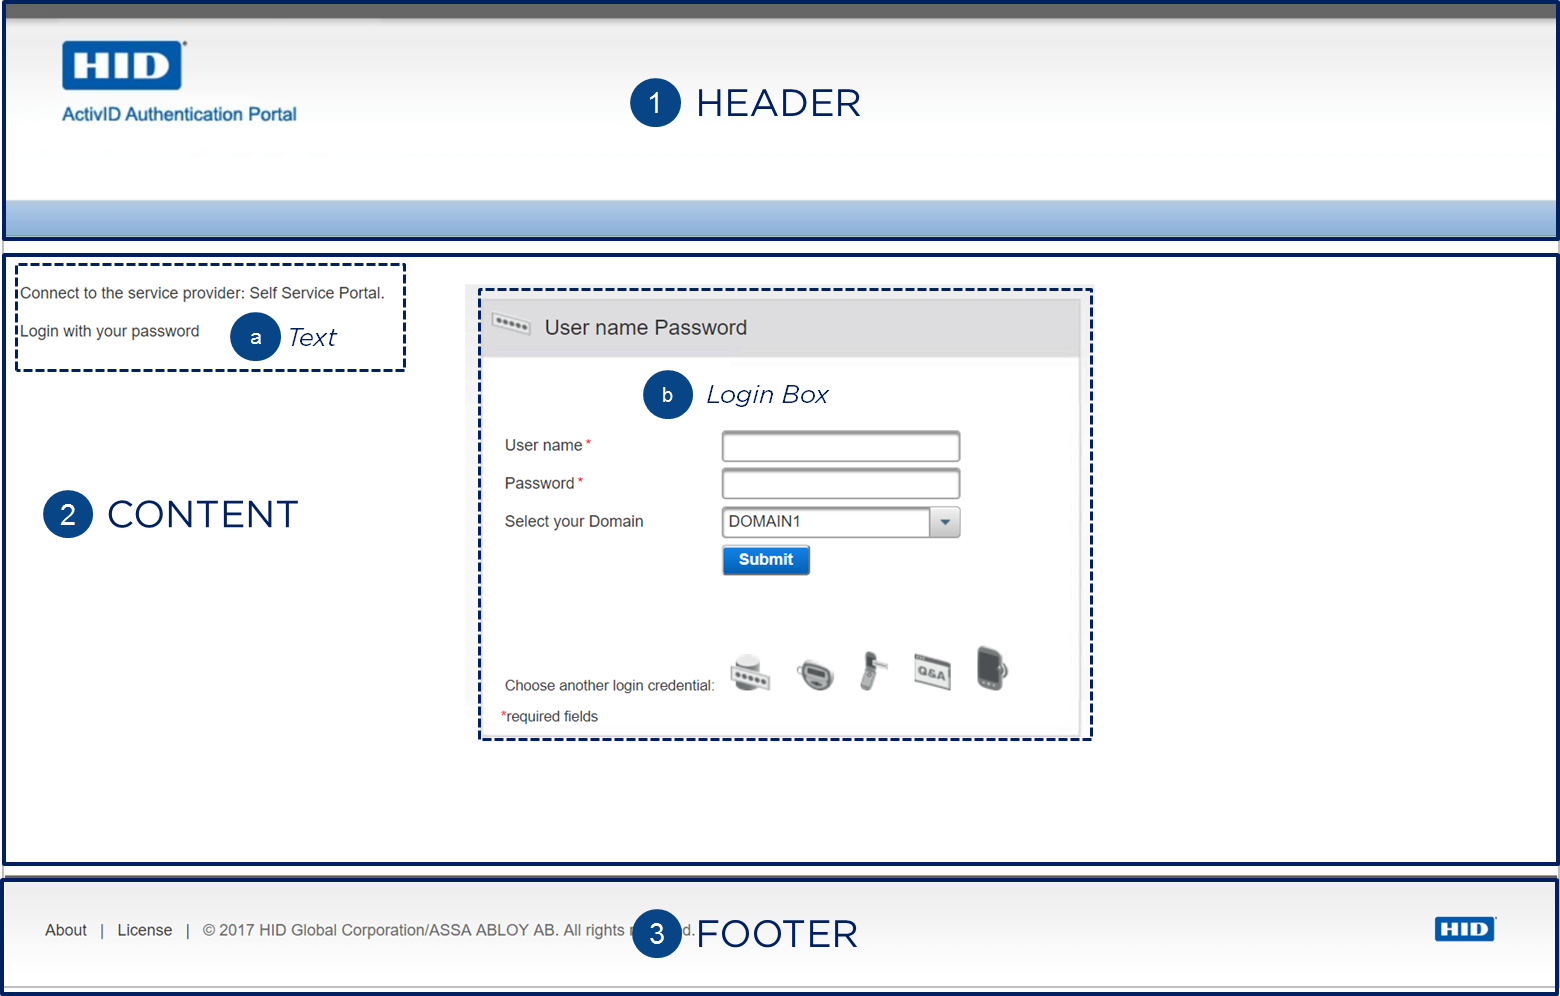
You can customize the following elements:
-
Header – logo and background.
-
Content:
- Title and text (infoText section).
- Login Box – position, login fields and authentication methods.
-
Footer – logo and text.
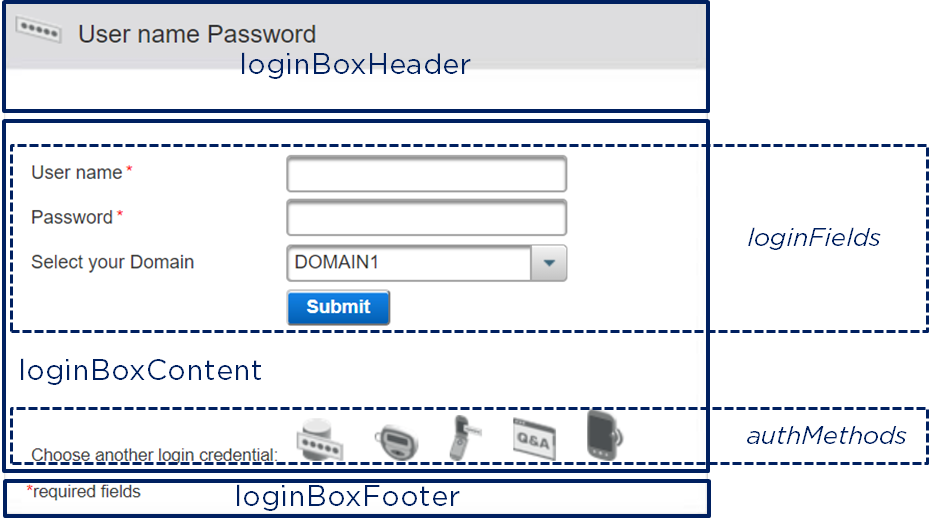
The Login Box sections are located in the loginForm element:
-
Header – logo, title, selected authentication method and message.
-
Content:
- Each field entry (including the button) is represented by a row.
- Each row contains two columns, identified by label and input classes.
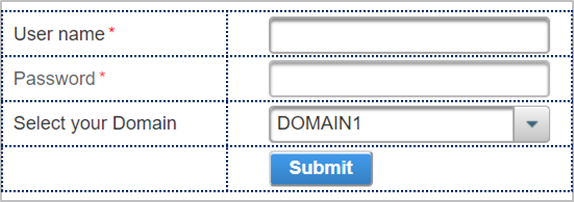
- The domain list is identified by the domainList class.
- The buttons row is also identified by a loginBoxButtons class.
- Footer – the *required legend
loginfields – the fields are organized in a table where:
authMethods – the icons for the available authentication methods (determined by the authentication policy) are located in the /AuthenticationPortal/branding/default/ap/img folder of the customization package.
You can also display the available methods as a drop-down list instead of the row of icons.
-
If you have not previously customized your deployment, manually create the _common_ and/or domain-specific folders using the default folder as a template.
-
Make a copy of the default theme.css (in the /AuthenticationPortal/branding/default/ap/css folder).
-
Edit the stylesheet with your required customization.
Some rules might be empty. They identify a section which does not require specific customization by default but can be customized if necessary.
You can add new rules if required, even if a part/component is not identified in the page.
You can also hide certain parts by changing the corresponding rule to
display: none.Some rules cannot be customized (for example, those specific to generated JSF/PrimeFaces components).
Certain elements have complex structures (for example, those specific to generated JSF/PrimeFaces components) and are less easy to identify.
-
To display the available authentication methods as a drop-down list instead of a row of icons, in the stylesheet:
- Locate the
.authMethodsrule:Copy.authMethods {
position: absolute;
bottom: 0;
width: 100%;
display: none;
}
- Add the
display: none;line.- Locate the
.authMethodsDropDownrule:Copy.authMethodsDropDown {
/* display: none; */
}
- Comment the
display: none;line.
- To move the domain selection field above the user name and password fields:
- Locate the
.loginFieldsrule and replace it with the following code:
Copy.loginFields {
width: 100%;
position: relative;
padding: 1px;
}
.loginFields > div:first-of-type {
margin-top: 30px;
}- Locate the
.domainListrule and replace it with the following code:
Copy.domainList {
position: absolute;
top: 0;
} - Locate the
- Save your changes.
-
Update the customization package with your stylesheet:
- To apply the customized design to all your domains, add your stylesheet to the /AuthenticationPortal/branding/_common_/ap/css folder.
- To apply the customized design to a specific domain, add your stylesheet to the /AuthenticationPortal/branding/<DOMAIN_NAME>/ap/css folder.
-
To fully customize the ActivID Authentication Portal, you can also modify the labels and images.
-
Restart all the ActivID Appliance applications.
-
If necessary, refresh (F5) the ActivID Authentication Portal page in your browser to apply the new design.
Apply the New ActivID Appliance 8.6 Look and Feel
The new ActivID Authentication Portal look and feel will not be applied if an existing customization is detected at installation time in order to not alter existing customizations.
When the customization is limited to only one or several domains, the remaining domains will not be updated with the new look and feel.
To apply the new look and feel for the domains that are not customized:
- Download the customization package.
- Merge the common customization with each of your customized domains in the domain-specific customization folders.
- Reset the customization to default.
- Upload your modified customization package.


