Configure Client Applications for Push-Based Authentication
Client applications can be registered in the ActivID Console to enable push-based authentication. This will allow it to be notified of end-users push-based authentication and action validations.
The notification uses the JMS technology, and requires client servers to connect to the appliance by TLS with mutual authentication.
Register Push-Based Client Applications
This will create a new Topic on the Appliance Message Queue, on which the client application will receive notifications of the result of HID Approve device activations or HID Approve logons or action validations.
- Log on to the ActivID Console and, under Configuration in the left menu, select Push-based Authentication.
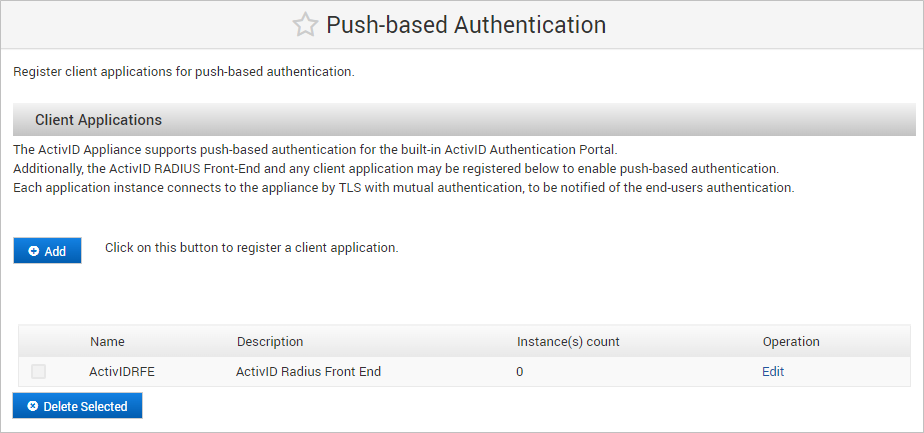
- Click Add to register a new client application.
- Enter a Name (consisting of only alphanumeric characters and no special characters including spaces) and optionally a Description, and then click Save.
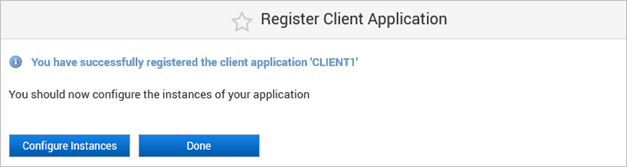
- Click Configure Instances and proceed to Add Client Application Instances.

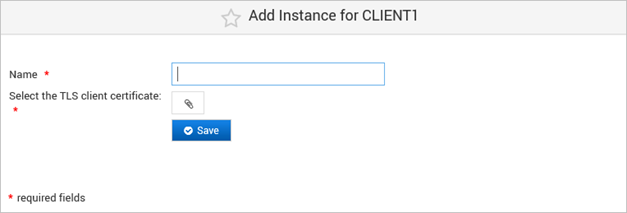
Add Client Application Instances
Each application instance represents a node hosting the client application. Each instance connects to the appliance by TLS with mutual authentication in order to be notified of the end-users authentication.
Typically, if you have a web application that is deployed in High Availability, to which you plan to add push-based authentication, you need to create one “application” and two “instances”.
- As the Message Queue is only accessible on secure mutual TLS authentication, you must have a client certificate and private key for your push-based application instance.
- The client certificate is available in a PEM-format file (required to define the client push-based application instance).
- The root CA certificate at the top of the client certification’s chain is also available in PEM format.
- Log on to the ActivID Console and, under Configuration in the left menu, select Push-based Authentication.
- Select the application to which you want add an instance.
- Under Instances in the client application configuration page, click Add.
- Enter a Name for the instance and then upload the required TLS client certificate and click Save.
- Add the root CA certificate of your client application certificate to the ActivID Appliance trusted certificates.
- Restart the ActivID Appliance applications to reload the JMS push applications configuration.