Import PKI Certificates
For further information about PKI authentication, see PKI Devices with Certificates and Managing PKI Authentication.
-
Log on to the ActivID Management Console as a Device Manager.
-
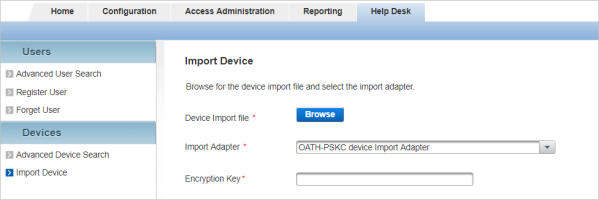
Select the Help Desk tab and, under Devices, select Import Device.
-
Click Browse to locate the .cer file to be imported.
-
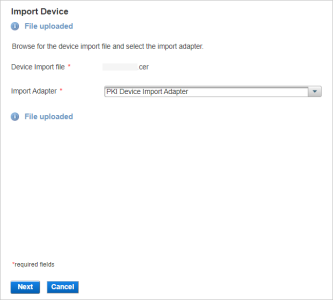
Select the file, and then click Open.
-
If not automatically selected, from the Import Adapter drop-down list, select PKI Device Import Adapter and click Next.
-
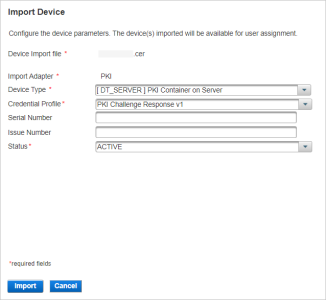
From the Device Type drop-down list, select PKI Container on Server.
-
From the Credential Profile (the Credential Type) drop-down list:
- For direct authentication, select PKI Challenge Response v1.
As direct authentication requires that the calling system perform a PKI-based challenge/response transaction with ActivID Appliance, a private key and certificate are required on the calling system.
In order to allow a calling system to be authenticated with direct PKI authentication, the certificate associated with the private key (which remains securely on the calling system) must be imported and assigned to the user.
- For indirect authentication, select PKI Certificate Check v1.
-
Optionally, enter a Serial Number.
The Serial Number can be used if you want to override the serial number of the certificate you are importing with another serial number. For example:
- For a device-based PKI credential, you could enter the smart card serial number.
- For a browser-based PKI credential, you could enter the unique serial number of the private key (.pfx or .p12).
- Optionally, enter a positive integer as an Issue Number to identify the user's credential.
-
Select the required Status from the drop-down list.
-
Click Import.
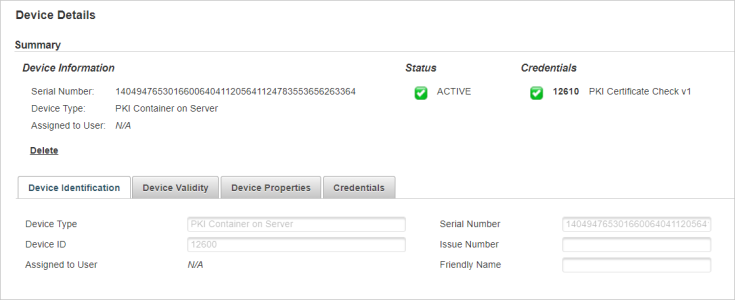
Important: Make a note of the serial number as you will need it when registering the user for PKI authentication. - Assign the imported PKI credential to the user.


