Configure a High Availability Deployment
View the High Availability Status
On each node, the overall status of both nodes is visible. When the connection is up, the status for each node is synchronized real-time on both nodes. When the nodes are synchronized, all data updates are replicated from A to B, and from B to A, in real-time.
To view the node status, log on to the ActivID Console and, under System in the left menu, select High Availability.
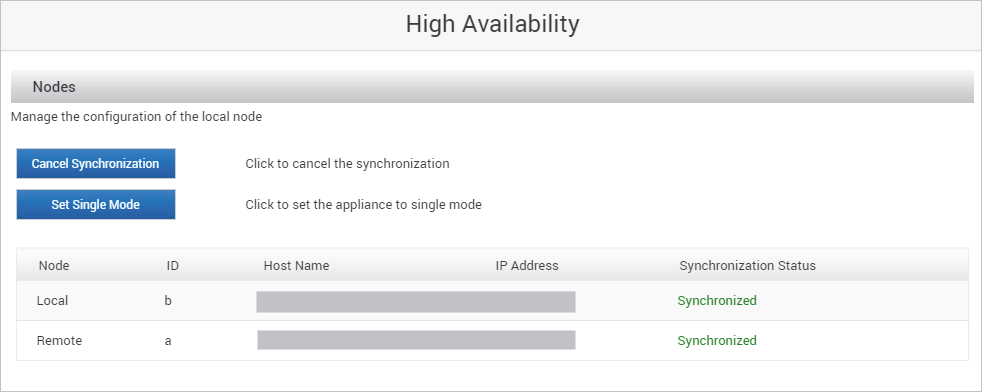
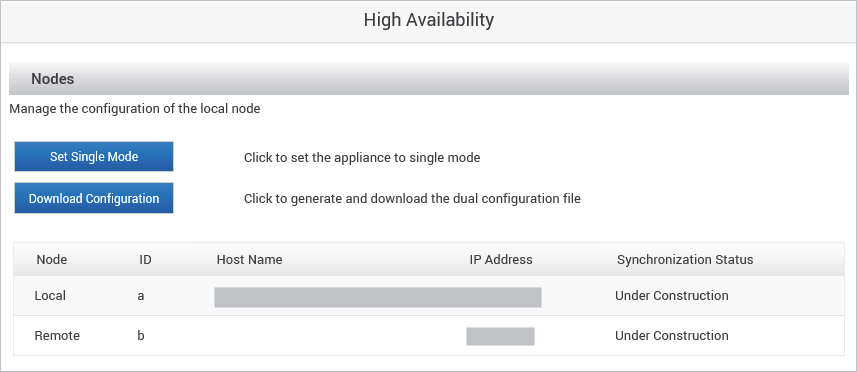
The High Availability page shows the following:
- The status of the synchronization on both nodes.
- The available options, depending on the context.
- The role of the node.
Set the Appliances to Dual Mode
You have installed both appliances in Single Mode
At least one Security Domain must be configured
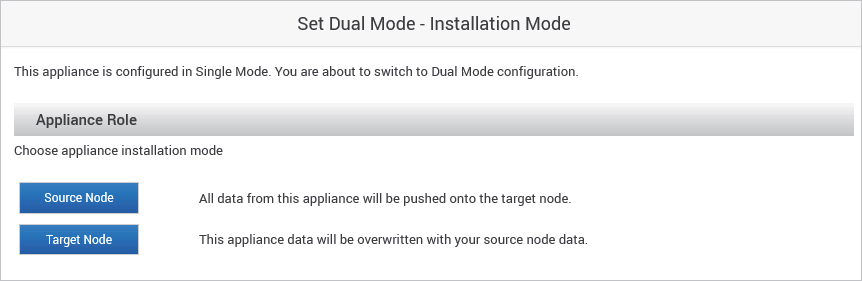
When setting one of the nodes to Dual Mode, the administrative operations of both nodes are not symmetric. You must select the source node (all data from this appliance will be pushed onto the target node) and the target node (appliance data from this appliance will be overwritten with the source node data).
Set the Source Appliance to Dual Mode
During the following procedure, there is no service interruption for the first appliance.
- You have installed the source ActivID Appliance in full installation configured the security domains.
- The source ActivID Appliance is functional.
- You must have the IP address of the second appliance.
- Verify that the network is configured for high availability.
- Log on to the ActivID Console and, under System in the left menu, select High Availability.
- Click Set Dual Mode.
- As your first appliance owns the source database and will be the reference for the initial synchronization, click Source Node.
- The Source Node option is only displayed if security domains are configured on the appliance.
- The node cannot be used as a source if it is broken (for example, due to unrecoverable replication errors).
- Enter the IP address of the second appliance (the Target Node), and click Next.
- Click Continue to generate the Dual Configuration file immediately.
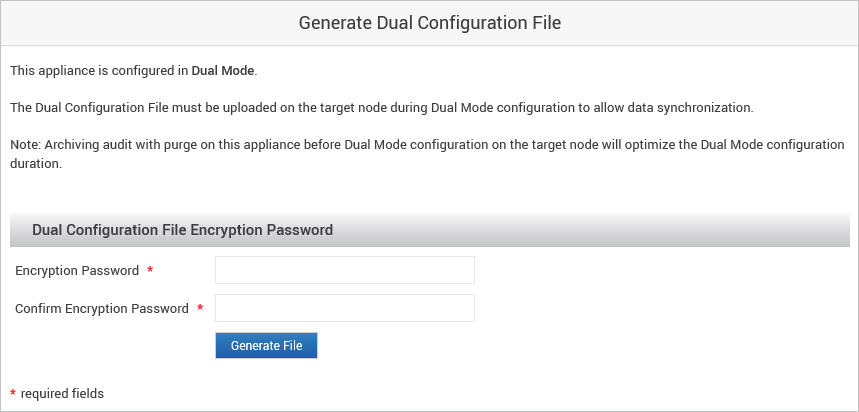
- Enter and confirm an Encryption Password.
- Click Generate File.
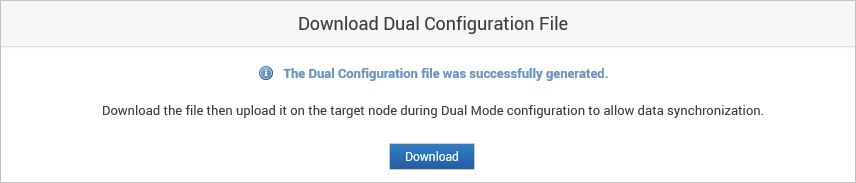
- Click Download and save the dual configuration file on your local file system.
- Click OK.
- The Set Dual Mode option has been replaced by Set Single Mode.
- The remote node is visible.
- The Download Configuration option is available.

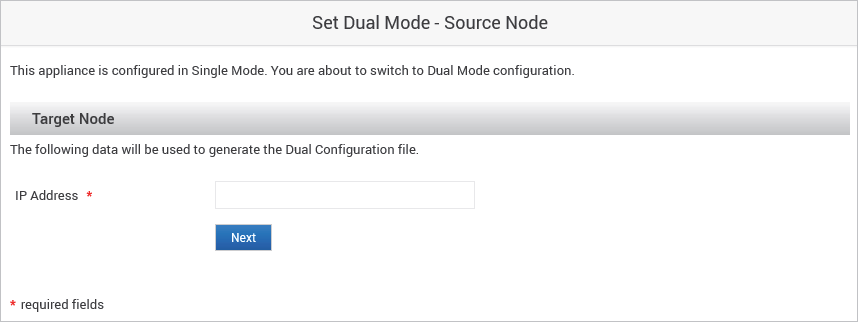
Otherwise, click Cancel to remain in the Single Mode (for example, you want to verify the IP of the second node before switching the first appliance to Dual Mode).
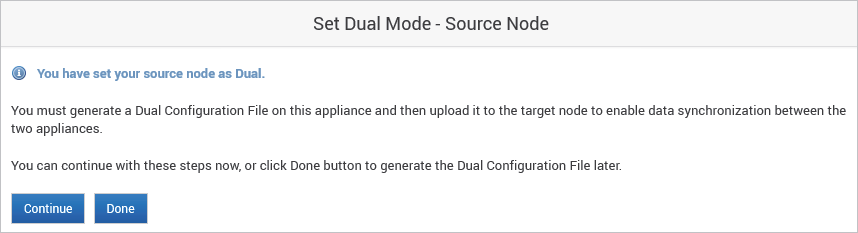
Otherwise, click Done to return to the High Availability page and generate the Dual Configuration File later.
The file is named dual_mode_<YYYY-MM-DD>_<Target Node IP>.cfg
The status is displayed as follows:
Set the Second Appliance to Dual Mode
- You have set the first (source) ActivID Appliance to Dual Mode.
- You have installed and initialized the second (target) ActivID Appliance as a Full Installation.
- Compatibility digest must be identical on both appliances.
- Log on to the ActivID Console (of the second/target appliance) and, under System in the left menu, select High Availability.
- Click Set Dual Mode.
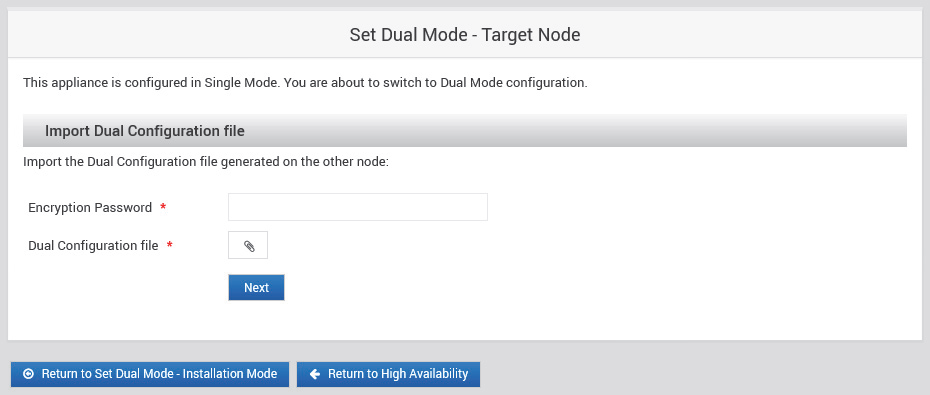
- As the data on your second appliance will be overwritten with that of the first appliance (the Source Node) synchronization, click Target Node.
- Enter the Encryption Password for the Dual Configuration file that you generated on the source appliance.
- Upload the Dual Configuration file and click Next.
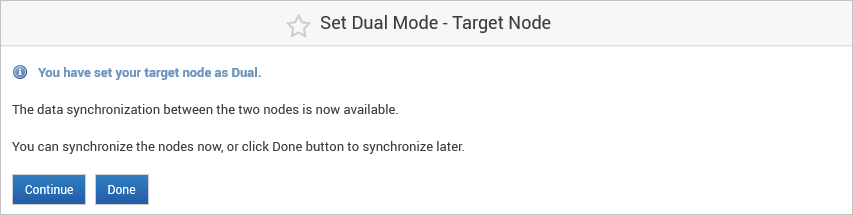
- Click Done.
- To initiate the synchronization, click Continue.
- Click Ok.
- Same Compatibility Digest on both nodes – the appliance checks if the Compatibility Digest is the same on both nodes. The installation proceeds only when it is identical. Otherwise, the installation process is stopped. You must update the appliances to have same compatibility digest and start again.
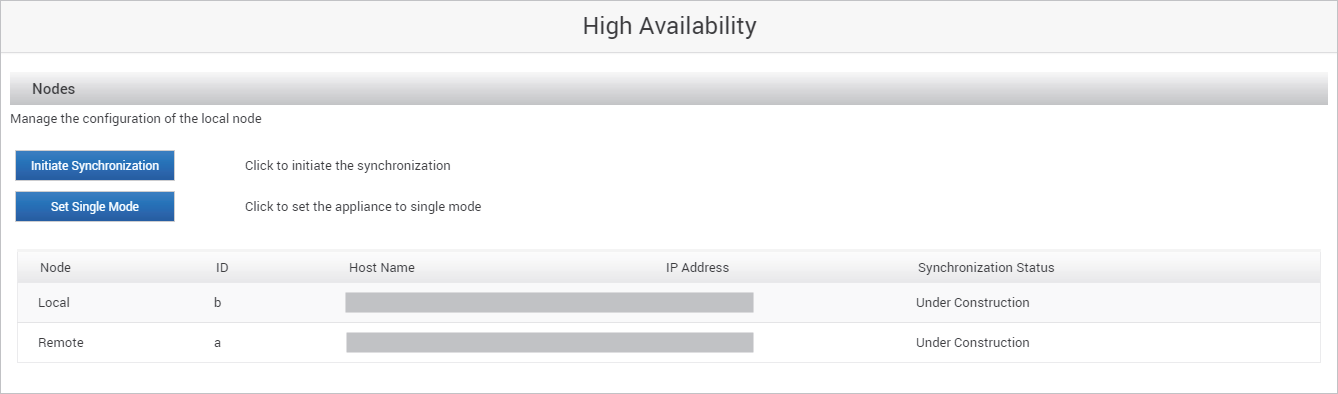
The following page appears on the second appliance, seeing itself as Node a.


The system automatically initiates the synchronization by downloading the database content and launching the replication processes.
If you want to synchronize the data later, click Done. The Initiate Synchronization option is available in the High Availability configuration page.

The system then checks the following items in the following order:
- Same security module is present on both nodes and Cryptographic Type is compatible.
- Same applications are installed on both nodes.
If all conditions are verified, the synchronization proceeds.
If one of these conditions is not verified, then an error message is displayed.
When the synchronization is complete, the status is Synchronized on both nodes.
This is the view from the second appliance once synchronization is completed.
If the synchronization initialization failed, restart the synchronization again from the High Availability configuration page.
If the error persists, see Manage High Availability Errors for troubleshooting suggestions.
Switch Back to Single Mode
If required, you can switch the nodes back from Dual Mode to the Single Mode.
Both appliances will automatically go back to Single Mode without service interruption but from that point, the two appliances will no longer be synchronized.
When you switch to single mode, the second node configuration will be deleted and the second node will no longer be visible from the node you are keeping.
- This option is only available in Dual Mode.
- Switching from the different states might take a few minutes, action links (such as, Set as Single or Initiate Synchronization) might not be immediately available when you are making such transitions. It might take some time for them to be available.
- Log on to the ActivID Console and, under System in the left menu, select High Availability.
- Click Set Single Mode.
The following page appears on the second appliance, seeing itself as Node a.
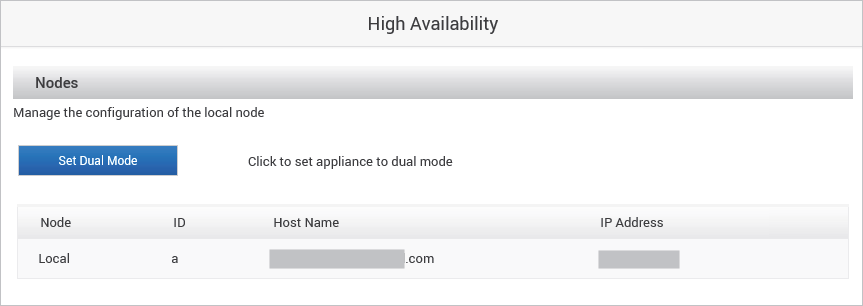
The remote appliance is removed.
- You might have to repeat this operation on the second appliance if the two appliances were isolated.
- When you set the node to Single Mode immediately after the Cancel Synchronization operation, the Set Single Mode button will only appear when the Cancel Synchronization is complete on the two nodes.
Download the Dual Configuration file
This procedure enables you to retrieve the Dual Configuration file that was downloaded during the Set Dual Mode step.
If issues arise during the Set Dual Mode step on the second node, you can download the file again, and try the Set Dual Mode step again.
- Log on to the ActivID Console (of the first/source appliance) and, under System in the left menu, select High Availability.
- Click Download Configuration.
- Enter and confirm a Encryption Password.
- Click Generate File.
- Click Download and save the dual configuration file on your local file system.
The file is named dual_mode_<YYYY-MM-DD>_<Target Node IP>.cfg
Initiate Synchronization
This procedure enables you to launch the entire replication process, which will then synchronize the two nodes. The synchronization process can take several hours, depending on the size of the database and the quality of the network.
The following operations occur:
- Check if the configuration (for example, the list of services) and the compatibility digests are identical on both nodes. The service pack version can be different as long as the compatibility digest is the same. If the symmetry is not checked, then the option is aborted, and you must update the node and restart the procedure again.
- Creation of a copy of the database on the remote appliance.
- Download of the copy in the local appliance.
- Launch of the replication processes on both appliances.
- This option is accessible only in Dual Mode.
- After the Cancel Synchronization operation, the Initiate Synchronization button will only appear when the Cancel Synchronization is complete on the two nodes.
- Log on to the ActivID Console and, under System in the left menu, select High Availability.
- Click Initiate Synchronization.
- Confirm the operation.
Cancel Synchronization
This procedure stops the synchronization and shuts down the replication processes. The Cancel Synchronization option is used when extended system maintenance lasts a long period of time. The node remains in the Dual Mode.
Cancel Synchronization will also delete the conflict resolution audit files stored on the appliances.
- Log on to the ActivID Console and, under System in the left menu, select High Availability.
- Click Cancel Synchronization.
- Confirm the operation.


