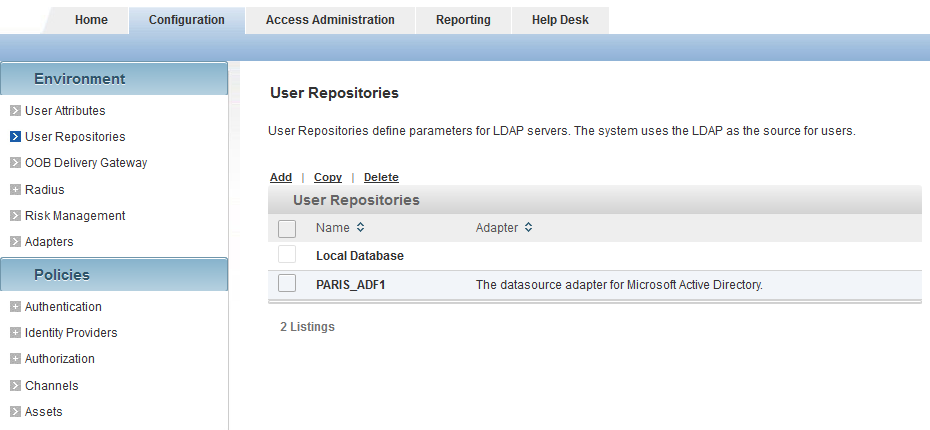
Configure User Repositories
The User Repositories define parameters for using LDAP servers as the source of user data for the ActivID AS system.
By configuring ActivID AS to communicate with your LDAP directory server, you enable access to user data for authentication purposes.
Each User Repository entry contains information about the Connection Settings used, the Attributes available for the users, the LDAP referrals (if any), as well as a summary of all the Groups (User Types and Admin Groups) and all the Roles that are bound to the User Repository.
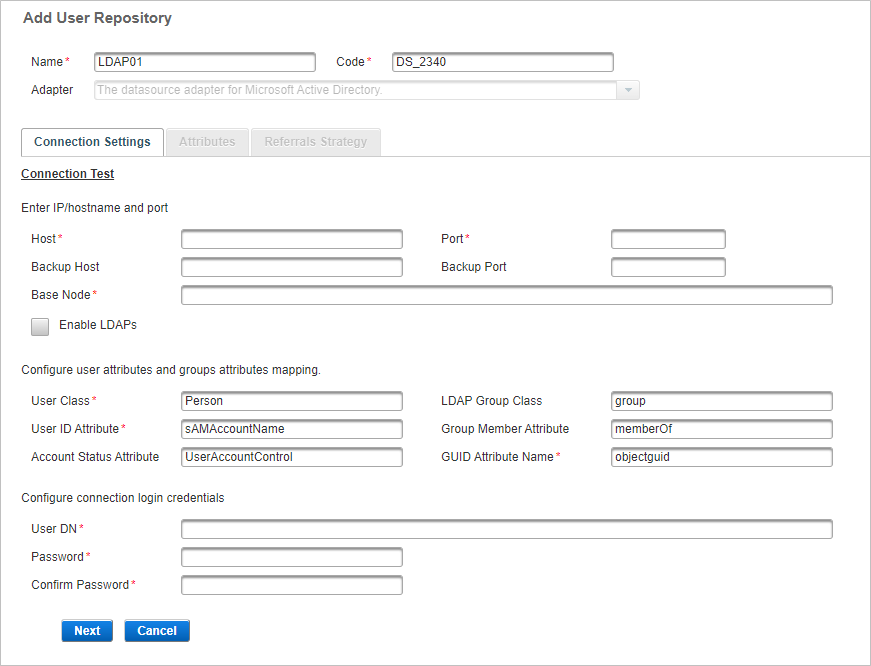
Add a User Repository
- Log on to the ActivID Management Console, select the Configuration tab and, under Environment, select User Repositories.
-
Click Add.

-
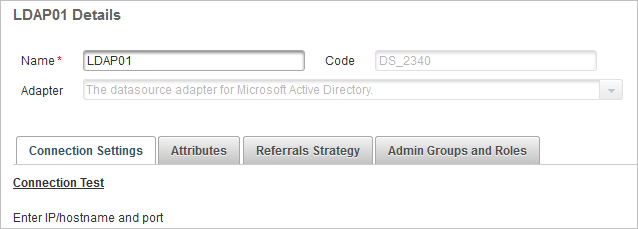
Enter a descriptive Name.
-
Modify the pre-assigned Code, if necessary.
-
From the Adapter drop-down list, select the adapter that corresponds to your directory type:
- Microsoft Active Directory
- Oracle Directory Server
- Novell eDirectory
The user attributes and groups attributes mapping section is used to map attributes to user group objects and user objects in the directory. This section is pre-populated with values set for the user in the directory.
-
Click Next and then Configure the Connection Settings.
Configure the Connection Settings
-
Enter the Host (IP address or hostname) of the server where your LDAP directory resides.
-
Enter the Port for the LDAP directory server’s listening port.
-
Enter the Backup Host (IP address or hostname) of the server where your backup LDAP directory resides.
-
Enter the Backup Port for the backup LDAP directory server’s listening port.
-
Enter the Base Node of your directory.
Base node is the base branch from which the mapping starts. If the base node is set at a particular level, you cannot map a user to a level higher than the base node level.

-
Select the Enable LDAPs option to connect to the LDAP via SSL.
-
Click Import LDAPs Root CA certificate to locate and import the certificate.

You can either View or Delete the certificate after it is imported.

-
Under Configure user attributes and groups attributes mapping, the user/group attributes mappings are pre-populated according to the datasource adapter selected.
You do not need to modify them unless your LDAP has a specific configuration.

-
Under Configure connection login credentials, enter the user credentials to be used by ActivID AS to access the LDAP. Then enter and confirm the user’s Password.
-
Click Next and then Map the Attributes.
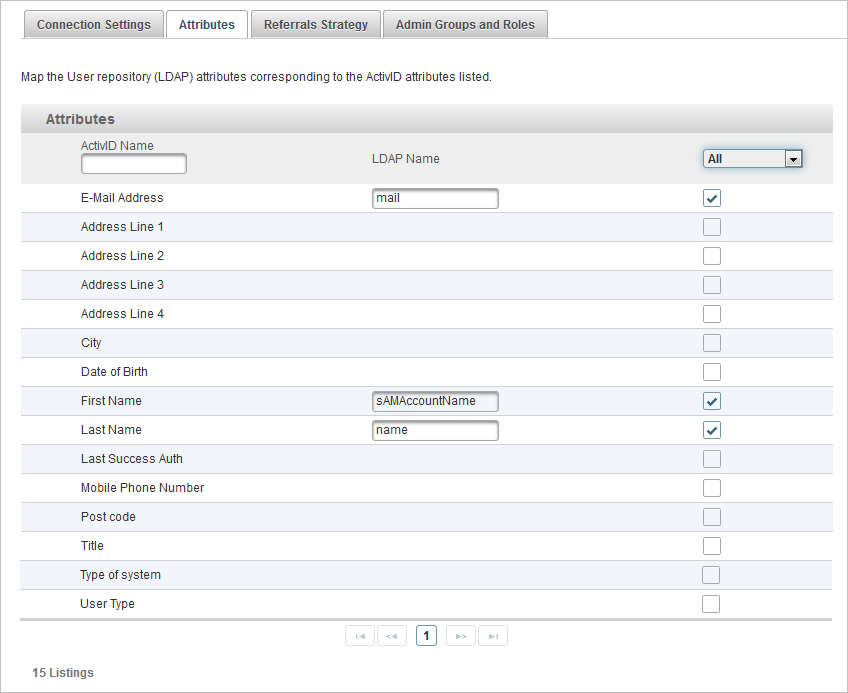
Map the Attributes
When registering a user with ActivID AS, you will be prompted to enter the user's values for the attributes defined for the selected User Type Top level category to organize the users. Based on the User Type, users can be organized into administration groups or sub-groups.. These values will be displayed in the User Details page.
In addition to the predefined user attributes, you can also create additional ones.
LDAP user attributes can be mapped to existing ActivID AS user attributes, and they can be used within the ActivID AS like any other attribute.
Once this is done, the list of enabled user attributes for each user can be managed from the list of available attributes in the User Type settings.
-
In the Attributes tab, select All (or Available) to view the attributes that can be mapped.
-
Select the check box(es) of ActivID AS attributes that you want to map to and enter the names of the corresponding LDAP attributes.
-
Click Next and then Configure the Referrals Strategy.
Configure the Referrals Strategy
Referrals strategy enables ActivID AS to search for users when multiple LDAPs are connected.
Referral is the process by which an LDAP server, instead of returning a result, returns a reference (a referral) to another LDAP server that might contain further information.
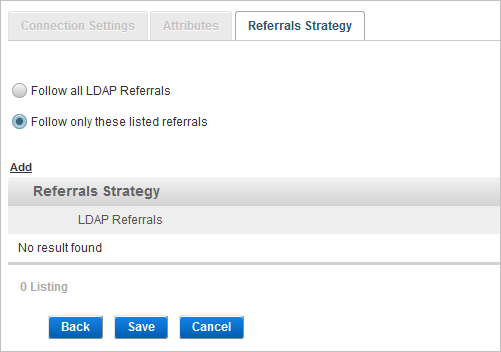
- In the Referrals Strategy tab, select the referral rule to be applied when searching for users:
To allow ActivID AS to search for the user in all LDAPs, select Follow all LDAP Referrals and click Save.
- For a Microsoft Active Directory, the Follow all LDAP Referrals option is not supported. It is recommended to select the Follow only these listed referrals option.
- For a Novell eDirectory, the credentials of all referral LDAP servers must be the same.
 Important:
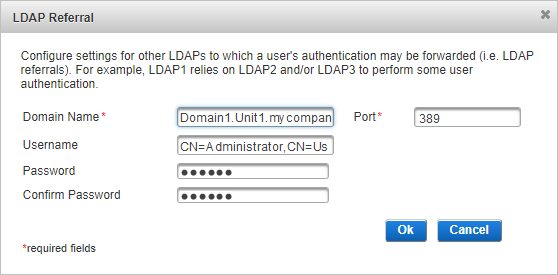
If you want to specify which LDAP referral(s) to apply when ActivID AS searches for a user, select Follow only these listed referrals and click Add.
- Enter the Domain Name and Port of the server where the LDAP directory is hosted.
- If the connection requires credentials that are different from those specified for the main LDAP directory, enter the Username for ActivID AS should use to authenticate to the LDAP directory (only if you have a protected directory). Then enter and confirm the Password for the account.
 Note: If the connection uses the same credentials as those specified for the main LDAP directory, leave the Username and Password fields empty.
 - Domain Name – the FQDN name of the base node of the referred domain, not the domain name (for example, Domain1.Unit1.mycompany.com).
- Username – the user DN (for example, CN=Administrator,CN=Users,DC=Domain1,DC=Unit1,DC=mycompany,DC=com)
- Domain Name – the server host name or IP address.
- Username – the User DN (or RDN) (for example, cn=Directory Manager).
Specify the following:
Specify the following:

- Before saving the changes, Test the Connection.
Test the Connection
-
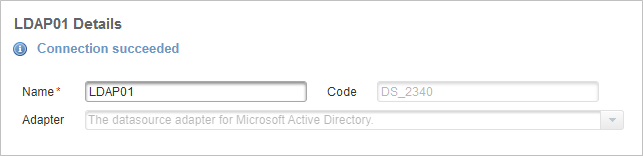
Click Connection Test to verify that the connection to the LDAP is correctly configured.
-
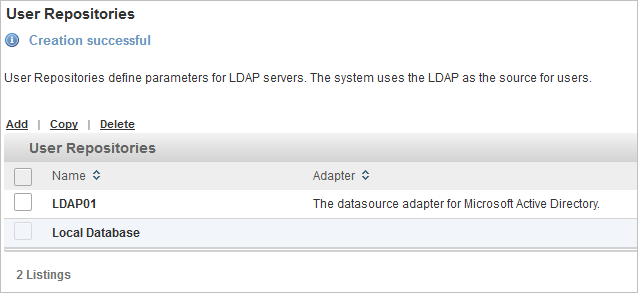
Click Save to apply the repository configuration.
View the Mapped Groups and Roles
The repository configuration includes the Admin Groups and Roles tab which enables visualizing groups and roles that are mapped to the LDAP.

This mapping can be done through the Access Administration tab once the LDAP is added to the ActivID AS.
Edit a User Repository
-
Select the Configuration tab and, under Environment, select User Repositories.

-
Click the Name of the user repository that you want to edit.
-
Edit the settings as required.
Note: If you modify the Name of the User Repository, the old name will still appear in the Advanced User Search page. You must log off from the ActivID Management Console for the change take effect. The new name appears when you log on again. -
Click Save.
Copy a User Repository
-
Select the Configuration tab and, under Environment, select User Repositories.
-
Select the check box of the user repository that you want to copy and click Copy.
-
Click the Name of the new repository, and edit the settings as required.
Important: You must specify a new base node for the new repository as each user repository added must have a unique base node. -
Click Save.
A copy of the repository appears in the list.
Delete a User Repository

-
Select the Configuration tab and, under Environment, select User Repositories.
-
Select the check box of the user repository that you want to delete and click Delete.
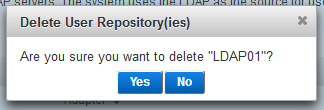
-
When prompted, click Yes to delete.


