Configure Permissions
A permission allows performing an action such as creating a user, resetting a password, or modifying user privileges. There are two types of permissions:
- Are provided by default as a list of elementary permissions (that is, ActivID AS functions and function parameters)
- Can be grouped into Predefined Permission sets
- Are not modifiable
- Are enforced by ActivID AS
| Name | Resource Type |
|---|---|
| ActivID Administration Functions | Admin Group |
| ActivID Prime User | Admin Group |
| ADFS Agent System Permission set for Unbound | Admin Group |
| ADFS Agent System User Permission set | Admin Group |
| Asset Type Administration Functions | Asset Type |
| Audit Functions | Admin Group |
| CMS Functions | Admin Group |
| Configuration Functions | None |
| Configuration Policies Functions | None |
| Device Administration Functions | Admin Group |
| Helpdesk Functions | Admin Group |
| Organization functions | Admin Group |
| Push based Validation Direct User Permissions | Admin Group |
| Radius Front End Role Assignment | Admin Group |
| RADIUS Functions | None |
| Read User Details | Admin Group |
| Reset password request Functions | None |
| Retrieve session transfer Functions | Admin Group |
| RGW System Administration Functions | Admin Group |
| RGW System Asset Management Functions | Asset Type |
| Roles Assignment Functions | Admin Group |
| SSP System Administration Functions | Admin Group |
| SSP System Asset Management Functions | Asset Type |
| STAP System Administration Functions | Admin Group |
| System Functions (full) | Admin Group |
| System Functions (restricted) | Admin Group |
| User Administration Functions | Admin Group |
| User Sub-Group Administration Functions | Admin Group |
| User Type Administration Functions | Admin Group |
- Can be created to meet specific requirements or needs.
- Can be conditioned by a threshold value (for example, a transaction will not be allowed above a certain amount of dollars).
- Can be grouped into External Permission sets.
- Are not enforced by ActivID AS, but by the application.
| Name | Resource Type |
|---|---|
| Classic Account - Credit Card | Unknown |
| External Permission Set 1 | None |
| REST Gateway Access Permissions | None |
| Self Service Portal Access Permissions | None |
- Change Soft Pin using the SSP
- Discard User Device using the SSP
- Hardware Token Activation through SSP
- Mobile Token Activation through SSP
- PC Token Activation through SSP
- Problem Solving using the SSP
- Rename User Device using the SSP
- Renew User Device using the SSP
- Test User Devices through SSP
- User Personal Information displayed in SSP
- View User Device List in SSP
- Web Token Activation through SSP
Assigning permissions to users enables them to perform specific actions. Instead of assigning the privilege for each individual function, you can:
- Assign a Permission set to an administration group - gives all the users in the group the permissions in the set
- Associate a Permission set with a role, and assign the role to an individual user (in the case of a local database user) - gives the individual user the permissions in the set
- Associate a Permission set with a role, and assign the role to an LDAP Group or Branch/Organizational Unit (in the case of an LDAP user) - gives all the users in the LDAP Group or Organization Unit the permissions in the set
- Assign elementary permissions to an individual user - a user will automatically inherit the permissions assigned to his administration group. However, high-level permissions granted only to a few users will be granted through a role, or direct user assignment of the permission
An exception to the permission assignment rule is when an External permission related to assets can be assigned to a user directly.
Permissions can also be restricted for use with a specified Administration Group or Asset Type.
Others might be restricted to specific Assets Resources on which permissions can be granted. For example, specific user bank accounts. or Asset Sets Group of Assets of the same Asset Type.. This is referred to as the “resource” type of the permission. For example, when a user attempts to perform an action in the ActivID Management Console, this action will only be allowed if it is on the specific resources defined in the permission assigned to him.
The resource type to be assigned depends on the Permission Type.
| Resource Type | External Permission Sets | Predefined Permission Sets |
|---|---|---|
|
Asset |
X |
|
|
Asset Set |
X |
|
|
Asset Type |
|
X |
|
Administration Group |
|
X |
|
None (when the function is independent of the Resource Type) |
X |
X |
|
Unknown (only used in the case of certain sample permissions) |
X |
X |
Create a Permission Set
- Log on to the ActivID Management Console as an ActivID Administrator.
-
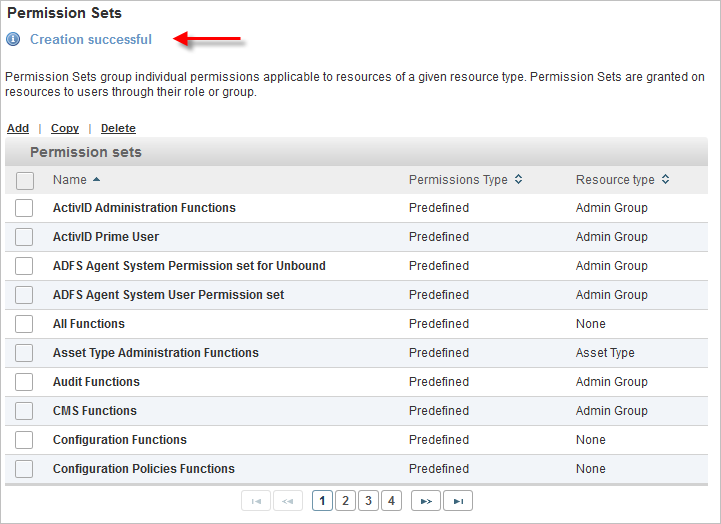
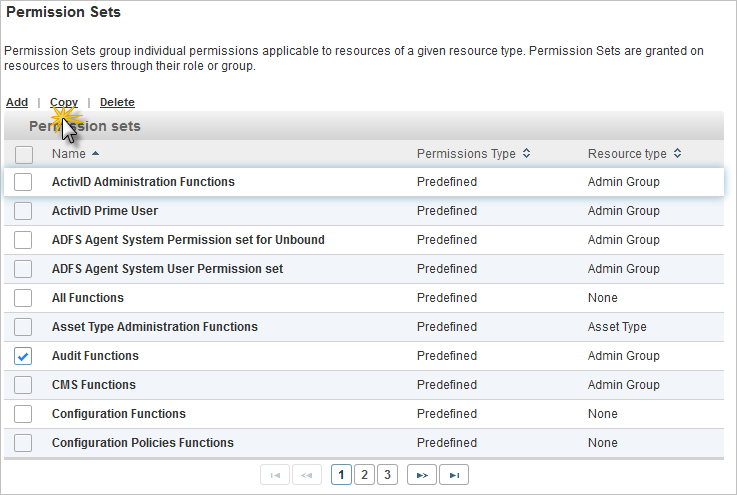
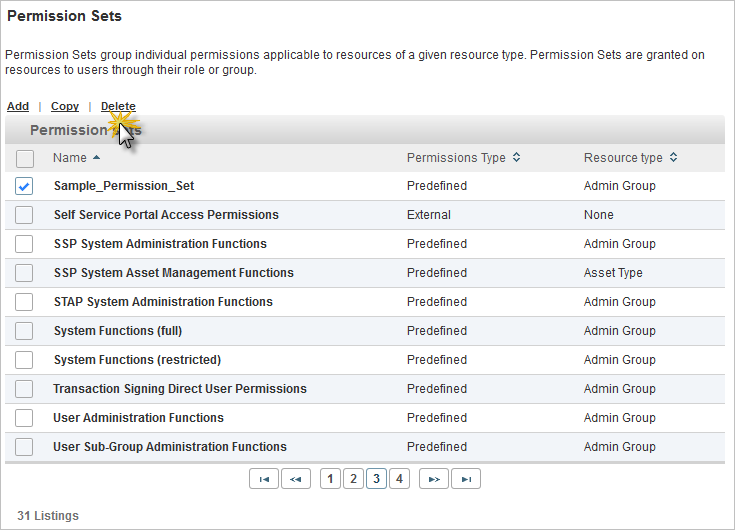
Select the Access Administration tab and, under Access Control, select Permission Sets.
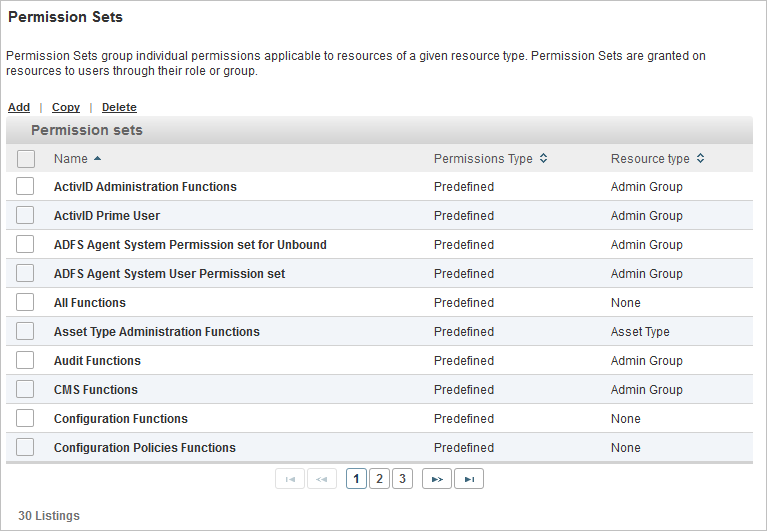
All existing Permission Sets are listed in a paged table. The total number of Permission Sets is given in the lower left corner.
Each row corresponds to a Permission Set. It provides the following information in the different columns:
- Name – the name of the Permission Set
- Permission Type – the type pf Permission Set (Predefined or External)
- Resource Type - the type of resource to which the Permission Set is assigned/associated
-
Click Add.

-
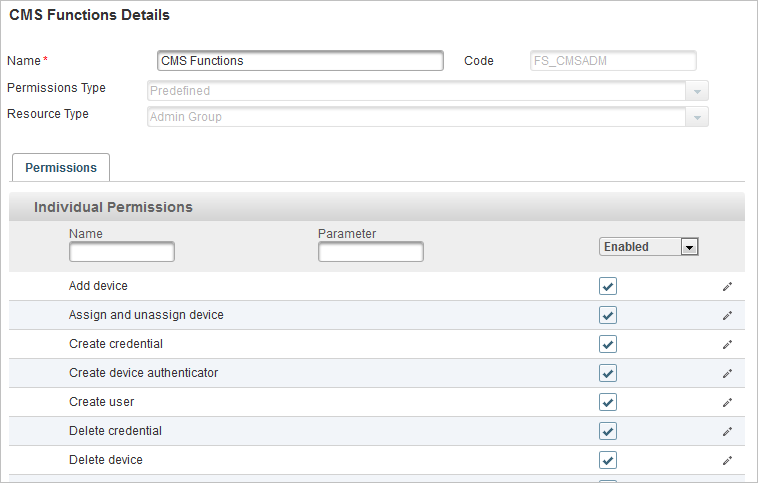
Enter a descriptive Name for the Permission set.
-
Edit the Code, if necessary.
The Code is pre-assigned and case-sensitive. You can modify it but it must be unique and a maximum length of 10 characters,
Note: The code for the Permission Set cannot be changed once you have created the set. -
Select the Permission Type:
- Select Predefined when the permission belongs to a predefined list of ActivID AS functions.
- Select External when the permission will not be enforced by ActivID AS but by an external application.
-
Depending on the permission type selected, select the Resource Type.
Resource types displayed correspond to the chosen Permission Type:
- For a Predefined permissions type, the available resource types are:
- Admin Group
- Asset Type
- None
- For an External permissions type, the available resource types are:
- Asset
- Asset Set
- None
- For a Predefined permissions type, the available resource types are:
-
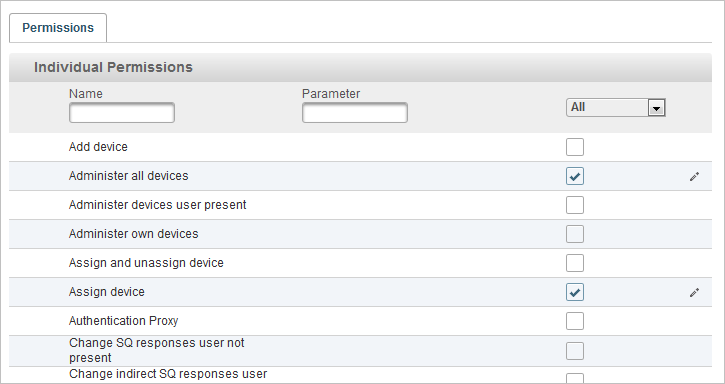
Select the check box(es) of any permission(s) from the Individual Permissions list.
- For a Predefined permission linked to role, enter the code for the role.
For most Predefined permissions, you do not need to have any parameters set.
- For an External permission, enter the threshold value as the Parameter.
-
Click Save.
Edit a Permission Set
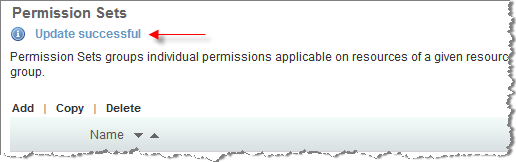
You can edit a Permission set by changing the name, adding and removing permissions, or both. You cannot change the code that uniquely identifies the Permission set.
When you edit a Permission set:
-
Users to whom you have assigned a role associated with the Permission set will have the permissions contained in the edited associated set.
-
Users in any administration groups to which you have assigned the Permission set will have the permissions contained in the edited set.
-
Users to whom you have directly assigned the Permission set will have the permissions contained in the edited set.
Update Predefined Permission set (to edit Predefined permissions)
Update External Permission set (to edit External permissions)
- Log on to the ActivID Management Console as an operator with the required permisions.
-
Select the Access Administration tab and, under Access Control, select Permission Sets.
-
Click on the Name of the Permission set that you want to edit.
-
To add permissions to the Permission set, select Available from the drop-down list and then select the check box(es) of the required permission(s).
-
To edit permissions from the Permission set, select Enabled from the drop-down list and then click on the edit (pencil) icon for the required permission.
-
To remove permissions from the Permission set, select Enabled from the drop-down list and then clear the check box(es) of the permission(s).
The Code, Permission Type and Resource Type cannot be modified.
Copy a Permission Set
- Log on to the ActivID Management Console as an operator with the required permisions.
-
Select the Access Administration tab and, under Access Control, select Permission Sets.
-
To copy or more Permission sets, select the checkboxes to the left of the names and click Copy.
-
Edit the Permission set as required.
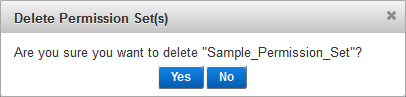
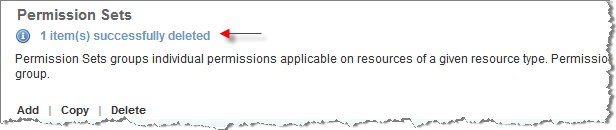
Delete a Permission Set
- Log on to the ActivID Management Console as an operator with the required permisions.
-
Select the Access Administration tab and, under Access Control, select Permission Sets.
-
To delete or more Permission sets, select the check box(es) to the left of the names and click Delete.
-
When prompted, click Yes.
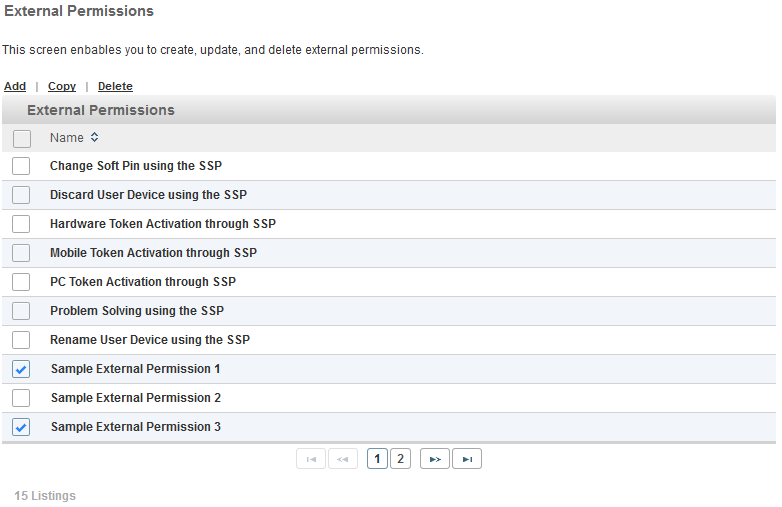
Managing External Permissions
You can create and update External permissions, and then group the permissions into sets. It facilitates assignment of authorization.
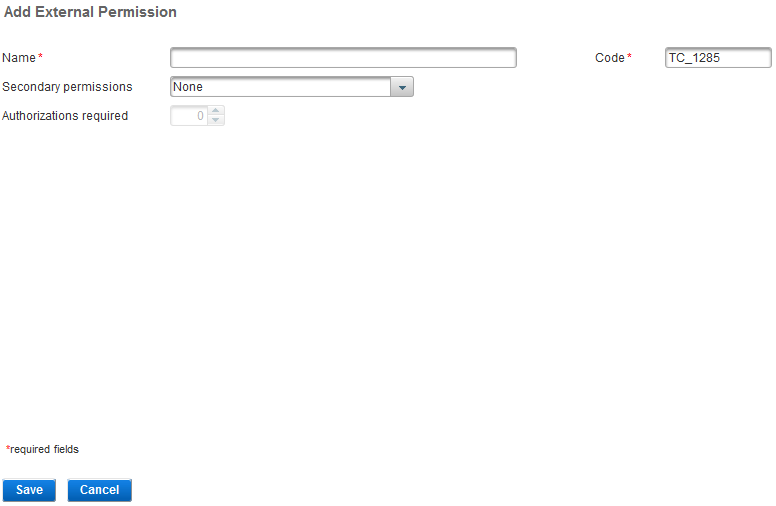
Create an External Permission
- Log on to the ActivID Management Console as an ActivID Administrator.
-
Select the Access Administration tab and, under Access Control, select External Permission.
-
Click Add to launch the External permission creation page:
-
Define the following parameters for the permission:
- Name – should be unique for ease of administration.
- Code – a value is automatically generated but it can be changed. The code must be unique, a minimum of three characters, and a maximum of 10 characters. It cannot be changed once the External permission is created.
- Secondary Permissions – this links permissions in order to model a scenario in which permission must be authorized by one or more users before being processed.
- If the Secondary Permission function is not relevant to your environment, select None from the Secondary Permission drop-down list.
- Using the asset Permission set authorization permissions, an operator can define which users are permitted to request withdrawals on an account and which users are permitted to approve those requests.
For example, within business banking, the mandate on an account might state that any withdrawal from the account that exceeds a certain value must be approved by two authorized signatories on the account.
This is modelled by creating two permissions: one representing the request for the withdrawal and the other representing the approval. The permissions are linked by defining the approval permission as a secondary permission for the request permission.ActivID AS also stores the number of approvals required.
- Authorizations Required – specifies the number of authorizations required. If you define a secondary permission, then you must enter a value for this field.
- Click Save.
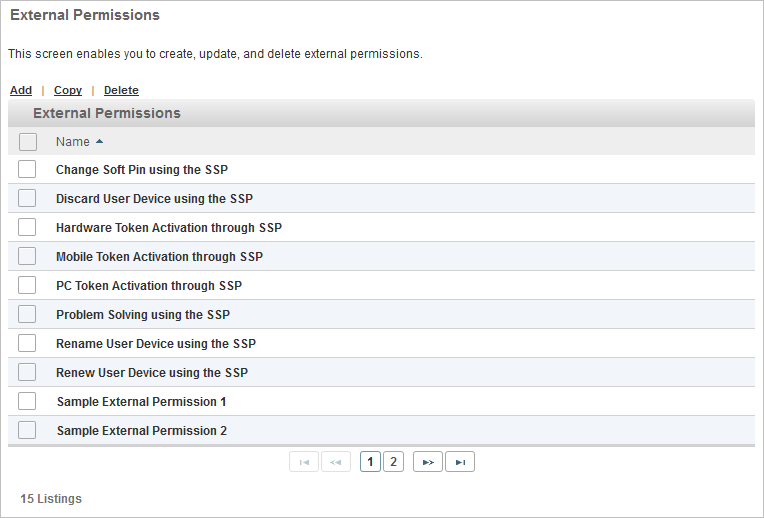
All existing External permissions are listed in a paged table. The total number of External permissions is given in the lower left corner.
Each row corresponds to an External permission (by name).
Edit an External Permission
- Log on to the ActivID Management Console as an ActivID Administrator.
-
Select the Access Administration tab and, under Access Control, select External Permission.
-
Click the Name of the External permission that you want to edit.
-
Edit the settings as required and click Save to apply your changes.
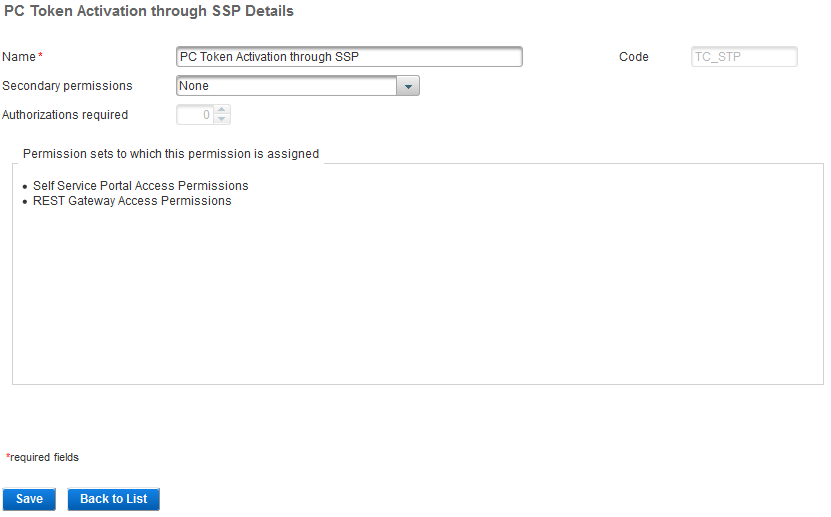
The Permission sets... section provides as read-only information about the currents use of the External permission in Permission sets.
If you want to cancel the operation, click Back to List.
Copy an External Permission
- Log on to the ActivID Management Console as an ActivID Administrator.
-
Select the Access Administration tab and, under Access Control, select External Permission.
-
To copy one or more External Permissions, select the check boxes to the left of the names and click Copy.
One copy for each selected security question is created with the same parameter values except the:
- Code
- Name (where ‘Copy of’ is appended to the original name)
-
Click the Code of the External Permission that you just copied and edit the settings.
Delete an External Permission
- Log on to the ActivID Management Console as an ActivID Administrator.
-
Select the Access Administration tab and, under Access Control, select External Permission.
-
To delete one or more External Permissions, select the check boxes to the left of the permission names and click Delete.
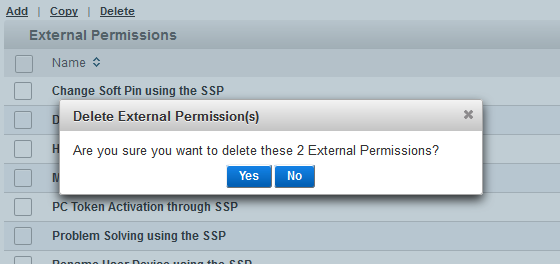
-
Click Yes to delete the permissions, or No to cancel the operation.
View/Delete Legacy Individual Permissions
If you are migrating from the ActivID 4TRESS™ AS 3.6.x version, you might have to re-assign certain permissions to users. You can view and/or delete the user’s “legacy individual permissions”.
- Search for the user.
-
If necessary, click the link in the User ID column beside a user to display the User Details page for the specific user.
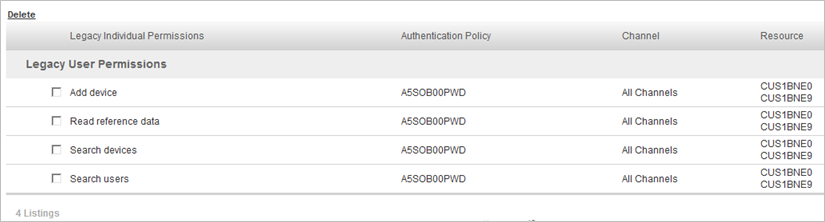
-
If Legacy Individual Permissions are displayed for the user, make a note of the listed permission names (for example, “Add device”, “Read reference data”).
-
Manually re-assign the listed permissions to the user:
- Create a new Permission Set with the Resource type “None” that includes the list of individual permissions from step 4.
- Add this new Permission Set to a new role for the user or to the user’s Administration Group (if all users from this group need these permissions).
-
Once they have been reassigned, you can choose to delete the Legacy User Permissions by checking the box next to the permission and then clicking Delete.
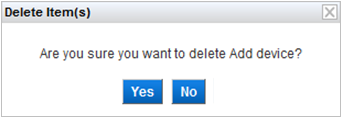
-
When prompted, click Yes to confirm.


