Quick A-Z Deployment Overview
The following sections illustrate the end-to-end deployment of the push-based solution with HID Approve for Windows and the ActivID Self-Service Portal (for registration and testing).
Configure the Azure Push Gateway
-
Log on to the ActivID Management Console and select the Configuration tab.
-
Under Environment, select OOB Delivery Gateway.
-
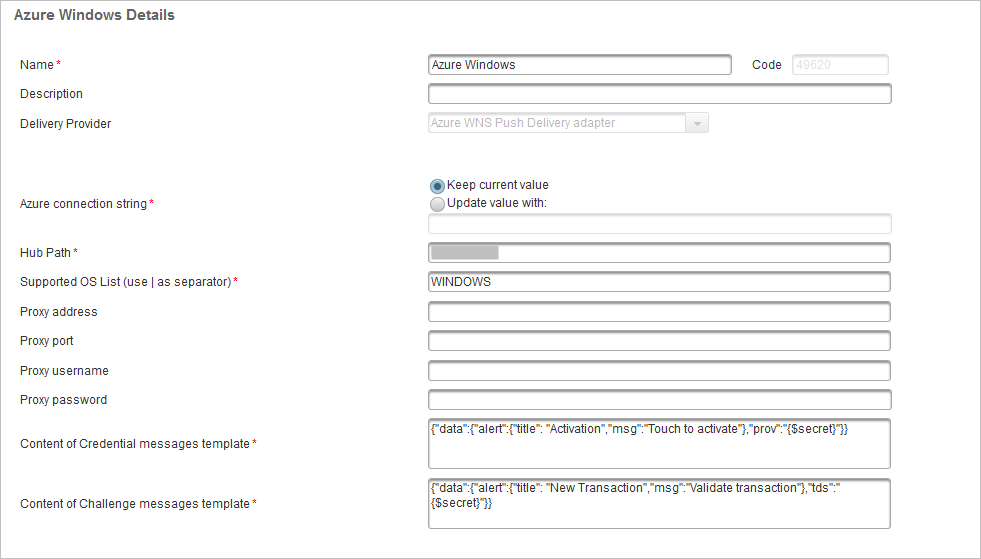
Add an Azure Windows gateway with the following parameters:
- Azure connection string
- Hub Path
- Supported OS List (set to WINDOWS)
-
Click Save.
-
Under Authentication, select Authentication Policies.
-
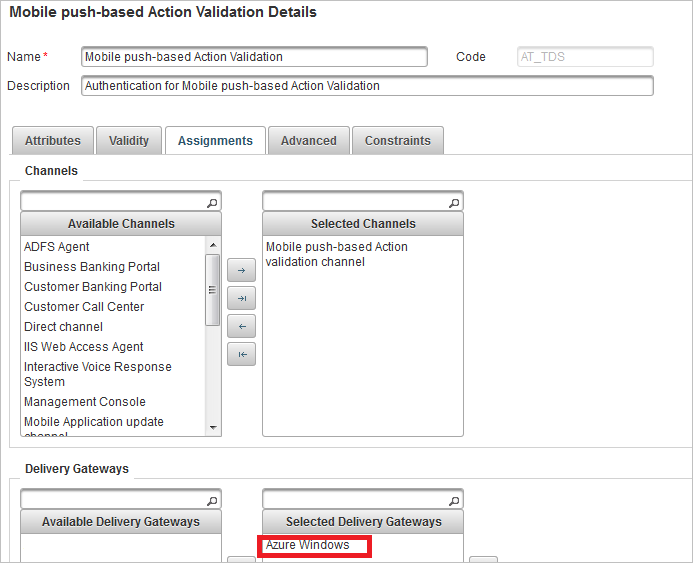
Add the new gateway to the push-based authentication policies:
- Mobile push-based Logon Validation (AT_PASA)
- Mobile push-based Action Validation (AT_TDS)
-
Click Save.
Configure the Push Device Type
-
Log on to the ActivID Management Console and select the Configuration tab.
-
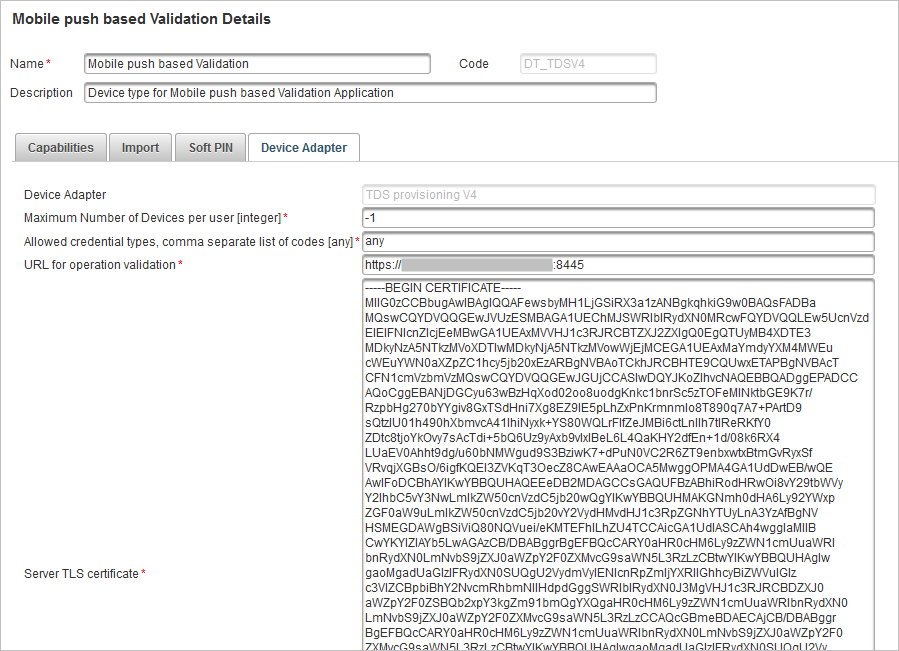
Under Authentication, select Device Types and then Mobile push based Validation (DT_TDSV4) to edit the settings.
-
Set URL for operation validation to the server public URL (for example, https://<server>:<port>).
Note: For deployments with the HID Approve application and HID Approve SDK (all versions), the URL for operation validation setting is deprecated. Leave the setting configured with default value (that is, https://<server_hostname>:<server_port>). -
Set Server TLS certificate to the Base 64 value of the ActivID AS server SSL certificate.
Save the certificate as PEM BASE 64 encoded (for example, as myserverSSLcertificate.crt). Then edit this file with Notepad and copy the content, including the -----BEGIN CERTIFICATE----- & -----ENDCERTIFICATE----- mentions.
-
Click Save.
Register a User
-
Log on to the ActivID Management Console as ftadmin.
-
Select the Helpdesk tab and then click Register User.
-
Select your Admin Group, enter the User Attributes and then Create a Password for the user (based on Customer Static password).
-
Complete the registration.
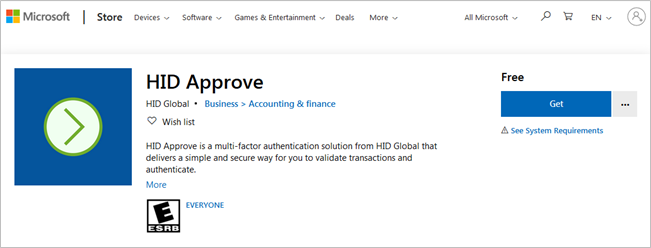
Install HID Approve
-
Go to the Microsoft Windows Store on your Windows machine.
-
Search for the HID Approve app and install it.
Note: Alternatively, your organization can provide a deep link that checks if the application is already installed on the device. If it is not, you are directed to the application on the relevant store, prompting them to install it. -
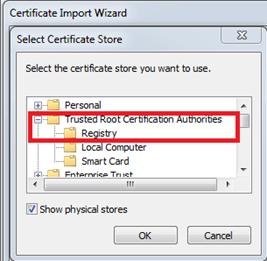
Configure your browser for the SSL connection - make sure that the Root CA of the ActivID AS server SSL certificate is imported into your browser’s Trusted Root Certification Authorities Store.

Activate the Service
-
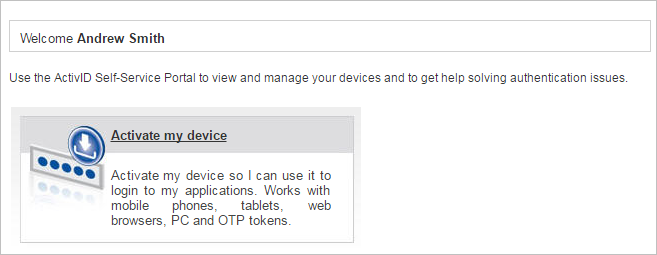
Log on to the ActivID Self-Service Portal using the username and password for the registered user.
-
Click Activate my device.
-
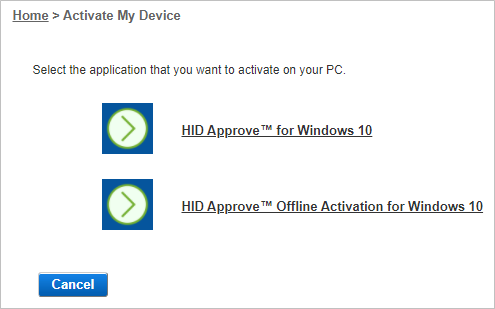
Under Software Tokens and Apps, select On my PC.
-
Click HID Approve for Windows 10 to activate the application on your PC using a URL (link) activation.


-
Launch HID Approve on your PC.
Then the service will be activated automatically.
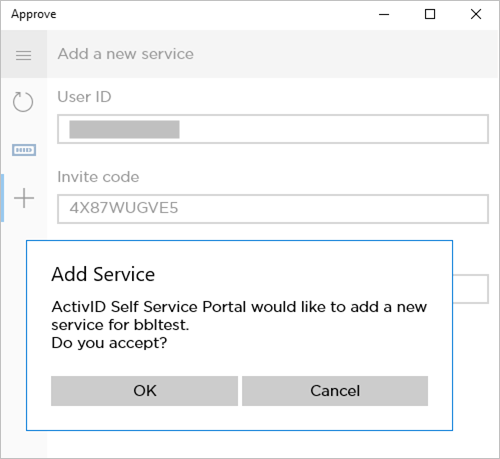
-
Click OK to add the service.
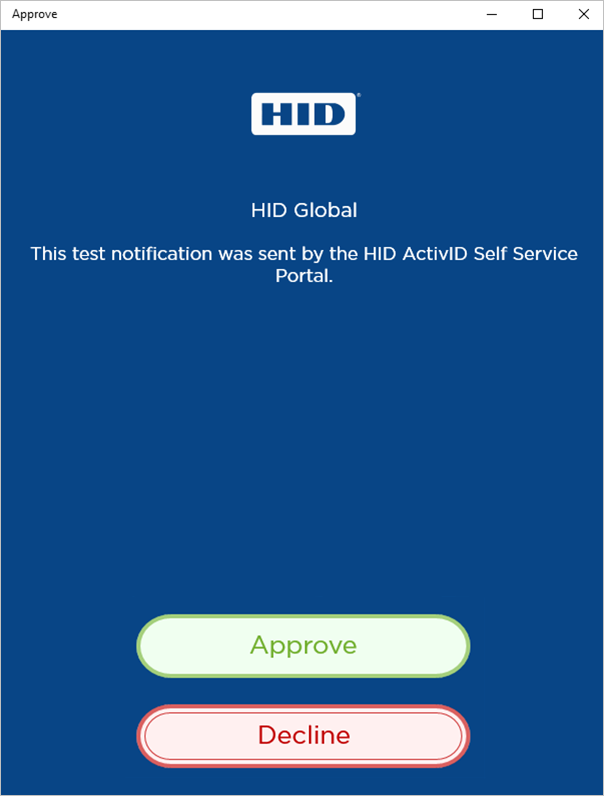
Test Push for Your Service
Once the service is successfully registered on your device, you can test it.
-
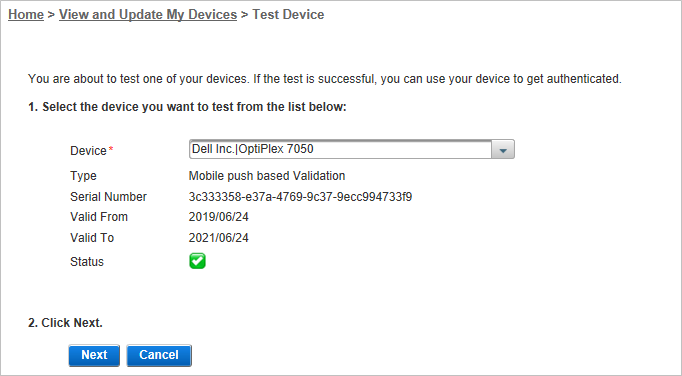
Log on to the ActivID Self-Service Portal with your username and password and select View and Update my devices.
-
Select your Push device from the list and click Next.

-
Select Push Notification then click Next.

-
Click Test.
You will receive a notification on your device that you can approve or decline.

-
Approve the test transaction by push using HID Approve.