jms-Listener Sample
This sample java application demonstrates how an application can wait for a Device registration result, or Action/Logon Validation request result, by listening JMS messages on the ActivID JMS topics.
See JMS Notifications Message Format for details of the messages published on the JMS topic by ActivID AS.
This sample:
-
Starts listening on the ActivID AS corresponding JMS topic.
-
Displays device registrations and logon/action validation resulting JMS messages.
Prerequisites
Define the Sample Push-Based Client Application for ActivID AS
-
Configure push-based solution on your ActivID AS server.
-
Configure the JMS topic (used to receive the result of the push-based authentication) on your ActivID AS server JMS broker.
In the following sections, it is assumed that your Client application is configured to use a Topic name= CLIENT1.
For details about configuring the JMS broker configuration, refer to the ActivID AS installation guide for your application server available from the ActivID Customer Portal.
For example, in a JBoss application server with ActiveMQ JMS broker:
-
In AMQ broker configuration, /opt/AMQ/broker-config.xml, authorize your topic for your application by adding the following under
<authorizationEntries>:Copy<authorizationEntry topic="jms/topics/CLIENT1/pushAuthn" read="CLIENT1"/>
<authorizationEntry topic="ActiveMQ.Advisory.Connection" read="CLIENT1" write="CLIENT1" admin="CLIENT1"/>
<authorizationEntry topic="ActiveMQ.Advisory.Consumer.Topic.jms/topics/CLIENT1/pushAuthn" read="CLIENT1" write=" CLIENT1" admin=" CLIENT1"/>
<authorizationEntry topic="ActiveMQ.Advisory.TempQueue" read="CLIENT1" write="CLIENT1" admin="CLIENT1"/>
<authorizationEntry topic="ActiveMQ.Advisory.TempTopic" read="CLIENT1" write="CLIENT1" admin="CLIENT1"/>
-
In the JBoss server configuration, /opt/jboss-eap-7.0/activid/configuration/standalone-full.xml, add the name of your topic under
<admin-objects>:Copy<admin-object class-name="org.apache.activemq.command.ActiveMQTopic" jndi-name="java:/jms/topics/DEMO1/pushAuthn" use-java-context="true" pool-name=" CLIENT1">
<config-property name="PhysicalName">
jms/topics/CLIENT1/pushAuthn
</config-property>
</admin-object>
-
-
Define a client certificate used for this sample (JMS Client application), and add its permissions in the ActivID AS server JMS broker configuration:
-
Generate a .jks file (for example, keystore.jks) with a client certificate and private key for your push-based application instance (required for secure connection to the JMS topic broker server).
This certificate can be issued with your preferred CA authority, and there is no specific requirement for the subjectDN of this certificate. The following configuration example uses CN=JMS_Client1, OU=JMS as a placeholder for the subjectDN.
Requirement for this certificate:
- RSA Key size – 2048
- Key usage – digitalSignature, keyEncipherment
- extendedKeyUsage – clientAuth
-
Add the root CA of the client certificate to the truststore of ActivID AS server JMS broker.
For example, for a JBoss application server, add the root to /opt/jboss-eap-7.0/ssl-server.truststore using the following command (after retrieving your root CA as root.cer):
Copykeytool -importcert -alias jmsca -keystore /opt/jboss-eap-7.0/ssl-server.truststore -storepass changeit -file root.cer -
Update ActivID AS server JMS broker configuration to allow connection to JMS topic (DEMO1) using this certificate.
For example, for a JBoss application server with AMQ broker:
-
Update /opt/AMQ/groups.properties by defining a user (demo1user) permitted to access the broker for your topic DEMO1:
Copy#<group>=<users>
ActivIDAuthPortal=airfe,aiapp,aibroker
DEMO1=demo1user -
Update /opt/AMQ/dns.properties by configuring the JMS client certificate subjectDN (that is, CN=JMS_Client1, OU=JMS) as demo1user :
Copy#<user>=<DN>
demo1user =CN=JMS_Client1, OU=JMS
-
-
-
Restart the ActivID AS applications to reload the JMS push applications configuration.
The result is a new JMS topic with name CLIENT1 that can be used to post the result of HID Approve device activation or HID Approve logon or action validation.
See the following section to configure the ActivID AS server to post result on the new application.
Configure ActivID AS to Post Result on the Application JMS Topic
-
To receive JMS notification messages for HID Approve application Logon or Action validation approval:
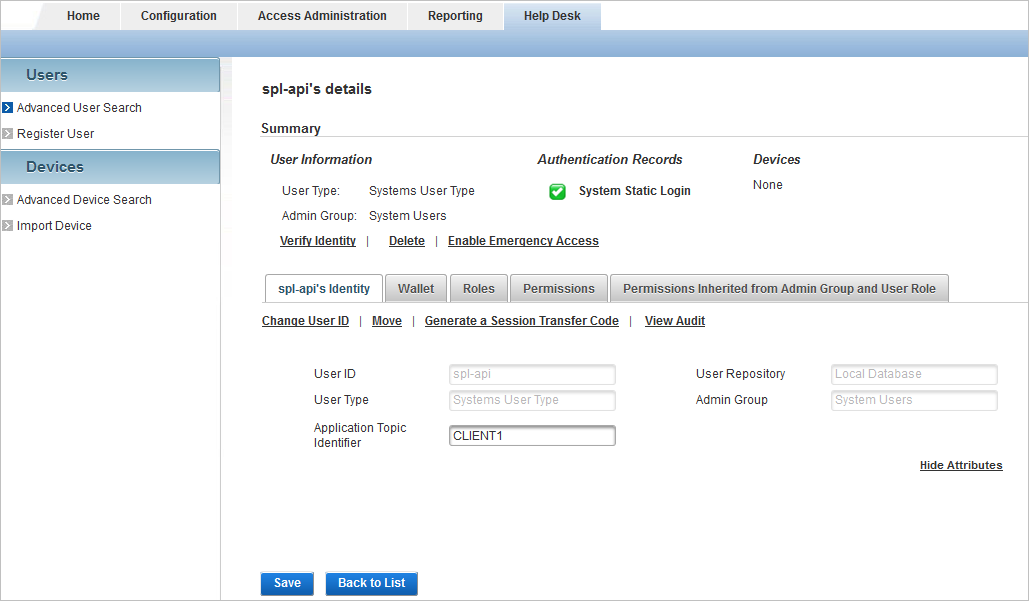
Make sure that the topic name for your application is configured as the Application Topic Identifier value in the attributes of the application’s Direct user (for example, spl-api) used to request logon or action.
-
To receive JMS notification messages for HID Approve application service registration:
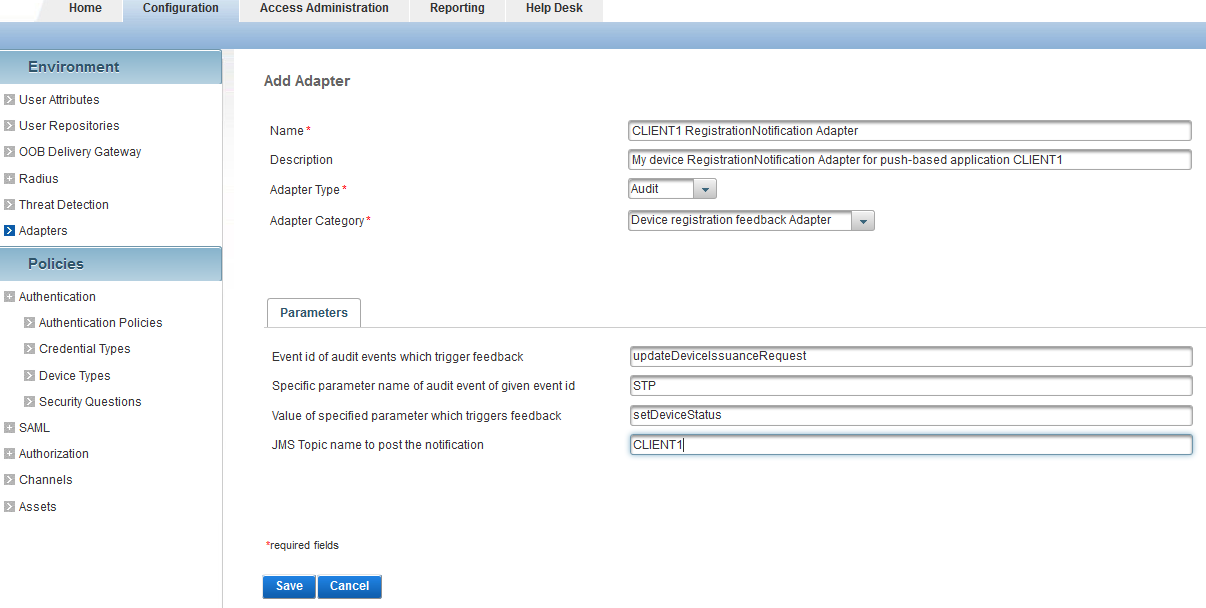
Define or update the adapter configuration for Device registration feedback Notification.
Update JMS Topic name to post the notification parameter with the topic name for your application.
In the ActivID Management Console, go to the Configuration tab and, under Environment, select Adapters:
Installation
-
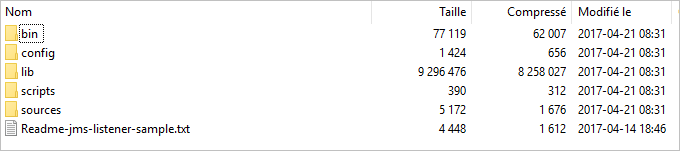
Unzip the Push_Authentication_Sample\JMS-client-listener-sample.zip file to the destination of your choice (for example, a jmslistener-sample folder).
Refer to the Readme-jms-listener-sample.txt for details.
Sample content:
-
Edit the jmsListener.properties file in the config folder and configure the following entries:
- jmsBrokerURI – the URI for your server ActiveMQ broker (for example, ssl://myserver:1004).
-
keystore_path – the full path to the .jks key store file that contains PKI client certificate and private key of your JMS Push application instance (for example, keystore_path=C:/myfolder/keystore.jks).
-
keystore_password – the password of the key store.
-
jmsTopic – the JMS topic name of your push application (for example, CLIENT1).
Run the jms-Listener Sample
-
Open a command window and change the directory to the scripts folder.
-
Run one of the following commands:
-
On Microsoft Windows, use
JMSListener.bat -
On Linux, use
JMSListener.sh
-
The script will output to the HIDSample.log:
-
The received JMS messages for HID Approve service registration are similar to:
Copy2017-03-23 18:01:03 ========== Text message received: action=activation;domain=ONLINEBANK;usercode=user1;deviceid=11063;response=success
-
The received JMS messages for Logon or Action operation validation are similar to:
Copy2017-03-23 18:01:03 ========== Text message received: action=opvalidation;domain=ONLINEBANK;usercode=user1;deviceid=11063;success=1;reason=Reason not defined;correlationid=12345678;clientapprovalstatus=accept;


