A SCIM federated datasource must be created on the provisioningAgentCredential.value which must reference the userId (for example, "123" for spl-api).
The ActivID AS server must have a certificate issued with a valid root CA (such as IdenTrust™).
To leverage your Microsoft Azure AD as a SCIM federated repository in ActivID AS, you first need to configure the directory for provisioning.
-
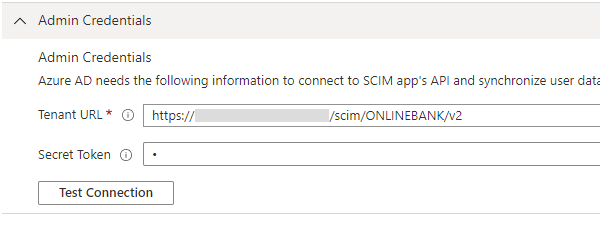
Log on to the Microsoft Azure AD portal (https://aad.portal.azure.com/) and set the Admin Credentials:
Follow the instructions (starting at step 4) in https://docs.microsoft.com/en-us/azure/active-directory/app-provisioning/use-scim-to-provision-users-and-groups#integrate-your-scim-endpoint-with-the-aad-scim-client to set the required credentials.
-
Tenant URL - the URL of the application's SCIM endpoint
- Secret Token – the OAuth bearer token (for example, generated by the ActivID AS OpenID API Token Endpoint).
-
-
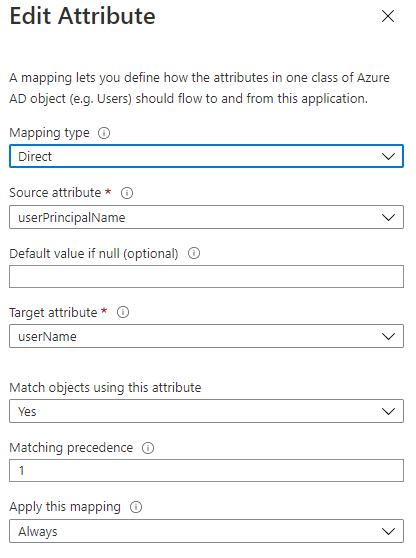
Map the directory User attributes to those of the ActivID AS deployment as described in https://docs.microsoft.com/en-us/azure/active-directory/app-provisioning/use-scim-to-provision-users-and-groups#design-your-user-and-group-schema
The following illustrates a possible attribute mapping:
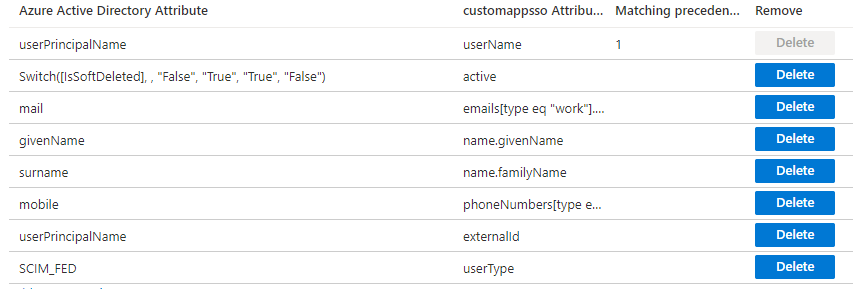
Specifically:
- userPrincipalName is mapped to externalId with the following configuration:
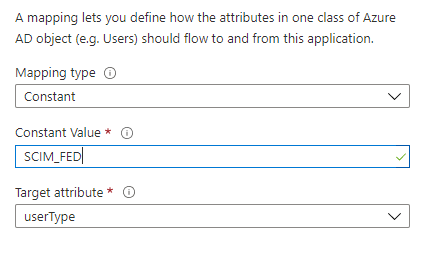
- To indicate to ActivID AS that a new user should be created as a ‘federated’ user, add a new Constant mapping with SCIM_FED as the value and mapped to the userType attribute:
-
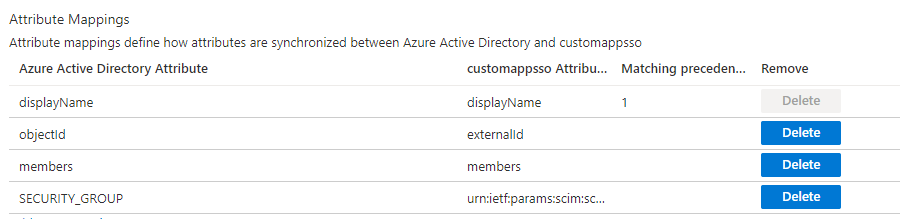
Map the directory Group attributes to those of the ActivID AS deployment as described in https://docs.microsoft.com/en-us/azure/active-directory/app-provisioning/use-scim-to-provision-users-and-groups#design-your-user-and-group-schema.
The following illustrates a possible attribute mapping:
Specifically, to indicate to ActivID AS that a new group should be created as a ‘federated’ group:
-
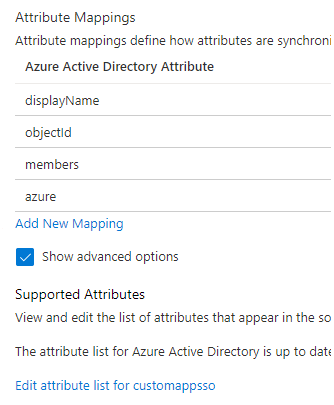
Go to the group attribute mapping configuration page, select Show advanced options and then click Edit attribute list for customappsso.
-
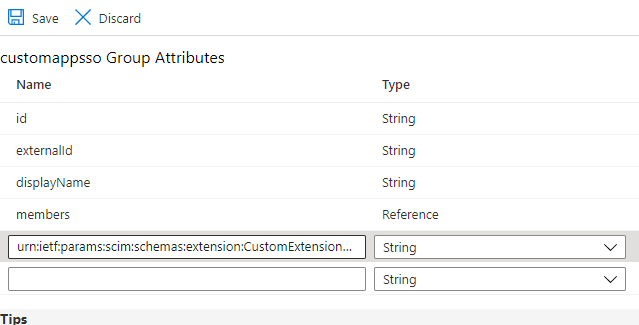
Add a custom attribute called urn:ietf:params:scim:schemas:extension:CustomExtensionName:2.0:Group:groupType and save your changes.
-
Return to the group attribute configuration page, click Add New Mapping.
-
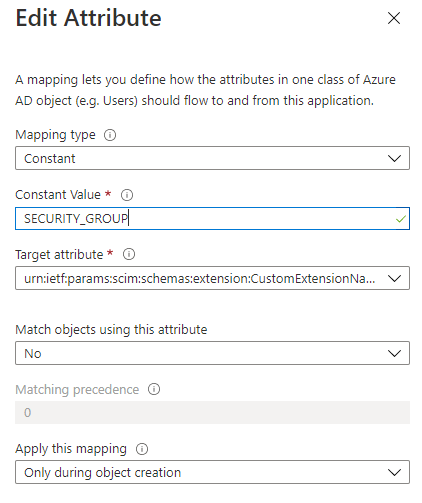
Create a new Constant mapping with SECURITY_GROUP as the value and mapped to the custom attribute you created in the previous step.
Next step - Configure Microsoft Azure for Authentication


