Upgrading to a New Version of Oracle
In order to upgrade your ActivID CMS database to a new version of Oracle, you must complete the following procedures:
-
Install ActivID CMS for Windows on a system that is using the Oracle database that contains the existing ActivID CMS data (not described in this documentation).
-
On the ActivID CMS server, upgrade the Oracle Client to the version applicable to your target Oracle database.
-
Uninstall the older Oracle client (use the Deinstall Products option of the Oracle Universal Installer).
-
Install the new Oracle Client and configure Local Net Service Name Configuration using Oracle Net Configuration Assistant.
-
-
Install and configure a new Oracle database running on a different system than ActivID CMS (not described in this documentation).
-
For PIV Personal Identity Verification (technical standard of "HSPD-12") deployments, back up the following ActivID CMS PIV files from your existing ActivID CMS server:
-
plugins.propertiesgeneric_plugin.properties
-
log4j.properties
-
eventnotificationplugins.properties
-
-
Migrate your data:
-
Export the ActivID CMS databases from the previous Oracle version and move the dump files to the more recent Oracle machine.
-
Update the oracle-create.bat file.
-
Import the ActivID CMS databases to the new Oracle database system.
For details, see Migrate Data
-
-
Repair ActivID CMS. For details, see Run Repair and Connect ActivID CMS to a New Version of Oracle.
-
Restore four previously backed up PIV .properties files. For details, see Restore Four PIV Files and Manually Update Two PIV Files.
-
Manually update two PIV .properties files (with the new URL).
-
Reconnect ActivID CMS to the new database.
-
Stop the ActivID CMS server.
-
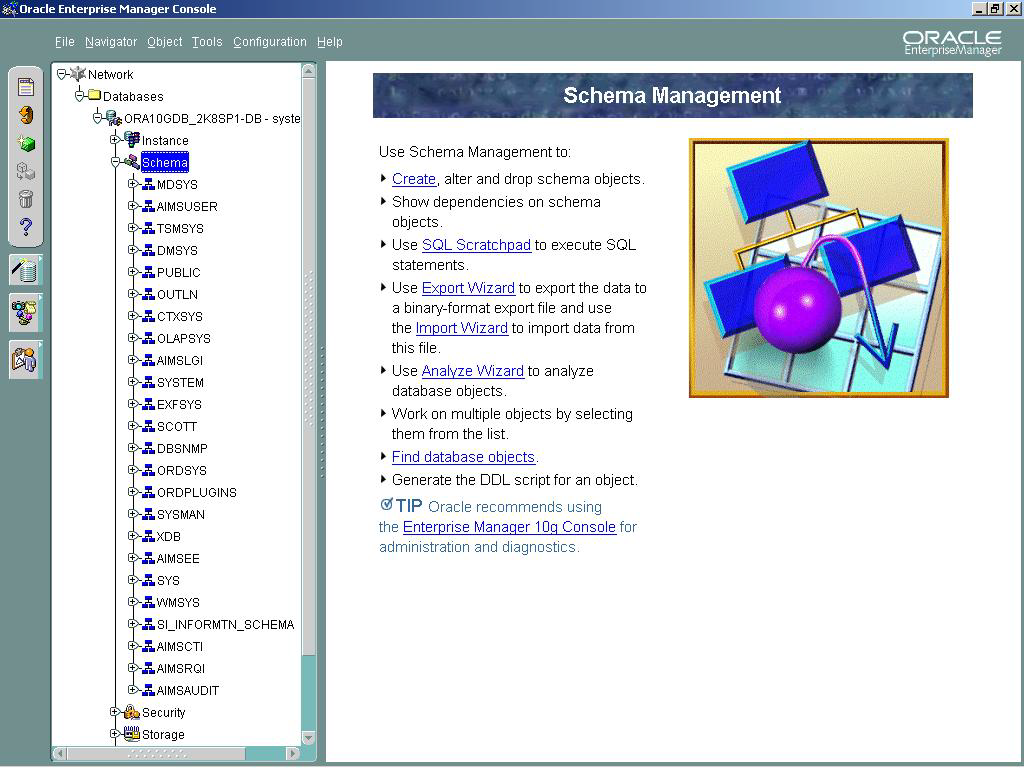
Start the Oracle Enterprise Manager for the existing version of Oracle and verify whether all the ActivID CMS databases are available.
-
On the Start menu of the system hosting the previous version of Oracle, click Run, type cmd, and then click OK to start a command prompt window.
-
Enter the following command line to export the ActivID CMS Audit Database:
Copyexp system/activcard FILE=aimsaudit.dmp owner=AIMSAUDIT compress=y indexes=y constraints=y
log=expaimsaudit.logThe following message sequence is displayed:
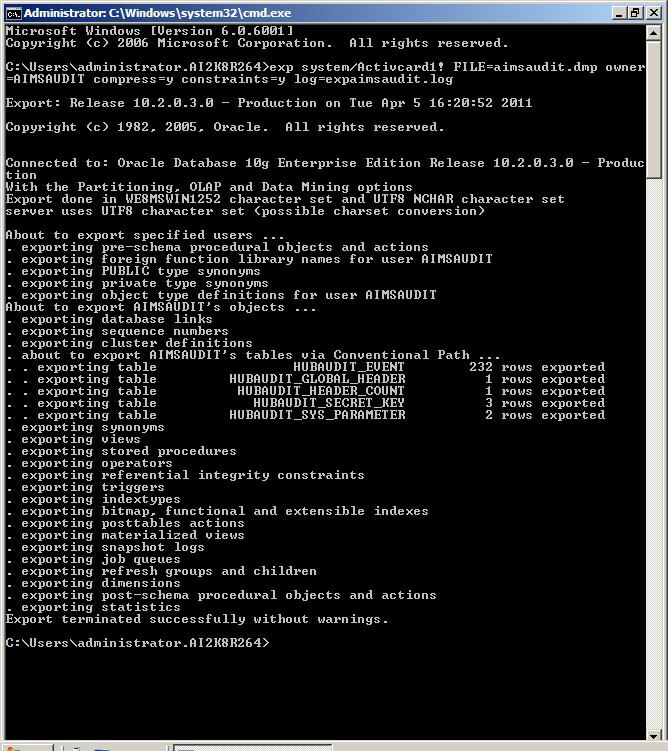
-
After successfully exporting the ActivID CMS Audit database, export the remaining five databases. To do this, enter the following command lines one by one:
Copyexp system/activcard FILE=aimsee.dmp owner=AIMSEE compress=y indexes=y constraints=y log=expaimsee.log
exp system/activcard FILE=aimcti.dmp owner=AIMSCTI compress=y indexes=y constraints=y log=expaimscti.log
exp system/activcard FILE=aimsrqi.dmp owner=AIMSRQI compress=y indexes=y constraints=y log=expaimsrqi.log
exp system/activcard FILE=aimslgi.dmp owner=AIMSLGI compress=y indexes=y constraints=y log=expaimslgi.log
exp system/activcard FILE=aimsuser.dmp owner=AIMSUSER compress=y indexes=y constraints=y log=expaimsuser.log -
After successfully exporting all six databases, copy the dump files that were generated by the export to the PC system that acts as the host for the new Oracle version.
-
On the ActivID Credential Management System Installation distribution, navigate to \DB Scripts\oracle and copy all the files on the hard disk of the PC system that acts as the host for the new Oracle version.
-
Right-click the hard-disk copy of the oracle-create.bat file, and then click Edit.
Note: Prior to performing this action, you must deselect the Read-Only option in the properties section of the file. -
Edit the oracle-create.bat file to match the following script:
Copy@echo off
rem --- Set configuration parameters ---
call oracle-config.bat
rem ------------------------------------
@echo on
rem - Create AIMSAUDIT
echo exit | sqlplus %INPUT_DBA_USR%/%INPUT_DBA_PWD%@%INPUT_DATABASE_INSTANCE% @%INPUT_SCRIPTS_CREATE_DIR%/oracle-create-aimsaudit-dba.sql %INPUT_DATAFILES_PATH% %INPUT_DBO_PWD%
echo exit | sqlplus %INPUT_DBA_USR%/%INPUT_DBA_PWD%@%INPUT_DATABASE_INSTANCE% @%INPUT_SCRIPTS_PRIVILEGES_DIR%/oracle-grant-prvileges-dbo-aimsaudit.sql
echo exit | sqlplus %INPUT_DBA_USR%/%INPUT_DBA_PWD%@%INPUT_DATABASE_INSTANCE% @%INPUT_SCRIPTS_PRIVILEGES_DIR%/oracle-revoke-prvileges-dbo-aimsaudit.sql
rem - Create AIMSLGI
echo exit | sqlplus %INPUT_DBA_USR%/%INPUT_DBA_PWD%@%INPUT_DATABASE_INSTANCE% @%INPUT_SCRIPTS_CREATE_DIR%/oracle-create-aimslgi-dba.sql %INPUT_DATAFILES_PATH% %INPUT_INDEXFILES_PATH% %INPUT_DBO_PWD%
echo exit | sqlplus %INPUT_DBA_USR%/%INPUT_DBA_PWD%@%INPUT_DATABASE_INSTANCE% @%INPUT_SCRIPTS_PRIVILEGES_DIR%/oracle-grant-prvileges-dbo-aimslgi.sql
echo exit | sqlplus %INPUT_DBA_USR%/%INPUT_DBA_PWD%@%INPUT_DATABASE_INSTANCE% @%INPUT_SCRIPTS_PRIVILEGES_DIR%/oracle-revoke-prvileges-dbo-aimslgi.sql
rem - Create AIMSEE
echo exit | sqlplus %INPUT_DBA_USR%/%INPUT_DBA_PWD%@%INPUT_DATABASE_INSTANCE% @%INPUT_SCRIPTS_CREATE_DIR%/oracle-create-aimsee-dba.sql %INPUT_DATAFILES_PATH% %INPUT_INDEXFILES_PATH% %INPUT_DBO_PWD%
echo exit | sqlplus %INPUT_DBA_USR%/%INPUT_DBA_PWD%@%INPUT_DATABASE_INSTANCE% @%INPUT_SCRIPTS_PRIVILEGES_DIR%/oracle-grant-prvileges-dbo-aimsee.sql
echo exit | sqlplus %INPUT_DBA_USR%/%INPUT_DBA_PWD%@%INPUT_DATABASE_INSTANCE% @%INPUT_SCRIPTS_PRIVILEGES_DIR%/oracle-revoke-prvileges-dbo-aimsee.sql
rem - Create AIMSUSER
echo exit | sqlplus %INPUT_DBA_USR%/%INPUT_DBA_PWD%@%INPUT_DATABASE_INSTANCE% @%INPUT_SCRIPTS_CREATE_DIR%/oracle-create-aimsuser-dba.sql %INPUT_DATAFILES_PATH% %INPUT_INDEXFILES_PATH% %INPUT_DBO_PWD%
echo exit | sqlplus %INPUT_DBA_USR%/%INPUT_DBA_PWD%@%INPUT_DATABASE_INSTANCE% @%INPUT_SCRIPTS_PRIVILEGES_DIR%/oracle-grant-prvileges-dbo-aimsuser.sql
echo exit | sqlplus %INPUT_DBA_USR%/%INPUT_DBA_PWD%@%INPUT_DATABASE_INSTANCE% @%INPUT_SCRIPTS_PRIVILEGES_DIR%/oracle-revoke-prvileges-dbo-aimsuser.sql
rem - Create AIMSCTI
echo exit | sqlplus %INPUT_DBA_USR%/%INPUT_DBA_PWD%@%INPUT_DATABASE_INSTANCE% @%INPUT_SCRIPTS_CREATE_DIR%/oracle-create-aimscti-dba.sql %INPUT_DATAFILES_PATH% %INPUT_INDEXFILES_PATH% %INPUT_DBO_PWD%
echo exit | sqlplus %INPUT_DBA_USR%/%INPUT_DBA_PWD%@%INPUT_DATABASE_INSTANCE% @%INPUT_SCRIPTS_PRIVILEGES_DIR%/oracle-grant-prvileges-dbo-aimscti.sql
echo exit | sqlplus %INPUT_DBA_USR%/%INPUT_DBA_PWD%@%INPUT_DATABASE_INSTANCE% @%INPUT_SCRIPTS_PRIVILEGES_DIR%/oracle-revoke-prvileges-dbo-aimscti.sql
rem - Create AIMSRQI
echo exit | sqlplus %INPUT_DBA_USR%/%INPUT_DBA_PWD%@%INPUT_DATABASE_INSTANCE% @%INPUT_SCRIPTS_CREATE_DIR%/oracle-create-aimsrqi-dba.sql %INPUT_DATAFILES_PATH% %INPUT_INDEXFILES_PATH% %INPUT_DBO_PWD%
echo exit | sqlplus %INPUT_DBA_USR%/%INPUT_DBA_PWD%@%INPUT_DATABASE_INSTANCE% @%INPUT_SCRIPTS_PRIVILEGES_DIR%/oracle-grant-prvileges-dbo-aimsrqi.sql
echo exit | sqlplus %INPUT_DBA_USR%/%INPUT_DBA_PWD%@%INPUT_DATABASE_INSTANCE% @%INPUT_SCRIPTS_PRIVILEGES_DIR%/oracle-revoke-prvileges-dbo-aimsrqi.sql
pause -
Before running the modified oracle-create.bat file, save it, and then run the bat file.
-
On the Start menu on the PC acting as the host for the new Oracle version, click Run, type cmd, and then click OK to start a new command prompt window.
-
Enter the following command line:
CopySET ORACLE_SID=<your sid name>where <your sid name> is the system ID of your database.
-
Enter the following command line to import the ActivID CMS Audit Database:
Copyimp system/activcard FILE=aimsaudit.dmp FULL=y log=impaimsaudit.logThe following message sequence is displayed:
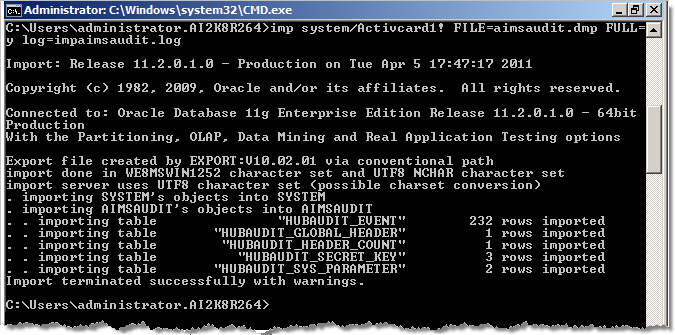
-
After successfully importing the ActivID CMS Audit database, import the remaining five databases. To perform this task, enter the following command lines one-by-one:
Copyimp system/activcard FILE=aimsee.dmp FULL=y log=impaimsee.log
imp system/activcard FILE=aimcti.dmp FULL=y log=impaimscti.log
imp system/activcard FILE=aimsrqi.dmp FULL=y log=
impaimsrqi.log
imp system/activcard FILE=aimslgi.dmp FULL=y log=impaimslgi.log
imp system/activcard FILE=aimsuser.dmp FULL=y log=
impaimsuser.log -
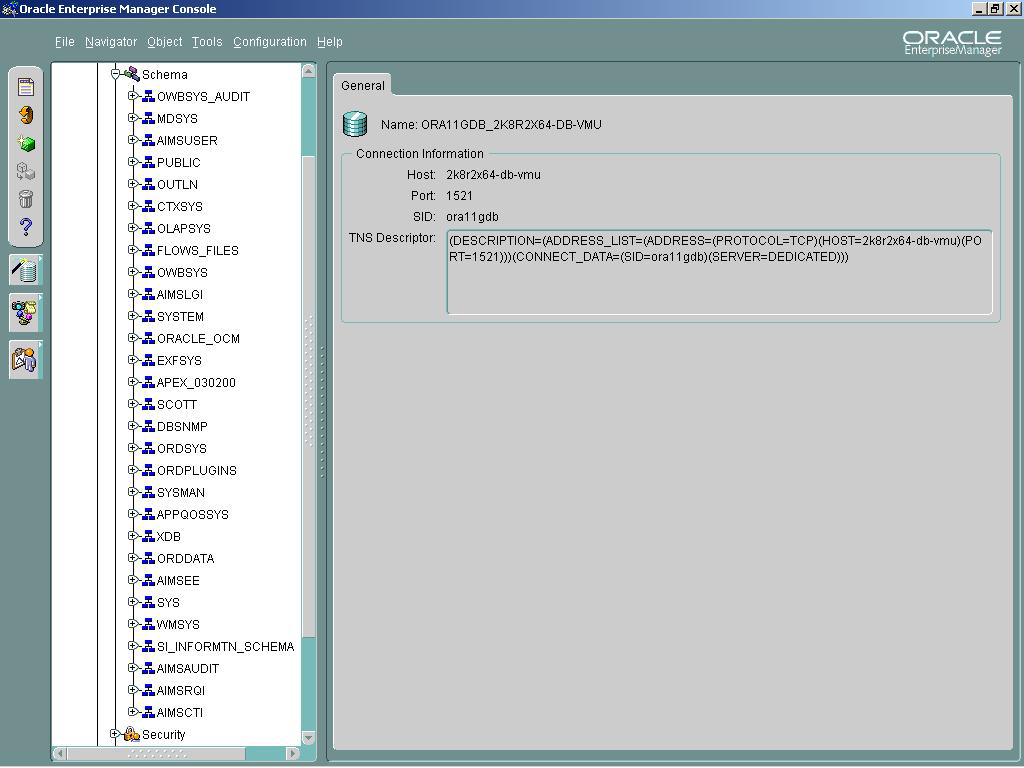
Start the Oracle Enterprise Manager for the new version of Oracle and verify that the imported databases are available.
-
Stop the ActivID CMS server.
-
On the Start menu of the system hosting ActivID CMS, point to All Programs > HID Global, then click Credential Management System, and then click Modify Credential Management System.
The InstallShield Wizard Credential Management System page is displayed.
-
Click Next.

-
Select the option Repair and then click Next.
The Database Server Information page appears.
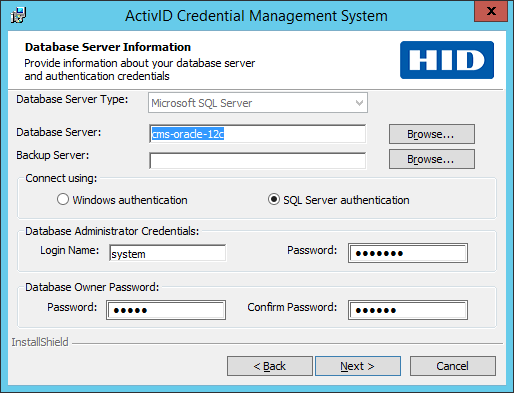 Note: If you initially created the database using the database creation scripts instead of the ActivID CMS setup, then some text boxes or options will be unavailable.
 -
Adjacent to the Database Server field, click Browse and then navigate to the new Oracle database server location.
-
If applicable, under Database Administrator Credentials, enter the login name and password of the Oracle Database Administrator.
-
Under Database Owner Password, enter the password and confirmation password. This password is used by the ActivID CMS to connect to its six databases.
-
Click Next. The Ready to Repair the Program page appears.
-
Click Install.
-
When prompted, click Finish.
-
Restore the four PIV properties files:
Copyplugins.properties
generic_plugin.properties
log4j.properties
eventnotificationplugins.properties -
Manually update the following two PIV files with the new URL:
CopyPIVEnrollment.properties
PIVNotification.properties -
Restart the ActivID CMS server.
-
From the ActivID CMS Operator Portal, perform a Connectivity Check. For details, refer to Checking Connectivity.


