Update the ISAPI Configuration Properties File
To update the ISAPI configuration properties file with the host name of the ActivID CMS server, perform the following steps.
-
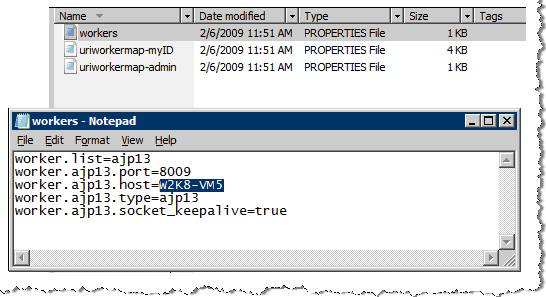
Go to the directory where the properties files reside (in this example, it is “C:\ISAPI\conf”).
-
Double-click the configuration properties file, it launches the file in a common text editor, such as Notepad.
In this example, it is the workers.properties file. The workers.properties file contains the host= line that defines the host name of the ActivID CMS server. In this example, it is worker.ajp13.host=.
-
Edit the existing host= line to define the name of the ActivID CMS server. In this example, it is W2K8-VM5.
-
Add a line starting with the parameter worker.ajp13.secret, where the value is the required secret from the above server.xml entry from the Tier 2 ActivID CMS server as described in section Configuring the Tier 2 ActivID CMS Server . In this example, it is:
Copyworker.ajp13.secret= DD86CAD283C9ABB7AA1A229122535BWarning! In cases where modifications are made that alter the ActivID CMS application on the ActivID CMS server itself, make sure that you perform the above two steps. This is required because during a repair procedure, the server.xml file is reconfigured and a new random number is generated. -
To save your configuration changes, select the File menu, and then click Save.
-
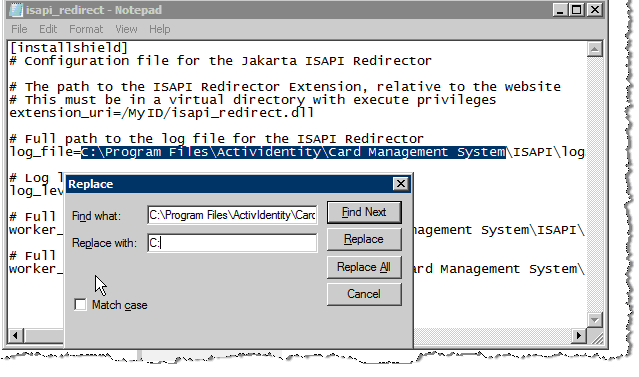
To update the install path in the isapi_redirect.properties file for the UserPortal folder, go to the directory where this properties file resides. In this example, it is C:\ISAPI\bin\MyDigitalID.
-
Double-click the properties file that you want to update, it launches the file in a common text editor, such as Notepad.
In this example, it is the isapi_redirect.properties file. This properties file contains the path location in the log_file= line that defines the path name of the ISAPI Redirector log file. In this example, the path to the Redirector log file is:
C:\Program Files\HID Global\Credential Management System\ISAPI\logs\isapi_redirect-myID.log
-
Change the path to C:\ISAPI\logs\isapi_redirect-myID.log.
-
Change the work_file= and work_mount_file= paths accordingly.
-
From the File menu, click Save to save the changes made to the isapi_redirect.properties file.
-
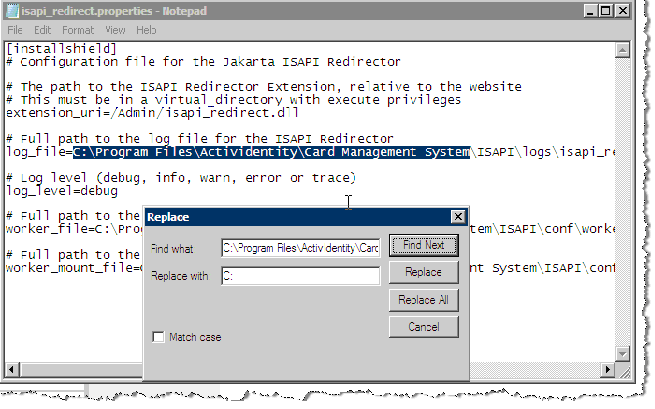
To update the install path in the isapi_redirect.properties file for the Administration folder, go to the directory where the ISAPI properties files reside (in this example, it is C:\ISAPI\bin\Administration).
-
Double-click the ISAPI Redirector properties file you want to update, it launches the file in a common text editor, such as Notepad.
In this example, it is the isapi_redirect.properties file. The selected properties file contains the path location in the log_file= line that defines the path name of the ISAPI Redirector log file. In this example, the path to the Redirector log file is:
C:\Program Files\HID Global\Credential Management System\ISAPI\logs\isapi_redirector.log isapi_redirect-admin.log
-
Change the path to C:\ISAPI\logs\isapi_redirect-admin.log.
-
Change the work_file= and work_mount_file= paths accordingly.
-
From the File menu, click Save to save the changes made to the isapi_redirect.properties file.
-
Go to the directory where your security certificates are stored (in the following example, it is the Security Certificate folder in the root directory).

-
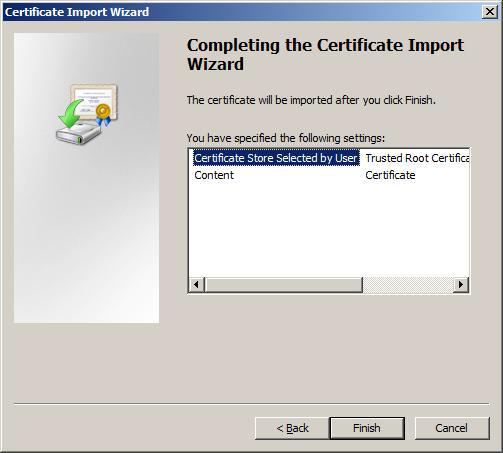
Double-click the directory where the security certificates reside. The Certificate Import Wizard dialog appears.
-
In the Certificate Import Wizard dialog, select the Place all certificates in the following store option.
-
Browse to locate and enter the path to the Certificate store. This location is the certificate store where you can place all certificates if the root certificate authority (CA) is not trusted.
-
Click Next at the bottom of the dialog (not illustrated).
-
Click Finish.


