Configuring Secure Connections Between the Server and the Active Directory
LDAP Lightweight Directory Access Protocol is used to read from and write to the Active Directory. By default, LDAP traffic is transmitted unsecured. You can make LDAP traffic confidential and secure by using SSL/TLS technology. You can enable LDAP over SSL (LDAPS) by installing the properly formatted certificate from the Microsoft CA The Certificate Authority (CA) issues and manages security credentials and public keys for message encryption in a networks environment..
To enable a new user in Active Directory, you must be using an SSL connection (you can only set a password in Active Directory if you are connected using SSL).
If you are not connected using SSL, then you can add a new user to Active Directory. However, that user is not enabled until an administrator connects using SSL and sets the user's password. In Active Directory you can issue an LDAPS certificate with the following properties.
-
An Enhanced Key Usage extension that includes the Server Authentication:
Copy(-1.3.6.1.5.5.7.3.1- OID).
-
A Fully Qualified Domain Name (FQDN) for the domain controller as in the following:
Copycn = directory
For example: DC01.DOMAIN.COM
For information about how to enable LDAP over SSL with a third-party certification authority, go to: https://support.microsoft.com/en-us/kb/321051.
In addition, you can configure the LDAPS protocol between ActivID CMS and Active Directory. For more information, see Configuring Connections to the LDAP Directory Using LDAPS Protocol.
To configure secure connections, perform the following steps.
-
Log on to the Operator Portal, select the Configuration tab, and then click Repositories. The Repositories Management page appears:

-
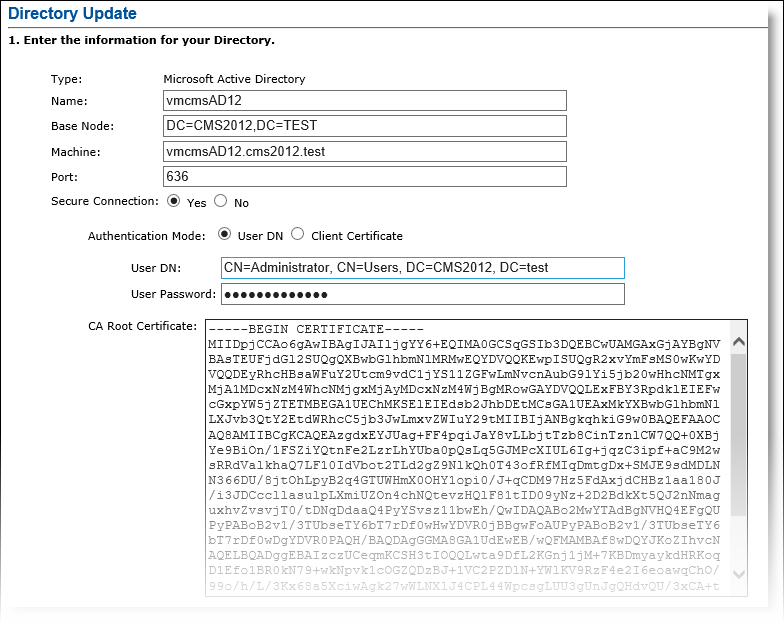
In the Directories section of the page, in the Type column, locate the relevant Microsoft Active Directory instance, and in the Action column, click Update. The Directory Update page is displayed.
-
Port—Enter 636 for LDAPS connections.
-
User Password—Enter the appropriate password for the account being referenced.
-
Secure Connection—Select Yes. The CA Root Certificate box is displayed.
Note: Starting with ActivID CMS 5.2, the Strict mode option (found in previous versions) is no longer available since this mode is now enabled by default. As a result, it is not possible to establish a connection if the certificate subject name or alternative subject name does not match the server hostname. -
Obtain the CA Root Certificate:
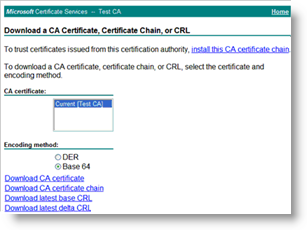
- Connect to Microsoft Certificate Services. (Log on with the ActivID CMS User account or the same account as configured for Active Directory in ActivID CMS.) For example: http://<ca.company.com>/certsrv.
- Click Download a CA Certificate, Certificate Chain, or CRL.
-
CA certificate list—Select the relevant CA.
-
Encoding method—Select Base 64.
-
Click Download CA certificate. The File Download dialog is displayed.
-
Click Save.
-
In the File name box, enter Root.txt and save.
-
Open the Root.txt file and copy its content.
-
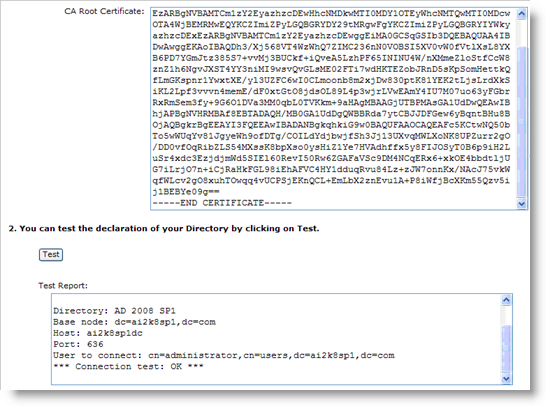
Paste the content into the CA Root Certificate box in the Directory Update page of the Operator Portal. For example:
-
Click Test. The connection test results will be displayed in the Test Report box.
-
Click Update (not illustrated),
-
In the Operator Portal, select the Configuration tab, and then click Customization.
-
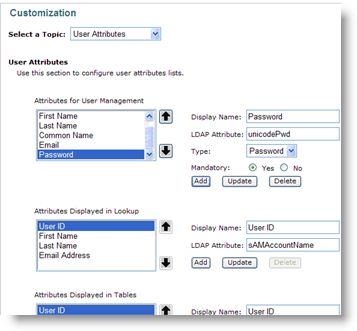
On the Customization page, from the Select a Topic drop-down list, select User Attributes.
Make sure that ActivID CMS is configured to require the following LDAP attributes to create the user when it is used with Active Directory:
sAMAccountName (User ID)
cn (Common Name)
sn (Last Name)
givenName (First Name)
mail (Email)
By default, a user created in ActivID CMS is disabled in Active Directory. To enable the ActivID CMS User in Active Directory, you must set a user password using the Operator Portal
To set the user password:
Display Name—Enter Password.
LDAP Attribute—Type unicodePwd.
Type—Select Password.
Mandatory—Select Yes.
Click Add. The Unicode password is added to the Attributes for User Management list.
-
Click Set.


