Procedure 5: Generate a Sample Card Production Request
This section describes how to generate a sample Card Production Request (CPR) required for issuing a PIV Personal Identity Verification (technical standard of "HSPD-12") card using ActivID CMS. ActivID CMS cannot issue a PIV card without first receiving a CPR. The CPR contains a list of user-specific attributes (such as a name, a fingerprint, or a facial image) that will be stored in the PIV Metadata database and loaded onto the PIV card during device issuance.
To generate a CPR, first customize the unsigned version of a sample CPR. You must edit the user attributes with real values, and then generate the signed version for device issuance. To find out more about CPR signing, refer to the readme.txt file in Tools\PIV\CPRSigning directory.
-
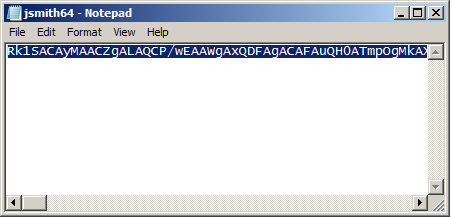
In the makeBase64 directory, open the newly created <%user ID>b64.txt file with WordPad. This file contains the user’s fingerprint in base64 format.
-
Remove all the carriage returns and copy the entire line.
-
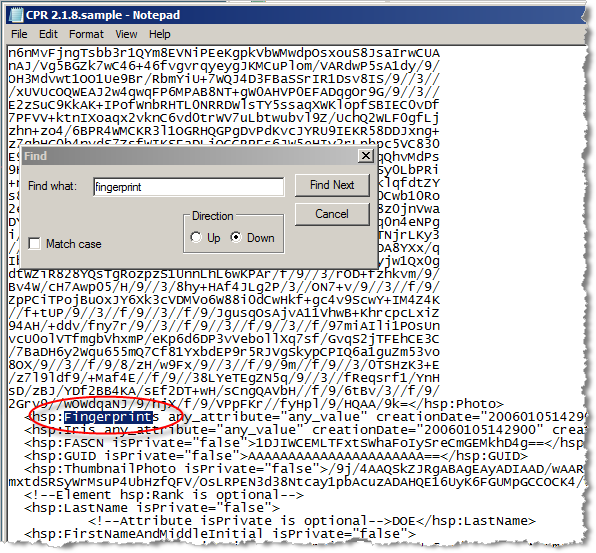
In the Tools\PIV\CPRSigning directory, right-click the CPR 2.1.8 sample.xml file, and then select Edit.
-
From the Edit menu, select Find, and then locate the line containing the entry Fingerprints.
-
Replace all content on this line between the signs “>” and “<“ (starting with Rk1 and finishing with AAA=) with the line you copied in step 2.
The CPR now contains the real fingerprint data of the future user. In the same way, you can also customize other CPR entries, such as the owner’s last name (entry LastName), address (entry Address), and e-mail (entry Email).
-
In the makeBase64 directory, open the newly created <resized user>b64.txt file with WordPad. This file contains the user’s facial image in base64 format.
-
Remove all the carriage returns and copy the entire line.
-
In the Tools\PIV\CPRSigning directory, open the CPR 2.1.8.sample.xml file with WordPad.
-
Find and locate the section containing the entry Photo.
-
Replace the content in this section between the signs “>” and “<“ (starting with RkF and finishing with 9k=) with the line you copied in step 7.
The CPR now contains the real values of fingerprint and facial image of the user. Customize the other CPR entries.
-
To save this file, click Save As, and enter an appropriate name for the file. For example, CPR 2.1.8.sample_custom.xml.
-
In the Tools\PIV\CPRSigning directory, locate the SignCPR.bat file. Right-click the file, and then click Edit.

-
Replace the entry CPR 2.1.8.sample.xml file with the CPR 2.1.8.sample_custom.xml you just saved.
-
Replace the entry CPR 2.1.8.sample.signed.xml file with the CPR 2.1.8.sample_custom.signed.xml, your new signed CPR file).
-
Save the file.
-
Run the SignCPR.bat file. A signed version of the CPR will be generated as shown in the following example.

The signed version of the file (CPR 2.1.8.sample_custom.signed.xml in the example) will be created in the Tools\PIV\CPRSigning directory.
-
In the Tools\PIV\simuIDPRS directory, locate the testCREATE-CPR.bat file. Right-click this file, and then click Edit.
SimuIDPRS is a testing tool containing files which simulate the sending of the CPR to ActivID CMS.
-
In the variable section starting with UPDATE VARIABLES IN THIS SECTION, perform the following steps:
-
Replace the USERID entry “John G. Doe” with the real name of the future user (for example, <%user ID>).
-
Replace the CPR entry “CPR 2.1.8.sample.signed.xml” file with the “CPR 2.1.8.sample_custom.signed.xml” file (your signed CPR file).
-
Replace the POLICY entry “F2F” with the name of the device policy that will be used for the test PIV card issuance.
-
Replace the CMSHOST entry with the correct host name (for example, “cmsserver.domain.com”).
-
Replace the OPERATOR entry “client.pfx” with the actual path to the .pfx file that contains the client certificate used by the ActivID CMS Operator, for example: C:\Program Files\HID Global\Credential Management System\certificates\client.pfx.
-
Replace the TRUST entry “root.cer” with the path to the actual .cer file that contains the root certificate of the CA The Certificate Authority (CA) issues and manages security credentials and public keys for message encryption in a networks environment. that issued the ActivID CMS server certificate, for example, C:\Program Files\HID Global\Credential Management System\certificates\root.cer.
-
Replace the PASSWORD entry “hidglobal” with the password used for the client.pfx certificate.
-
If necessary, you can replace the default CMSPORT entry “443” (HTTPS).
-
Save the file.
-
Run the testCREATE-CPR.bat file. This tool uses the CCM Card and Credential Management API In the context of ActivID CMS, an Application Programming Interface (API) is an external interface (for example, the CCM API) that makes it possible for applications not supported by HID Global to incorporate ActivID functionality. to simulate operations performed by a PIV Identity Management System (IDMS).


