Configuring IIS 7 and IIS 8
For a three-tier configuration using IIS 7 or IIS 8, there are no configuration changes required on the ActivID CMS application server. To install the IIS redirector on an IIS 7 server or IIS 8.0 server (tier 1), complete the following steps.
-
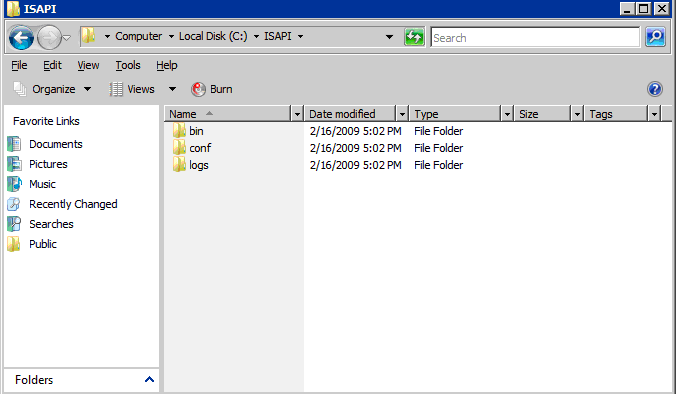
Go to the ISAPI folder and copy ISAPI folder <CMS install path>\ISAPI\ from the installed ActivID CMS server to the IIS 7 server that is acting as the redirector server.
-
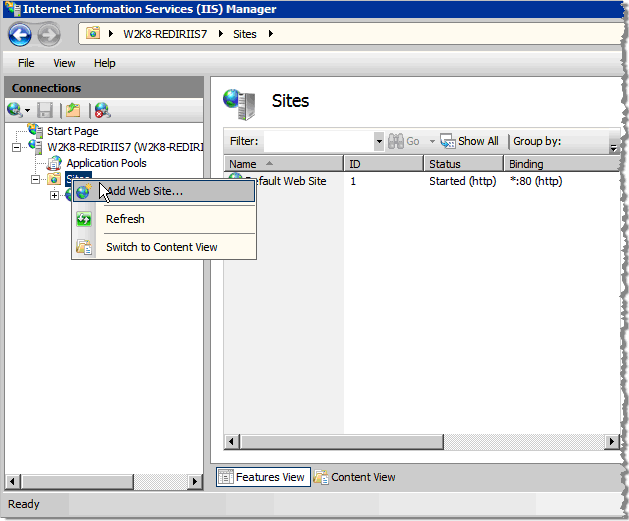
To add a new ActivID CMS website to the IIS redirector server, go to the Connections panel in the Internet Information Services (IIS) Manager main window.
-
Right-click on Sites, and then click Add Web Site. The Add Web Site dialog is displayed.
-
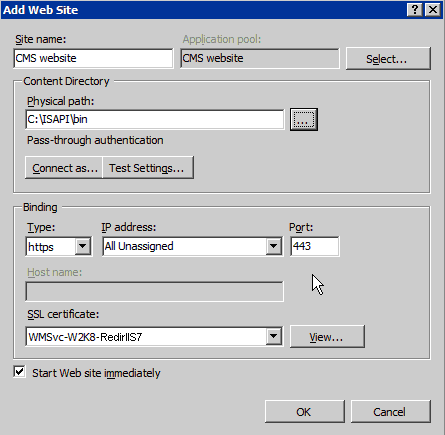
Enter the Site name of the ActivID CMS website (in this example, the name is CMS website).
-
Verify that the Physical Path contains a valid path (in this example, it is C:\ISAPI\bin).
-
Select https as the Binding Type.
The Binding enables you to configure the binding to https (Hypertext Transfer Protocol Secure).
-
Select the SSL certificate that was generated previously for this server (in this example, the SSL certificate is W2K8-RedirIIS7).
-
Optionally, select the option Start Web site immediately.
-
Click OK. This creates the ActivID CMS website.
-
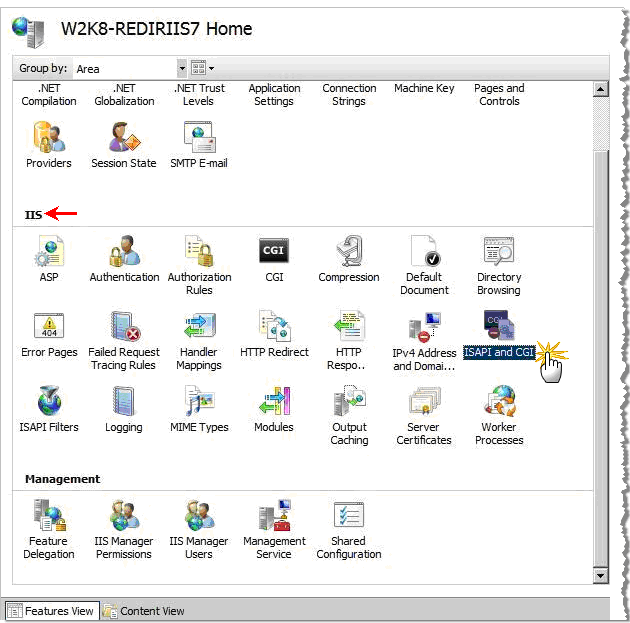
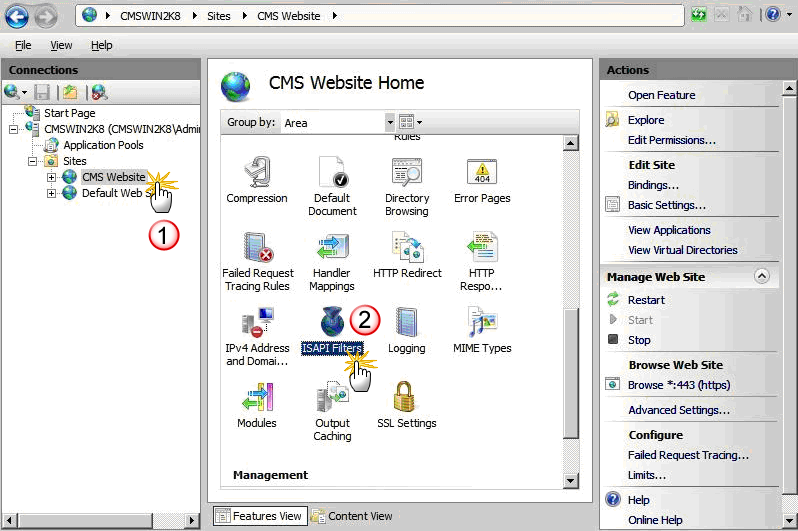
From the IIS Manager main window, select the IIS Server in the connections panel. The IIS Server Home page appears.
-
Scroll down to locate the IIS panel of the Home page.
Make sure that you have selected the IIS server in the Connections panel.)
-
Click ISAPI and CGI. The ISAPI and CGI Restrictions page appears.
From this page, you can add ISAPI and CGI restrictions at the IIS server level.
-
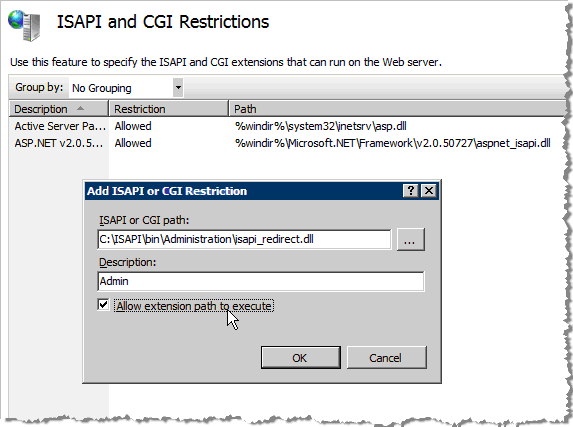
On the ISAPI and CGI Restrictions page, right-click to display the shortcuts menu, and then click Add ISAPI and CGI Restrictions.
-
In the Add ISAPI or CGI Restriction dialog, click Browse to locate the ISAPI or CGI path for the server file.
-
Enter a meaningful Description (for example “Admin”).
-
Select the option Allow extension path to execute.
-
Click OK. The ISAPI and CGI Restrictions page appears with the new values you just configured (see the red arrow in the next illustration).
-
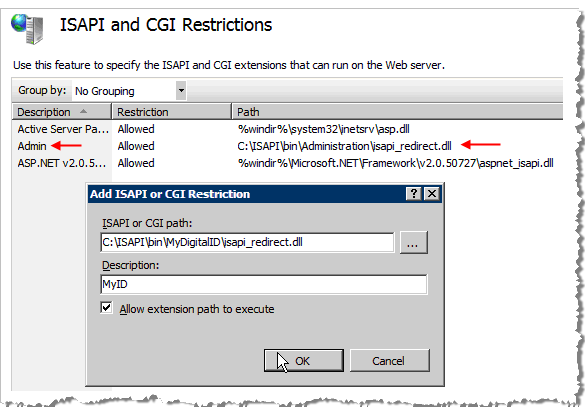
From the Home page, click ISAPI and CGI again. The ISAPI and CGI Restrictions page reappears.
-
Click Browse to locate the ISAPI or CGI path for the server ID file.
-
Enter a meaningful Description (for example, “MyID”).
-
Select the option Allow extension path to execute.
-
Click OK to configure these restrictions settings. The ISAPI and CGI Restrictions page appears with the new values you just configured.
-
Return to the Connections panel, and then expand the Sites folder, if needed.
-
In the Connections panel, click CMS Website. The CMS Website Home page appears (where you will configure two ISAPI filters).
-
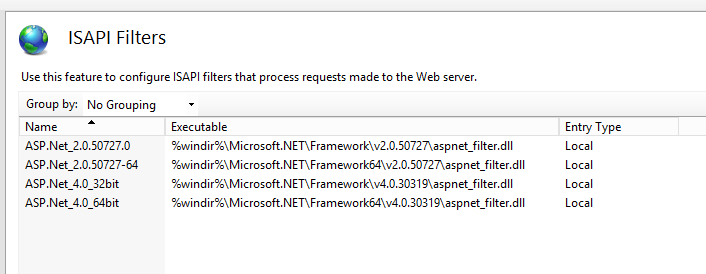
Click ISAPI Filters. The ISAPI Filters page appears.
From the ISAPI Filters page, you can add ISAPI filters at the IIS server level.
-
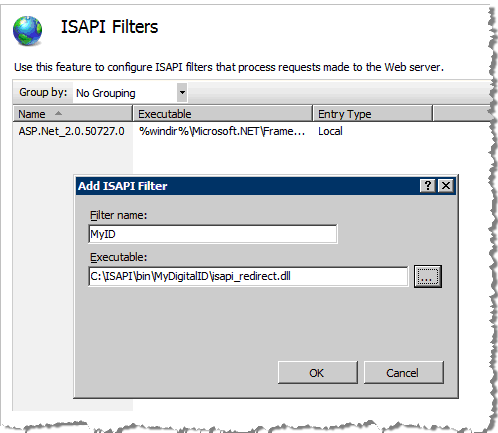
Right-click to display the shortcuts menu, and then click Add ISAPI Filter.
-
Enter a Filter name for the first of two filters (for example, “MyID”).
-
Click the browse button to locate and enter the full path to the Executable .dll file.
-
Click OK to configure the ISAPI filter settings for the first filter.

-
Repeat step 27 to 29 for the second filter.
-
Return to the Connections panel.
-
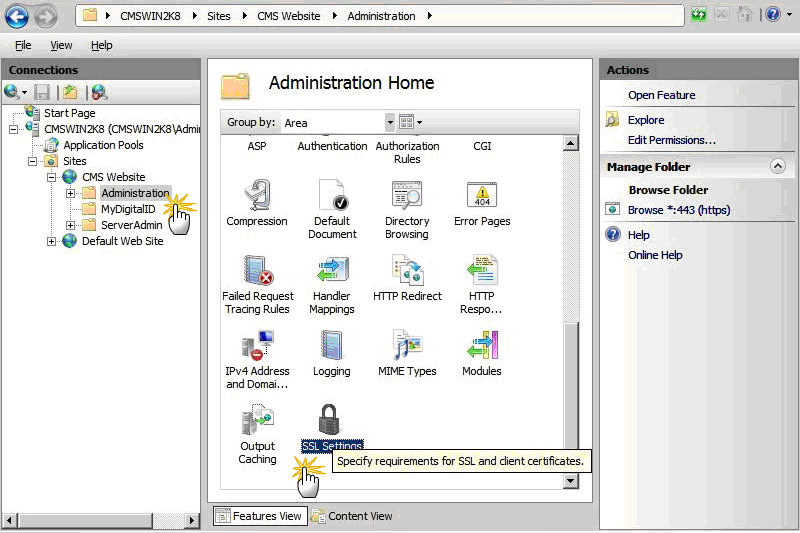
In the Connections panel, under CMS Website, click Administration. The Administration Home page appears.
-
In the IIS panel in the Admin Home page, click SSL Settings. The SSL Settings page appears.
-
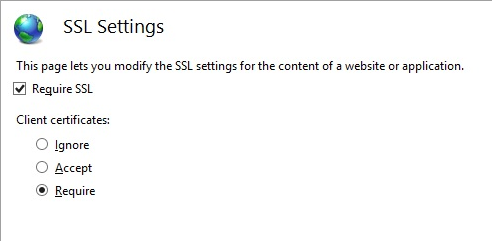
To configure SSL settings in the Admin virtual directory (and SSL Settings window), select the Require SSL option.
-
Under Client certificates, select the Require option.
-
In the Actions panel, click on Apply to save the changes.
-
In the Connections panel under CMS website, click MyDigitalID. The MyDigitalID Home page appears.
-
In the IIS panel, click SSL Settings. The SSL Settings window reappears.
-
To configure SSL settings in the MyDigitalID virtual directory (and SSL Settings window), select the Require SSL option.
-
Under Client certificates, select the Ignore option.
-
In the Actions panel, click on Apply to save the changes.
The next step is to Configure Handler Mappings.
Topics in this section:


