Creating a Role
-
Select the Configuration tab.
-
Select the Roles sub-tab. You can create a role by duplicating an existing role, and then editing it as needed.

-
In the Role Name column, locate the role you want to use as a template for the new role.
-
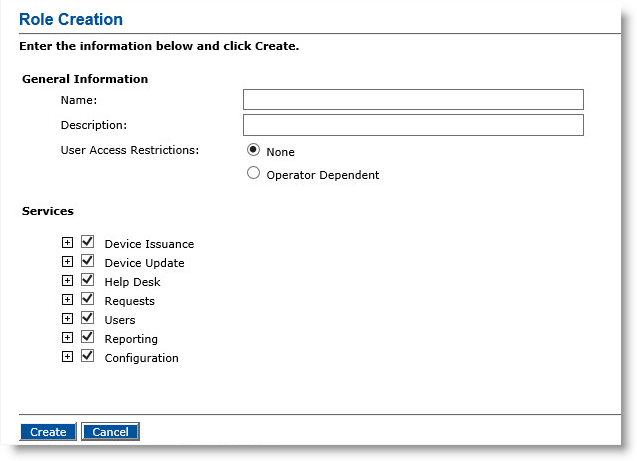
In the Action column, click Duplicate. The Role Creation page appears:

-
Under General Information, in the Name field, enter a name for the new role. This is the name that will appear in the Administrative Role drop-down list when you enroll an operator.
-
In the Description field, enter a description of the role.
-
Next to User Access Restrictions, select one of the following options:
-
None—Enables an operator assigned this role to manage all users in the LDAP Lightweight Directory Access Protocol directories that ActivID CMS supports.
- Operator Dependent—Enables an operator assigned to this role to manage only the users in the groups to which the operator has access (as specified during enrollment of the operator).
-
-
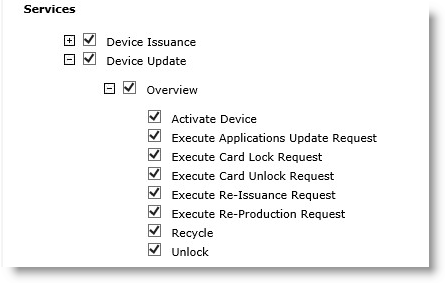
Under Services, select or clear the appropriate options.

For example, if you want to enable the operator to update devices, then expand Device Update and select the tasks that you want the operator to perform.
The order of the options mirrors the structure of the Operator Portal for its main tabs, sub-tabs, and the tasks that the role can perform. For example, if you do not select any tasks under Device Update, then the operator will not see the Device Update tab on the Operator Portal.
-
Click Create. A confirmation message appears.


