Adding a Virtual Contact Interface (VCI) Provider
This section describes how to set up a VCI provider for devices that need to be used over a contactless interface.
Generating a CVC Signing Key
There are two ways to generate the ECC key needed to sign the CVC:
-
From the ActivID CMS Operator Portal main page, select the Configuration tab.
-
Click the HSM Credentials sub-tab.

-
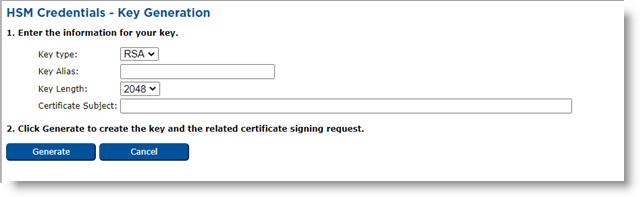
Click Generate Key.
-
From the Key type drop-down list, select ECC.

-
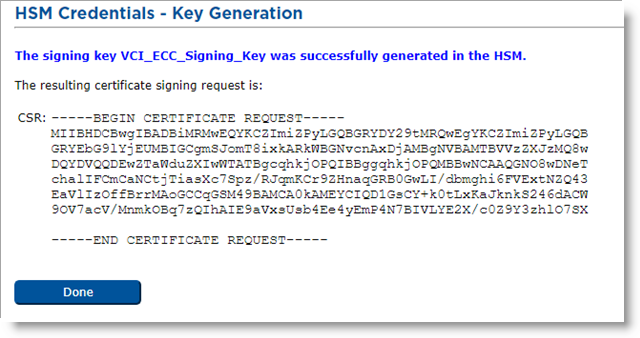
Enter the appropriate information and click Generate. A page displaying the Certificate Signing Request (CSR) appears.
-
Click Done. Then use the CSR to generate a certificate signed by your CA The Certificate Authority (CA) issues and manages security credentials and public keys for message encryption in a networks environment..
-
Once you have the certificate, return to the HSM Credentials page.

-
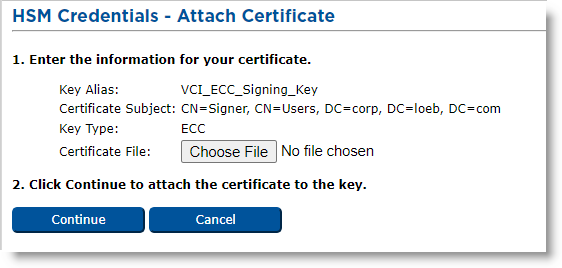
Next to the key you generated previously, click Attach Certificate.
-
Use the Choose File button to select the signed certificate you created and click Continue. A success message is displayed.

-
Click Done. The self-signed certificate is now replaced with your custom certificate.

If ActivID CMS is not configured with an HSM A Hardware Security Module (HSM) securely stores secret key material. They are similar to large-storage, multisession smart cards. However, unlike smart cards, they are used mainly on the server side of a system., you can use a PKCS12 keystore containing the CVC signing key and its certificate. Note that the key must be an ECC key.
-
On your CA, generate an ECC key and export it with its certificate (including an extended key usage extension asserting id-PIV-content-signing) in a PKCS12 keystore.
-
Take note of the alias of the keystore entry where the key and certificate are stored and of the password protecting the keystore.
-
Copy the keystore to the server where ActivID CMS is installed.
-
Use this information to configure a VCI provider without an HSM.
Configuring a VCI Provider
-
From the ActivID CMS Operator Portal main page, select the Configuration tab.
-
Click the Repositories sub-tab.
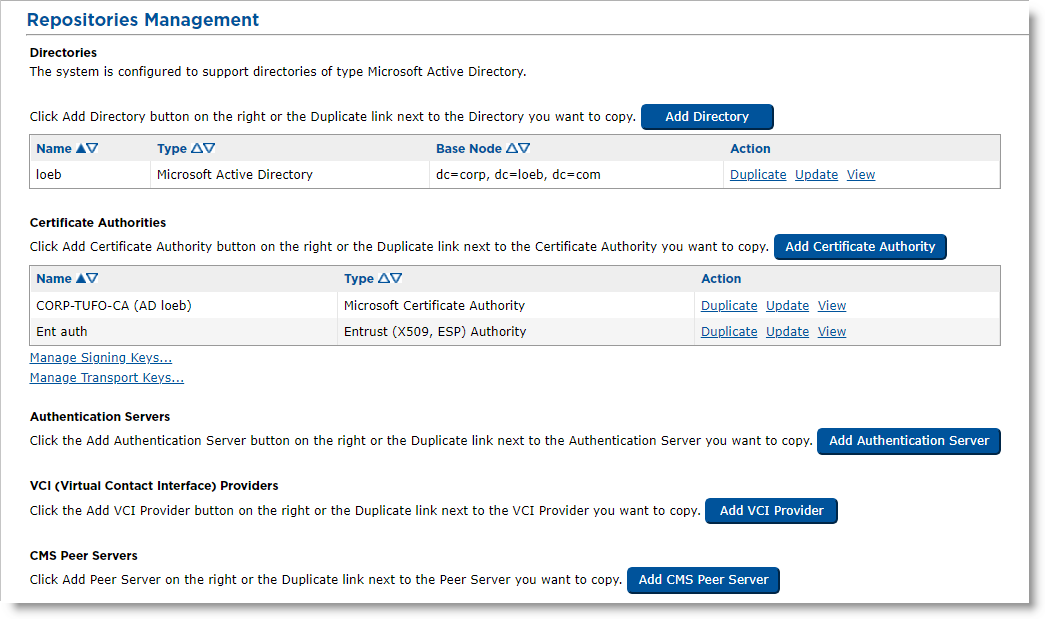
-
In the VCI (Virtual Contact Interface) Providers section, click Add VCI Provider.
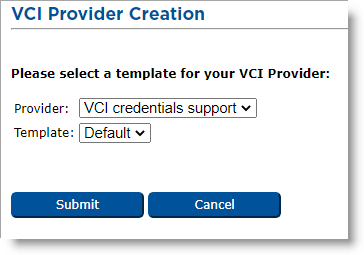
-
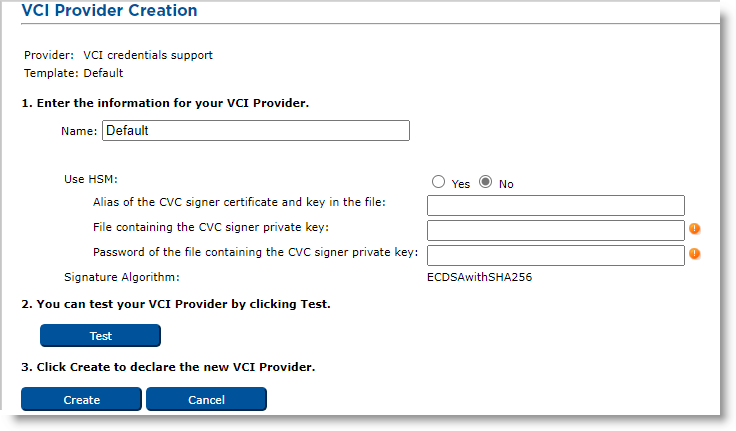
Leave the default values and click Submit. The VCI Provider Creation page appears.

-
If you are using an HSM (recommended), set Use HSM to Yes.
-
Set the HSM key alias to the value you used when generating the key.
-
Click Test. The result is displayed in the Test Report box.
-
Click Create. A confirmation page is displayed.
(Optional) If you are using a software key:
-
On the VCI Provider Creation page, set Use HSM to No.
-
Set the Alias to the key alias found in the p12 store.
-
Set the File to the absolute path towards the keystore.
-
Set the Password to the password protecting the p12 store.
-
Click Test. The result is displayed in the Test Report box.
-
Click Create. A confirmation page is displayed.