Configuring Entrust Authority X.509/ESP Certificates
First, open the ActivID CMS Repositories Management page.
-
On the Operator Portal, click the Configuration tab.
-
Click Repositories. The Repositories Management page appears.
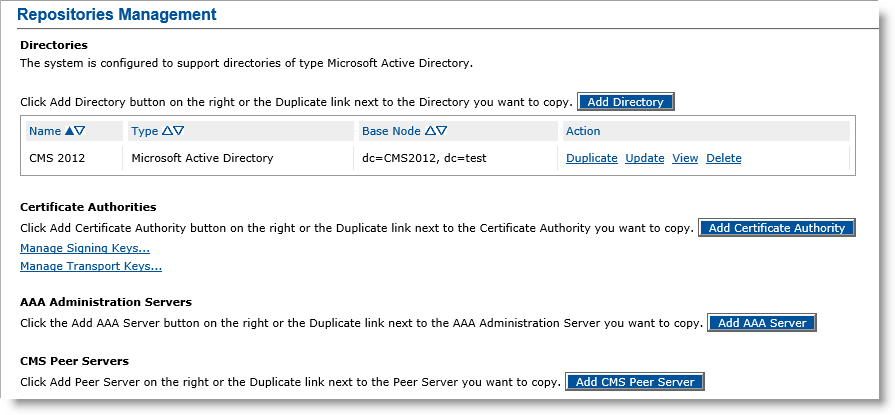
For additional information about the Repositories Management page, refer to Configuring Repositories.
-
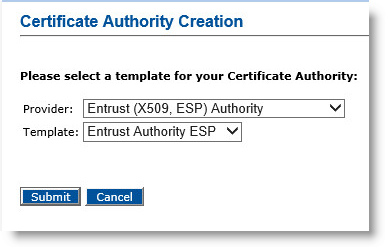
Click Add Certificate Authority. The Certificate Authority Creation page appears.
-
In the Provider drop-down menu, select Entrust Authority (X509, ESP).
-
In the Template drop-down menu, select Entrust Authority X509.
-
Click Submit. The Certificate Authority Creation page appears.
-
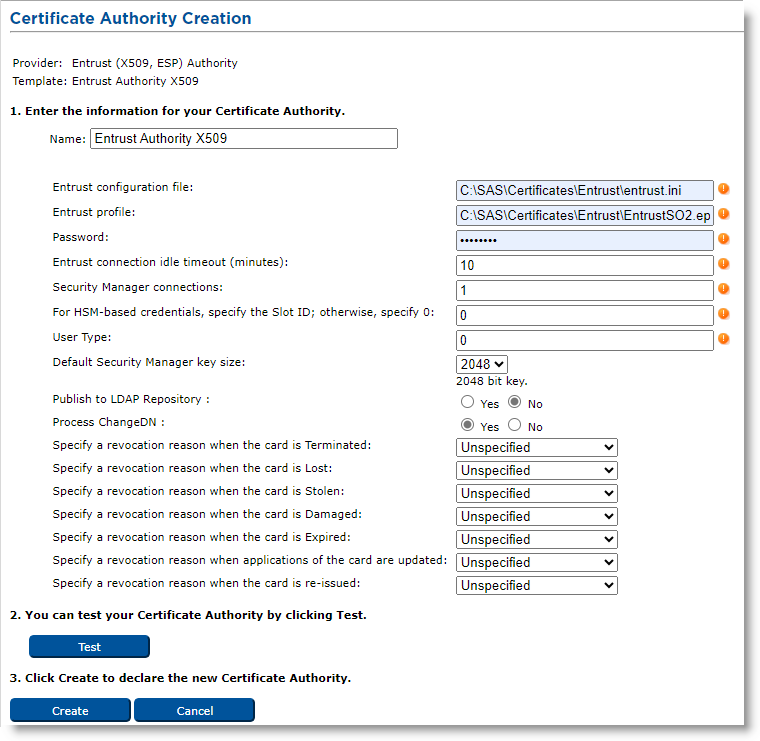
Name—Enter the configuration name identifier of the CA within ActivID CMS (in this example, it is Entrust Authority X509).
-
Entrust configuration file—Enter the full name (including the path) of the entrust.ini file on the ActivID CMS server (in this example, it is C:\my_ent\entrust.ini).
-
Entrust profile—Enter the full name (including the path) of the Administrator .epf file on the ActivID CMS server (in this example, it is C:\my_ent\First Officer.epf). If you are using a Registration Authority (RA) credential In the context of ActivID, a credential is a collection of one or more credential elements that together provide some form of digitally provable identity. In the context of PIV, a credential refers to the completed PIV card itself. in the HSM A Hardware Security Module (HSM) securely stores secret key material. They are similar to large-storage, multisession smart cards. However, unlike smart cards, they are used mainly on the server side of a system., it is a .tkn file rather than an .epf file.
-
Password—Enter the password that protects the .epf file. If you are using an RA credential in the HSM, enter the HSM PIN (which acts as the token password).
-
Entrust connection idle timeout (minutes)—Time after which an unused socket connection is closed. It must be below the time such an unused connection is forcibly closed by the Entrust server or an intervening network equipment (usually half an hour). Recommended value: 10 minutes.
-
Security Manager connections—Enter the maximum number of concurrent connections that the Credential Provider will open to the Entrust Authority Security Manager (the number of connections range from 1 through 50, with 50 being the recommended value).
-
For HSM-based credentials, specify the Slot ID; otherwise, specify 0—Enter the ID number of the HSM slot used for the Entrust credential (only used if the Entrust profile configured is a .tkn file; i.e., if the RA credential is in the HSM).
If the Entrust profile is configured as a .epf file (case of an RA credential not in an HSM), this value must be set to 0. -
User Type—The type of the users to create when issuing credentials. Usually “0” (interpreted as “people”).
-
Default Security Manager key size—Select the default key size (in bits) for certificates in the Entrust Authority Security Manager (in this example, it is 2048 bits).
Note: The value you enter must match the default key size that is configured in the Entrust Authority Security Manager. -
Publish to LDAP Repository—Select Yes if you want to publish Entrust user to the LDAP Lightweight Directory Access Protocol repository.
-
Process ChangeDN—Select Yes if you want to be able to use the "DN Change Tool" (see Using the DN Change Tool).
-
Locate the possible state of the card for which you want to update the revocation reason. For details about the revocation reason code, refer to step 6 of Procedure 2: Updating a Connection to a CA.
Note: To ensure that publishing to the LDAP repository functions properly, you have to update the usertype.templates of the Entrust CA so that the overrideCommonNameFormat in the [Person] section is commented out. -
Click Test to verify that the connection to the CA works.
-
Click Create. A confirmation message appears.
-
Click Done.


