Task 2: Configuring the HSM Ethernet Port
The first step in configuring an HSM Ethernet port is to assign it an IP address. Configure the HSM Ethernet port by completing the following steps.
-
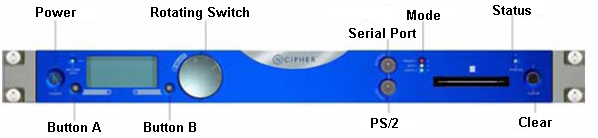
Using buttons A and B and the Rotating Switch on the nShield Connect front panel, complete the following tasks to display the following screen:
-
Press Button B to select System
-
Press Button B to select System configuration
-
Press Button B to select Network configuration
-
Press Button B to select Set up interface #1
-
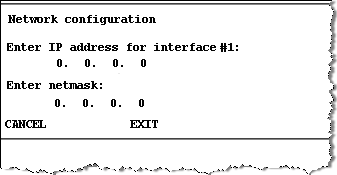
-
Set each field of the IP address and netmask for the interface.
-
Press button B when the settings are correct, which displays the following screen:

-
When prompted, press button B to accept the new interface.
-
When prompted to reboot now or later, press button A to select a later reboot or press button B to reboot now.


