Testing the Installation
Before you use ActivID KMS to manage HSMs A Hardware Security Module (HSM) securely stores secret key material. They are similar to large-storage, multisession smart cards. However, unlike smart cards, they are used mainly on the server side of a system. in a production environment, you must test the installation. This section explains how to start ActivID KMS, initialize a test HSM, view the contents of the test HSM, and exit ActivID KMS.
-
To launch ActivID KMS double-click the ackms.exe file.
The command prompt welcome screen is displayed.
-
To continue, press any key.
-
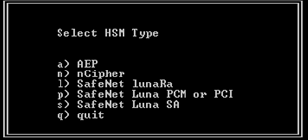
Select an HSM by entering the option that corresponds to your HSM type:
-
a) AEP
-
n) nCipher
-
l) SafeNet LunaRa
-
p) SafeNet Luna PCM or PCI
-
s) SafeNet Luna SA
-
-
Select one of the following sections to review sample command line illustrations, and then continue with step 5 below.
 Sample Flow 1: Select SafeNet Luna SA as the HSM
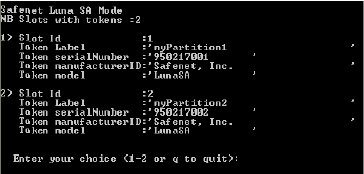
When you select option “s” (SafeNet Luna SA) as the HSM type, one or more partitions are displayed (depending on the number of partitions set up when the SafeNet Luna SA HSM was prepared). A partition is a secure area in the HSM that contains keys. In order to access a partition, you must present the partition PIN.
In the following illustration, two HSM partitions are defined.
-
Select 1 or 2.

In this example, Partition 1 will receive the keys.
-
Press the Enter key. The command prompt main menu is displayed.
-
To continue the HSM initialization process, skip to step 5.
Sample Flow 2: Select SafeNet Luna PCM or PCI as the HSM
When you select option “p” (SafeNet Luna PCM or PCI) as the HSM type, the following command lines are displayed (sample lines in the illustration). This also applies to Luna PCI-E models.
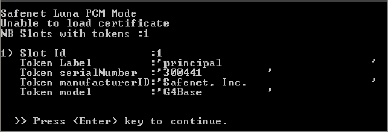
On SafeNet Luna PCM or PCI, there is only one partition available.
-
Press the Enter key.

-
Press the Enter key. The command prompt main menu is displayed.
-
To continue the HSM initialization process, skip to step 5.
Sample Flow 3: Select nCipher as the HSM
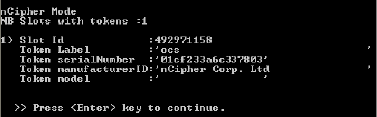
When you select option “n” (nCipher) as the HSM type (which applies to Entrust Datacard (formerly Thales) nShield HSMs), the following command lines are displayed (sample lines in the illustration).
-
Press the Enter key.

-
Press the Enter key. The command prompt main menu is displayed.
-
-
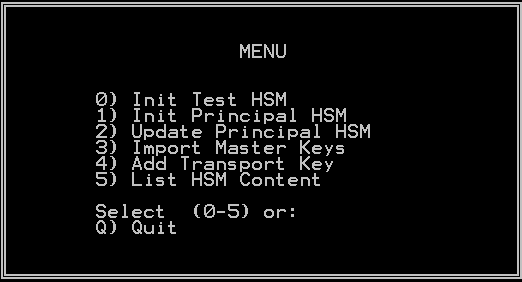
From the command prompt menu, type 0 to start the Init Test HSM. The setup test HSM command prompt screen is displayed.
Important: Make sure that the HSM that you selected is connected or inserted properly. For SafeNet Luna PCM or PCI, make sure there is ONLY one SafeNet Luna PCM HSM connected to the SafeNet Luna Dock reader. You can use any HSM (new or already initialized).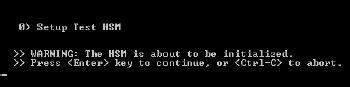
-
For SafeNet Luna PCM or PCI, the Init Test HSM operation requires that you enter the current Security Officer PIN in order to continue.
-
For SafeNet Luna PCM or PCI, the initial PIN for testing purposes is default (this is the HSM factory state).
-
-
To continue, press ENTER.
-
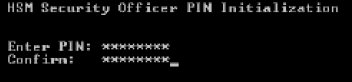
Enter and confirm the Security Officer PIN.
Note:About PINs and the rest of this test:
-
This is ONLY an initialization test of the HSM. What you see as you move through this test depends on the type of HSM you are using. Please review the tips here, but ignore any steps or directions that do not match what you see on your console. Follow the steps presented for your HSM type.
-
For SafeNet Luna PCM or PCI, the Init Test HSM operation requires that you enter the current Security Officer PIN in order to continue. For SafeNet Luna PCM or PCI, the initial PIN for testing purposes is default (this is the HSM factory state).
-
For SafeNet Luna SA, the Security Officer and Operator PIN are initialized through the SafeNet Luna SA tool when the HSM is set up (outside the scope of ActivID KMS). During ActivID KMS operations, the Operator is required to enter the Operator PIN, which protects access to the partition selected during the session. The 0) Init Test HSM and 1) Init Principal HSM The first or main HSM. If you require multiple HSMs with the same master keys, use HSM manufacturer tools to duplicate the keys in the other HSM. operations do not actually initialize the HSM, but just add the keys to the HSM. You must clean up the HSM using the SafeNet Tool, and call the partition clear: command to delete “old” keys when the test is completed.
-
For Entrust Datacard (formerly Thales) nShield, the Security Officer PIN and the Operator PIN are initialized using Entrust Datacard tools; the Security Officer and the Operator have these PINs on their smart cards, which they use to access the HSM. As a result, during ActivID KMS operations, there are prompts to enter the Operator PIN (which is the same as the PIN on the Operator card inserted into the nShield Module). For this model, the 0) Init test HSM and 1) Init Principal HSM operations do not actually initialize the HSM, but just add the keys to the HSM. As a result, if you are using Entrust Datacard nShield, you must clean up the HSM using an Entrust Datacard tool, such as KeySafe™ to delete “old” keys when the test is completed. END OF NOTE
-
-
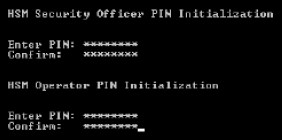
Press ENTER.
-
Enter and confirm a new HSM Operator PIN.
-
Press Enter.
ActivID KMS reads the keys stored in the test.cfg file and injects them into the HSM.
-
When the operation is completed, press ENTER or any other key to return to the main menu.
-
From the ActivID KMS main menu, enter 5 (List HSM Content) and enter the correct Operator PIN (if prompted) in order to view the list of Keys.

-
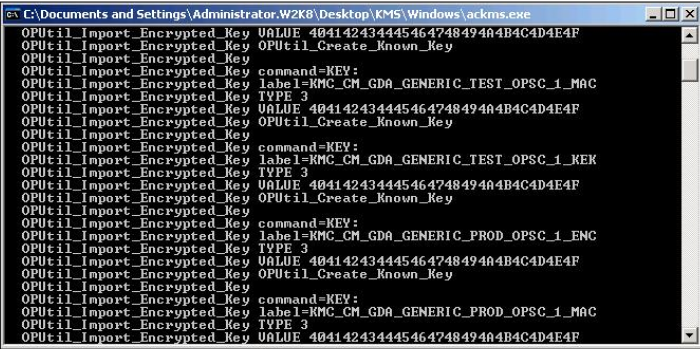
View the test HSM content to confirm that ActivID KMS successfully injected the test.cfg keys.
Note: The list of keys displayed will differ from what is displayed in the illustration on this page. Check the content of the test.cfg file to find out what keys are loaded into the test HSM -
Press ENTER to return to the main menu. To exit, type Q (Quit).


