Procedure 6: Issue a Test PIV Card
This section describes how to issue a test PIV Personal Identity Verification (technical standard of "HSPD-12") card using the ActivID CMS Operator Portal.
In the ActivID CMS Operator Portal, verify that a pending Card Production Request (CPR) has been generated for the future user.
-
Select the Requests tab, and then click Overview.
-
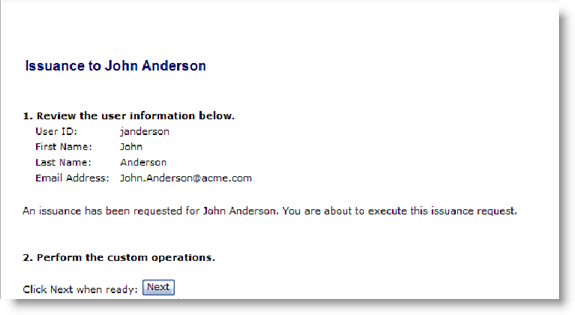
Select the Device Issuance tab, and then search for the user who will be issued the card.
-
Click Next.
The future user is prompted to place a finger (left or right) on the biometric sensor to initiate fingerprint verification.
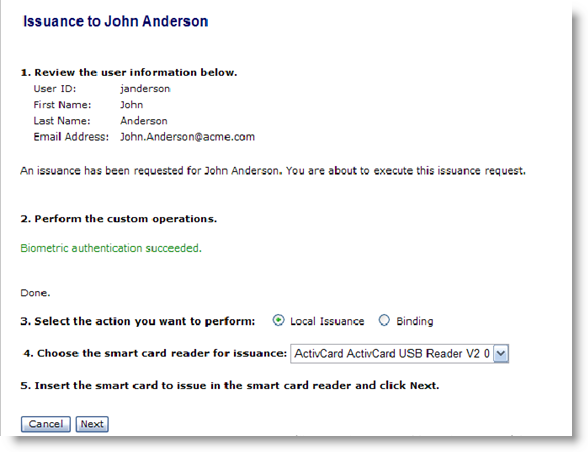
If the fingerprint verification is successful, then the Device Issuance page appears.
-
Select the type of issuance you want to perform.
Note: Select Local Issuance for face-to-face issuance, or Binding for self-issuance. -
Insert a blank card into the reader, and then select the card reader you want to use from the drop-down list.
-
Click Next. The Device Issuance page appears.
-
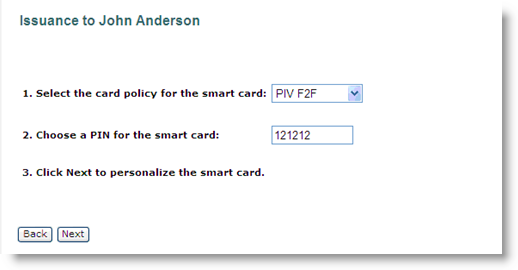
Select the device policy you want to apply to the card. If only one device policy has been configured, then it will be selected by default.
-
Enter the PIN for the smart card (smart card initial PIN).
-
Click Next to personalize the card for this user.
If ActivID CMS is configured for two biometric authentications (one before device issuance and one after device issuance), then fingerprint verification must be performed before the card is activated.
Device issuance takes one of two forms. If you previously selected Local Issuance, then you should see a success message telling you to remove the card from the reader. If you previously selected Binding, then complete the remaining steps.
-
When prompted, enter the Initial Password. This password must be communicated to the future user as it will be required to perform the self-issuance in the User Portal. In the ActivID CMS Security Setting, the “Authentication method when card is blank and bound” is set to the Initial Password. This could also be set to an LDAP Lightweight Directory Access Protocol Password or Security Questions.
-
Click Next. The card is assigned to the user.
-
Have the future user connect to the User Portal, insert the assigned card, and then click Start.
-
When prompted, have the user log on with the user name and the Initial Password.
-
When prompted, have the user perform fingerprint verification after which the card will be issued.


