Migrating Data to a New Microsoft SQL Server
To migrate your ActivID CMS data to a new Microsoft SQL Server, complete the following steps.
-
Stop the ActivID CMS server.
-
On the source system where the older Microsoft SQL Server is installed, open Microsoft SQL Server Management Studio to open the new Microsoft SQL Server database.
-
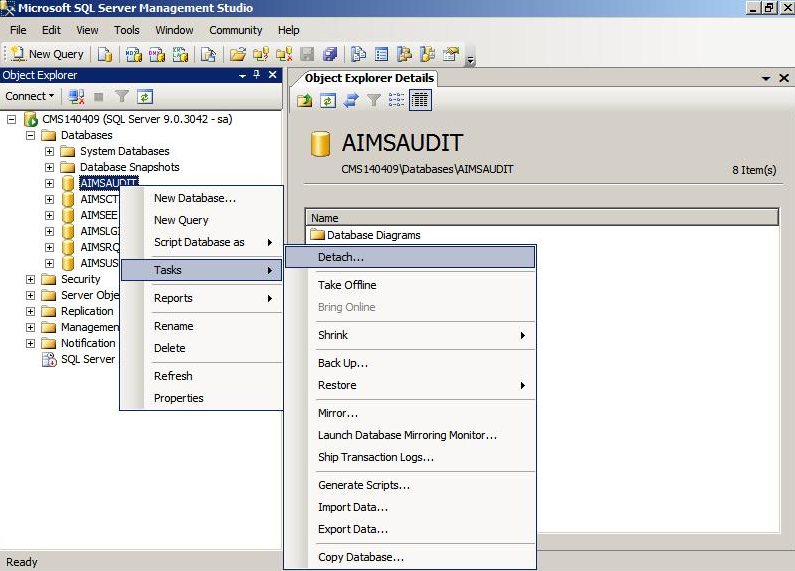
Click to expand the Server node to reveal all databases (as illustrated next).
-
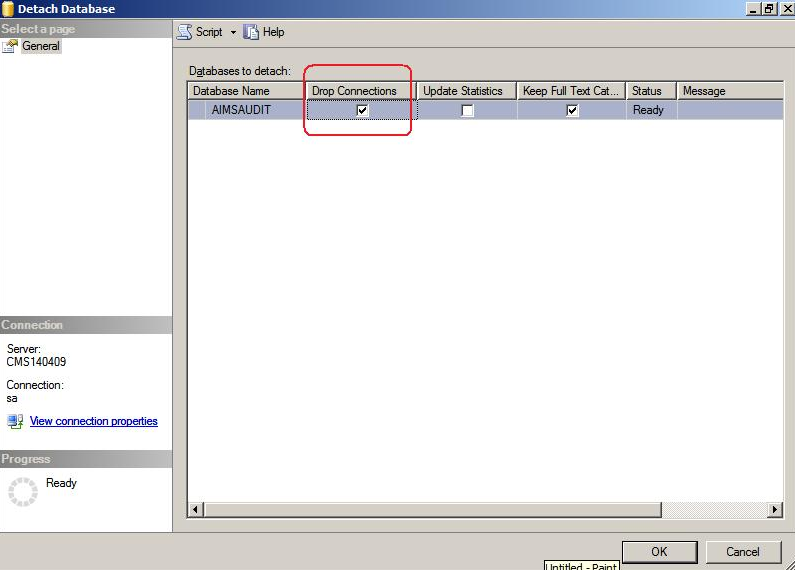
Right-click the AIMSAUDIT database, click Tasks, and then click Detach to display the Detach Database window.
-
Check the Drop Connections check box and click OK.
-
Repeat steps 4 and 5 to detach each of your remaining ActivID CMS databases (AIMSCTI, AIMSEE, AIMSLGI, AIMSRQI, and AIMSUSER).
-
On the source system where the older Microsoft SQL Server is installed, go to:
C:\Program Files\Microsoft SQL Server\MSSQL.1\MSSQL\Data
-
Copy all of the .mdf and .ldf files in your source ActivID CMS databases. For example, the files:
AIMSAUDIT.mdf, AIMSAUDIT_log.ldf or AIMSCTI.mdf
-
On the destination system where the new Microsoft SQL Server is installed, go to:
C:\ Program Files\Microsoft SQL Server\MSSQL10.MSSQLSERVER\MSSQL\DATA
-
Paste all of the .mdf and .ldf files that you previously copied in step 8.
-
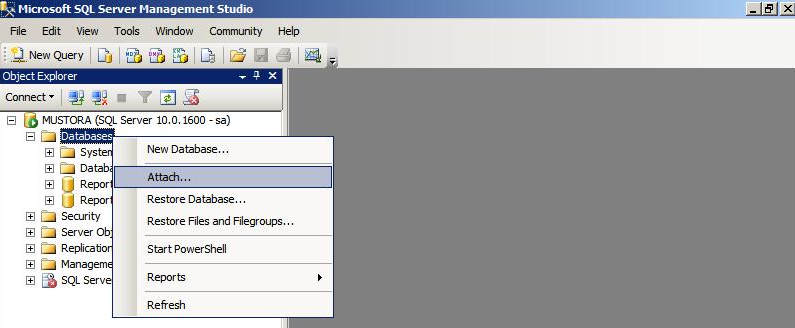
On the destination system where the new Microsoft SQL Server is installed, open Microsoft SQL Server Management Studio to open the new Microsoft SQL Server databases.
-
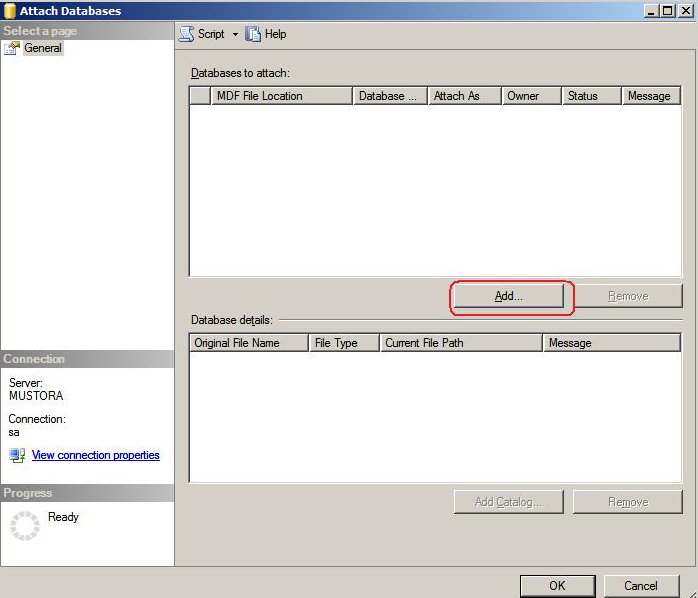
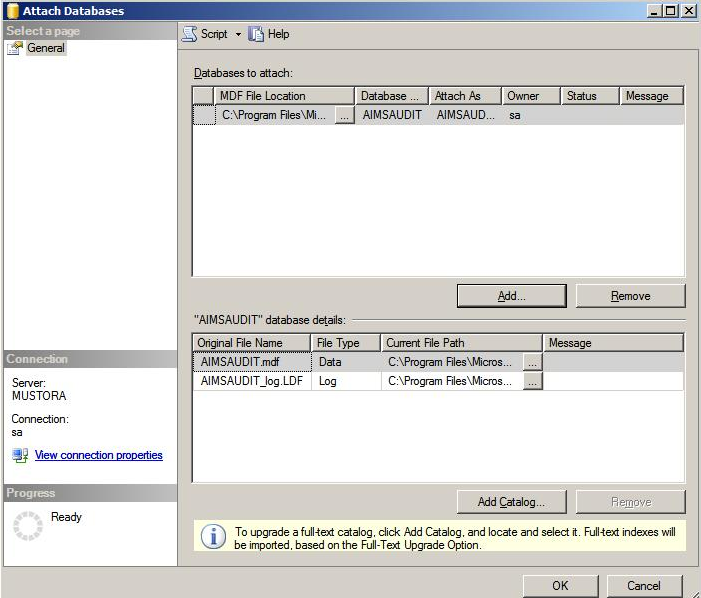
Right-click the Databases node, and then click Attach to display the Attach Databases window.
-
Click Add to display the Locate Databases window.
-
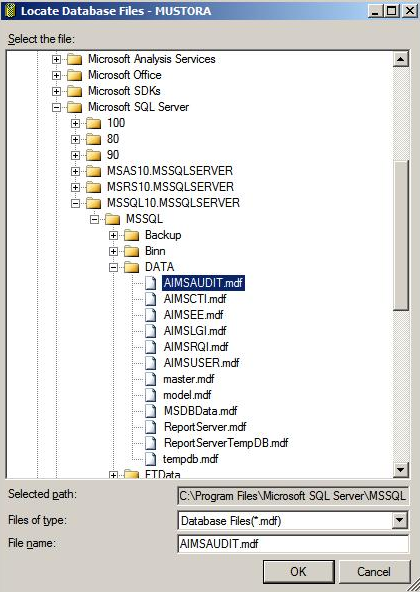
Expand the nodes as needed to locate the Data subdirectory. For example, the directory might be:
C:\Program Files\Microsoft SQL Server\ MSSQL10.MSSQLSERVER\MSSQL\DATA
-
Expand the Data subdirectory where the .mdf files of the ActivID CMS databases are located.
-
Select AIMSAUDIT.mdf and then click OK to attach this database to the new Microsoft SQL Server.
-
Click OK.

-
Click OK to the confirmation message to attach the database to the new Microsoft SQL Server.
-
Repeat step 11 through step 18 for the five remaining ActivID CMS databases (AIMSCTI, AIMSEE, AIMSLGI, AIMSRQI and AIMSUSER).
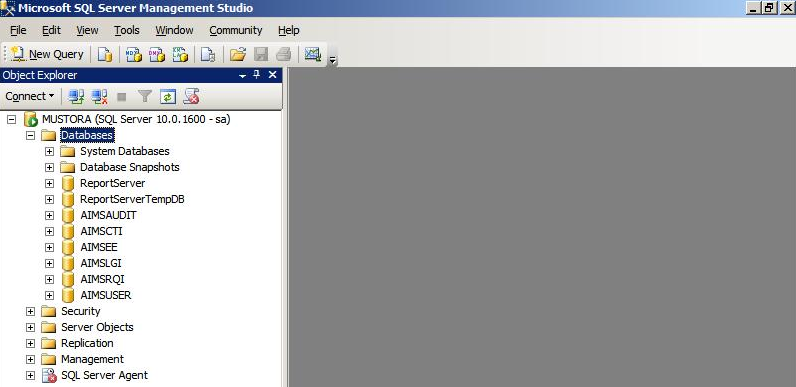
The following image illustrates all ActivID CMS databases attached to the new Microsoft SQL Server.
-
Create a login for each of the ActivID CMS databases by completing the following steps.
-
Select the AIMSAUDIT database, and then click New Query to display the New Query window.
The following list contains the guidelines you must observe when using database logins.
-
Each of the six ActivID CMS databases must be linked to a login that is composed of a Database Owner username and password.
-
The username is always the name of the database (for example, for the AIMSAUDIT database, the username is AIMSAUDIT).
-
The password is the Database Owner password that was created during the ActivID CMS installation.
-
-
In the New Query window, enter the following query:
Copyexec sp_change_users_login ‘Auto_Fix’, ‘AIMSAUDIT’, NULL, ‘your_db_password’;This query creates a database login with the username AIMSAUDIT and the password <your_db_password>, and linked to the database.
Note: <your_db_password> must match the Database Owner password that was defined when ActivID CMS was installed. If you use a different password, you must also change the Database Owner password that was defined during your ActivID CMS installation. -
Click Execute. This displays the Query executed successfully message shown in the following illustration.
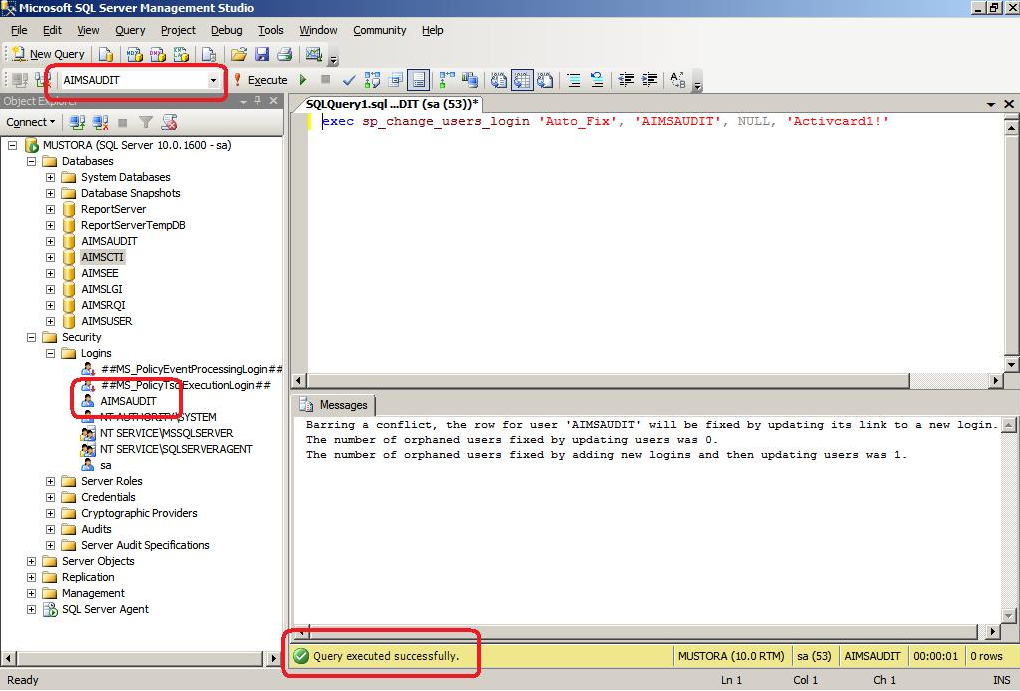
You can expand the Security node to verify that the AIMSAUDIT database login has been successfully created under Logins (illustrated above).
-
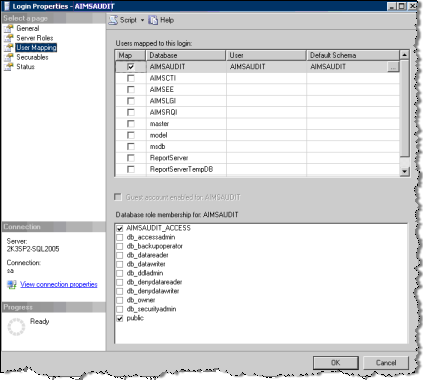
To verify the state of the login configuration, under Logins, right-click AIMSAUDIT, and then click Properties.
-
Repeat steps 20 through step 23 for the five remaining ActivID CMS databases (using the corresponding database names).
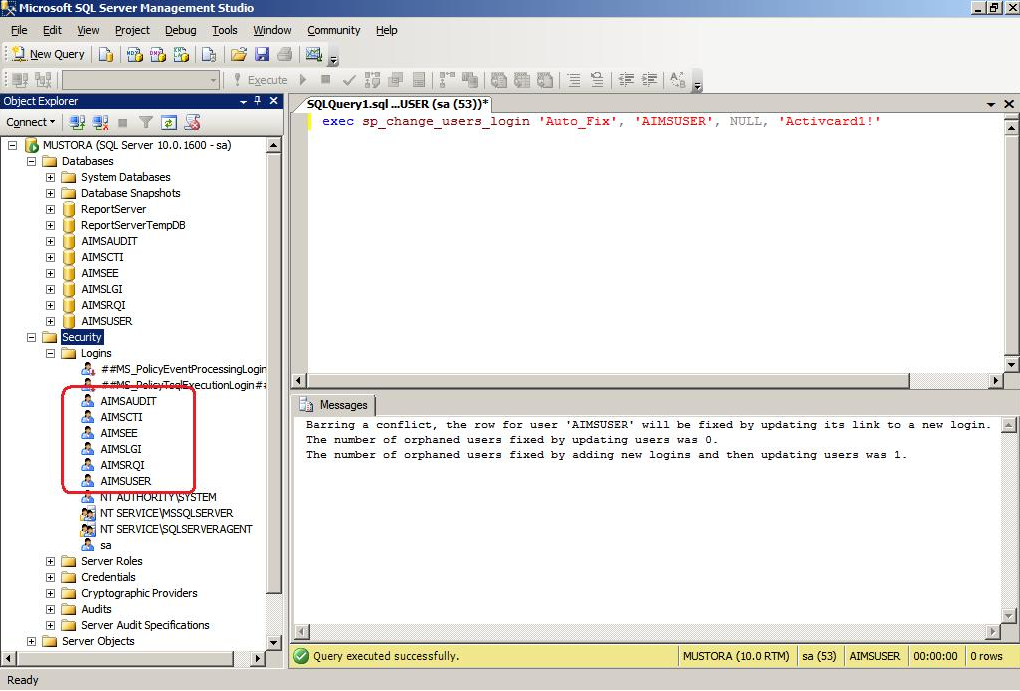
When you have run all queries, all ActivID CMS logins should be displayed under Logins as illustrated next.
-
Recreate the AIMSEE user in the AIMSLGI database and map the AIMSEE login to the AIMSLGI_ACCESS role by completing the following steps.
-
On the destination system where new Microsoft SQL Server is installed, open the SQL Server Management Studio and click New Query.
-
Execute the following script as shown in the below screenshot.
CopyUSE [AIMSLGI
GO
DROP SCHEMA [AIMSEE]
GO
USE [AIMSLGI]
GO
DROP USER [AIMSEE]
GO
USE [AIMSLGI]
GO
CREATE USER [AIMSEE] FOR LOGIN [AIMSEE]
GO
USE [AIMSLGI]
GO
ALTER USER [AIMSEE] WITH DEFAULT_SCHEMA=[AIMSEE]
GO
USE [AIMSLGI]
GO
EXEC sp_addrolemember N'AIMSLGI_ACCESS', N'AIMSEE'
GO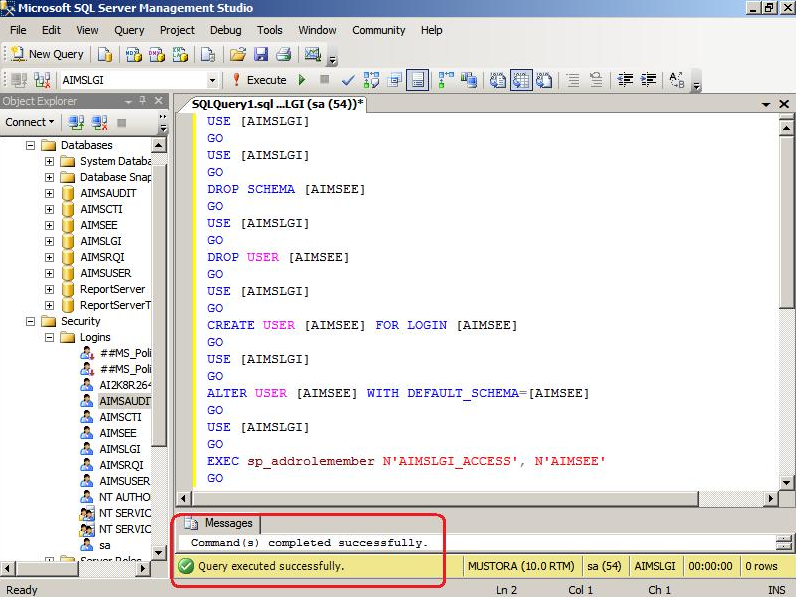
-


