Configuring the Application to Work with Symantec PKI Manager
This section describes how to configure ActivID CMS to work with Symantec certificates using a defined sequence of procedures.
You must have access to Symantec PKI Manager Portal version 8.x.
Symantec PKI client must be installed on the workstation that is used to access Symantec PKI Manager Portal.
You must know how to create a Java KeyStore and Trust Store to establish mutual SSL authentication with Symantec PKI Manager.
If you want to perform key escrow, you must request a SAAS account from Symantec.
For details, refer to the Symantec Managed PKI technical documentation.
Obtaining an RA Certificate to Store in a Java KeyStore File
You can store your RA A Registration Authority (RA) is an authority in a network that verifies user requests for a digital certificate and instructs the CA to issue it. An RA is part of a PKI, a networked system that enables companies and users to exchange information safely and securely. certificate in an HSM A Hardware Security Module (HSM) securely stores secret key material. They are similar to large-storage, multisession smart cards. However, unlike smart cards, they are used mainly on the server side of a system. or a software-based Java KeyStore.
 Store the RA Certificate in an HSM
To create and store the SSL credentials In the context of ActivID, a credential is a collection of one or more credential elements that together provide some form of digitally provable identity. In the context of PIV, a credential refers to the completed PIV card itself. in an HSM, you can use the HSM Credentials management feature in the ActivID CMS Configuration tab.
-
Log on to the ActivID CMS Operator Portal with an ActivID CMS Administrator certificate.

-
Go to the Configuration tab, and then click HSM Credentials.
-
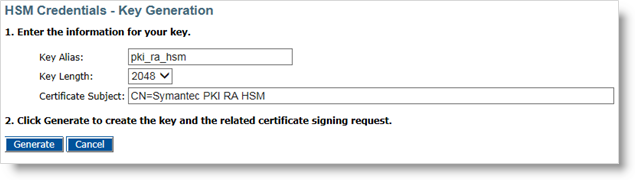
Click Generate Key.
-
Enter the:
-
Key Alias
-
Key Length – Symantec requires the key size to be 2048-bit.
-
Certificate Subject Common Name (CN)
-
-
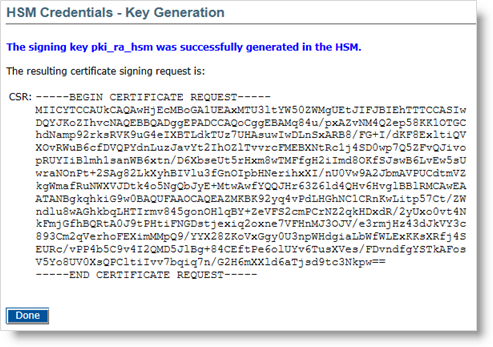
Click Generate to generate the key.
-
Click Done.
In the credentials list, your new credentials appear with the Certificate Type as Self Signed.

-
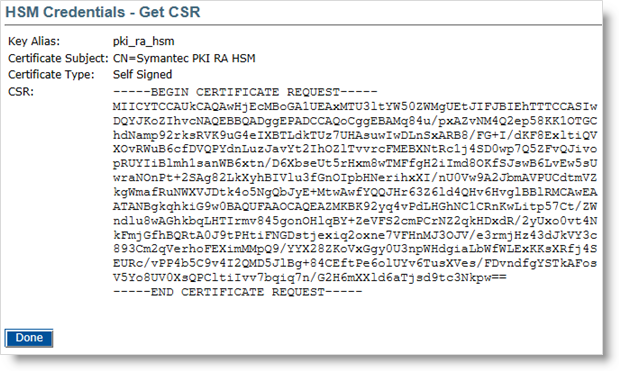
Click Get CSR to get the content of the Certificate Signing request.
-
Copy the CSR to the machine that has access to the PKI Manager:
-
Copy the contents of the CSR to your system clipboard.
-
Access the PKI Manager and select Get RA certificate.
-
Paste the contents of your clipboard into the Request field and click Submit.
-
When prompted, download the RA-Certificate.p7b certificate file.
-
-
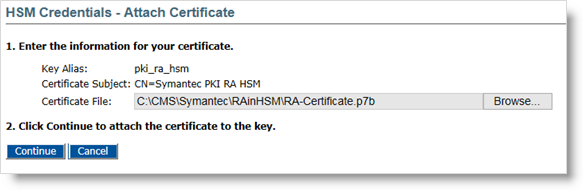
Return to the HSM Credentials tab, and click Attach Certificate.
-
Click Browse to locate the RA-Certificate.p7b certificate file that you downloaded in the previous step.
-
Click Continue.
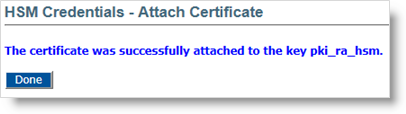
The file uploads and a success message appears.
-
Click Done.

In the credentials list, the RA certificate appears with the Certificate Type as Custom (instead of Self Signed).
The subject DN of the certificate was customized by the Symantec CA.
-
Restart the CMS Server service before using this new certificate.
Store the RA Certificate in a Java KeyStore File
You must use the Java keytool to generate the keys, and import them into your KeyStore. For details, refer to Symantec technical documentation.
To store your RA certificate in a software-based Java KeyStore:
-
Generate a key pair as follows:
Copykeytool -genkey -alias pki_ra -keyalg RSA -keysize 2048 -sigalg
SHA1withRSA -dname "CN=<common name>" -keypass <password>
-keystore <keystore name> -storepass <password> -
Generate a CSR as follows:
Copykeytool -certreq -alias pki_ra -sigalg SHA1withRSA -file
pki_raCSR.req -keypass <password> -keystore <keystore name>
-storepass <password> -
Copy the pki_raCSR.req file to the machine that has access to the PKI Manager.
-
Open the pki_raCSR.req file in a text editor, and copy the contents of the file to your system clipboard.
-
Access PKI Manager, and select Get RA certificate from the Tasks icon at the bottom of the screen.
-
Paste the contents of your clipboard into the Request field and click Submit.
-
When prompted, download the cert.p7b certificate file.
-
-
Copy the cert.p7b certificate file to a temporary directory on the machine where the key pair was generated.
-
Import the certificate into your KeyStore by using the following command:
Copykeytool -import -alias pki_ra -file cert.p7b -noprompt -keypass
<password> -keystore <keystore name> -storepass <password> -
The root and issuing CAs for the RA certificate are located in the Certificates folder in the Symantec PKI Web Services package which can be downloaded by clicking on the Symantec PKI Resources icon in the lower left corner of the PKI Manager.
You should import these CAs as trusted root CAs into the KeyStore using the appropriate command. This guarantees that the RA certificate you install is trusted correctly.
-
For intermediate CAs:
Copykeytool -import -trustcacerts -alias pki_ca -file RAintermegiateCA.cer -keystore <keystore name> -storepass <password>-
For root CAs:
Copykeytool -import -trustcacerts -alias root -file RAroot.cer -keystore <keystore name> -storepass <password> -
-
Save the certificates in the ActivID CMS directory (C:\Program Files\HID Global\Credential Management System\certificates).
Setting Up Symantec PKI Certificate Profiles
You must use Symantec PKI Manager to enable the PKI administrator to configure certificate profiles for different CAs.
To set up a Symantec PKI certificate profile:
-
Go to the URL for the PKI Manager (for example: https://ptnr-pki-manager.bbtest.net/pki-manager/).
-
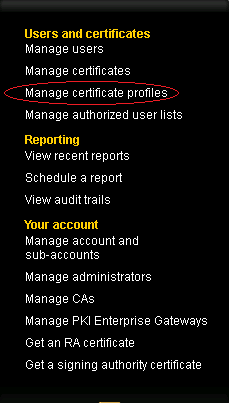
To create new Symantec certificate profile, click Manage certificates profiles.
-
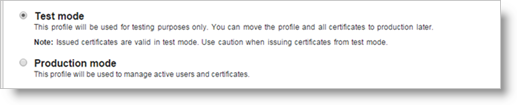
Click Test mode.
After testing the profile and certificate, you can move to the Production mode.
-
Select the required template. For more information, refer to the Symantec technical documentation.
-
If you want to use the certificate for authentication, verification, and signing purposes without key escrow, you can select the Client Authentication template.
-
If you want to use key escrow for encrypting the certificates, you can select the Secure Email template.
-
-
Click Continue.
-
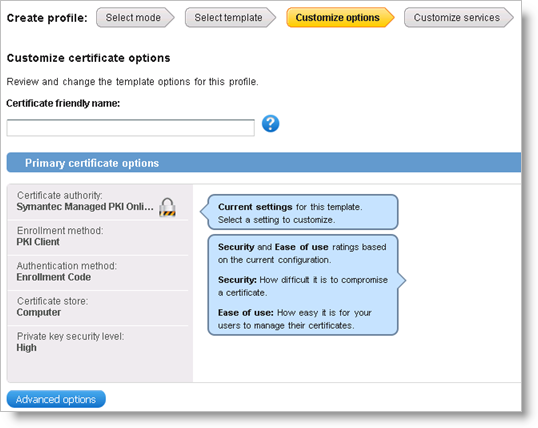
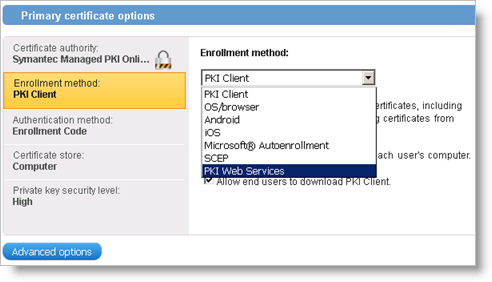
Make sure the Enrollment method is set to PKI Web Services for all your templates.
-
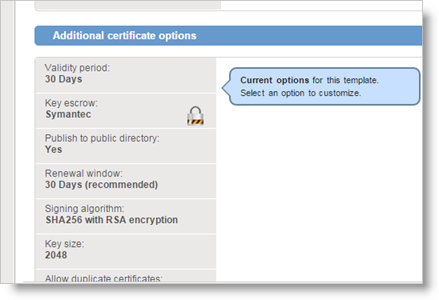
Click Advanced options to customize additional options if required.
-
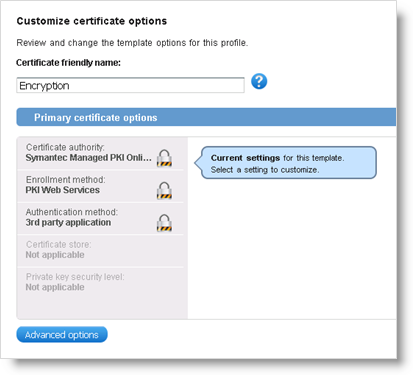
If you want to use key escrow, then in the Key escrow field, select Symantec.
-
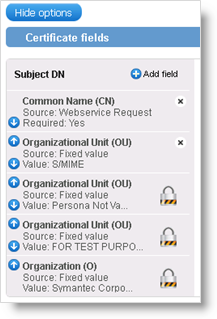
By default, the Common Name Standard term for some LDAP directories specified in the format, cn=<common name>. is set to the "First Name Last Name" value. If you want to customize the CN, you need to delete the Common Name field and add it again in the Subject DN fields:
-
Click Advanced options.
-
In the list of Certificate fields, remove the Common Name (CN) field at the top.
-
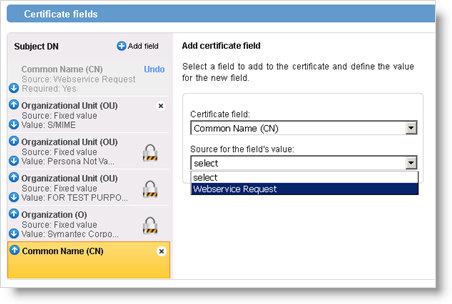
Then click Add field.
-
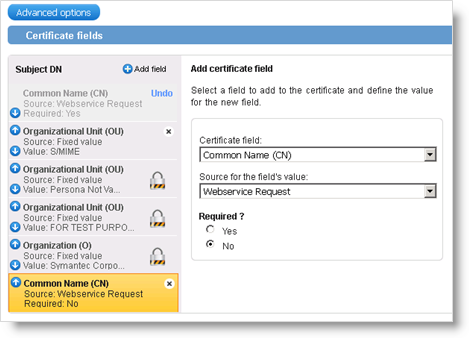
For the Certificate field, select Common Name (CN).
-
For the Source for the field's value, select Webservice Request.
-
For Required?, keep No (the default option).
Note: If you set Required to Yes but you do not provide a CN in the Device Policy, the issuance will fail. -
-
Click Save.
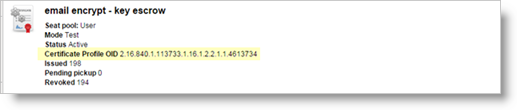
The certificate profile is created.
-
Make a note of the Certificate Profile OID.
You will need the OID when creating ActivID CMS device policy associated with this particular certificate template.


