Managing Devices
The sections listed below provide details about how to manage devices using the ActivID CMS Operator Portal Help Desk.
Use this method if you want to search for a device for a specific user.
-
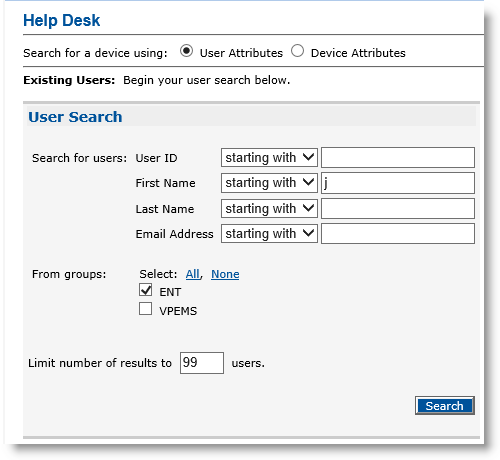
In the Welcome page, select the Help Desk tab.
-
For the Search for a device using options, select User Attributes.
-
In the Search for users drop-down lists, accept the default starting with to search using any one of the listed user identifiers.
Alternatively, select matching from one or more of the drop-down lists for specific user identifiers, and then enter the attribute(s) in the field(s).
To add a custom user attribute setting, see Setting Parameters for User Attributes.
-
In the From groups section, select one of the group options that you want to search, or click All to select all groups.
-
In the Limit number of results to field, enter a value.
To improve performance, set the value between 1 and 10 in the limit number of results field.
-
Click Search.
If a record matches the search criteria you selected, then ActivID CMS displays that user’s information in the table at the bottom of the Help Desk page.

-
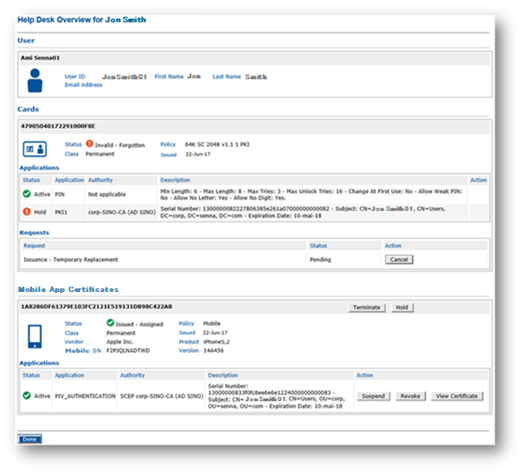
In the User ID column, click the user ID. The Help Desk Overview page appears:
-
In the Cards, Virtual Smart Cards, Mobile App Certificates, or YubiKeys section, click the task you want to perform on the device, or, in the associated Action column, on a specific credential or request.
Note: Refer to specific sections in this documentation that describe how to perform the task that corresponds to the one you selected. -
Click Done.
Use this method to search for a device by a serial number.
-
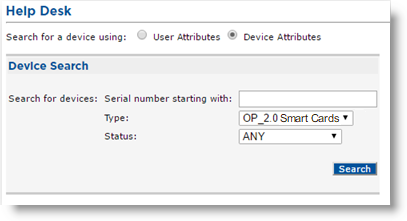
In the Welcome page, select the Help Desk tab.
-
In the Search for a device using option, click Device Attributes.
-
In the Search for devices: Serial number starting with field, enter the serial number or the first number(s) of the device.
-
In the Type drop-down list, select one of the following:
-
ANY: to search for any type of device
-
OP_2.0 Smart Cards
-
PKCS#11 Devices
-
Mobile App Certificates
-
Mobile Smart Cards
-
Virtual Smart Cards
- YubiKeys
Note:-
Initially, the device type matches the default device type. For details on setting a default device type, see Setting Parameters for Devices.
-
Support for mobile smart cards has been deprecated starting with ActivID CMS 5.4.
-
-
In the Status drop-down list, select one of the following:
-
ANY (default)
-
AVAILABLE
-
ASSIGNED
-
IN PRODUCTION
-
PRODUCED
-
ISSUED
-
INVALID
- TERMINATED
-
-
Click Search.
If a record matches the designated search criteria, then the information is displayed at the bottom of the Help Desk page.
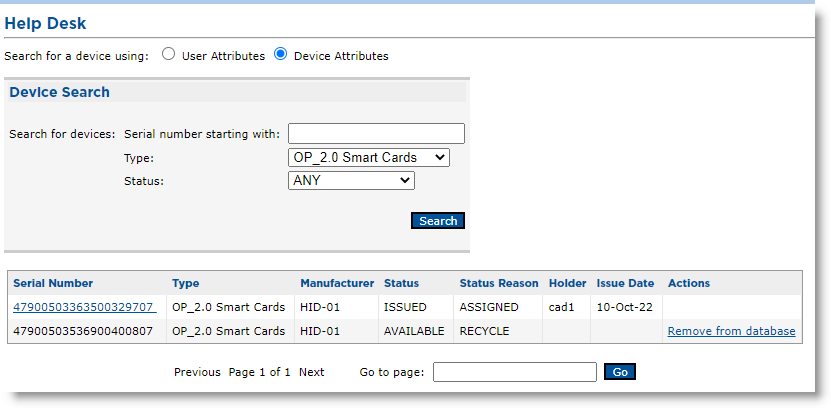 Note: For information about the Remove from database option available in the Action column (shown above), see Removing a Device from the Database.
 -
In the Serial Number column, click the serial number. The Help Desk Overview page appears again.
-
In the Cards, Virtual Smart Cards, Mobile App Certificates, or YubiKeys section, click the task you want to perform on the user’s device or, in the associated Action column, on a specific credential or request.
The actions available for devices depend on your operator role and access rights, as well as the device status, and the device type. The credential actions available depend on your operator role and the credential status.
-
See the specific section in this documentation that describes how to perform the task that corresponds to the one you selected.
-
Click Done.
Starting with ActivID CMS 5.9, an option to remove a device from the database is available. When a device has been terminated or recycled, the operator can click Remove from database in the Actions column. A confirmation screen appears and, if validated, the device is removed from the database.
Removing a device from the database is permanent and prevents ActivID CMS from using the device again. This operation should not be performed routinely. If the device can be reused, it is preferable to recycle it instead.
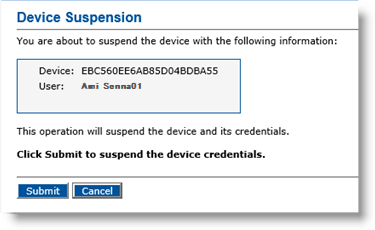
When you suspend a device, all the credentials stored on the device are suspended. They are not usable.
Depending on your device model, the device itself might become unusable after synchronization with ActivID CMS. The device would stay unusable until the device is resumed (and synchronized using the Device Update tab in the Operator Portal or via the User Portal).
-
Go to the Help Desk Overview page.
-
In the Cards, Virtual Smart Cards, Mobile App Certificates, or YubiKeys section, click Suspend next to the card or device you want to suspend.
Note:
For virtual smart card deployments: When ActivClient is installed, virtual smart cards are listed both as “Microsoft Virtual: Microsoft Virtual Smart Card X” and “ActivClient: Microsoft Virtual Smart Card X”. Only the first option should be used.The Device Suspension page appears:
-
If supported by the device, you can also select to Request the physical lock of the device during the next device update.
If the device does not support lock/unlock operations (such as PKCS#11 devices), this option does not appear.
-
Click Submit. The credentials are suspended and the Help Desk Overview page reappears. The available action for the device has changed from Hold to Resume.
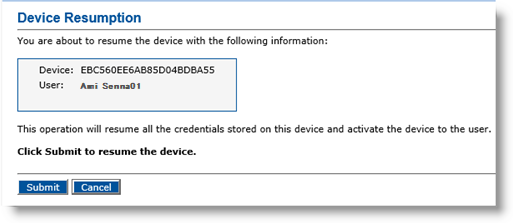
To “resume” a device, it must be suspended. When you resume a device, all the credentials stored on the device are re-activated.
-
Go to the Help Desk Overview page.
-
In the Cards, Virtual Smart Cards, Mobile App Certificates, or YubiKeys section, click Resume next to the card or device you want to resume.
-
Click Submit.
-
Click Done. The Help Desk Overview page reappears. The available action for the device has changed from Resume to Hold.
For virtual smart card deployments: When ActivClient is installed, virtual smart cards are listed both as “Microsoft Virtual: Microsoft Virtual Smart Card X” and “ActivClient: Microsoft Virtual Smart Card X”. Only the first option should be used.
The Device Resumption page appears:
Terminating a device revokes the device’s credentials and unassigns the device from the user. It does not perform any physical action on the device itself. You cannot terminate a device that has been declared forgotten, damaged, lost or stolen.
-
ActivID CMS can revoke only the credentials issued using ActivID CMS.
-
Terminating a primary device also terminates its derived devices automatically.
-
Go to the Help Desk Overview page.
-
In the Cards, Virtual Smart Cards, Mobile App Certificates, or YubiKeys section, click Terminate next to the card or device you want to terminate.
The Device Termination page appears:
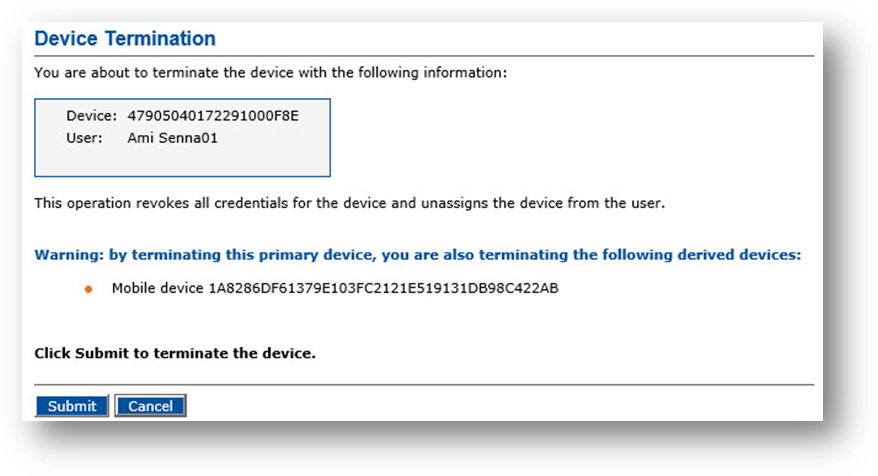 Note: If ActivID CMS finds a secondary (derived) device, an additional warning is displayed in the confirmation screen as shown above.
 -
Click Submit.
After ActivID CMS has revoked all of the user’s credentials and unassigned the device, a confirmation message appears.
-
Click Done. The Help Desk page reappears.
Important: Now, you can recycle the terminated device and issue it to another user. For more information, see Recycling a Device.
However, if a virtual smart card is terminated in the Operator Portal, its policy cannot be updated because it remains referenced by the virtual smart card on the user’s computer. As a result, the virtual smart card remains in the database and is not recycled.
Canceling a temporary device revokes the temporary device’s credentials, unassigns the temporary device from the user, and re-activates the user’s permanent device. You do not need to have the temporary device in hand in order to cancel it.
-
Go to the Help Desk Overview page.
-
In the Cards, Virtual Smart Cards, or YubiKeys section, click Cancel.
After ActivID CMS has revoked all of the user’s temporary credentials, unassigned the temporary device, and re-activated the user’s permanent device (including the credentials), a confirmation message appears.
-
Click Done.
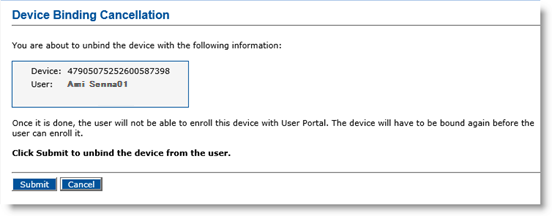
The Help Desk operator can unbind a device. For example, this is useful if the Issuance officer has assigned the device to the wrong user.
-
Go to the Help Desk Overview page.
-
In the Cards or YubiKeys section, click Unbind.
The Device Binding Cancellation page appears:
-
Click Submit. A confirmation message appears.
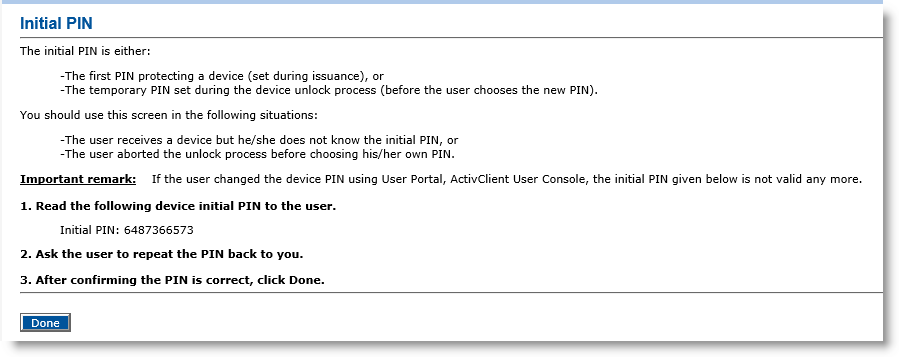
If ActivID CMS has been configured to hide the initial PIN code during device issuance, then you can go to the Help Desk page to view the initial PIN code and give it to the user (after the device has been issued).
-
Go to the Help Desk Overview page.
-
In the Cards, Virtual Smart Cards, Mobile App Certificates or YubiKeys section, click Get Initial PIN.
The Initial PIN page appears:
-
Give the Initial PIN to the user.
-
Click Done. The Help Desk Overview page reappears.
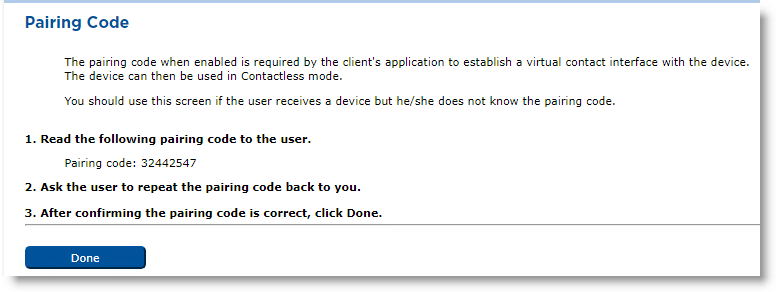
If a device is configured with a Virtual Contact Interface (VCI) application that generates a pairing code during device issuance, you can go to the Help Desk page to get the pairing code and give it to the user (after the device has been issued).
-
Go to the Help Desk Overview page.
-
In the Cards section, under Applications, locate the VCI application.

-
In the Action column, click Get Pairing Code.
The Pairing Code is displayed.
-
Give the Pairing Code to the user.
-
Click Done. The Help Desk Overview page reappears.


