Managing User Groups
ActivID CMS retrieves user data from corporate directories. You can create user groups from these directories. Each group represents a population of users for whom you want to manage devices. User groups are defined as LDAP Lightweight Directory Access Protocol queries and these groups are used for:
-
Group assignment,
-
User search (to limit the search to particular groups), and
-
Access control (an operator can manage only the users s/he is authorized to manage).
The User Groups tab enables you to create new user groups, and update, delete, or view information about an existing user group.
Before creating a user group, you must have defined the directory in ActivID CMS to which the user group will be assigned.
-
Select the Configuration tab.
-
Click User Groups. The User Groups page appears:

-
There are two methods from which to choose:
-
Method 1: Click Add User Group to create a new group.
-
Method 2: From the list of User Groups, in the Name column, locate the group you want to duplicate and then click Duplicate.

-
-
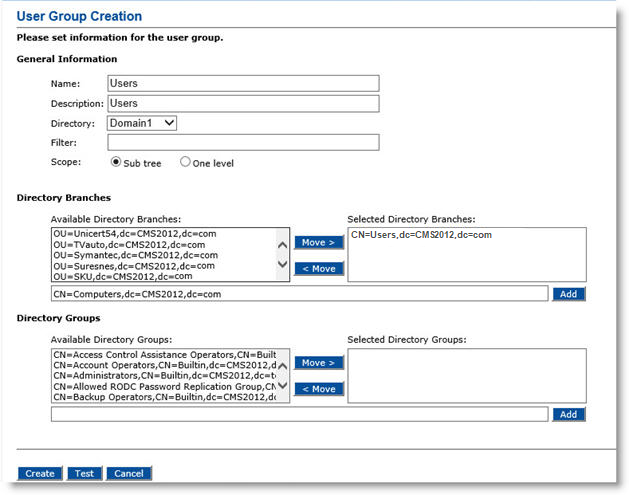
In the General Information section of the page:
-
Name—Enter a name for the user group. Choose a descriptive name for easy recognition. This name must be unique within ActivID CMS.
-
Description—Enter a description of the user group. This is a mandatory field.
-
Directory drop-down list—Select the name of the directory that contains the users for the group. A group is defined in a single directory.
-
Filter—Enter the LDAP Lightweight Directory Access Protocol filter to use for this group. For example, if you specify (mail = *), the system will return only users with a mailing address.
-
For the Scope option, select either Sub tree for users stored in the selected directory branches and in all their sub-branches, or One level for the users stored only in the selected branches for the group.
-
-
In the Directory Branches section of the page, select or add the directory branches that contain the users that belong to the group you are creating. ActivID CMS returns all the users that are members of the selected branches.
To add a directory branch to the Selected Directory Branches list:
In the Available Directory Branches list, double-click the branch you want to add, or click it once, and then click Move >.
OR
Enter the LDAP branch in the field to the left of Add, and then click Add.
To remove a directory branch from the Selected Directory Branches list:
In the Selected Directory Branches list, double-click the directory branch you want to remove, or click it once, and then click < Move.
After you set the directory type, only the first-level branches are listed in the Available Directory Branches list.
If you want to enter a sub-tree, then you must type its name in the box next to Add, and then click Add.
-
Under Directory Groups, select or add the directory groups to which the user group belongs. The user group returns all users that are members of all the selected groups. If no group is selected, then all users are returned without applying filters to the group membership.
To add a directory group to the Selected Directory Groups list:
In the Available Directory Groups list, double-click the directory group you want to add, or click it once, and then click Move >.
OR
Enter the name of a directory group in the field to the left of Add, and then click Add.
To remove a directory group from the Selected Directory Groups list:
Under Selected Directory Groups, double-click the directory group you want to remove, or click it once, and then click < Move.
-
Click Test to verify that the configuration is correct.
-
Click Create.
You can update user groups regardless of whether or not they are used in the definition of an operator or in a group assignment.
-
Go to the User Groups page.
-
Under User Groups, in the Name column, locate the group you want to update.
-
In the Action column, click Update.

-
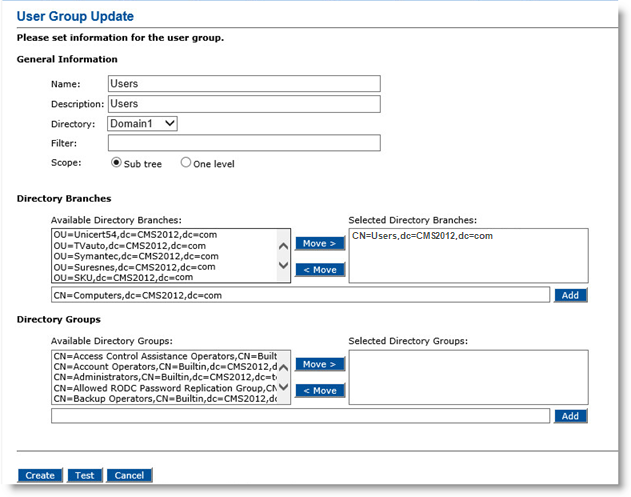
Update the fields as required. Refer to the previous section for details.
-
Click Update.
-
Go to the User Groups page.
-
Under User Groups, in the Name column, locate the group you want to view.
-
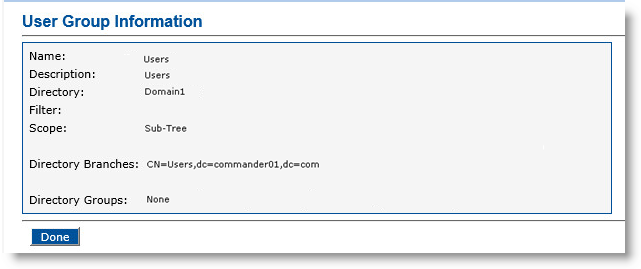
In the Action column, click View. The following is an example of a user group.

-
Click Done.
You can only delete user groups that are not used in the definition of an operator or in a group assignment.
-
Go to the User Groups page.
-
Under User Groups, in the Name column, locate the group you want to delete.
-
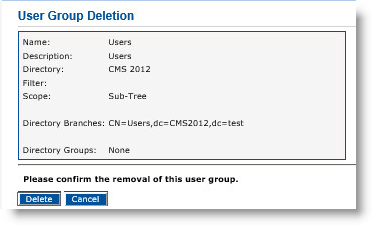
In the Action column, click Delete. The User Group Deletion page appears:

-
Click Delete to confirm the deletion. After the user group is deleted, a confirmation message appears.


