Running ActivID CMS as a Standard User
This section describes the process that explains how to configure the IIS server, Microsoft Windows, and ActivID CMS to run under a non-administrator user account, and it defines exactly what rights are required.
ActivID CMS is generally installed using a user account with Local Administrator rights to the system upon which it runs. While being the recommended method of installation, following the installation of ActivID CMS you must ensure that this user account is modified to only grant it the necessary rights required to perform ActivID CMS functions.
It is recommended that rights be assigned to a user group rather than to an individual user. This allows a more granular and manageable assignment of rights and provides the ability to run each ActivID CMS instance or process under different user accounts. For purposes of explanation in this documentation, the following Users and Groups are used in the following listed examples.
Local File System Rights
To ensure that ActivID CMS can function correctly, it is required that Read rights are assigned to the ActivID CMS installation directory.
The rights in this instance need to be assigned to the L-adm-CMS-User group which should be created locally on the system running ActivID CMS. In addition, the Active Directory Group adm-CMS-LDAPUpdate needs to be a member of the L-adm-CMS-User group, as shown in the following example:
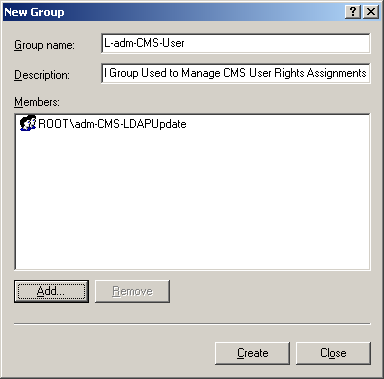
To assign the required rights to the ActivID CMS installation directory, perform the following tasks:
-
Go to the directory where ActivID CMS is installed using Windows Explorer.
-
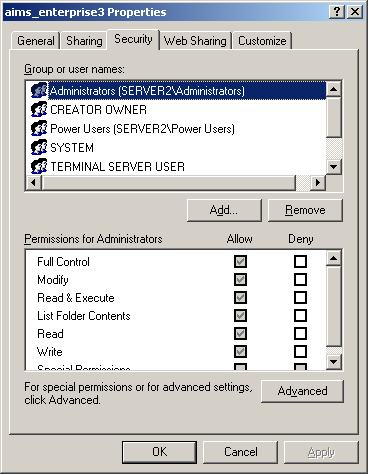
Right-click and select Properties, and click the Security tab.
-
Click Add, and enter the details for the local group you wish to assign Read rights to.
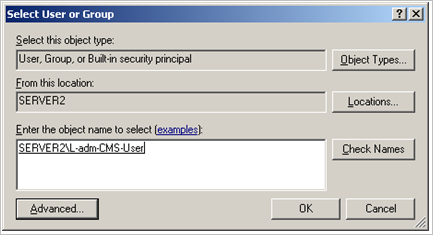
-
Click OK twice.
Local Registry Rights
To grant the ActivID CMS user Read access rights to the local machines certificate store, specific registry rights need to be granted to HKEY_LOCAL_MACHINE/Software/Microsoft/SystemCertificates. To assign the rights to the registry, perform the following tasks:
-
To run the Microsoft Registry Editor, click Start > Run > Regedit.
-
Go to the HKEY_LOCAL_MACHINE/Software/Microsoft/SystemCertificates key.
-
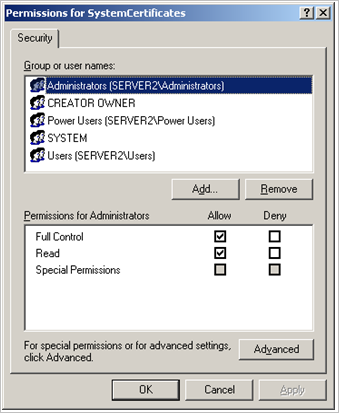
Right-click SystemCertificates, and then click Permissions > Add.
-
Enter the object name of the Local Group to which the rights should be assigned.
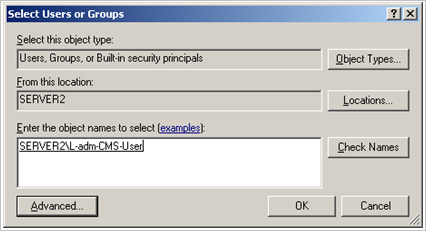
-
Click OK.
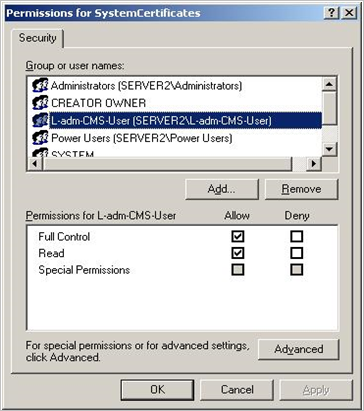
-
Click to select the Allow option for Full Control and Read rights.
-
Click OK to continue and quit the Registry Editor.
Configuring IIS to Use the Restricted User Account
ActivID CMS runs under the Microsoft web server. You need to complete the following tasks to be able to configure the website to run under a specific user.
-
At the Internet Information Services (IIS) Manager, go to the ActivID CMS Web Site, right-click, and click Properties to display the Web Site Properties window.
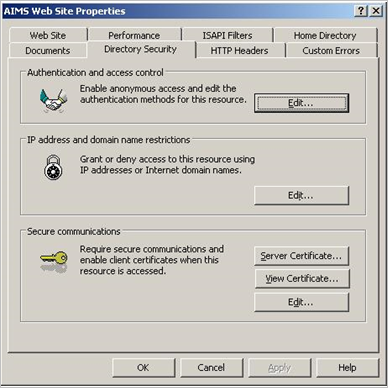
-
Click the Directory Security tab, and in the Authentication and access control panel, click Edit.
-
Configure the Windows user account to allow anonymous access to use the pre-defined ActivID CMS user account by the settings you choose in the Authentication Methods window.
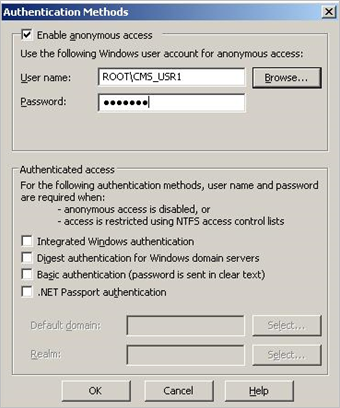
-
Click OK, and enter the Password for a second time.
-
Click OK and exit the Administration Tool.
-
Restart the IIS server.


