Enabling MS-SQL Server Mirroring
Three servers (Principal, Mirror, and Witness) using Microsoft SQL Server.
ActivID CMS must be installed according to the information provided in Configuring ActivID CMS to Use Database Mirroring. This means the system must be configured to have Principal and Mirror database servers set up, even if the ActivID CMS databases are not installed on the Mirror server.
All servers must be members of the same domain.
This section describes the procedures for the operations listed below.
This section explains the two steps you must complete prior to starting to apply the mirroring solution.
-
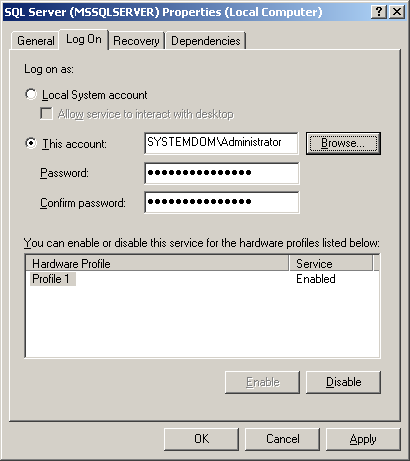
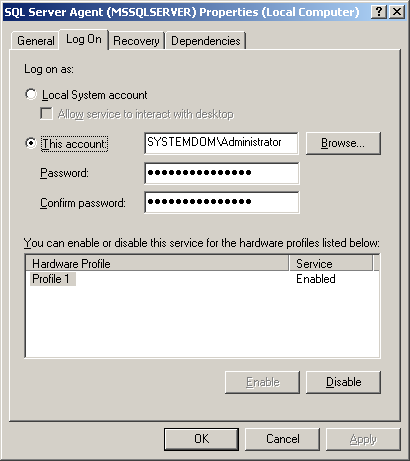
Start the SQL Server and SQL Server Agent services using the system domain administrator account on all Principal, Mirror, and Witness servers.
MS-SQL Server Properties Page
MS-SQL Server Agent Properties Page
-
Log on as the system domain administrator for all servers.
To connect to the Principal and Mirror servers using the SQL Server Management Studio, complete the following steps.
-
Run the SQL Server Management Studio on the Witness server (SERVER-Witness).
-
On the File menu, select Connect Object Explorer and connect to both servers (Principal and Mirror individually).
Note: Use the SA login information to connect to the servers.
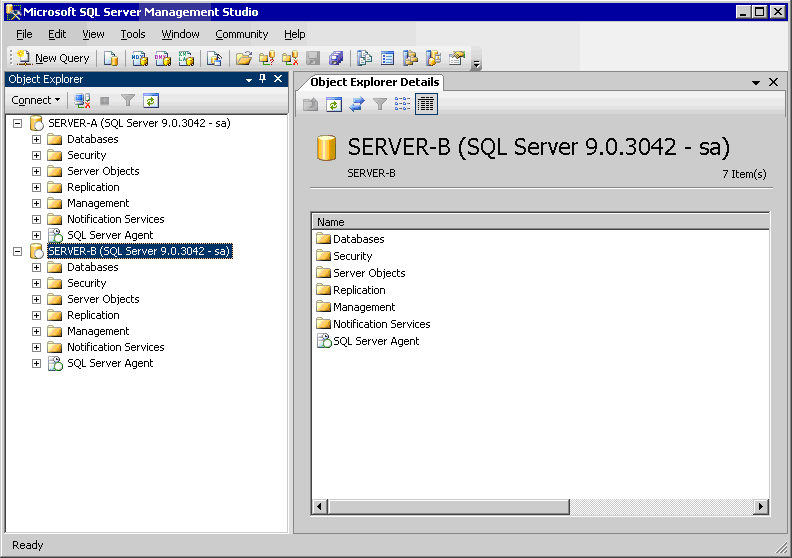
Both SQL servers should be available in the Object Explorer (as shown in the following illustration).
SQL Servers Available in Object Explorer
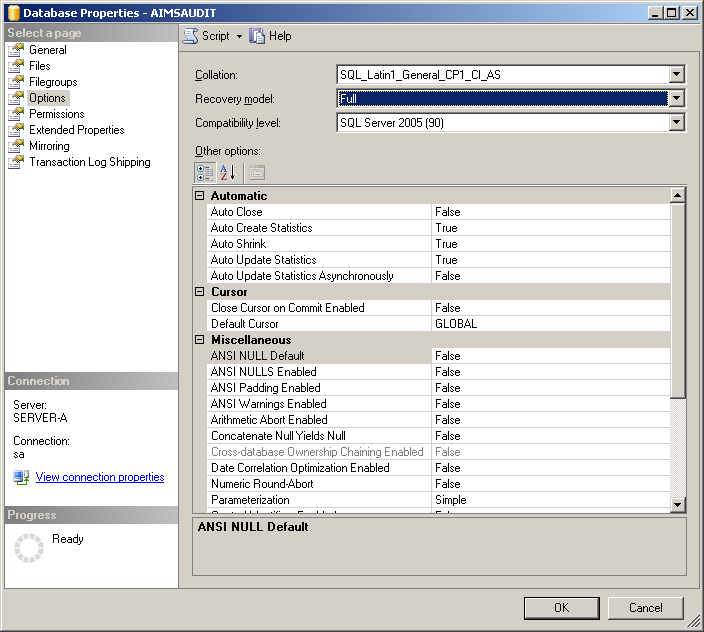
This section describes how to set the Recovery Model for the ActivID CMS databases.
-
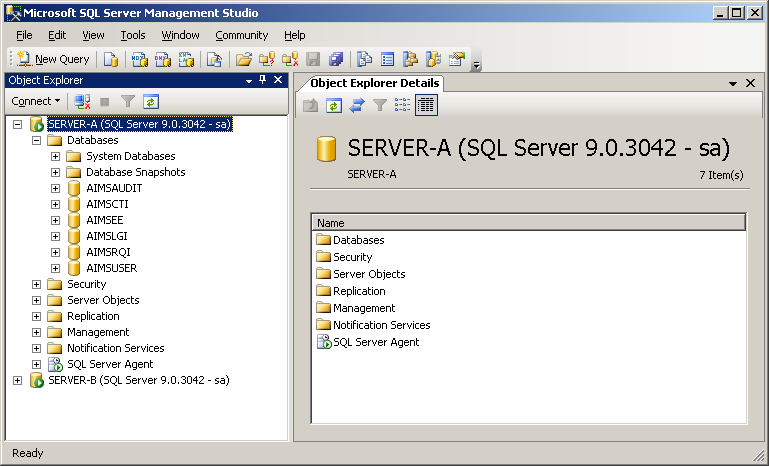
Expand the tree for SERVER-A to display the ActivID CMS databases.
-
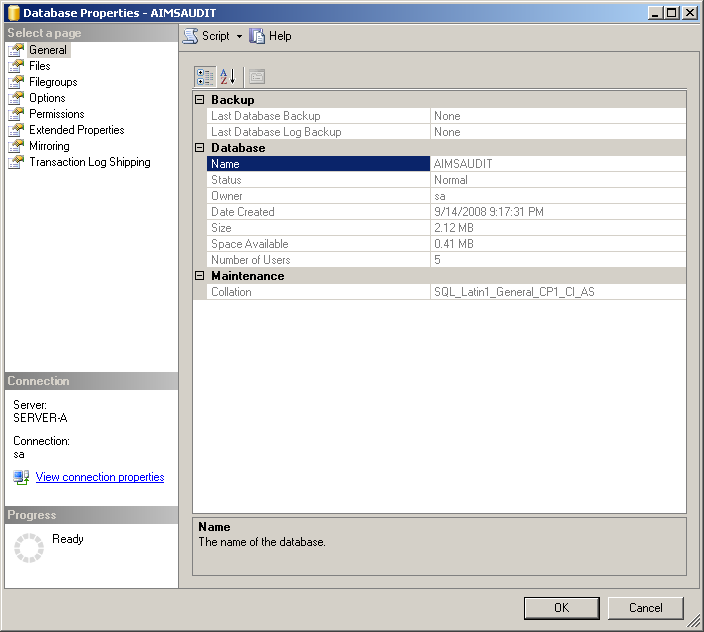
Right-click the AIMSAUDIT database, and then click Properties.
-
Select the Options page.
-
From the Recovery Model drop-down list, select Full, and then click OK.
-
Verify that the Recovery Model is set to Full for the AIMSCTI, AIMSEE, AIMSLGI, AIMSRQI and AIMSUSER databases. If necessary, repeat steps 2 to 3 for these databases.
Leave the SQL Server Management Studio active for other procedures.
This section explains how to create databases (including Users and Roles) on the Mirror server (SERVER-B).
-
Switch to the Mirror server (SERVER-B).
-
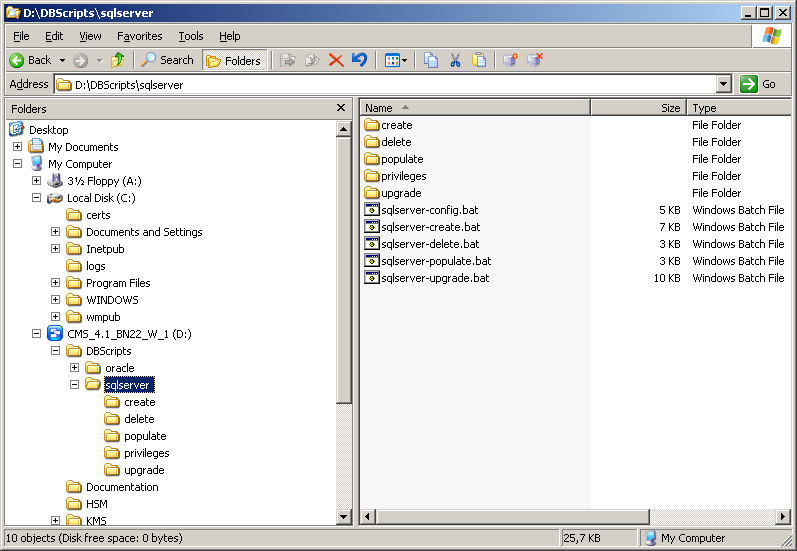
Copy the sqlserver folder from the CD1\DBScripts\sqlserver directory of the ActivID CMS distribution to the local hard disk of SERVER-B.
-
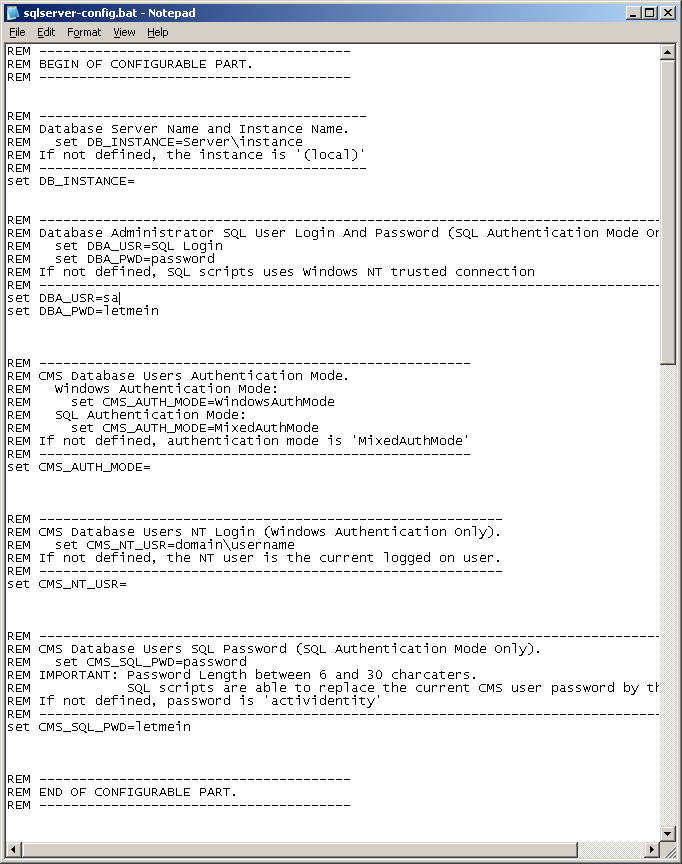
Go to the sqlserver folder and open the sqlserver-config.bat file.
Sample sqlserver-config.bat File
-
Enter the credentials for the SQL SA user account and the ActivID CMS database password (which was set during the installation of the ActivID CMS database).
-
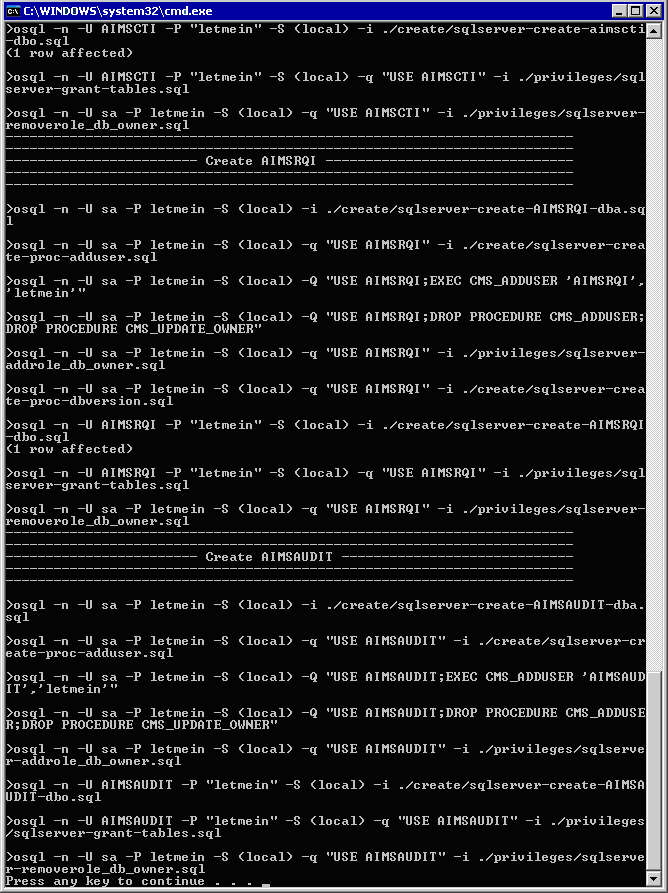
Save your changes and then run the sqlserver-create.bat file on SERVER-B.
This creates all the ActivID CMS accounts on SERVER-B, as shown in the following illustration.
Sample sqlserver-create.bat File Process
-
Press any key to close the command window.
This section explains how to back up the ActivID CMS databases on the Principal server (SERVER-A).
-
Stop the ActivID CMS server.
-
Create a temporary folder on the local hard disk of SERVER-A (the server hosting the ActivID CMS databases). This folder stores a backup copy of all ActivID CMS databases. Name this folder appropriately (for example, aims-backup).
-
Return to the SQL Server Management Studio on the SERVER-Witness.
-
Go to the ActivID CMS databases on SERVER-A, and then right-click AIMSAUDIT.
-
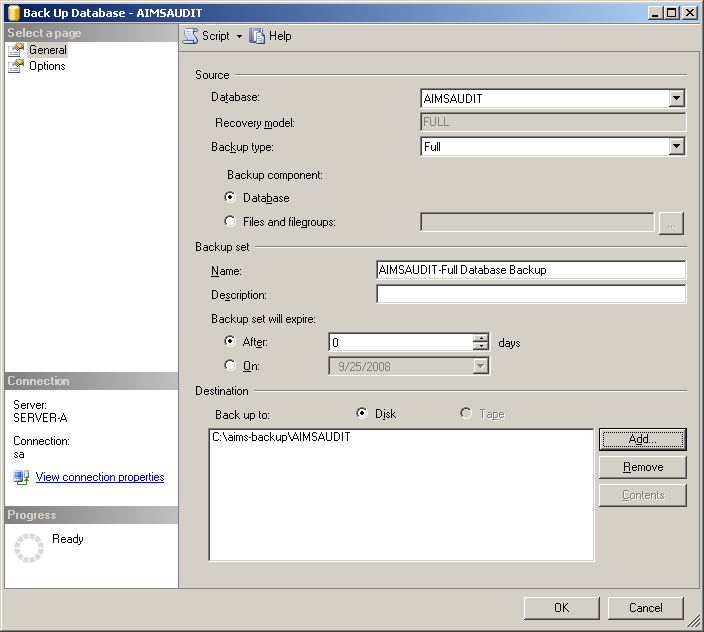
On the menu, select Tasks and then Back Up.
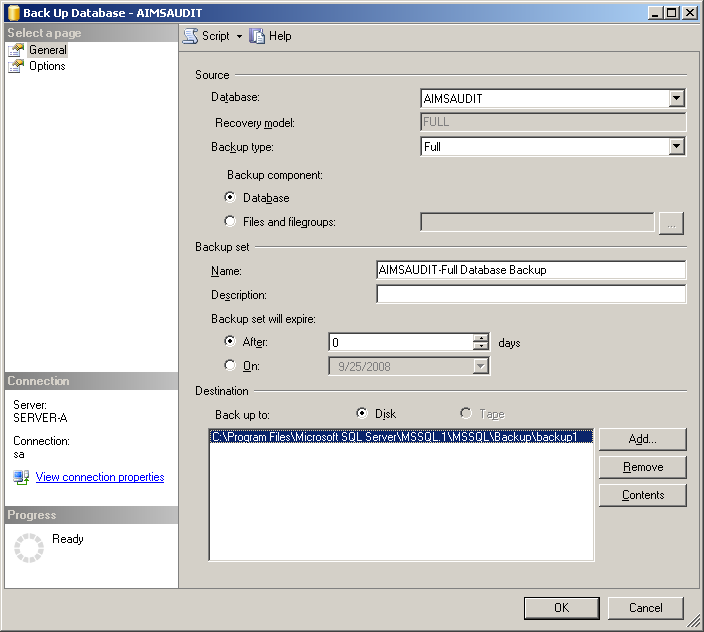
-
In the Destination panel, select the existing backup, and then click Remove.
-
Click Add.
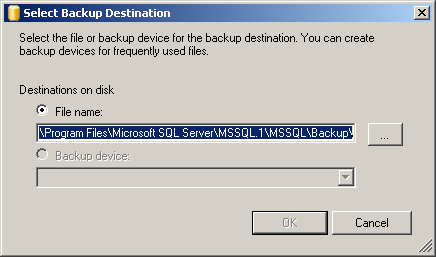
-
Click the browse button to go to the folder you previously created (for example, aims-backup).
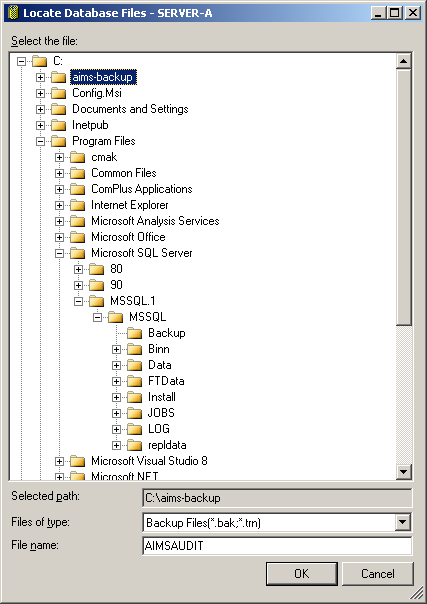
-
Define the file name for the ActivID CMS database (for example, AIMSAUDIT), and then click OK.
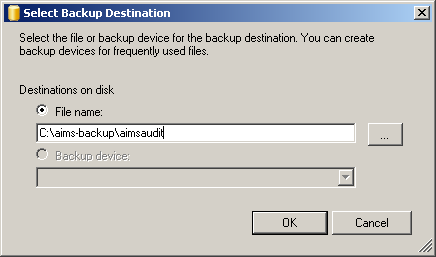
-
In the Select Backup Destination page, click OK.
-
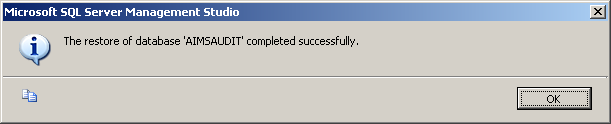
Click OK to create the backup. The following message is displayed when the backup has been successfully created.

-
Repeat steps 3 to 11 for the other ActivID CMS databases (AIMSCTI, AIMSEE, AIMSLGI, AIMSRQI, and AIMSUSER).
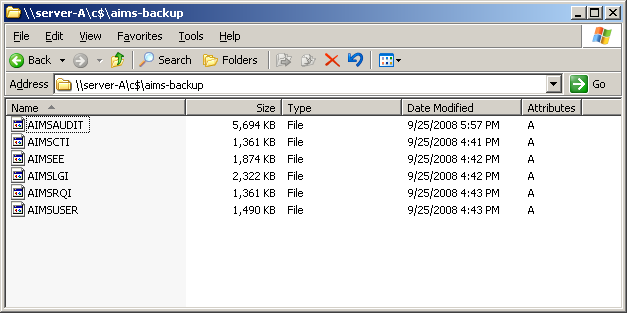
After you have created backups for all of the ActivID CMS databases, you will have six files in your backup folder, as shown in the following illustration.
ActivID CMS Database Backup Files
-
Copy the backup folder to the local hard disk of SERVER-B (for example, in the C:\aims-backup directory).
This section explains how to restore the backed up ActivID CMS databases on the Mirror server (SERVER-B).
-
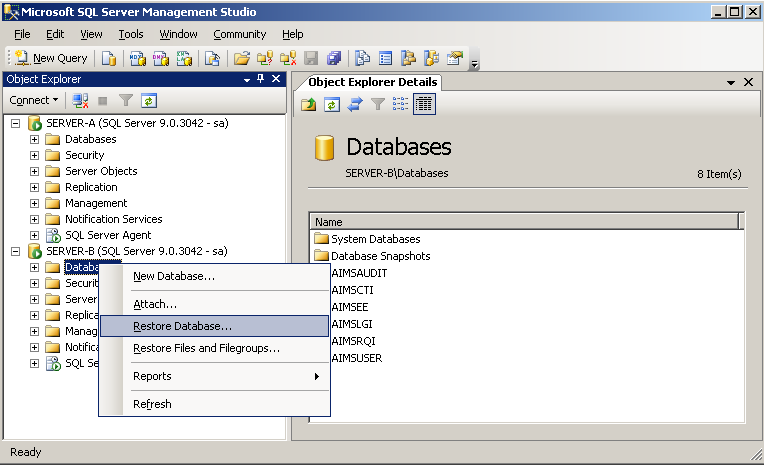
Return to the SQL Server Management Studio on SERVER-A, and expand the tree node for SERVER-B.
-
Right-click on Databases, and then click Restore Database.
-
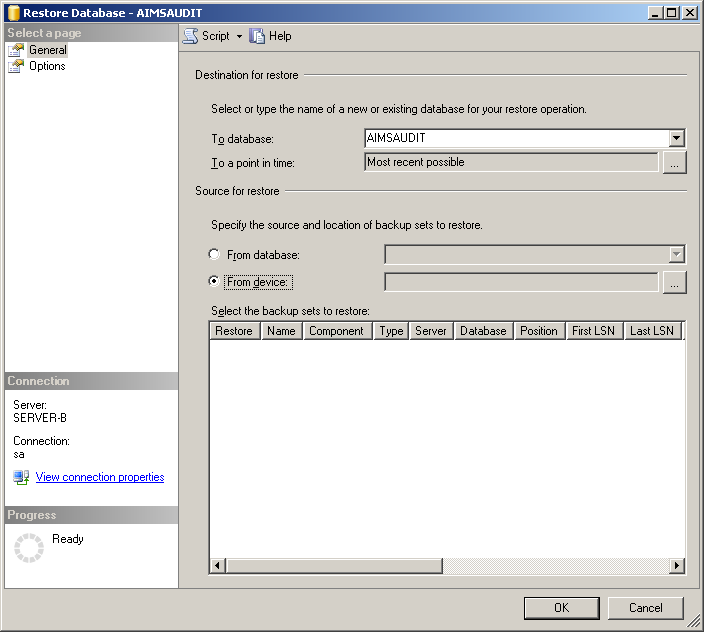
In the Destination for restore section, from the To database drop-down list, select the destination database (for example, AIMSAUDIT).
-
In the Source for restore section, select the option, From device, and then click the browse button to go to the backup file.
-
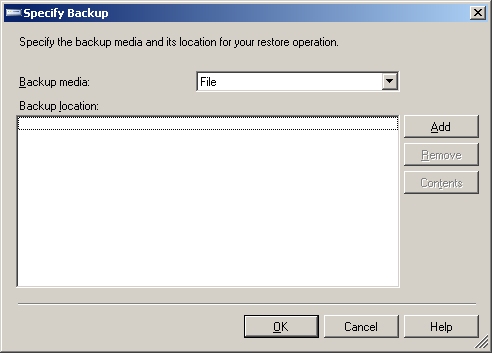
From the Backup media drop-down list, select File, and then click Add.
-
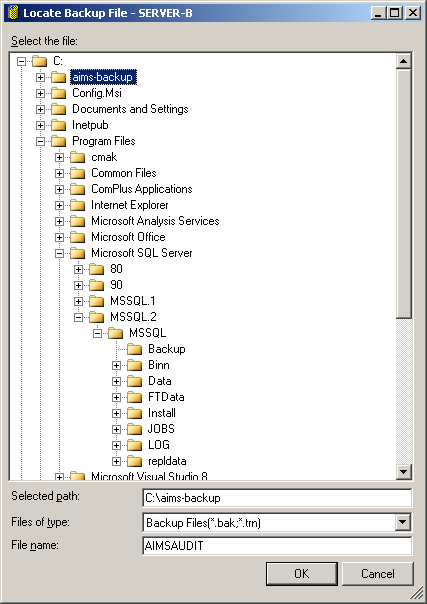
Select the directory containing the backup files, enter the file name for the ActivID CMS database to be backed up (in this example, AIMSAUDIT), and then click OK.
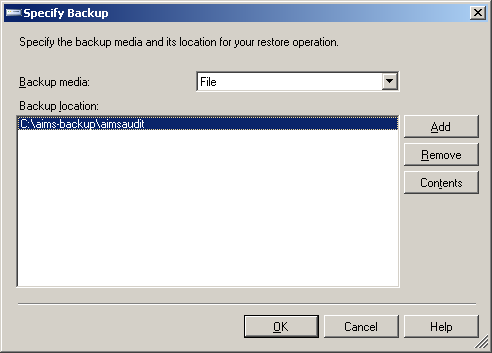
-
Click OK.
-
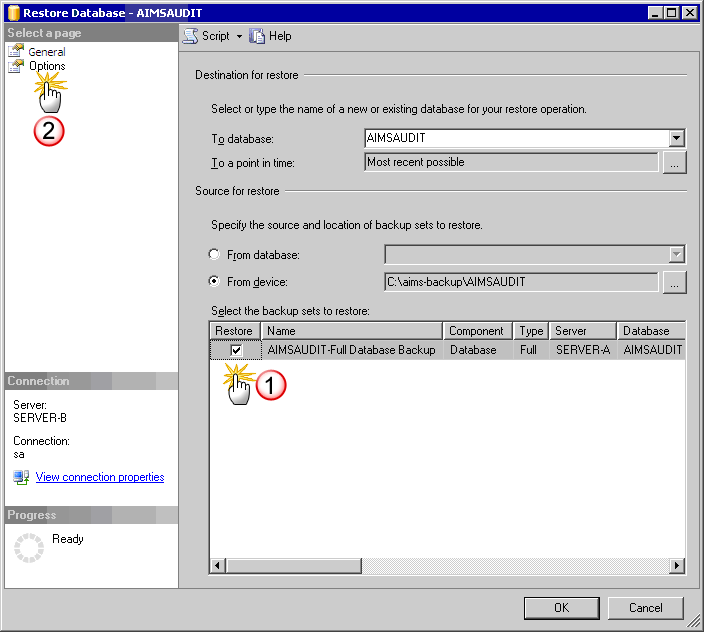
In the Select the backup sets to restore list, under the Restore column, select the check box for full database backup.
Note: Do not click OK. -
In the pane to the left, select Options.
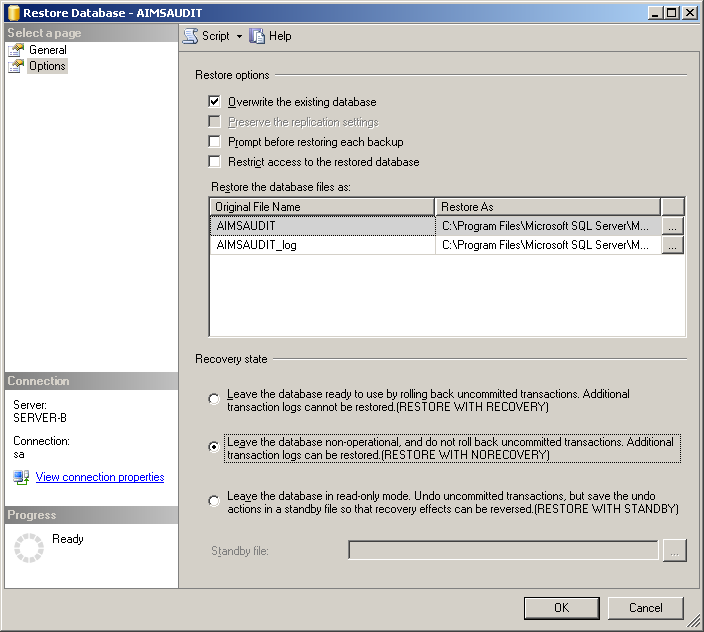
-
In the Restore options section, select Overwrite the existing database.
-
In the Recovery state section, select the Leave the database non-operational option, and then click OK.
-
Click OK.
-
Repeat steps 3 to 10 to restore the other ActivID CMS databases (AIMSCTI, AIMSEE, AIMSLGI, AIMSRQI, and AIMSUSER).
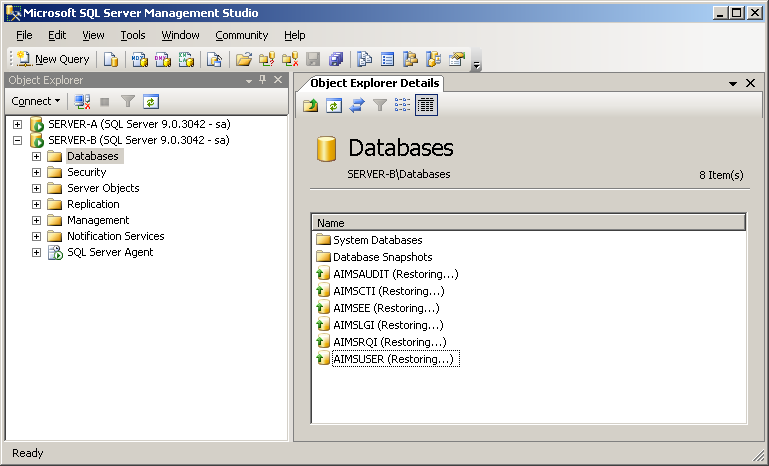
After you have restored all of the ActivID CMS databases, you will have six files restored in the Databases folder as shown in the following illustration.
ActivID CMS Databases in the Restoring State
This section explains how to enable mirroring on the Principal server (SERVER-A).
-
Return to the SQL Server Management Studio on SERVER-A and expand the tree node for SERVER-A.
-
Expand Databases, right-click on AIMSAUDIT, and then select Properties.
-
Select the Mirroring page.
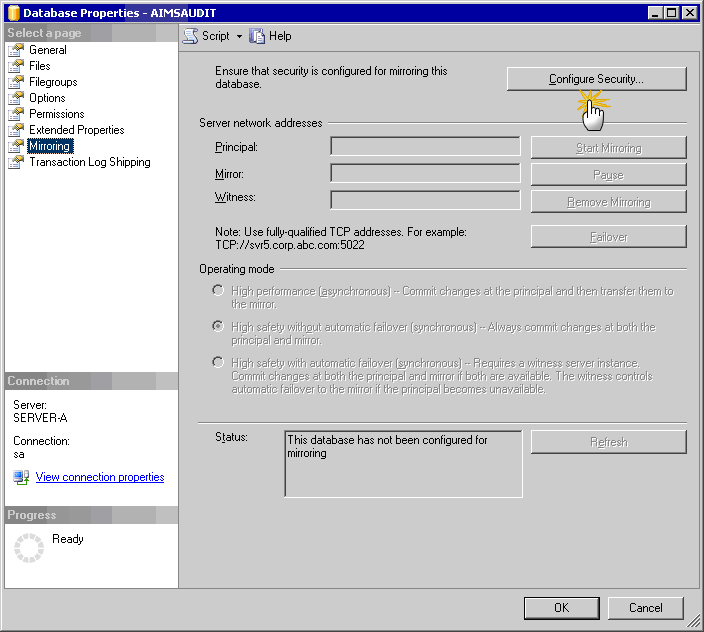
-
Click Configure Security.
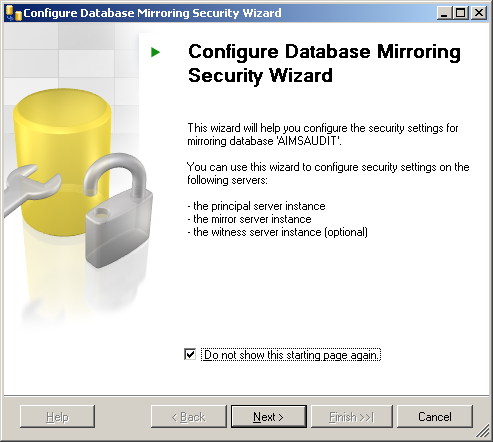
-
Click Next.
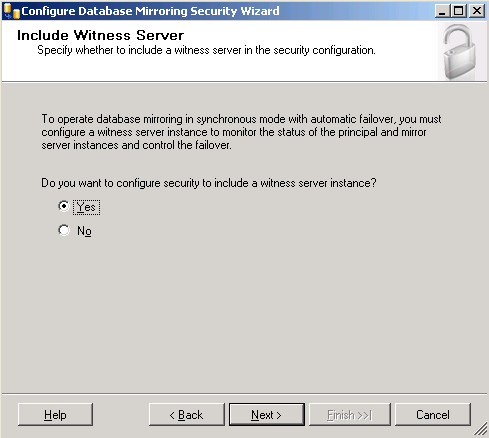
-
Select Yes, and then click Next.
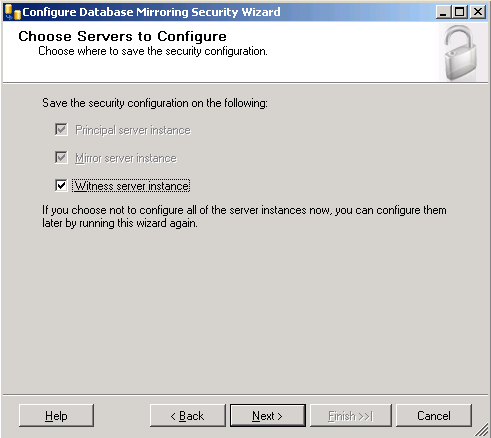
-
Select Witness server instance, and then click Next.
-
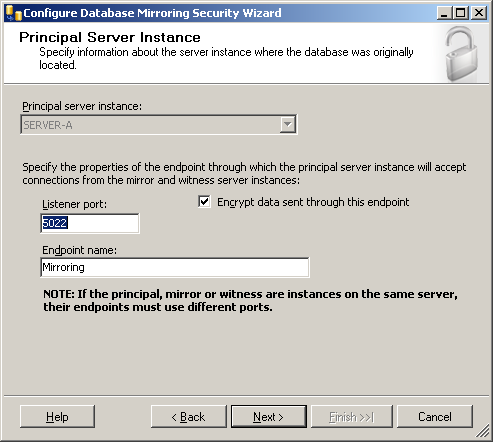
Select the option, Encrypt data sent through this endpoint, and then click Next.
-
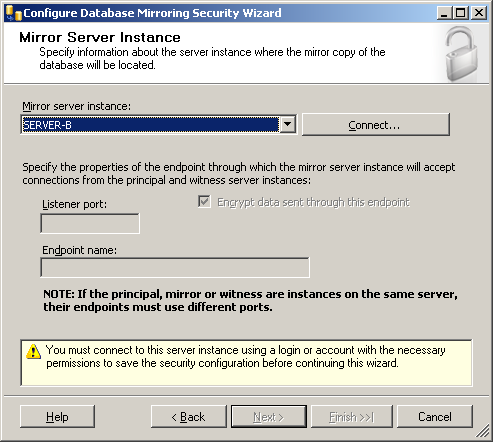
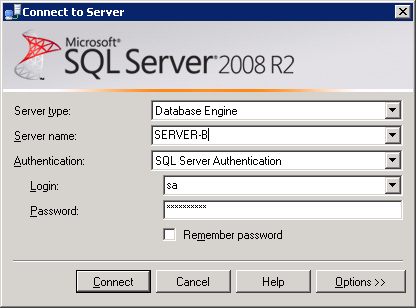
From the Mirror server instance drop-down list, select the server instance you want (in this example, SERVER-B), and then click Connect.
-
From the Authentication drop-down list, select SQL Server Authentication.
-
Enter the credentials for the SA account, and then click Connect.
-
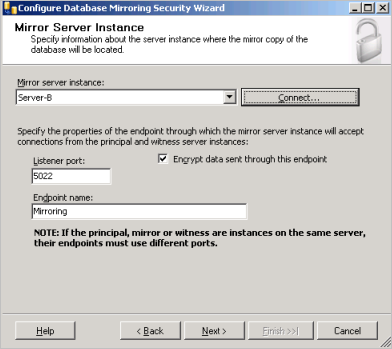
Click Next.
-
Repeat steps 9 to 12 for the SERVER-Witness.
-
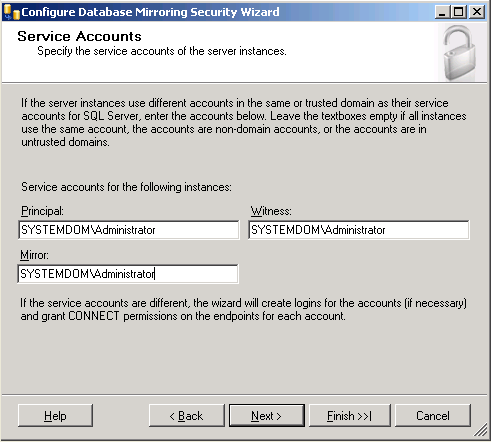
Verify if the SQL server instances for the Principal, Witness, and Mirror servers use the same service account. If they use different service accounts, then enter the appropriate account information in the corresponding textboxes. If they use the same service account, then leave the textboxes empty.
-
Click Next.
-
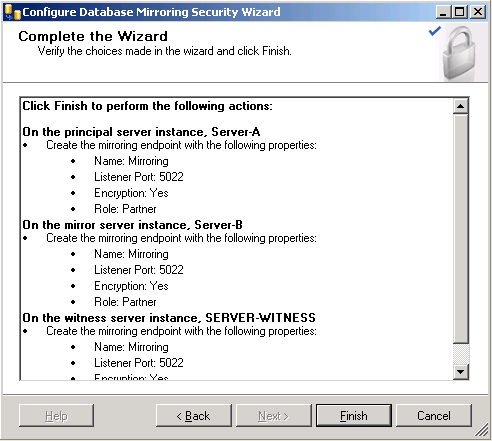
Review your database mirroring configuration choices, and then click Finish.
The Configure Database Mirroring Security Wizard starts the mirroring configuration process.
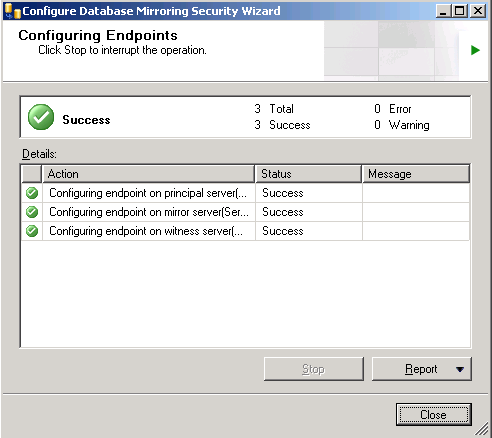
-
Verify that the Status of the configuration on all servers is Success, and then click Close.
-
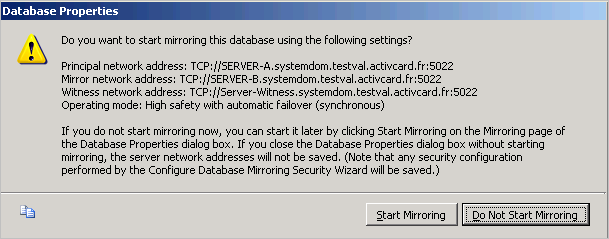
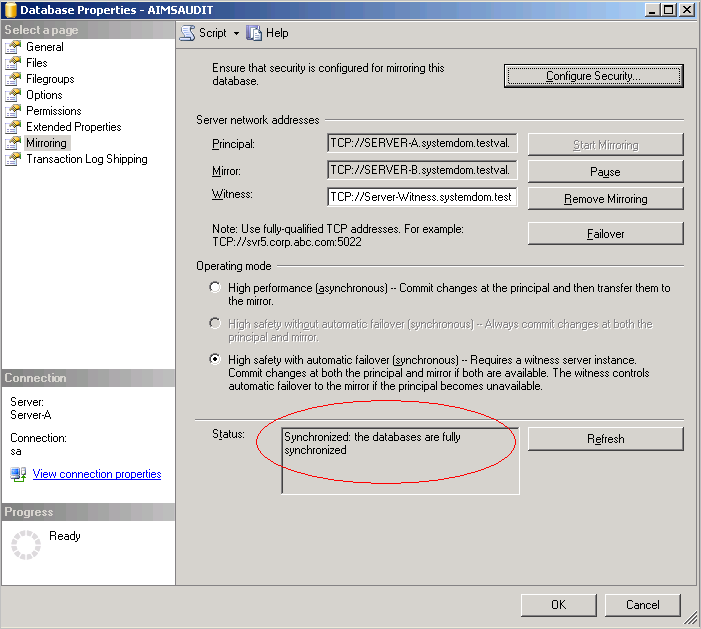
Click Start Mirroring.
A success message is displayed in the Status section (as illustrated next).
-
Click OK.
-
Repeat steps 2 to 19 for the other ActivID CMS databases (AIMSCTI, AIMSEE, AIMSLGI, AIMSRQI, and AIMSUSER).
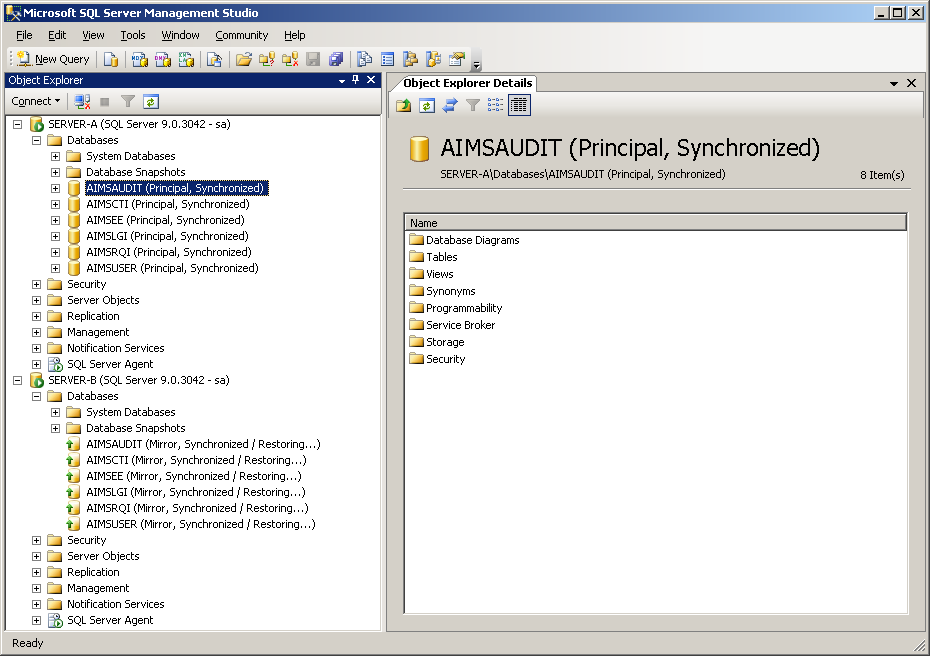
After you have enabled mirroring for all of the ActivID CMS databases, you should have six databases in the synchronized state, as illustrated next.
ActivID CMS Databases Synchronized
-
Principal—Synchronized on SERVER-A
-
Mirror—Synchronized /Restoring on SERVER-B
For information on how to transfer logins and passwords between the Principal and the Mirror server instances, refer to the article at the following URL:
http://support.microsoft.com/kb/918992/
-
From the SQL Server Management Studio, connect to the SQL Server instance from which you moved the database. (SERVER-A).
Open a new Query Editor window, and then run the following script. (The script file is not delivered with the product. You must copy and paste the following script into the SQL Query editor window.)
CopyUSE master
GO
IF OBJECT_ID ('sp_hexadecimal') IS NOT NULL
DROP PROCEDURE sp_hexadecimal
GO
CREATE PROCEDURE sp_hexadecimal
@binvalue varbinary(256),
@hexvalue varchar (514) OUTPUT
AS
DECLARE @charvalue varchar (514)
DECLARE @i int
DECLARE @length int
DECLARE @hexstring char(16)
SELECT @charvalue = '0x'
SELECT @i = 1
SELECT @length = DATALENGTH (@binvalue)
SELECT @hexstring = '0123456789ABCDEF'
WHILE (@i <= @length)
BEGIN
DECLARE @tempint int
DECLARE @firstint int
DECLARE @secondint int
SELECT @tempint = CONVERT(int, SUBSTRING(@binvalue,@i,1))
SELECT @firstint = FLOOR(@tempint/16)
SELECT @secondint = @tempint - (@firstint*16)
SELECT @charvalue = @charvalue +
SUBSTRING(@hexstring, @firstint+1, 1) +
SUBSTRING(@hexstring, @secondint+1, 1)
SELECT @i = @i + 1
END
SELECT @hexvalue = @charvalue
GO
IF OBJECT_ID ('sp_help_revlogin') IS NOT NULL
DROP PROCEDURE sp_help_revlogin
GO
CREATE PROCEDURE sp_help_revlogin @login_name sysname = NULL AS
DECLARE @name sysname
DECLARE @type varchar (1)
DECLARE @hasaccess int
DECLARE @denylogin int
DECLARE @is_disabled int
DECLARE @PWD_varbinary varbinary (256)
DECLARE @PWD_string varchar (514)
DECLARE @SID_varbinary varbinary (85)
DECLARE @SID_string varchar (514)
DECLARE @tmpstr varchar (1024)
DECLARE @is_policy_checked varchar (3)
DECLARE @is_expiration_checked varchar (3)
DECLARE @defaultdb sysname
IF (@login_name IS NULL)
DECLARE login_curs CURSOR FOR
SELECT p.sid, p.name, p.type, p.is_disabled, p.default_database_name, l.hasaccess, l.denylogin FROM sys.server_principals p LEFT JOIN sys.syslogins l
ON ( l.name = p.name ) WHERE p.type IN ( 'S', 'G', 'U' ) AND p.name <> 'sa'
ELSE
DECLARE login_curs CURSOR FOR
SELECT p.sid, p.name, p.type, p.is_disabled, p.default_database_name, l.hasaccess, l.denylogin FROM sys.server_principals p LEFT JOIN sys.syslogins l
ON ( l.name = p.name ) WHERE p.type IN ( 'S', 'G', 'U' ) AND p.name = @login_name
OPEN login_curs
FETCH NEXT FROM login_curs INTO @SID_varbinary, @name, @type, @is_disabled, @defaultdb, @hasaccess, @denylogin
IF (@@fetch_status = -1)
BEGIN
PRINT 'No login(s) found.'
CLOSE login_curs
DEALLOCATE login_curs
RETURN -1
END
SET @tmpstr = '/* sp_help_revlogin script '
PRINT @tmpstr
SET @tmpstr = '** Generated ' + CONVERT (varchar, GETDATE()) + ' on ' + @@SERVERNAME + ' */'
PRINT @tmpstr
PRINT ''
WHILE (@@fetch_status <> -1)
BEGIN
IF (@@fetch_status <> -2)
BEGIN
PRINT ''
SET @tmpstr = '-- Login: ' + @name
PRINT @tmpstr
IF (@type IN ( 'G', 'U'))
BEGIN -- NT authenticated account/group
SET @tmpstr = 'CREATE LOGIN ' + QUOTENAME( @name ) + ' FROM WINDOWS WITH DEFAULT_DATABASE = [' + @defaultdb + ']'
END
ELSE BEGIN -- SQL Server authentication
-- obtain password and sid
SET @PWD_varbinary = CAST( LOGINPROPERTY( @name, 'PasswordHash' ) AS varbinary (256) )
EXEC sp_hexadecimal @PWD_varbinary, @PWD_string OUT
EXEC sp_hexadecimal @SID_varbinary,@SID_string OUT
-- obtain password policy state
SELECT @is_policy_checked = CASE is_policy_checked WHEN 1 THEN 'ON' WHEN 0 THEN 'OFF' ELSE NULL END FROM sys.sql_logins WHERE name = @name
SELECT @is_expiration_checked = CASE is_expiration_checked WHEN 1 THEN 'ON' WHEN 0 THEN 'OFF' ELSE NULL END FROM sys.sql_logins WHERE name = @name
SET @tmpstr = 'CREATE LOGIN ' + QUOTENAME( @name ) + ' WITH PASSWORD = ' + @PWD_string + ' HASHED, SID = ' + @SID_string + ', DEFAULT_DATABASE = [' + @defaultdb + ']'
IF ( @is_policy_checked IS NOT NULL )
BEGIN
SET @tmpstr = @tmpstr + ', CHECK_POLICY = ' + @is_policy_checked
END
IF ( @is_expiration_checked IS NOT NULL )
BEGIN
SET @tmpstr = @tmpstr + ', CHECK_EXPIRATION = ' + @is_expiration_checked
END
END
IF (@denylogin = 1)
BEGIN -- login is denied access
SET @tmpstr = @tmpstr + '; DENY CONNECT SQL TO ' + QUOTENAME( @name )
END
ELSE IF (@hasaccess = 0)
BEGIN -- login exists but does not have access
SET @tmpstr = @tmpstr + '; REVOKE CONNECT SQL TO ' + QUOTENAME( @name )
END
IF (@is_disabled = 1)
BEGIN -- login is disabled
SET @tmpstr = @tmpstr + '; ALTER LOGIN ' + QUOTENAME( @name ) + ' DISABLE'
END
PRINT @tmpstr
END
FETCH NEXT FROM login_curs INTO @SID_varbinary, @name, @type, @is_disabled, @defaultdb, @hasaccess, @denylogin
END
CLOSE login_curs
DEALLOCATE login_curs
RETURN 0
GONote: This script file creates two stored procedures in the master database. The two stored procedures are named sp_hexadecimal and sp_help_revlogin.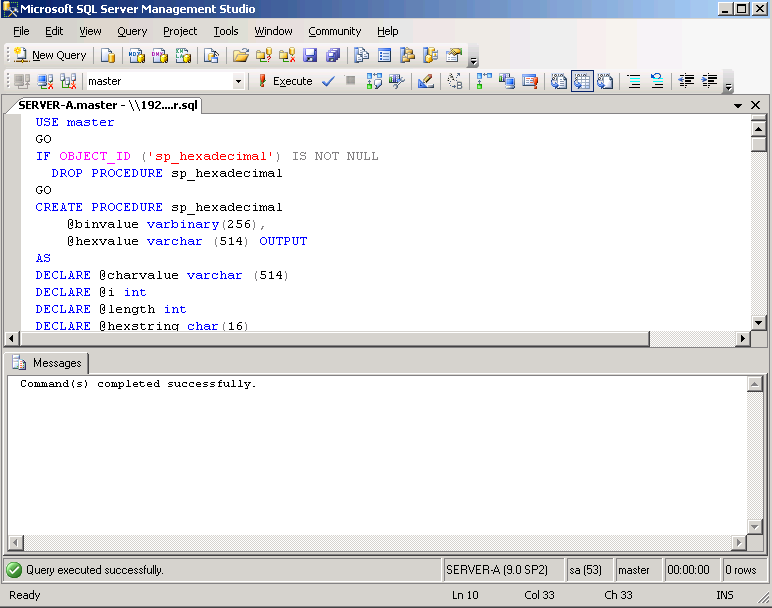
-
Run the following:
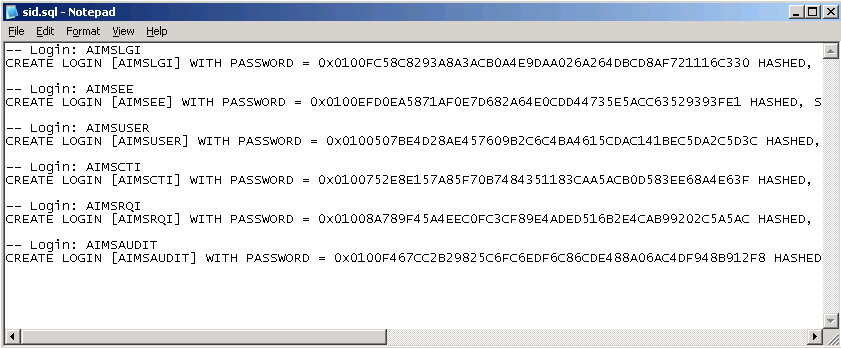
CopyEXEC sp_help_revloginNote: The output script file generated by the sp_help_revlogin stored procedure is the login script file. This login script file creates the logins that have the original Security Identifier (SID) and the original password.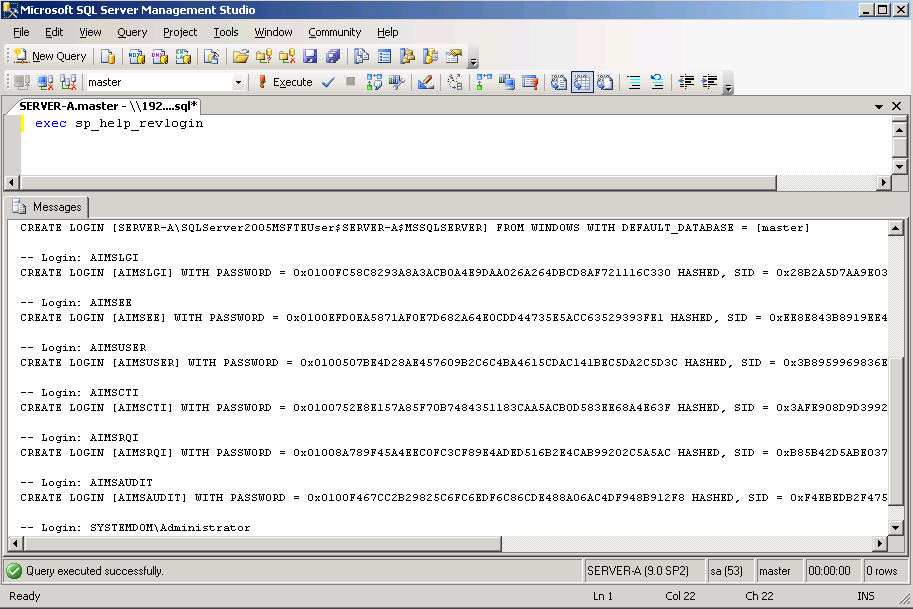
-
In the sp_help_revlogin script file, delete those commands that are not related to the ActivID CMS logins (retain only the SQL commands for creating the AIMSLGI, AIMSEE, AIMSCTI, AIMSAUDIT, AIMSUSER, and AIMSRQI logins).
-
Failover the databases on SERVER-A (the databases on SERVER-B are promoted to Principal).
-
On SERVER-B, open a query window and drop the existing ActivID CMS logins (as shown in the following example).
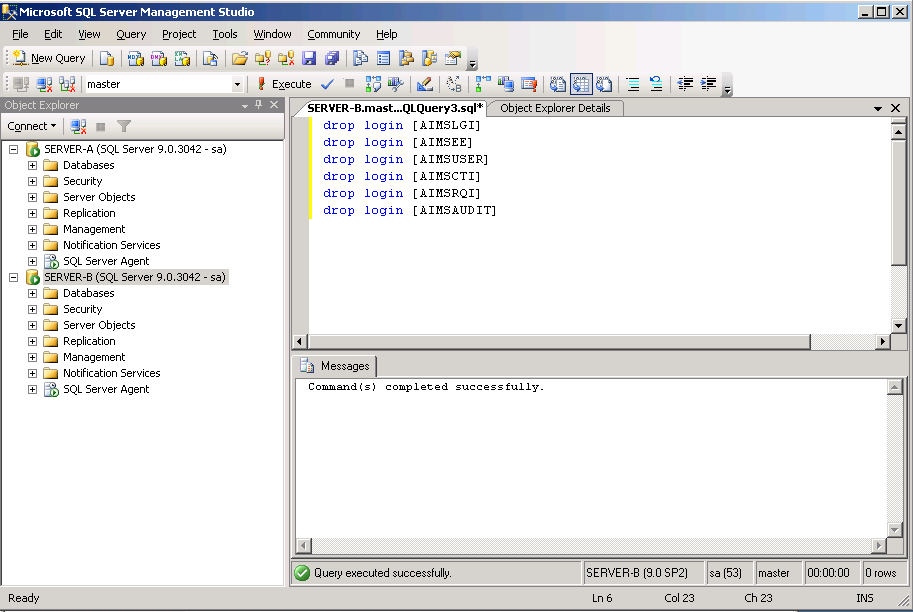
-
Open a new Query Editor window, and then run the output script file that was generated in step 2.
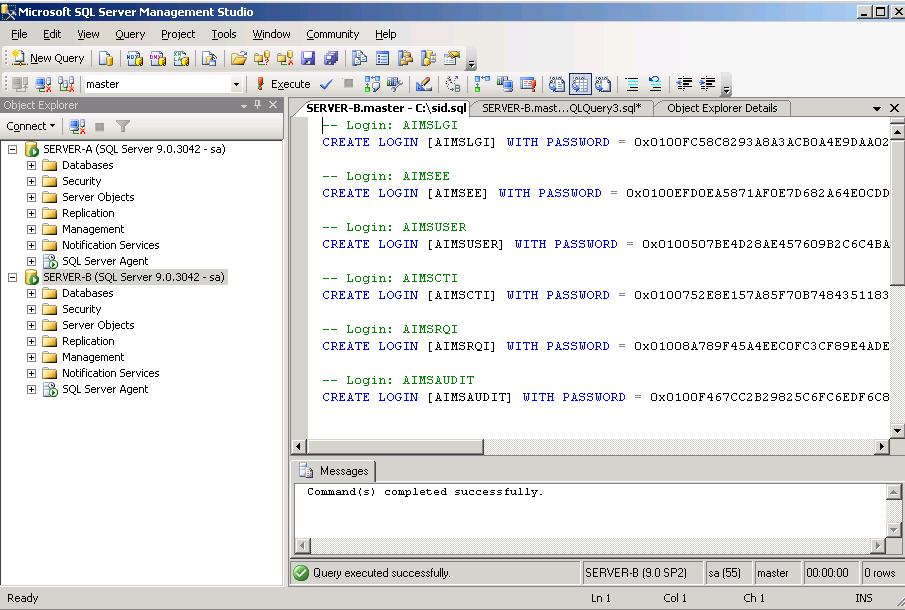
-
Open a new query window and execute the change_users_login script:
Copyuse AIMSAUDIT
exec sp_change_users_login Update_One, 'AIMSAUDIT', 'AIMSAUDIT'
go
use AIMSCTI
exec sp_change_users_login Update_One, 'AIMSCTI', 'AIMSCTI'
go
use AIMSEE
exec sp_change_users_login Update_One, 'AIMSEE', 'AIMSEE'
go
use AIMSLGI
exec sp_change_users_login Update_One, 'AIMSLGI', 'AIMSLGI'
exec sp_change_users_login Update_One, 'AIMSEE', 'AIMSEE'
go
use AIMSRQI
exec sp_change_users_login Update_One, 'AIMSRQI', 'AIMSRQI'
go
use AIMSUSER
exec sp_change_users_login Update_One, 'AIMSUSER', 'AIMSUSER'
go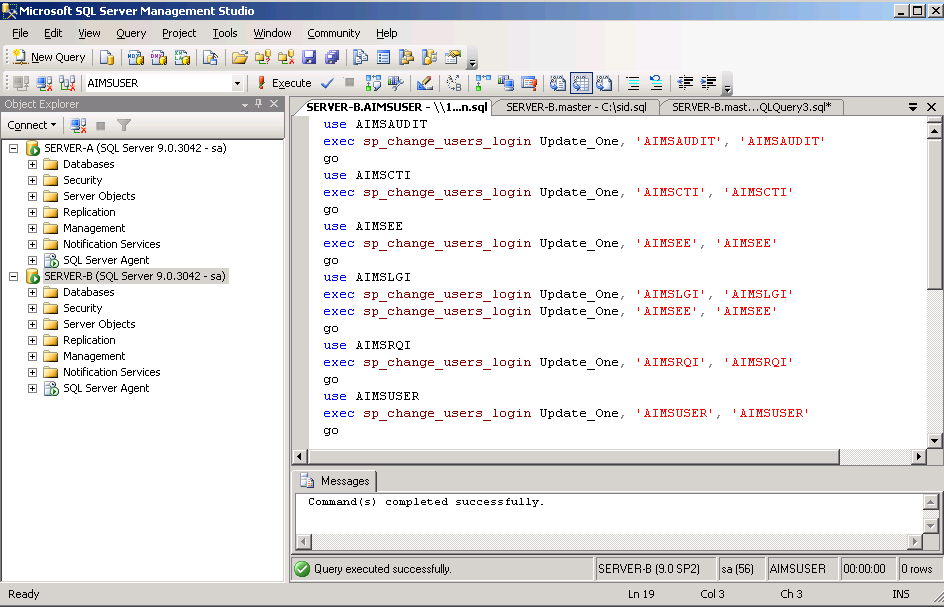
-
If necessary, promote the SERVER-A as the Principal server.


