Setting Up an nShield Connect
This section describes how to set up an nShield Connect (formerly netHSM) HSM for use with ActivID Key Management System (KMS) and ActivID Credential Management System (CMS).
-
You must install one of the following Java products prior to installing the nCipher components:
-
Java Runtime Environment (JRE)
- Java Developer Kit (JDK)
-
-
You must install the 64-bit version of the nCipher Security World software.
-
Connect the Ethernet cable to the nShield Connect unit (use the Ethernet port 1 or 2).
-
Double-click the Setup.exe file to start the installation.
-
When the Welcome window is displayed, click Next.
-
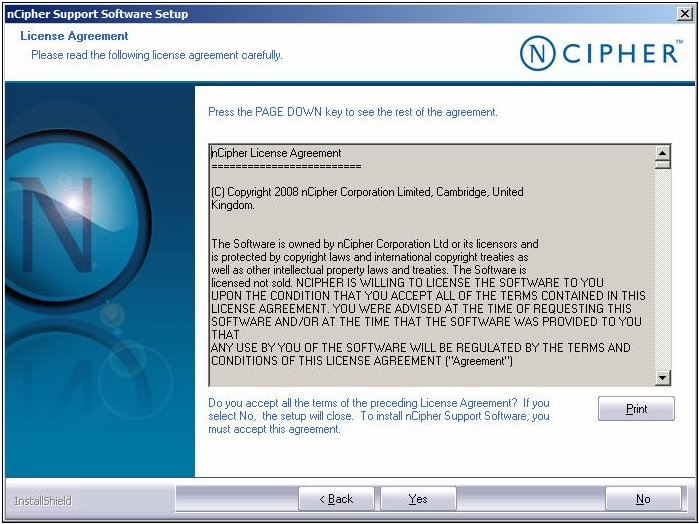
Click Yes to accept the license agreement, and click Next.
Note: The remaining steps in this procedure are not intended to replace nCipher technical documentation. Read and review the nCipher material, follow the presented prompts, and note any additional tips documented here.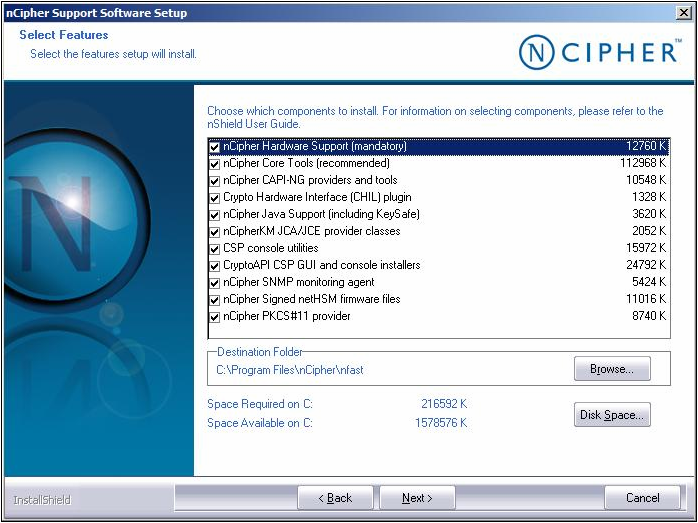
-
When the Select Features window displays, complete the following tasks:
-
Accept the default options that are already selected.
-
Accept the default installation directory.
Important: It is strongly recommended that you accept the default installation directory. In this documentation, the installation directory is referred to as <installdir>. - Click Next.
-
-
Click Next.
-
Click Next.

-
Select Yes to enable the Security Assurance Mechanism, and then click Next.
-
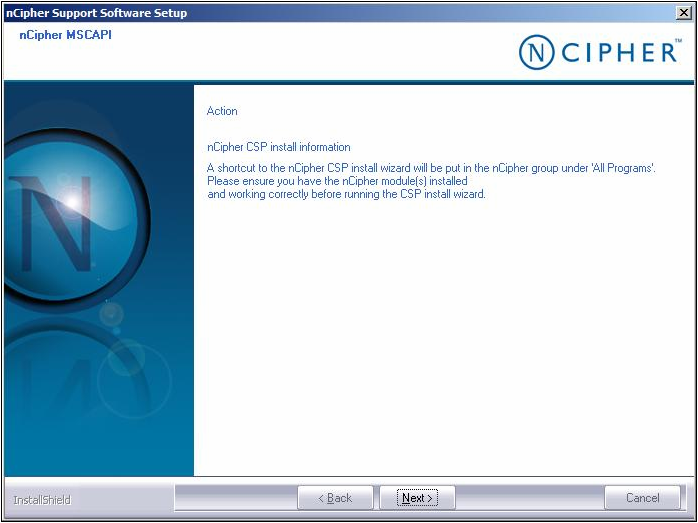
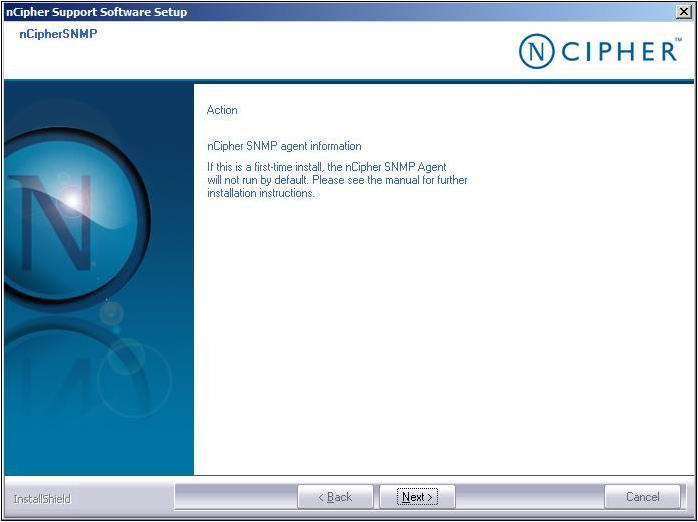
In the nCipher PKCS#11 window, complete the following tasks:
-
Click Yes to enable the Security Assurance Mechanism (default option).
-
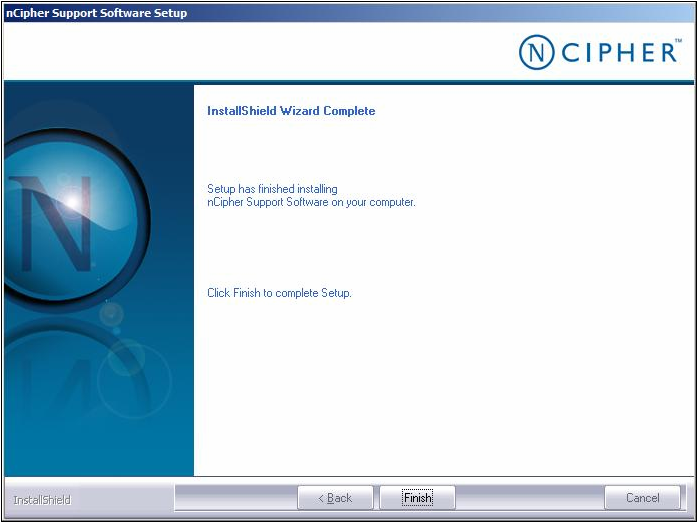
Click Next to display the Installation Completed message.
-
-
Click Finish when the Installation Completed message displays.
The first step in configuring an HSM Ethernet port is to assign it an IP address. Configure the HSM Ethernet port by completing the following steps.
-
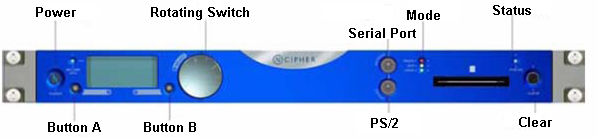
Using buttons A and B and the Rotating Switch on the nShield Connect front panel, complete the following tasks to display the following screen:
-
Press Button B to select System
-
Press Button B to select System configuration
-
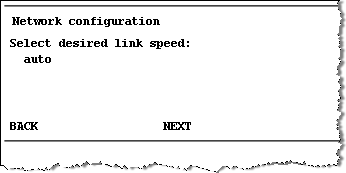
Press Button B to select Network configuration
-
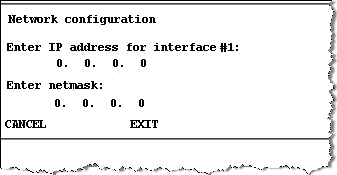
Press Button B to select Set up interface #1
-
-
Set each field of the IP address and netmask for the interface.
-
Press button B when the settings are correct, which displays the following screen:
-
When prompted, press button B to accept the new interface.
-
When prompted to reboot now or later, press button A to select a later reboot or press button B to reboot now.
The Remote File System (RFS) contains a copy of the Security World data which serves as a backup. For details about creating an nCipher Security World, see Task 6: Configuring an nCipher Security World. The RFS needs to be located on a separate server or on a client system (running either ActivID KMS or ActivID CMS). You must execute KeySafe from the system where the RFS is created.
You must repeat the same procedure performed in Task 1 on the server where the RFS resides (see Task 1: Installing the nCipher Software for details). The Task 1 procedure installs the nCipher software environment and the utility necessary to create the RFS.
-
There is one RFS for each HSM unit. In the following example, the command set enables several clients to connect to the HSM (where the client can be the system running ActivID KMS or ActivID CMS). The RFS configuration accepts access by cooperating client machines, where the client can either be authenticated or non-authenticated.
-
In the following example, there are references to KNETI, which is the nCipher integrity key of the HSM (installed when the HSM is shipped). This is the key used for authentication between the HSM and clients.
The first step in the following procedure involves making a choice between the two options below. Determine which option you plan to use and select either Option 1 or Option 2.
Option 1 enables the client to connect to the RFS with KNETI authorization.
On the server system, enter the following command:
C:\Program Files\nCipher\nfast\bin>rfs-setup --force --gang-client <IP CLIENT> <netHSM ESN> <netHSM KNETI HASH>The IP address identified as IP CLIENT is the IP address for the client system connected to the HSM, for example:
C:\Program Files\nCipher\nfast\bin>rfs-setup --force --gang-client 192.168.5.170 683E-33D9-2AF5 95a316146da7d9feb1fb0258746baed9990776c7The result:
Removing old remote_file_system entries with remote_esn 683E-33D9-2AF5
Adding read-only remote_file_system entries
Ensuring the directory C:\ProgramData\nCipher\Key Management Data\local exists
Adding new writable remote_file_system entries
Ensuring the directory C:\ProgramData\nCipher\Key Management Data\local\sync-store exists
Saving the new config file and configuring the hardserver
Done
Option 2 enables the client to connect to the RFS without KNETI authorization (use this option if you trust the current network environment).
On the server system, enter the following command:
C:\Program Files\nCipher\nfast\bin>rfs-setup --gang-client --write-noauth <IP CLIENT>For example:
C:\Program Files\nCipher\nfast\bin>rfs-setup --gang-client –write-noauth 192.168.5.170The result:
Adding read-only remote_file_system entries
Ensuring the directory C:\ProgramData\nCipher\Key Management Data\local exists
Adding new writable remote_file_system entries
Ensuring the directory C:\ProgramData\nCipher\Key Management Data\local\sync-store exists
Saving the new config file and configuring the hardserver
Done-
Synchronize the client(s).
You must synchronize the kmdata between the cooperating client and the RFS. The rfs-sync command is sent each time that a client is initialized so that it retrieves data from the RFS. The synchronization is executed from each client involved.
Note: The following example, for an unauthenticated client, is provided for illustration purposes only.On each client system, enter the following command:
CopyC:\Program Files\nCipher\nfast\bin>rfs-sync --setup --no-authenticate < File Server IP> -
To display the configuration summary, enter the following command:
CopyC:\Program Files\nCipher\nfast\bin>rfs-sync –show
The File Server IP represents the IP address for the server system where the RFS resides, for example:
C:\Program Files\nCipher\nfast\bin>rfs-sync --setup --no-authenticate 192.168.5.93The result:
No current RFS synchronization configuration.
Configuration successfully written; new config details:
Using RFS at 192.168.5.93:9004: not authenticating.The result:
Using RFS at 192.168.5.93:9004: not authenticatingConnecting with the client is done using Ethernet (port 1 or 2) and depends upon the port to which you connected with the HSM (in the following example, port 1 is used). Configure HSM to work with a client system by completing the following steps:
-
Using buttons A and B and the Rotating Switch on the nCipher front panel menu (see the Figure in Task 2: Configuring the HSM Ethernet Port), complete the following tasks:
-
Press Button B to select System
-
Press Button B to select System Configuration
-
Scroll down using the Rotating Switch and press Button B to select Client Configuration
-
Press Button B to select New Client

-
-
Enter the IP address for the client using the dotted decimal notation format.
-
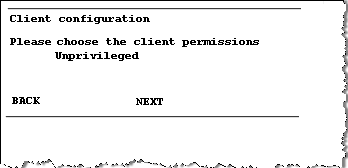
Press Button B to display Client permissions.
-
Using the Rotating Switch, select privileged on any port for the client.
-
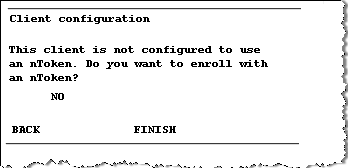
Press Button B to display the following message.
-
Using the Rotating Switch, select NO to indicate that you do not want to enroll using the nToken.
Selecting this option means that the client is enrolled without nToken authentication.
-
When Finish is displayed, press Button B to end this operation.
-
Repeat this series of steps for each client that is involved.
To establish a connection with the HSM from the client system, perform the following steps in this procedure.
-
You must configure each client individually to use the nShield Connect.
-
Before attempting client configuration, you must first obtain the following information from the nShield Connect front panel:
-
ESN (Electronic Serial Number)
-
HSM IP address
-
Hash of the KNETI key (nCipher integrity key)
-
The ESN and hash of the KNETI key are also readable from the nCipher anonkneti utility in <installdir>\nCipher\nfast\bin\. From this directory, you must enter the following command:
anonkneti - <netHSM IP>-
On the client system, open a DOS command prompt window, and enter the following commands:
CopyC:\Program Files\nCipher\nfast\bin>nethsmenroll --force -p <netHSM IP> <netHSM ESN> <netHSM KNETI HASH> -
Enable the TCP socket for Java and KeySafe by entering the following command:
CopyC:\Program Files\nCipher\nfast\bin\config-serverstartup –sp -
Stop the hardServer on the client by entering the following command:
CopyC:\Program Files\nCipher\nfast\bin\net stop “nfast server”Note: The hardServer is the nCipher software that controls communication between the hardware and the applications running on the client system. “nfast server” represents the name of the server. -
Restart the hardServer by entering the following command:
CopyC:\Program Files\nCipher\nfast\bin\net start “nfast server” -
Verify that you can launch the KeySafe utility.
Note: Repeat the previous steps for each client system with which you intend to connect to the HSM. -
Confirm that the HSM and Client connection is working by opening a DOS command prompt window and entering the following command:
CopyC:\Program Files\nCipher\nfast\bin>enquiry
C:\Program Files\nCipher\nfast\bin> nethsmenroll --force -p 192.168.5.100 683E-33D9-2AF5 95a316146da7d9feb1fb0258746baed9990776c7
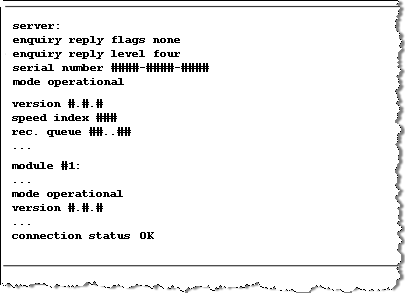
In response to the enquiry request, the Connection Status for the module must return an OK response to indicate there has been a successful installation. If any errors occur, please see the nCipher technical documentation for details and more information.
Security World is an nCipher proprietary concept. Each Security World is comprised of an HSM unit and the following two sets of smart cards:
-
ACS (the Administrator Card Set): this contains credentials for managing a specific Security World and for use with recovery operations.
-
OCS (the Operator Card Set): this controls access to the Application Keys (for example, for applications such as ActivID KMS and ActivID CMS).
Each Security World also includes the keys and certificates that are encrypted by the Security World Key and stored on the computer where the Security World has been created (in the C:\ProgramData\nCipher\Key Management Data\ directory).
-
Each Security World is stored in a different subdirectory (kmdata_nn). Before you can use a Security World HSM with ActivID KMS, you must first configure the Security World on the HSM. Key materials are stored in the nCipher Security World.
-
During the HSM cloning process using ActivID KMS, the Security World is also cloned onto other HSMs.
The following are the two procedures for creating a new Security World:
To create a new Security World, you must use the nCipher KeySafe. Perform the following steps to create a new Security World.
-
Turn on your PC system and launch the nCipher KeySafe utility.
-
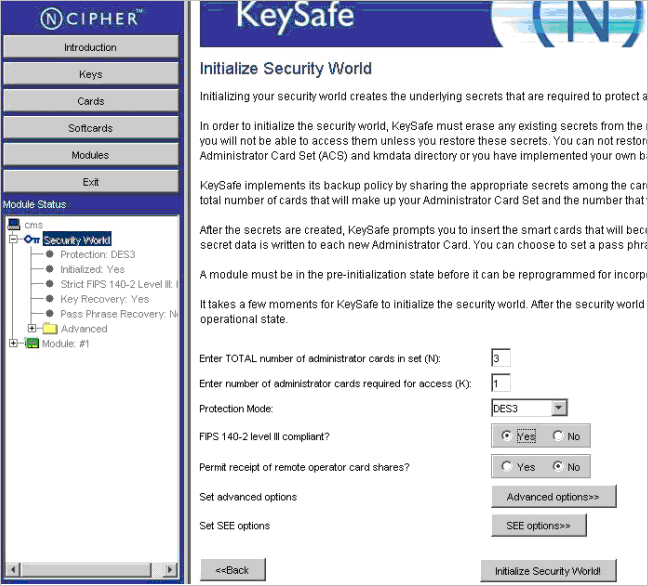
Click Modules to display the Initialize Security World page.
-
Enter the appropriate values for your Security World by completing the following tasks in the Initialize Security World page:
-
Enter the number of cards in the Enter Total Number of administrator cards in set (N) text box; in this example, it is 3 (N=3).
-
Enter the number of cards in the Enter number of administrator cards required for access (K) text box; in this example, it is 1 (K=1).
-
Click to select AES (Advanced Encryption Standard) or DES3 (Triple Data Encryption Standard) in the Protection Mode pull-down menu. The mode you select determines the algorithm used to protect the keys in the Security World Key.
-
Click to select Yes or No from the FIPS 140-2 level III compliant options. The security level you select is applicable to your HSM and only applies to the Security World being created. This security level has nothing to do with the security level that the HSM physically supports.
-
Click to select Yes or No from the Permit receipt of remote operator card shares options. It is recommended that you accept the No option (which is the default).
-
No selection is required at this time for the Set advanced options.
-
No selection is required at this time for the Set SEE options. SEE refers to Secure Engine Execution. This setting is not required for the HSM to work in the ActivID KMS / CMS environment.
-
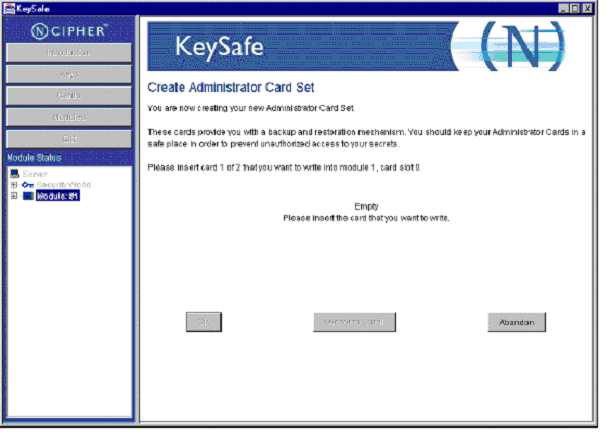
Click Initialize Security World to display the Create Administrator Card Set page.
-
-
Insert the first of the N set of administrator cards (in the example N=3), which displays the Set Card Protection Pass Phrase page.
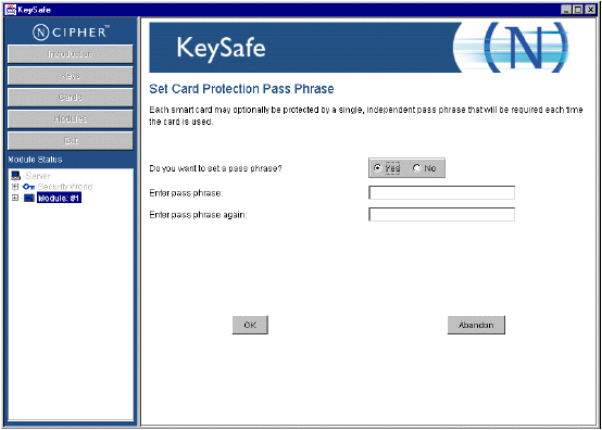
KeySafe displays a page where you set a pass phrase (PIN) to protect the card with a single, independent pass phrase that is required each time that the card is used.
-
In the Set Card Protection Pass Phrase page, perform the following tasks:
-
Select the Yes option.
-
Enter the pass phrase (PIN) in the Enter pass phrase text box.
-
Confirm the pass phrase by entering it in the Enter pass phrase again text box.
-
Click OK.
-
-
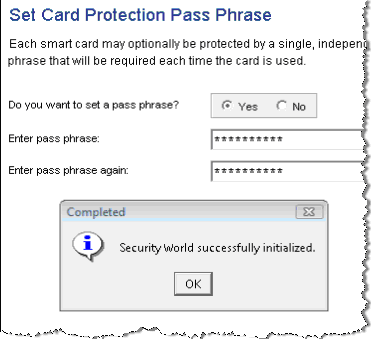
Repeat this same procedure for the second and third set of smart cards. When the Security World has been created, the following message window displays.
-
In the Security World successfully initialized window, click OK.
-
Reboot your client system.
-
Launch KeySafe and verify that the HSM can be contacted and the Security World has been created (you should see an entry corresponding to the new Security World).
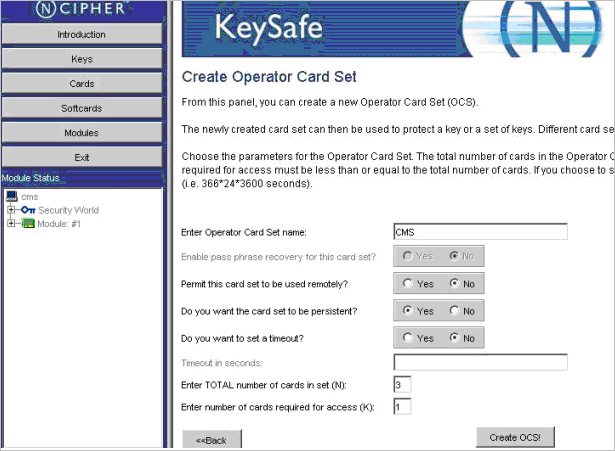
Complete the following procedure to create an Operator Card Set that protects access to the ActivID CMS keys. To create a new operator card set, complete the following tasks.
-
Launch KeySafe.
-
Click Cards.
-
Click Create New OCS which displays the Create Operator Card Set page.
-
Enter the appropriate values for your Operator Card Set by responding to the parameter and prompts and completing the following tasks in this page:
-
Enter a new card set name (for example, CMS) in the Enter Operator Card Set name text box.
-
Click No for the Permit this card to be used remotely? option.
-
Click Yes for the Do you want the card set to be persistent? option.
When you click Yes for this option, the keys protected by an OCS card remain available in the module even if the card is removed from the nCipher card reader (It is recommended that you use this option). This mode enables multiple applications to access the HSM simultaneously without requiring multiple operators to insert their cards during a session.
-
Click No for the Do you want to set a timeout? option. If you choose to set a timeout period, the maximum duration cannot be longer than one year in length.
-
Enter the number of cards in the Enter Total Number of administrator cards in set (N) text box (the total number cannot exceed 64).
-
Enter the number of cards in the Enter number of administrator cards required for access (K) text box (the number of cards required for access must be less than or equal to the total number of cards).
Warning!
For an Administrator Card Set, the total number of cards is (N) and the number of administrator cards required for access is (K). This same formula applies for an Operator Card Set. As per nCipher Security World requirements, if you cannot present the proper number of cards (K/N) if and when required, the keys that are protected using this card may be unusable. -
-
Click Create OCS.
This window prompts you to set card protection similar to when you created pass phrases for N cards for the ACS (see step 5 in Creating a New Security World and Administrator Card Set for details).
You need to enter a pass phrase (equivalent to an HSM Operator PIN), and enter a confirmation pass phrase for all the cards when prompted. When you are finished creating the Operator Card Set, the HSM is ready for use in ActivID KMS and ActivID CMS.


