Using Dynamic Print Templates
Dynamic print templates allow you to specify an ActivID CMS attribute whose value indicates the print template to use for printing.
Use the format dynamic_<attribute> to enter a template value into the ActivID CMS server and assign it to a print job. The <attribute> can be any valid ActivID CMS attribute, including attributes from plugins such as PIV Personal Identity Verification (technical standard of "HSPD-12") or CIV Commercial Identity Verification. Any colons in the attribute names must be replaced with underscores.
Dynamic templates can be configured to download from the ActivID CMS server during the print operation, which means that these templates are not required to be present locally on the workstation(s) used for printing.
Configuring Dynamic Print Templates
-
On the Configuration tab, select the Customization sub-tab.
-
From the Select a Topic drop-down list, select Miscellaneous.
-
Under Card Printing, in the Supported Printer Type drop-down list, select Fargo – Asure ID.

-
In the AsureID template names field, set the dynamic print template(s) to be used (for example, to use the PIV Print Layout, enter dynamic_piv_PrintLayout).
-
In the AsureID Print Service URL field, set the URL to https://127.0.0.1.
-
For the Use Server-Hosted Templates option, select Yes. This feature allows you to load the Asure ID Template file on the ActivID CMS server and have it downloaded to the print service automatically.
-
Click Set. A confirmation message appears.
-
On the Configuration tab, select the Customization sub-tab.
-
From the Select a Topic drop-down list, select User Attributes.

-
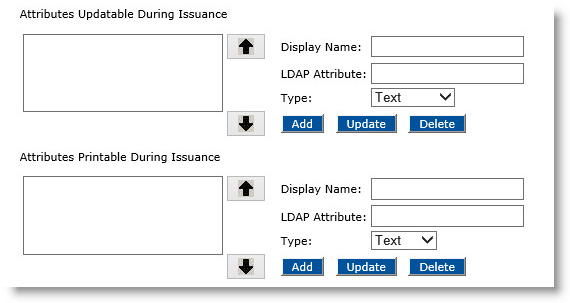
In the Attributes Printable During Issuance section, add the print template attribute to the list of attributes available:
Example:
Display Name:
Print Template Name
LDAP Attribute:
piv:PrintLayout
Type:
Text
-
Add any other attributes required in your template(s).
-
Click Set. A confirmation message appears.
-
On the Configuration tab, select the Policies sub-tab.
-
Select the Card Layout to which you want to add the template and then click Update.
-
In the Card Printing Layouts section, select the conditions when it will print using the new dynamic print template.
-
Click Update to save the changes.
-
On the ActivID CMS server, go to the ActivID CMS installation folder (the default is: C:\Program Files\HID Global\Credential Management System).
-
Go to aims.war\data\printing\layouts
Important: The cms_portal directory, used in previous versions of ActivID CMS, no longer exists. With the migration to WildFly in ActivID CMS 6.0, that directory is now called aims.war. -
Create a new folder named: asureid.
-
Copy all the templates that you plan to use into this new folder (C:\Program Files\HID Global\Credential Management System\aims.war\data\printing\layouts\asureid).
Client Installation
-
Uninstall any existing ActivID CMS Asure ID print service from the workstation using the following script:
CopyCMS_AsureID_Service_Uninstall.vbs -
Install the new ActivID CMS Asure ID print service on any workstation where printing is required.
Debug Logging for ActivID CMS Asure ID Print Service
To enable debug logging:
-
Edit the AsureIDService.exe.config file located in the Asure ID folder.
-
In the <level value="ERROR" /> line, replace ERROR with DEBUG.
-
Save the file.
-
Restart the ActivID CMS service.
To disable debug logging:
-
Edit the AsureIDService.exe.config file located in the Asure ID folder.
-
In the <level value="DEBUG" /> line, replace DEBUG with ERROR.
-
Save the file.
-
Restart the ActivID CMS service.
The error/debug log file (AsureIDService.Log) is located in: %PROGRAMDATA%\HID Global\CMS Print Service


