Configuring the Microsoft Certificate Authority
This section describes how to:
-
Configure ActivID CMS to work with the Microsoft CA,
-
Set permissions for the CMS Server service (named “CMS Server”) and individual certificate templates, and
-
Add the Microsoft CA and enable escrow/recovery.
Configuring the Server User Access Rights to a Microsoft CA
The procedures in this section apply to the ActivID CMS “Server User” (which is the CMS Server user account set during ActivID CMS setup). This is not to be confused with the “CMS User” (who is the person logged on to the ActivID CMS Operator Portal). The ActivID CMS “Server User” establishes the connection to the Microsoft CA.
Setting Permissions for the CMS Server Service Account
The CMS Server service account must have these rights to perform the following tasks:
-
Issue and manage certificates
-
Request certificates and
-
Use Enrollment Agent certificates.
To set permissions for the CMS Server service account, complete the following steps.
-
Open a DOS Command Prompt window.
-
Enter MMC and press Enter to open the Microsoft Management Console.
-
On the File menu, click Add/Remove Snap-in.
-
In the Add Standalone Snap-in window, click Certification Authority, and then click Add.
-
Click Finish, then Close, and then OK.
-
In the console tree, expand Certification Authority, right-click the CA to which you want to set permissions, and then click Properties.
Note: The following illustrations are for Microsoft Windows 2012.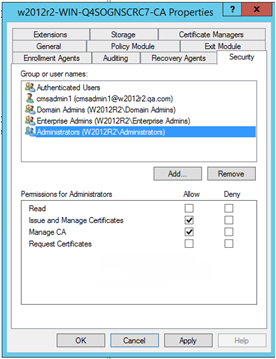
-
In Properties, select the Security tab.
-
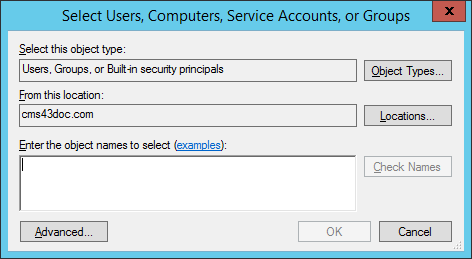
Click Add. The Select Users, Computers, Service Accounts, or Groups dialog is displayed.
-
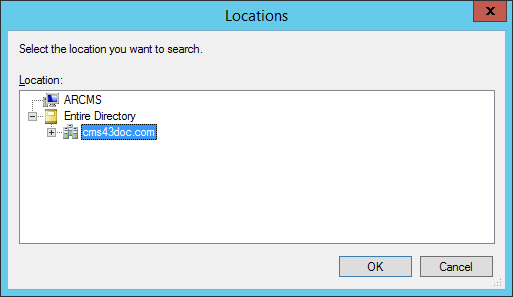
Click Locations.
-
Highlight the name of the local computer or domain to which the user belongs.
-
Click OK.
-
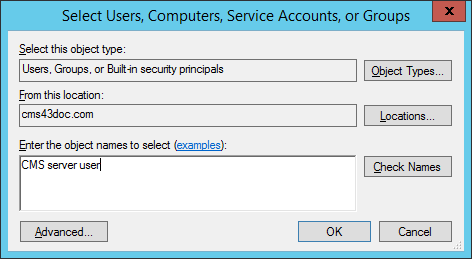
In the Enter the object names to select text box, enter the object name.
(Optional) If you do not know the user’s name, click Advanced, and then click Locations. Under Location, click the name of the local computer or domain to which the user belongs, and then click OK. Under Search results, click Find Now, click the user’s name, and then click OK. The name of the local computer or domain to which the user belongs appears in the Enter the object name to select text box.
-
Click Check Names. This displays the name of the local computer or domain to which the user belongs in the text box, as illustrated next.
-
Click OK to add the user name to the Group or user names list in the Properties window, as illustrated next.
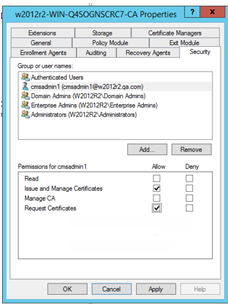
-
In the Permissions for <CMS Server User> list (2008 /2012), in the Allow column, select the Issue and Manage Certificates and Request Certificates options (as illustrated on this page).
-
Click OK.
Setting Permissions for the Individual Certificate Template
-
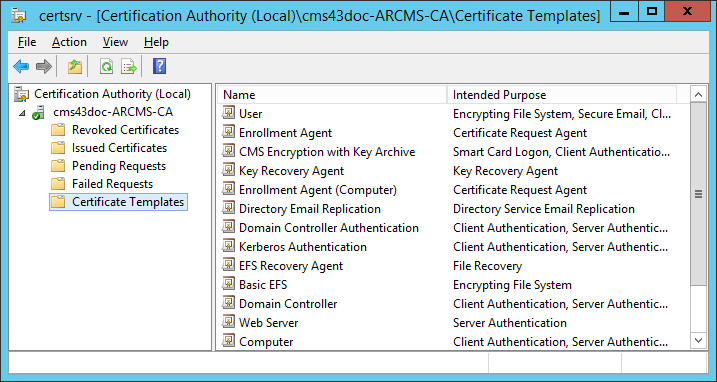
On the Microsoft CA machine, from the Start menu, click Programs, point to Administrative Tools, and then click Certification Authority. The Certification Authority window is displayed.
-
In the console tree, expand Certification Authority, right-click Certificate Templates, and then click Manage. The Certificate Templates snap-in is displayed.
-
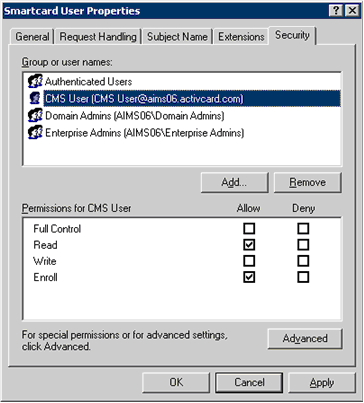
In the Details pane, right-click the certificate template that you want to use, and then click Properties. The Smartcard User Properties window is displayed.
-
In the Group or user names box, select the user created with the roles specified in Configuring the Server User Access Rights to a Microsoft CA (for example, ActivID CMS User).
Note: If the CMS User Name is not available in the list of users, then you must add the ActivID CMS User (see Setting Permissions for the CMS Server Service Account for instructions). -
In the Permissions for CMS User section, in the Allow column, select the Read and Enroll options.
-
Click Apply, and then OK.
-
Repeat the above procedure for each type of certificate template that you want to use.
Note: Make sure you set permissions for the Enrollment Agent (Computer) and Key Recovery Agent certificate templates that allow access to the CMS Server User.
Configuring the Enrollment Agent Account
To issue certificates from a Microsoft CA using the Use the Variable Menu to Type the Product Name option, you must issue Enrollment Agent certificates to the CMS Server service account or to the local machine administrator account.
These credentials are used by the Use the Variable Menu to Type the Product Name feature to sign certificate requests. For more information, refer to the section Installing ActivID CMS. For information about issuing certificates with a Microsoft CA, go to: http://support.microsoft.com/
-
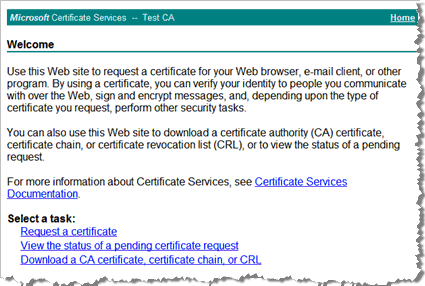
Connect to Microsoft Certificate Services (https://<hostname>/certsrv/). You will be asked for a user name and password if you are not already logged on to the CA server domain. This displays the Microsoft Certificate Services Welcome page.
-
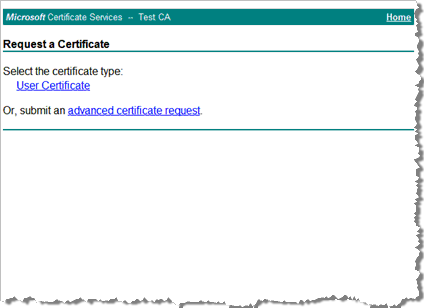
Click Request a certificate.
-
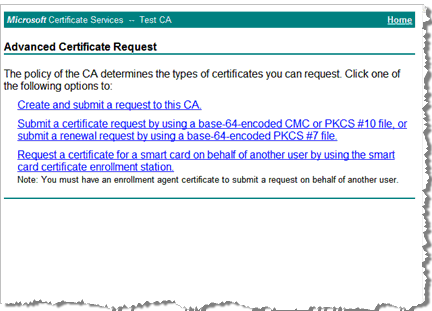
Click Advanced certificate request.
-
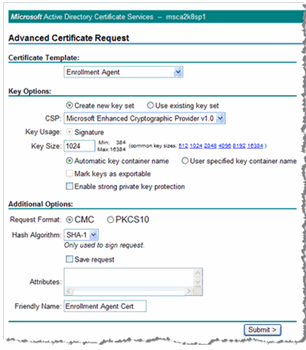
Click Create and submit a request to this CA to display the Advanced Certificate Request page again.
-
In the Certificate Template drop-down list, select Enrollment Agent.
-
In the Key Size text box, enter the appropriate size or click the appropriate size in the common key sizes adjacent to the text box.
Select the option, Automatic key container name (as illustrated on this page).
-
Enter a name in the Friendly Name text box, and then click Submit.
-
When you receive the Enrollment Agent certificate, import the certificate on your personal computer certificate store (make sure you use the personal computer store instead of the user personal store).
Adding the Microsoft CA
Make sure that you meet the prerequisites, and then perform the following steps in this section.
-
Log on to the Operator Portal, and go to the Repositories Management page.
-
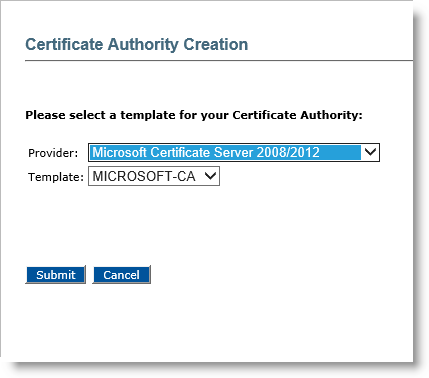
Click Add Certificate Authority.
-
In the Provider drop-down list, select Microsoft Certificate Server 2008/2012.
-
the Template drop-down list, select the appropriate template.
-
Click Submit to display the Certificate Authority Creation page again.
-
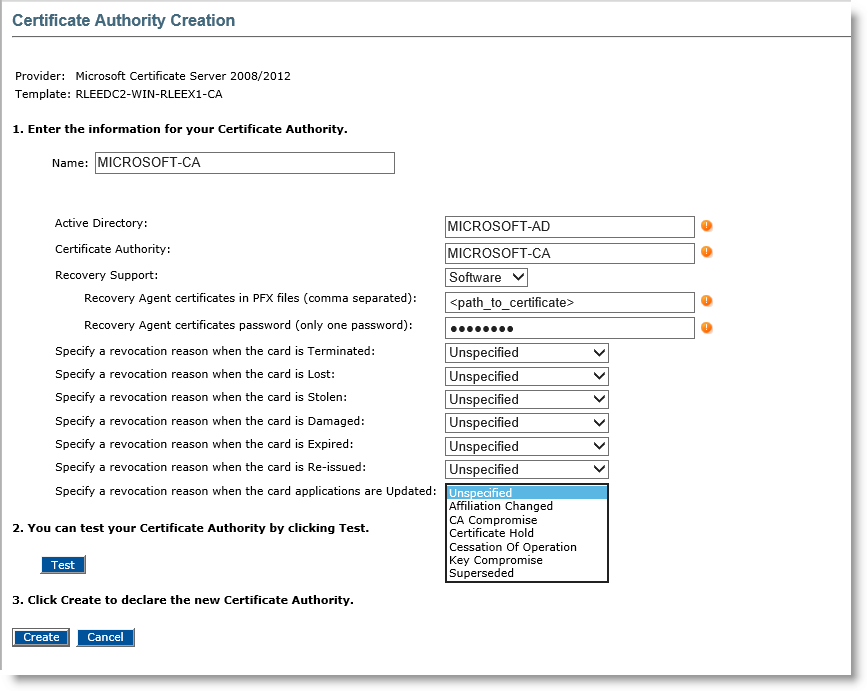
Name—Enter a valid, unique name for the CA within ActivID CMS.
-
Active Directory and Certificate Authority are informative and can't be updated.
-
Recovery support—Select Software,Hardware or No from the list.
-
If you select No, then certificate recovery will not be supported.
-
If you select Software, then enter the .pfx file path for each recovery agent. You can list several agents in a comma separated list.
Enter the password in the Recovery Agent certificates password text box.
Note: If you use several agents, all pfx files MUST use the same password.
-
If you select Hardware, then enter the recovery agent HSM key labels using comma separators.
Enter the recovery agent’s public certificates (.cer files) using comma separators.
-
-
Optionally, you can specify a revocation reason which is going to be sent to the CA when performing one of the specified operations:
-
Device is Terminated,
-
Device is Lost,
-
Device is Stolen,
-
Device is Damaged,
-
Device is Expired,
-
Device is Re-issued,
-
Device Applications are Updated
-
-
The possible revocation reasons are:
-
Unspecified,
-
Affiliation Changed,
-
CA Compromise,
-
Certificate Hold,
-
Cessation of Operation,
-
Key Compromise,
-
Superseded.
-
-
-
Click Test. The connectivity check results are displayed in the Test Report box
-
Click Create. A confirmation page is displayed. For more information, refer to Configuring a PKI Application Using a Microsoft CA.
Enabling Key Escrow/Recovery with a Microsoft CA
Make sure that you meet the prerequisites listed here, and then complete the steps listed in the following section.
-
The ActivID CMS server is connected to a CA (refer to Procedures for Configuring Connections to Certificate Authorities).
-
The ActivID CMS User has an enrollment certificate and is assigned CA level rights to manage certificates.
-
If you plan to use ActivID CMS to Escrow and recover RSA keys with a Microsoft CA, then install ActivID CMS on a Windows Server (Enterprise Edition) machine. The CA must be a Microsoft Windows 2016, 2019, or 2022 CA.
-
If you plan to use ActivID CMS to Recover RSA keys with a Microsoft CA, then install ActivID CMS on a Windows Server machine and update the definition of the connection in ActivID CMS to provide Recovery Agent credentials. For more information, refer to Configuring ActivID Credential Management System for Key Recovery.
Adding the Key Recovery Agent Certificate Template
-
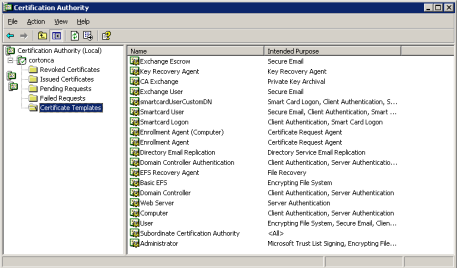
On the Microsoft CA machine, from the Start menu, click Programs, point to Administrative Tools, and then click Certification Authority. The Certification Authority window is displayed.
-
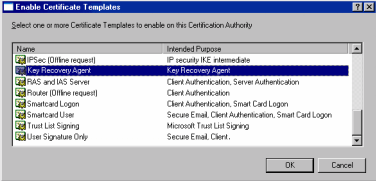
In the console tree, expand Certification Authority, right-click Certificate Templates, click New, and then click Certificate Template to Issue. The Enable Certificate Templates window is displayed.
-
Select the Key Recovery Agent template, and then click OK.
-
In the certificate templates, right-click and click Manage.
-
A new Manage templates window is opened. In the Details pane, right-click the Key Recovery Agent certificate template, and then click Properties.
-
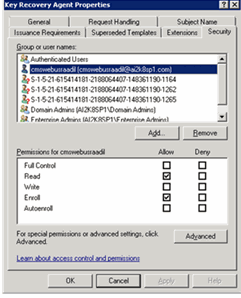
In the Key Recovery Agent Properties window, select the Security tab.
-
In the Group or user names list, select the CMS User.
Note: If the correct ActivID CMS user does not appear in the list, see Setting Permissions for the CMS Server Service Account for information on how to add the ActivID CMS User. -
In the Permissions for CMS User box, in the Allow column, select the Read and Enroll options, and then click OK.
-
Select the Issuance Requirements tab.
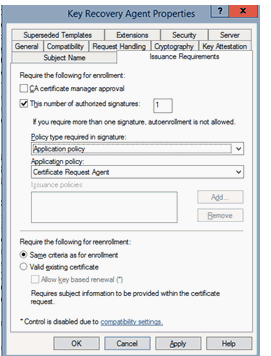 Important: Clear the CA certificate manager approval option—if needed.
 -
Select the This number of authorized signatures option and enter 1 in the adjacent text box.
-
Select Policy type requirement as Application Policy and Application Policy: Certificate Request.
-
Click Apply.
Requesting the Key Recovery Agent Certificate
-
Connect to Microsoft Certificate Services. You will be asked for a user name and password if you are not already logged on to the CA server domain. This displays the Microsoft Certificate Services Welcome page.
Note: Log on using the ActivID CMS Server User credentials.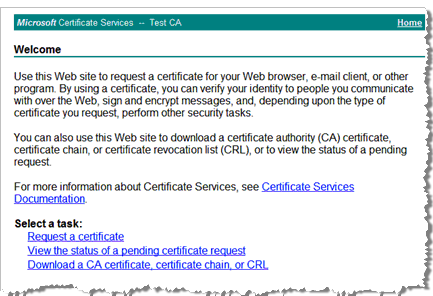
-
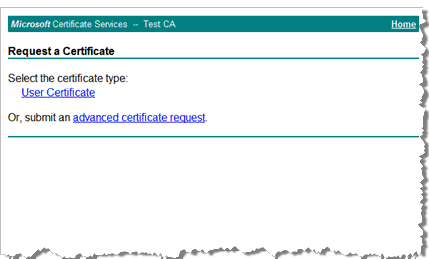
Click Request a certificate.
-
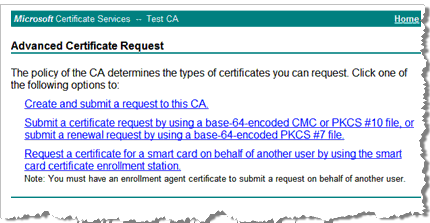
Click advanced certificate request.
-
Click Create and submit a request to this CA.
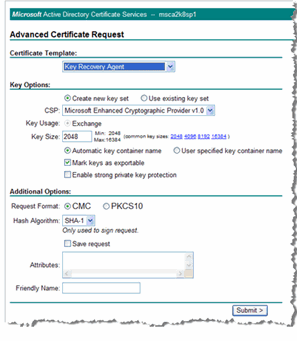
-
Certificate Template—In the drop-down list, select Key Recovery Agent.
-
Key Size—Enter the appropriate size, or click the appropriate size in the common key sizes adjacent to the text box.
-
Select the Mark keys as exportable option.
Important: Leave the Friendly Name box blank. The Key Recovery Agent certificate MUST NOT have a friendly name. -
Click Submit.
-
Connect to ActivID CMS, and open the Repositories Management page.
-
In the Certificate Authorities section, locate the CA you want to update, and then click Update. The Certificate Authority Update page is displayed.
-
Name—Enter a valid, unique name for the CA within ActivID CMS. If Active Directory and the CA are installed on the same host system, then the information in the Active Directory and Certificate Authority boxes should be the same.
-
Recovery support—Select either the Yes or No option. If you select Yes, then enter the .pfx file path in the Recovery Agent box and type the password in the Recovery Agent’s password text box.
-
Click Test to check the connectivity result, which will be displayed in Test Report box.
-
Click Update. A confirmation message is displayed.
For more information, refer to Configuring a PKI Application Using a Microsoft CA.
Enabling Key Archiving with a Microsoft CA
Before you can enable key archiving with a Microsoft CA, you must be sure that key escrow and recovery is enabled.
-
On the Microsoft CA machine, from the Start menu, point to Programs, click Administrative Tools, and then click Certification. The Certification Authority window is displayed.
-
In the console tree, expand Certification Authority, right-click the CA you want to enable for key archiving, and then click Properties.
-
In the Properties window, select the Recovery Agents tab, and then select the Archive the key option.
-
Click Add and select the required Key Recovery Agent certificate.
This adds the recovery agent(s) to the Key recovery agent certificates list.
-
Click OK.
Automating the Deployment of a Microsoft CertControl Component
To issue certificates from a Microsoft CA, the ActivID CMS Client must be installed on the client workstation. The browser uses this program to allow web-based certificate enrollments and to submit PKCS #10-compliant certificate requests.
When the ActivID CMS Client receives the requested certificate, it stores the certificate in the local certificate store for the ActivID CMS User. If the program is not present on the workstation during device issuance, then ActivID CMS proposes to install it when it is needed.
-
On the system where the Microsoft CA is installed, locate the following directory:
certcontrol in windows_dir\system32\certsrv
Where windows_dir refers to the directory containing the Windows files (for example, C:\WINNT).
-
Copy the certcontrol directory to the system hosting the ActivID CMS servers into the following directory:
cms_install_dir\aims.war\data
Where cms_install_dir refers to the installation directory of ActivID CMS (by default, C:\Program Files (x86)\HID Global\Credential Management System).
Important: The cms_portal directory, used in previous versions of ActivID CMS, no longer exists. With the migration to WildFly in ActivID CMS 6.0, that directory is now called aims.war. -
Restart the ActivID CMS server(s).


