Configure OCSP Request Parameters
This section describes how to configure Validation Extension options for making OCSP requests.
To configure OCSP request parameters, complete the following steps:
-
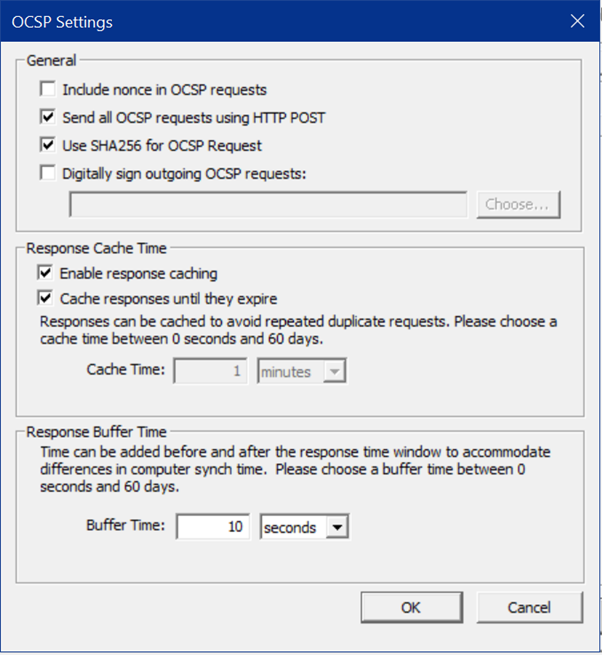
Run the Management Console (refer to Section Using the Management Console), select the OCSP tab, and click Advanced.
-
Check Include nonce in OCSP requests to include a nonce in each OCSP request. See Section Support for OCSP Requests and Responses.
-
Check Send all OCSP requests using HTTP POST if you want Validation Extension to use only the HTTP POST method when sending OCSP requests. See Section Support for OCSP Requests and Responses.
-
Check Use SHA256 for OCSP Request if you want Validation Extension to use SHA256 algorithm while sending OCSP requests. See Section Support for OCSP Requests and Responses.
Note: By default, OCSP requests are sent using SHA1.Note: If SHA256 is selected for the OCSP request, verify that the Validation Authority is also configured to use SHA256 for the OCSP response data (refer to Configuring the Keystore). Then, regenerate the proofs and update the Validation Responder accordingly. -
Check Digitally sign outgoing OCSP requests if you know that one or more of your OCSP responders requires OCSP requests to be digitally signed. See Section Support for OCSP Requests and Responses.
If you choose to digitally sign requests, the Management Console prompts you to select a digital certificate from the Certificate store.
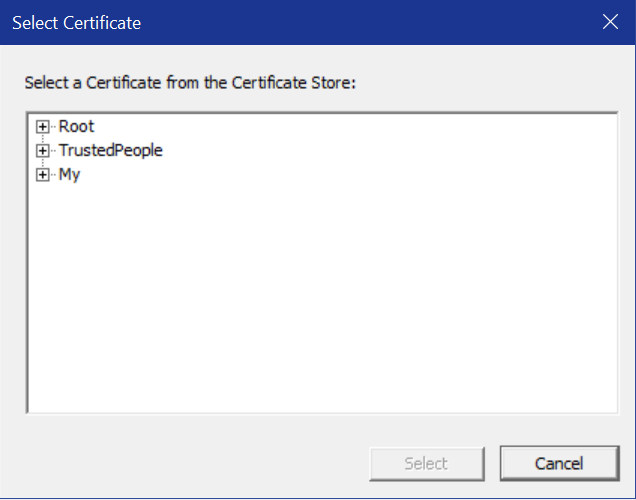
Select the certificate that you wish to use for signing from the list, then click Select to make the choice and return to the General tab.
Note:-
You must hold the private key that corresponds to a certificate in order to use the certificate for request signing. Contact your system administrator if you need assistance in obtaining the certificate and corresponding private key.
-
You may not choose a certificate that requires strong private key protection.
Note: If you want to change the existing signing certificate after selecting the required certificate from the certificate store, then you need to restart the Validation Client Service. -
-
Click Apply to save the changes.


