Procedure 4: Configure OCSP Request Logging
You can enable or disable logging of OCSP requests made to the Validation Responder Appliance. The information in this log can be useful in monitoring Validation Responder Appliance operations.
OCSP request logs are similar in format to web server access logs. It is best to enable this logging function. If you want to create an OCSP Log Signing Certificate with a Certificate Authority, then see section Task 2: Create Certificate Request for OCSP Request Log Signing.
Task 1: Initial Request Logging Configuration
-
In the Responder Software section of the navigation bar, click Request Logging.
-
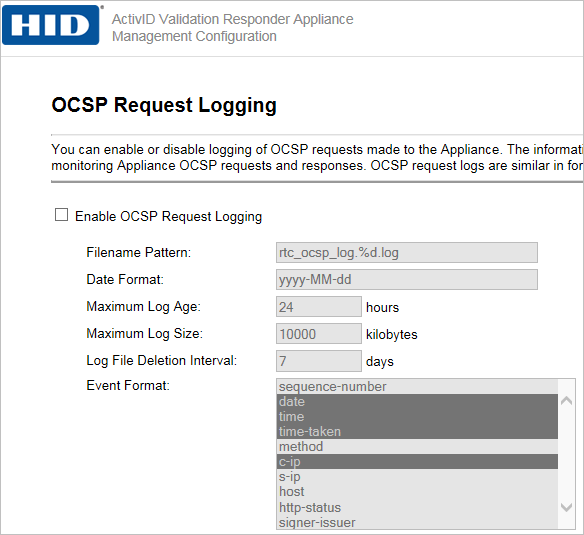
Select the Enable OCSP Request Logging option, and then specify the OCSP request logging options, as described next.
-
Maximum Log Age—Specifies the maximum amount of time that a log file remains open (in hours). The default is 24 hours. The Validation Responder Appliance opens a new log file at the end of the maximum log age time.
-
Maximum Log Size—Specifies the maximum size of the log file.
-
Log File Deletion Interval—The Validation Responder Appliance periodically deletes OCSP request log files to prevent its hard drive from becoming full. You can specify how long the Validation Responder Appliance waits to delete a log file by specifying an interval, in days, after which a log file should be deleted. The default log deletion interval is seven days.
-
Event Format—The information to be logged in the OCSP request log file is specified as a series of fields, each of which is described below. By default, the following fields are configured: date, time, time-taken, c-ip, issuer-name, serial, and response-status. Select or deselect fields from the list provided. For details, see Event Format Options.
-
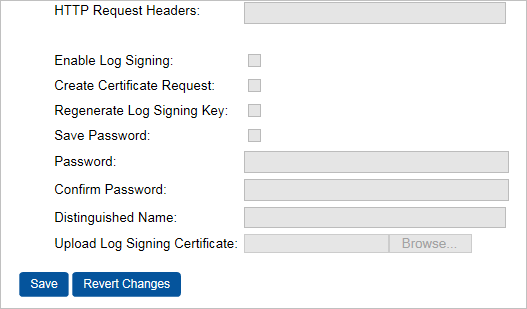
HTTP Request Headers—Enter appropriate parameters.
-
Enable Log Signing—The information in the OCSP request log can be digitally signed by the Validation Responder Appliance. If this is the first time you are enabling log signing, please make sure to select the Regenerate Log Signing Key option and enter and confirm a key store password of your choice.
-
Create Certificate Request—Select this option and then see section Task 2: Create Certificate Request for OCSP Request Log Signing.
-
Regenerate Log Signing Key—When the OCSP Request Log Signing is enabled, you can recreate a signing key to be used when signing the logs. If you select this option, then you must enter a Distinguished Name before you save.
Note: The OCSP request log signing keys are used only to sign OCSP request logs to certify that the logs have not been altered by another party. This process is unrelated to the cryptographic operations involved in certificate revocation status checking.
-
Distinguished Name—Enter a DN.
-
Upload Log Signing Certificate—Select this option to upload an existing certificate.
-
-
Click Save.
Event Format Options
The information to be logged in the OCSP request log file is specified as a series of fields, each of which is described below. By default, the following fields are configured: date, time, time-taken, c-ip, issuer-name, serial, and response-status. Select or deselect fields from the list provided.
-
Sequence-number—Specifies a unique number for each OCSP event, beginning with 1, for use in detecting OCSP request log tampering. The size of this field is variable.
-
Date—Specifies the date on which the transaction was completed, in UTC. The size of this field is 10 characters.
-
Time—Specifies the time at which the transaction was completed, in UTC. The size of this field is 8 characters.
-
time-taken—Specifies the time, in milliseconds, taken to complete the transaction. The size of this field is variable.
-
Method—Specifies the HTTP request method, GET or POST. The size of this field is up to 4 characters.
-
c-ip—Specifies the IP address of the client making the request. The size of this field is up to 15 characters
-
s-ip—Specifies the IP address of the server handling the request. The size of this field is up to 15 characters.
-
Host—Specifies the value of the HTTP Host header in the request. The size of this field is variable.
-
signer-issuer—Specifies the distinguished name of the issuer of the certificate used to sign the request. The size of this field is variable.
-
signer-serial—Specifies the serial number of the certificate used to sign the request. The size of this field is variable.
-
signer-name—Specifies the subject name from the certificate used to sign the OCSP request. The size of this field is variable.
-
http-status—Specifies the HTTP status code returned. The size of this field is 3 characters.
-
cert-count—Specifies the number of certificates whose status was queried in the request. The size of this field is variable but is typically 1 character.
-
issuer-name—Specifies the distinguished name of the requested issuer, or the hex-encoded hash of the distinguished name if the issuer is not known. The size of this field is variable.
-
issuer-key—Specifies the hash of the requested issuer's public key. The size of this field is 40 characters.
-
Serial—Specifies the requested serial number. The size of this field is variable.
-
Nonce—Specifies whether a nonce was present in the request (1) or not (0). The size of this field is 1 character.
-
relay-url—Specifies the URL of the server to which the request was relayed (omitted if the request was serviced locally). The size of this field is variable.
-
this-update—Specifies the time at which the status of the certificate was known to be correct. The size of this field is 19 characters.
-
next-update—Specifies the time at or before which newer information about the status of the certificate will be available. The size of this field is 19 characters.
-
response-status—Specifies the contents of the responseStatus code in the response. The size of this field is 1 character.
-
response-type—Specifies the type of OCSP response returned, if the responseStatus was “successful”. If the responseStatus is other than “successful”, then the field is omitted. The size of this field is 20 characters.
-
cert-status—If the responseStatus is successful, then this specifies the contents of the certStatus code in the response. If the responseStatus is other than successful, then the field is omitted. The size of this field is 1 character.
-
Request—Specifies the full base-64 encoded OCSP request. The size of this field is variable.
-
Response—Specifies the full base-64 encoded OCSP response. The size of this field is variable.
Task 2: Create Certificate Request for OCSP Request Log Signing
-
In the Responder Software section of the navigation bar, click Request Logging.
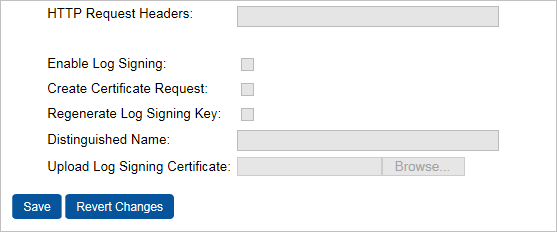
At the bottom of the OCSP Request Logging page, you can create a certificate request that can be copied and pasted to a file. Then, you can send it to a CA to create an OCSP Log Signing Certificate.
When an OCSP Log Signing Certificate has been created, you can upload it to the Validation Responder Appliance.
-
Select the Enable Log Signing and Create Certificate Request options.
Regenerate Log Signing Key: If this is the first time you are enabling log signing, then please make sure to select this option and enter and confirm a key store password of your choice.
-
Enter a Distinguished Name.
-
Click Save.
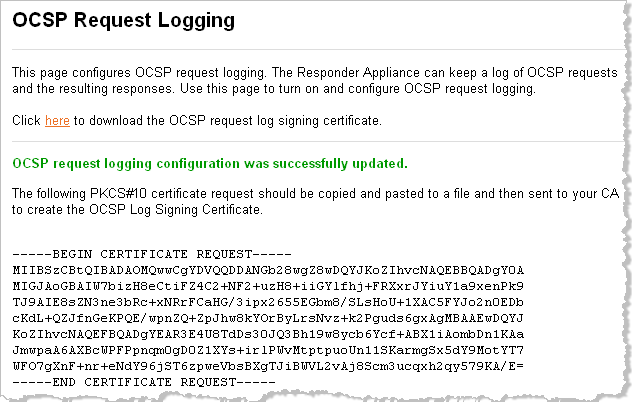
The page will reload and a PKCS#10 certificate request will appear at the top of the page, similar the following example.
-
Copy and paste the entire certificate request (including the “BEGIN” and “END” lines) for submission to a CA.
-
To update the OCSP Request Log Signing Certificate, click Browse, and then select the file from your local directory.
-
Click Save.
Task 3: Save OCSP Request Logs
To make use of the information contained in OCSP request logs, copy the logs to another server.
Option 1: From the Validation Responder Management Console, click View Responder Logs.
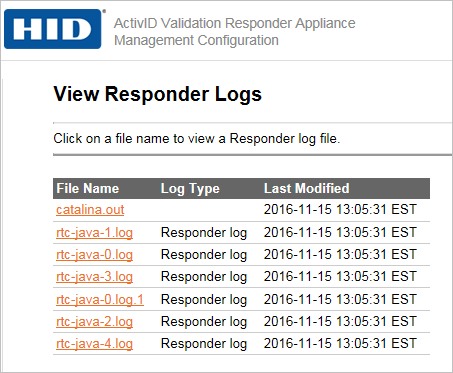
In the File Name column, click a log link. When the log is displayed in your browser, select the File menu and then save the txt file.
Option 2: Use Secure Copy Protocol (SCP). If you use SCP to copy the logs, then the following information will help you to identify the logs to copy:
-
The location of OCSP request logs is /var/log/ocsp.
-
The logreader user on the Validation Responder is used when logging in via SCP.
-
The default pattern for the name of the log files is rtc_ocsp_log*.
You can use any SCP client to securely copy the files from the Validation Responder to a directory on another server. An SCP client is part of the OpenSSL distribution (Linux) or the PuTTY distribution (Windows).
-
On your local system, open a command window and change to the directory into which the OCSP Request Logs are to be copied.
-
Enter a command in the following format.
Linux:
scp logreader@appliance-name:/var/log/ocsp/*
PuTTY:
pscp logreader@appliance-name:/var/log/ocsp/*
-
Enter the Validation Responder logreader password when prompted.


