Quick Start
Contents of the Validation Responder Appliance Distribution
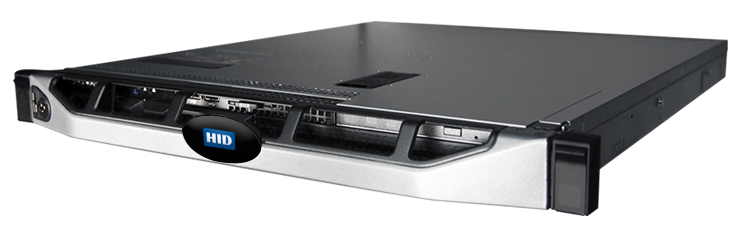
Check the contents of the shipment. If anything is missing, then please contact your sales representative. Your package should include the following items:
| Shipped with the Responder Appliance | Available from the Management Console |
|---|---|
|
|
Meet the Prerequisites:
Before initial configuration, you must have available the following prerequisites information and peripherals:
-
A hostname for the Validation Responder Appliance
-
Your network domain name
-
Network configuration type: DHCP or static
-
OCSP Response List URLs
-
1U rack space, power and network connectivity
-
Terminal display, keyboard and mouse with USB connectors (PS/2 or USB keyboard)
-
Monitor with a VGA connector
-
Ethernet cable
Additional requirements for static networking:
-
DNS servers’ IP addresses
-
Validation Responder Appliance IP address
-
Subnet mask Default gateway IP address
About the admin User:
-
Recommended: Prepare planned user name(s) and password(s) for additional Management Console users.
-
The initial configuration process creates an admin user.
-
The admin user creates additional users (admin and non-admin users).
Mount and Set Up the Appliance:
-
Mount the Appliance.
-
Dimensions:
-
Depth without bezel: 495.0 mm (19.5 in)
-
Depth with bezel: 551.3 mm (21.7 in)
-
Height: 42.8 mm (1.68 in)
-
Width without rack latches: 434.0 mm (17.08 in)
-
Width with rack latches: 482.4 mm (18.99 in)
-
Warning!Do not power on the appliance until all appliance connections are completed. Observe standard precautions for handling electrostatic sensitive devices.
-
-
Connect the keyboard to the USB port on the back panel.
-
Connect the monitor to the blue video connector on the back panel.
-
Connect one end of the Ethernet cable to a switch or router on your network.
-
Connect the other end of the Ethernet cable to the RJ-45 jack labeled “1” located to the right of the system status indicator (that is, to the right of the blue video connector on the back panel).
-
Connect the enclosed power cable to a power source, and then connect the other end to the Validation Responder Appliance on the back panel.
-
On the front panel briefly press the power switch (located to the left of the two USB connectors) to power on the unit. The initial configuration page is displayed on the system console.
-
Perform the following start-up configuration steps displayed on the initial configuration page after power up.
Note: After power up, the Validation Responder Appliance initial configuration page is displayed on the system console.You will perform start-up configuration steps listed below to initialize the following system settings.
-
The system root password,
-
The system logreader password used to download logs from the Validation Responder Appliance,
-
The admin account password used to log on to the web-based Validation Responder Appliance Management Console, and
-
The primary network interface.
-
Initial Configuration
|
Important: The root user is for logging on to the underlying Validation Responder Appliance operating system. It is NOT for logging in to the Management Console.
Note:
Each time you are prompted with a success message, select Ok and press Enter. |
|
Option 1: For static networking configuration, enter the IP address of your computer, select Ok and press Enter.
Option 2: To configure DHCP networking:
-
Select Configure DHCP networking, select Ok and press Enter.
-
At the success message, select Ok and press Enter. The IP address that the Validation Responder Appliance received will be displayed.
-
Select Ok and press Enter.
-
When you have completed configuring either static or DHCP networking, you will be prompted to confirm your entries. Select Yes to configure the primary network interface with these settings or No to return and modify your selections.
-
When you select Yes and click Enter, you will see a screen confirming that setup has been completed.
-
Select Ok and press Enter.
-
Launch the Validation Responder Management Console to view documents and configure other settings.
Note: You will configure the system date and time, response list sources, response list polling schedule and other settings from the Management Console. For complete details, refer to Configure the Validation Responder Appliance.
Optional Initial Configuration
Optional SSH Connections: By default, SSH connections are disabled. If you want to connect to the Validation Responder Appliance via SSH, then perform the following additional steps:
-
At the appliance console screen, press Alt+F2 to get a shell prompt.
-
Login as root with the password that you previously set.
-
Invoke a vi editor: vi /etc/ssh/sshd_config
-
Change the value of PermitRootLogin from "no" to "yes".
-
Restart the SSHD service: /etc/init.d/ssh restart.
Troubleshooting
You can use the Validation Responder Appliance console configuration interface to restore the Validation Responder Appliance to factory defaults.
System Console Post-Configuration Updates
To make updates to the initial configuration settings, access the system console (if not visible on the appliance monitor, use Alt+F1 to access it). Log in as an admin. From the system console, you can perform the following procedures:
-
Configure the primary network interface
-
Configure shared network settings
-
View current network configuration
-
Change the logreader password
-
View the Responder Appliance version
-
Reset the Responder Appliance to factory defaults (see the WARNING below under Troubleshooting)
-
Configure the banner file
Select any option, select Ok and press Enter. Follow the prompts.
Access the Management Console to View Technical Documentation
-
Open a web browser and connect to the Validation Responder Appliance Management Console using the IP address assigned during initial configuration: https://<responder-appliance-IP-address>:3605.
-
Enter the initial user name (admin) and password.
-
Use the links at the top of the Management Console to change your password, view documentation, or log out of the Management Console.
-
Create at least one new admin user account immediately for an additional administrator.
Note: If you are currently logged on as an admin, then you cannot delete your own account. If you are logged on as an admin user, then you can delete any other account, including an admin user account, just not your own. All users can change their own user account passwords using the link on the menu bar.
Get Access to Technical Documentation Prior to Access via the Management Console
To view the Validation Responder Appliance documentation, visit our online documentation portal https://docs.hidglobal.com.


