Installing the Virtual Appliance
This section describes how to install the virtual ActivID® Validation Responder Appliance.
You must have the following information available to configure the appliance:
-
A hostname for the Validation Responder Appliance,
-
Your network domain name,
-
Network configuration type: DHCP or static, and
-
OCSP Response List URLs.
Statically configured networking requires the following additional information:
-
DNS servers IP addresses,
-
Validation Responder Appliance IP address, and
-
Subnet mask Default gateway IP address.
Security Consideration
-
The Validation Responder Appliance contains no security-sensitive information.
-
An attack on a Validation Responder Appliance could result in a denial of service to relying parties until the system breach is rectified.
-
Validation Responder Appliance virtual installations should be treated as standard, high-value servers, and they must be properly secured using security best practices.
-
Physical access control should be implemented to prevent compromise of the physical host.
Set Up the Virtual Machine
About the VM Setup Package
The ActivID Validation Responder Appliance virtual machine package is delivered as a folder named: responder-appliance-7.4.
This folder contains .ovf, .mf, .nvram, and .vmdk files. Open Virtualization Format (OVF) is a platform-independent open standard file format for packaging and distributing virtual appliances (software to be run in virtual machines).
VMware Software Requirements
-
VMware® ESXi 6.7 and greater
-
VMware vSphere client 6.7 and greater
Procedure 1: Create Virtual Appliance Using VMware ESXi
Place a copy of the responder-appliance-7.4 folder where it is accessible to the VMware vSphere client machine.
Procedure 2: Deploy the ActivID Validation Responder Appliance OVF
This section describes how to deploy ActivID Validation Responder Appliance OVF using the VMware ESXi server. If required, for additional information and explanations, refer to the formal VMware technical documentation.
-
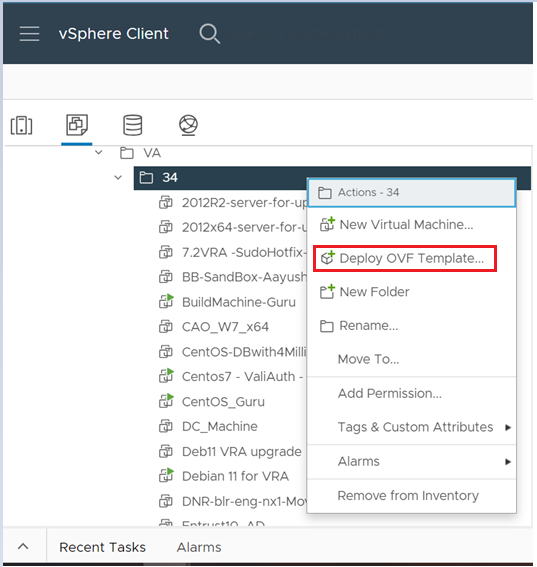
In the vSphere client, select the applicable file and then click Deploy OVF Template.
-
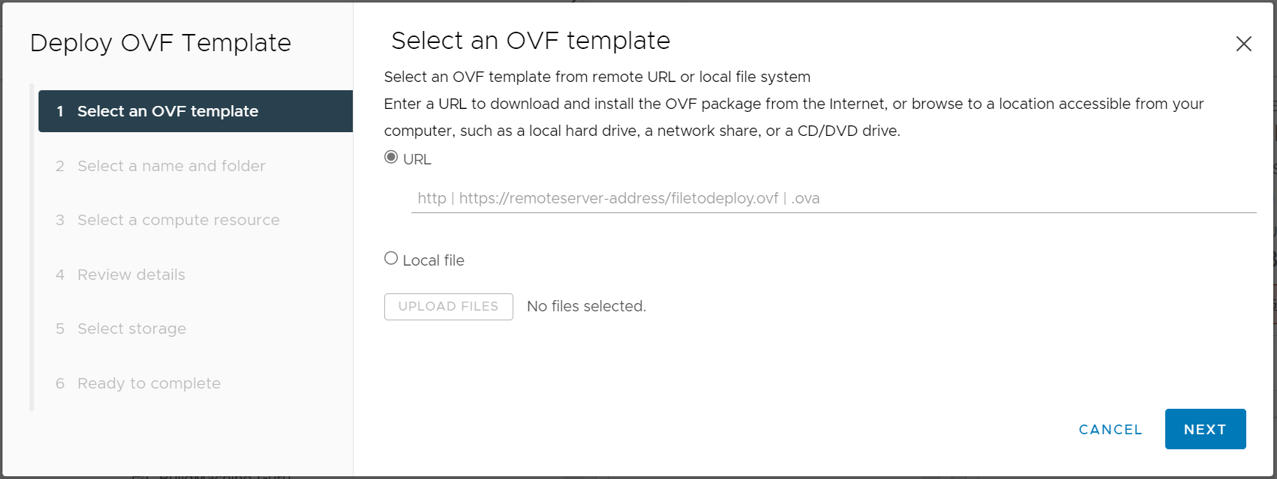
To deploy from a file, click UPLOAD FILES to locate the files, and then click Open. Click NEXT.
-
Define the name and location for the virtual machine, and then click NEXT.
Important: This name must be unique within the ESXi server inventory folder.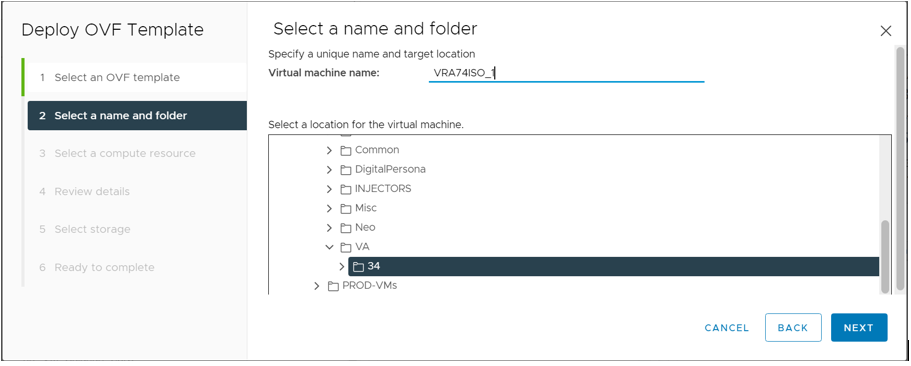
-
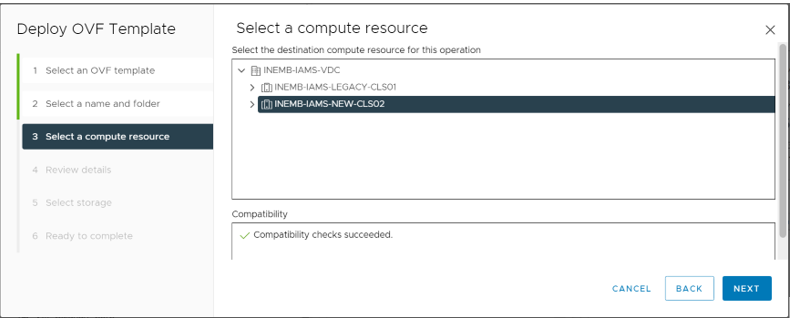
Select the resource pool within which you wish to deploy this template, and then click NEXT.
-
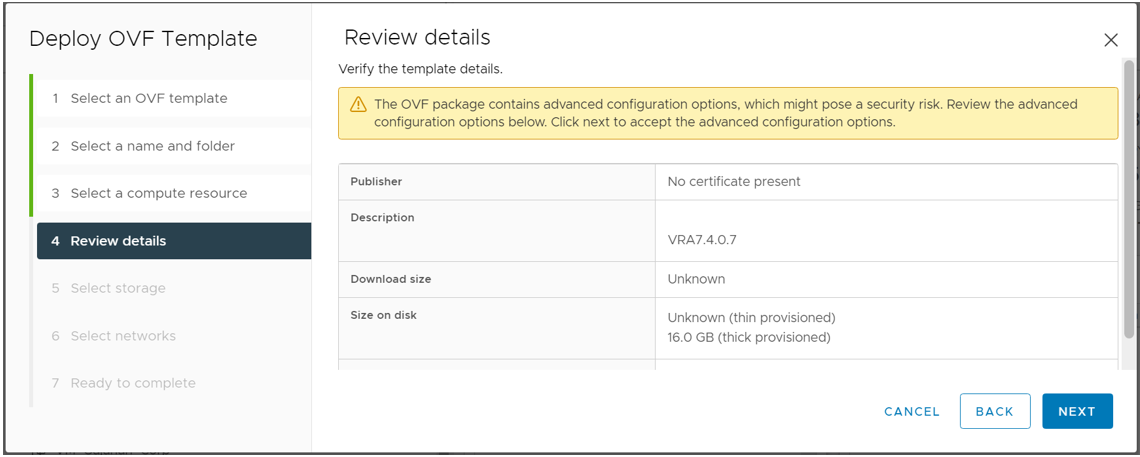
Review the template details and then click NEXT.
-
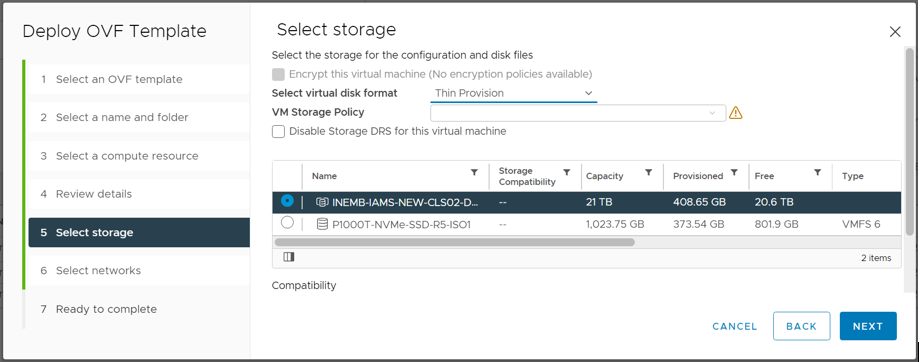
Select the store destination in which to store the VM files.
Note: The storage capacity should correspond to your specific deployment requirements.Also, select a format in which to store the virtual disks, and then click NEXT.
-
Select one of the Thick Provision options for optimum performance of Operating System (Disk 0:1).
-
Select Thin Provision to reduce immediate disk space allocation.
Note: The ASM (disk 0:0) always has a minimum of 30 GB allocated when the machine is powered on, but using the Thin option expands it from 30 to 50 GB.
-
-
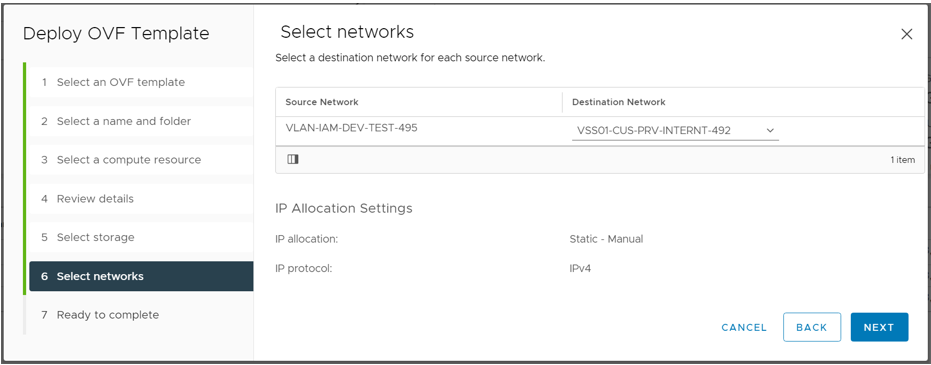
Select the network deployed template should use, and then click NEXT.
-
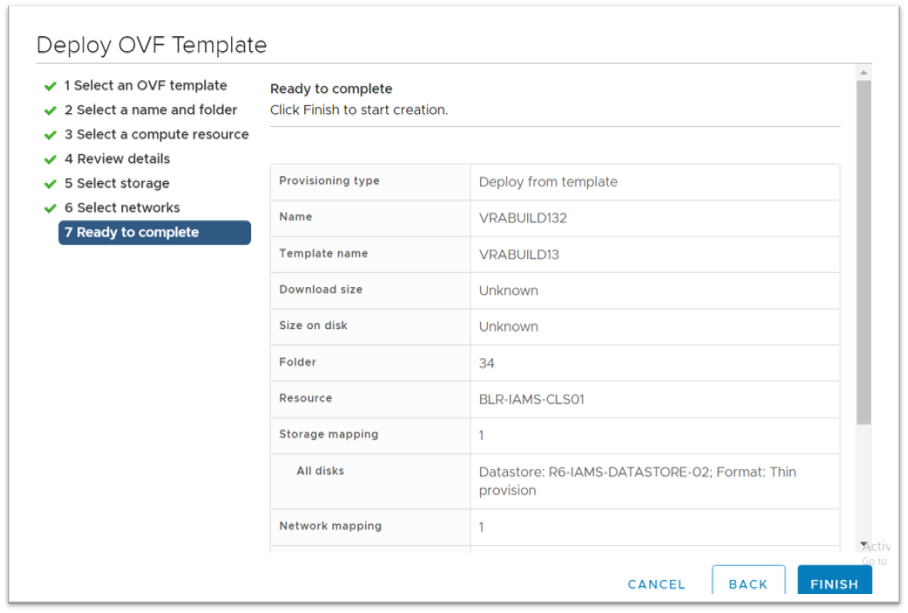
Review the Deployment settings summary in Ready to complete section and then click FINISH.
-
Make sure the status is shown as "Completed" in the Recent Tasks tab.

Procedure 3: After Powering Up the Virtual Appliance
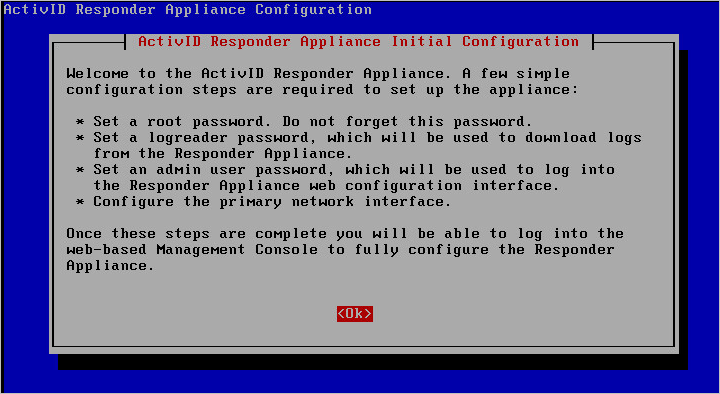
You will see the terminal console window appear when the virtual appliance is powered up.
-
Follow the instructions in section Perform Initial Configuration.
-
At the conclusion of all required configuration, when a success message is displayed, click Close.
Procedure 4: Edit the VM Settings
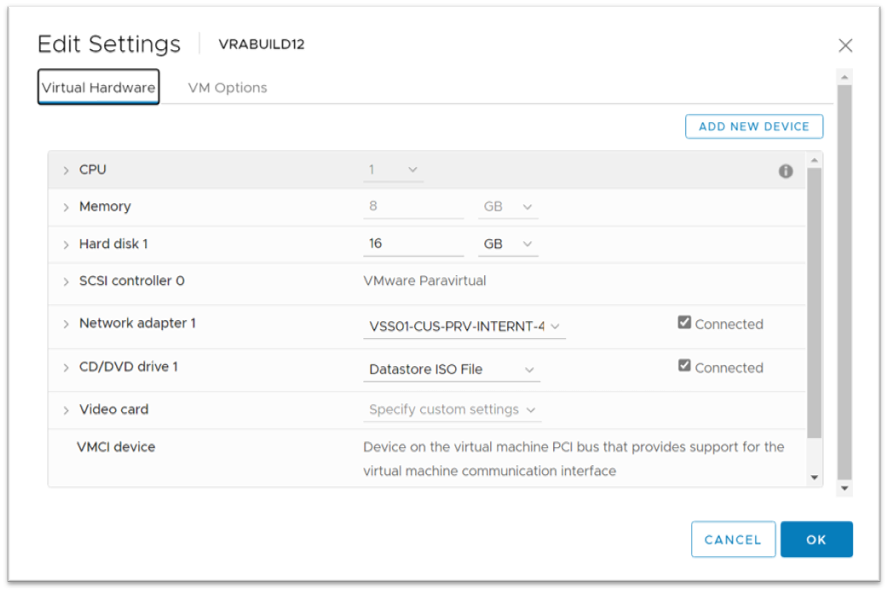
-
Select responder-appliance-7.4 from the ESXi inventory.
-
Select Edit Settings to view the properties.
-
Make sure the Boot option is set to EFI mode.
-
Edit the VM settings according to your requirements.
