Generating Self-Signed Certificates With Existing Keys
If you have a key stored on your token, you can generate corresponding self-signed certificates with it.
To generate a self-signed certificate using an existing key:
-
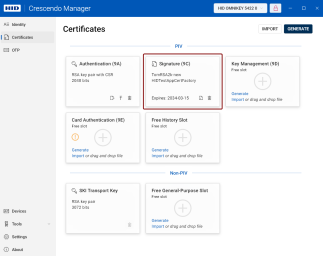
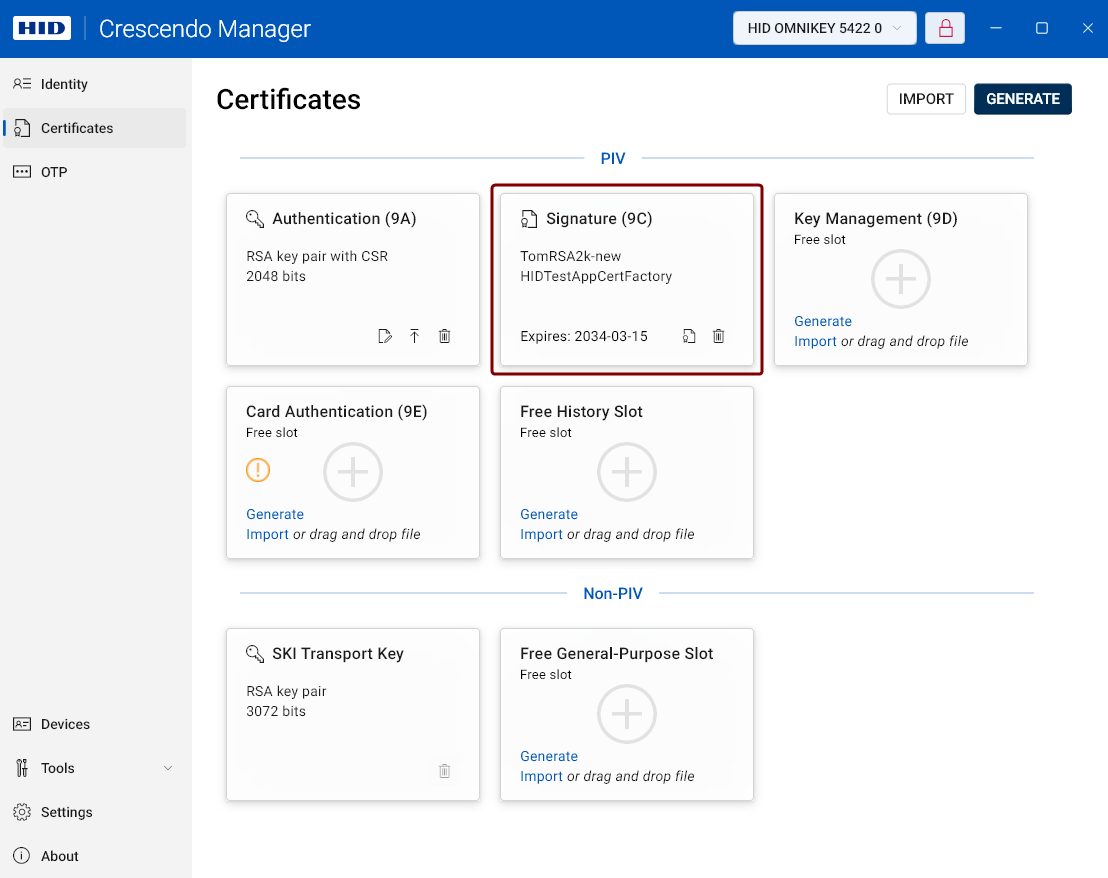
Go to the Certificates view in the left navigation pane.
-
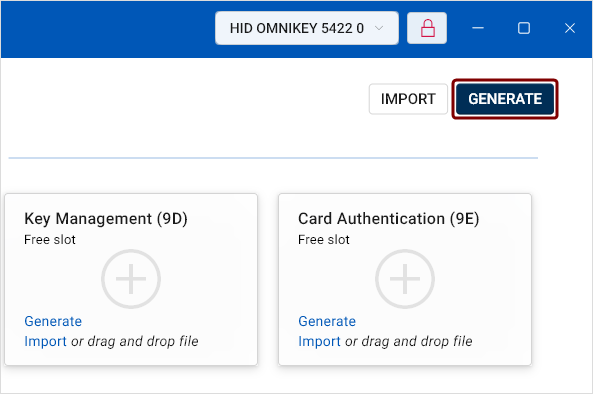
Click the Generate button in the top-right corner of the Certificates view.

-
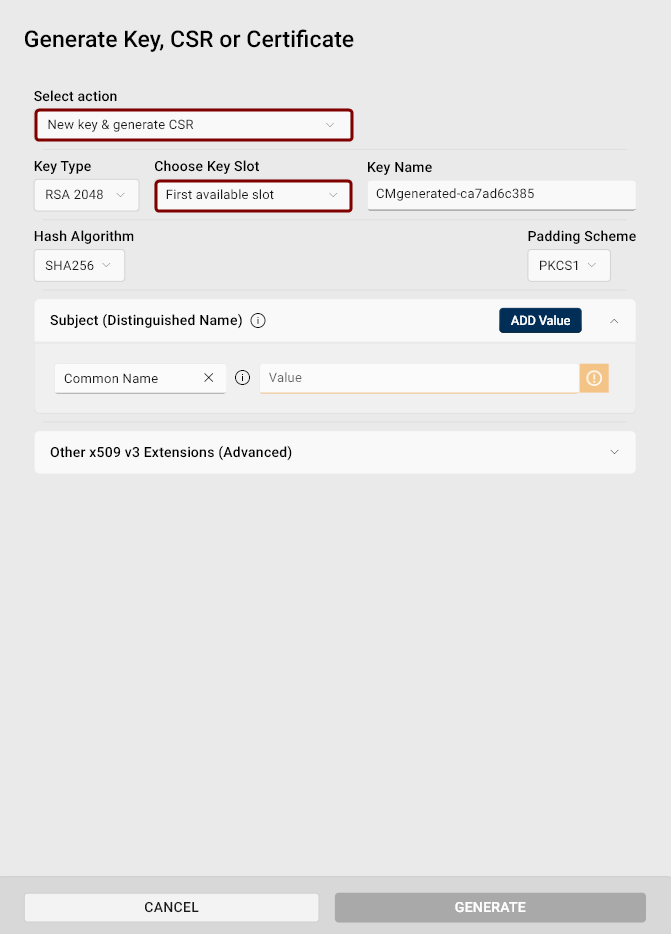
The Generate Key, CSR or Certificate dialog opens, with the New Key & generate CSR action and the First available slot pre-selected.

-
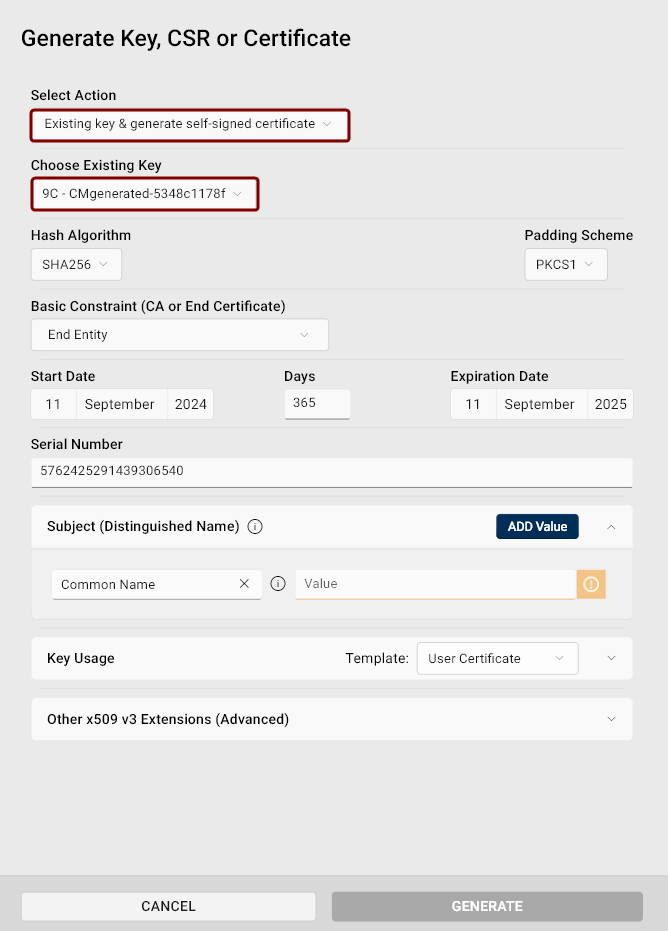
Click the Select Action drop-down and select Existing key & generate self-signed certificate and select an existing key.

-
Hash Algorithm: Select the hash algorithm used to create a digital representation (hash) of the data within the self-signed certificate. This hash is used to create a digital signature that proves the integrity and authenticity of the certificate.
 Available options:
-
SHA1
-
SHA256 (default)
-
SHA384
-
SHA512
We recommend using SHA-256 (default) or higher.
-
-
Padding Scheme: If a RSA key type is selected, you can choose the padding A method used to add extra data to a hash before creating a digital signature with an RSA key to ensure that the resulting signature is unique and resistant to certain types of cryptographic attacks. scheme.
-
PKCS1 (Public Key Cryptography Standards #1)
-
PSS (Probabilistic Signature Scheme): PSS adds randomness to the padding process, making the signature more secure against certain types of cryptographic attacks.
Important: PSS is considered more secure, but PSS-signed certificates may not be supported by older systems.
-
-
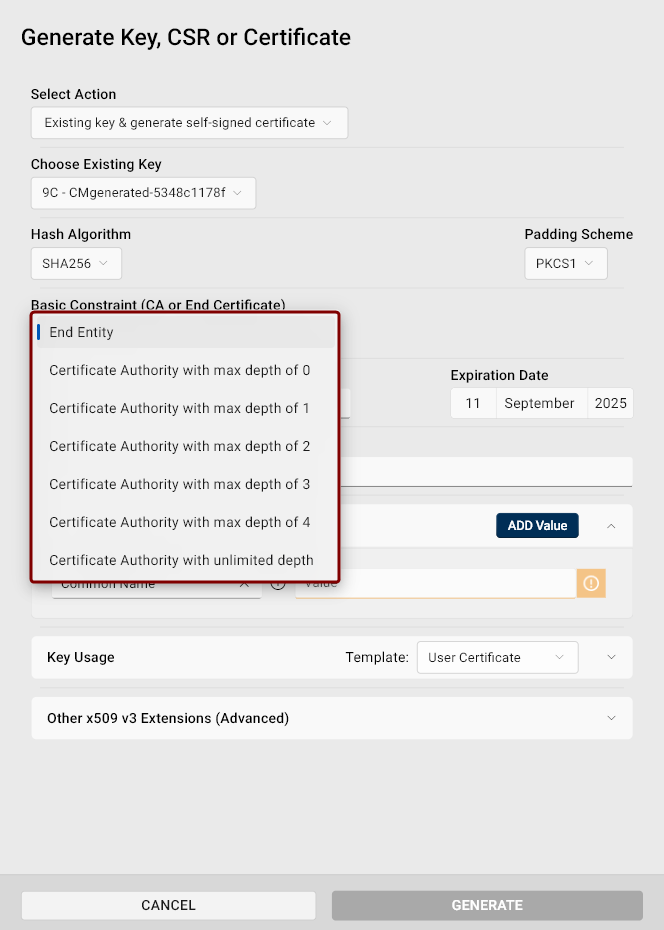
Basic Constraint (CA or End Certificate): Use this field to specify whether the certificate should be an end-entity certificate (default) or a Certificate Authority (CA) certificate.
 Available options:
-
End Entity: Issues a leaf certificate for an end user, server, or device.
-
Certificate Authority with max depth of 0: Issues a CA certificate that can only issue end-entity certificates (no CA certificates).
-
Certificate Authority with max depth of 1-4: Issues a CA certificate that can issue one to four levels of subordinate CA certificates, in addition to end-entity certificates.
-
Certificate Authority with unlimited depth: Issues a CA certificate that can issue an unlimited number of subordinate CA certificates. This setting is typically used for root CAs or higher-level CAs that need the capability to create multiple levels of CA certificates below them.
Note: If you selected a CA certificate as the basic constraint, don't forget to specify appropriate key usage (see point 11). -
-
Set the self-signed certificate validity: Use the Start Date field along with the validity period defined in days, or set the Expiration Date directly.

-
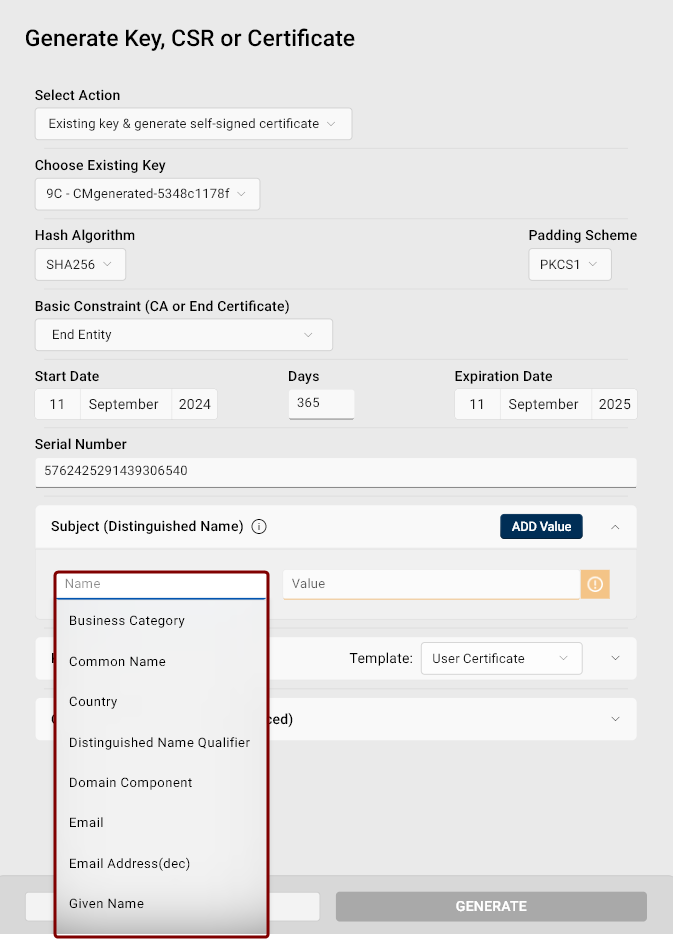
Serial Number: Enter a decimal or hexadecimal number for the certificate's serial number, or use the automatically generated value.

-
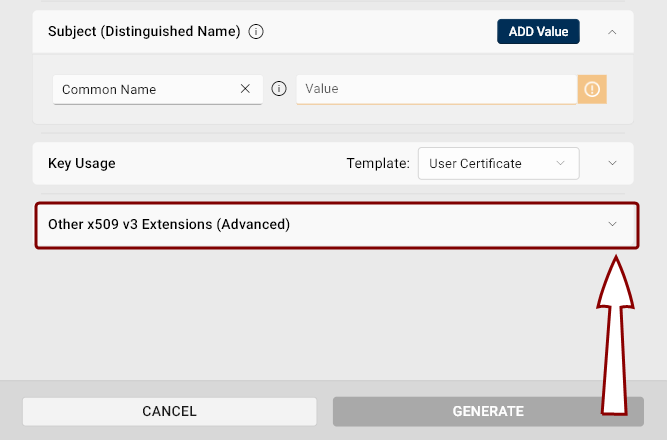
Subject (Distinguished Name): Specify at least one Subject Distinguished Name component for your self-signed certificate.
-
Common Name is selected as default, but you can delete the value by clicking the Clear icon
 and select another option from the drop-down list.
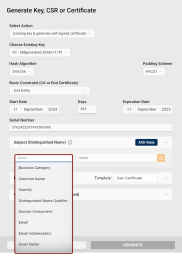
-
Alternatively, you can type the attribute's long or short name or OID directly into the field.
-
Click the Add Value button to include additional attributes of your Subject Distinguished Name in the self-signed certificate.

-
-
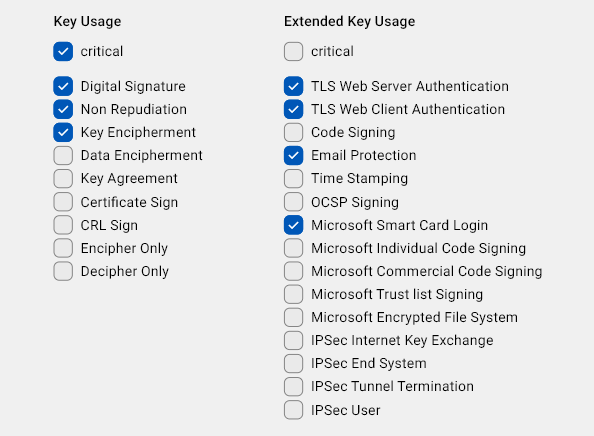
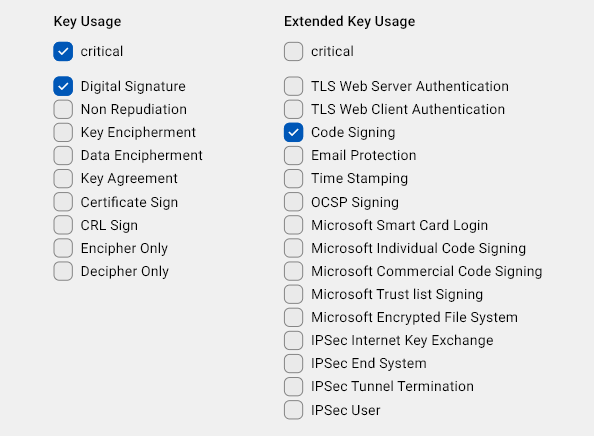
Key Usage: Use this section to specify the intended purpose of the certificate. The User Certificate template is pre-selected.

You can select a template with pre-selected options, which you can edit, or choose the empty template to define the key usage from scratch.
Click the drop-down button
 on the right do display key usage and extended key usage options.
The available templates are:
-
Certificate Authority: You can use this template as a starting point if you selected a CA certificate as the basic constraint (see point 10.)
-
User Certificate (default)
-
Empty
-
-
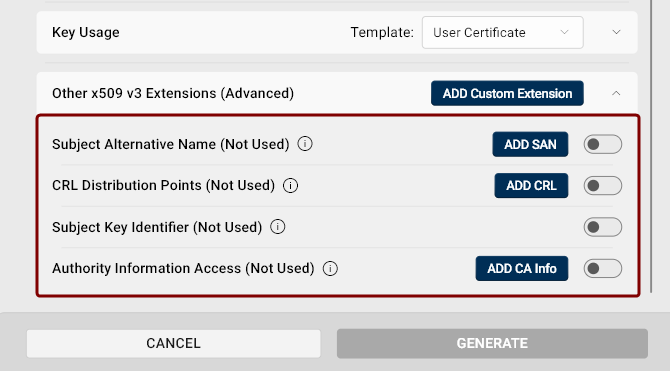
Other x509 v3 Extensions (Advanced): If you need x509 v3 extensions to be added to your certificate:
-
Click the Other x509 v3 Extensions (Advanced) drop-down button.
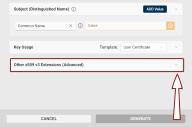
-
A list of most commonly used extensions will be displayed.

If you want to add a custom extension to your certificate, see point 16.
-
Click the toggle button
 to enable an extension in your certificate.
 -
A checkbox will appear to the left of the toggle button. If checked, the extension will be marked as critical.

-
Subject Alternative Name:
-
IP Address
-
DNS Name
-
Email
-
URI (Unique Resource Identifier)
-
UPN (User Principal Name)
Hover over the information icon to view example entries for each type.
Click the Add SAN button for additional SAN entries. The number of SANs is not limited.
-
-
CRL Distribution Points:
Specify the HTTPS or LDAP endpoints' URLs where the Certificate Revocation List (CRL) can be accessed.
Click the Add CRL button for additional CRL distribution point entries. The number of entries is not limited.
-
Subject Key Identifier
This field is used to uniquely identify the certificate. Its value is typically the SHA-1 hash of the subject's public key.
If not enabled, the correct value will be automatically filled in during generation. You may enter your own value for testing purposes.
-
Authority Information Access:
This extension specifies the locations where information about the issuing Certificate Authority (CA) certificate can be found, typically HTTP or LDAP URIs.
Select the access method to retrieve information about the CA certificate and enter the corresponding value:
-
OCSP: Specify the URI for the Online Certificate Status Protocol (OCSP) responder, which checks the revocation status of the certificate.
-
CA Issuer: Specify the URI for the issuing CA’s certificate.
-
-
-
To remove an extension, click the trash bin icon
 .
.
-
-
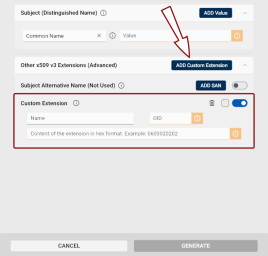
To add custom extensions to your certificate, click the Add Custom Extension button in the Other x509 v3 Extensions (Advanced) field.
-
The Custom Extension form will appear in the dialog:
-
Enter a Name for the custom extension. This value is for informational purposes only.
-
Enter the custom extension's object identifier (OID Object identifier. Globally unique identifiers standardized by the International Telecommunication Union. OIDs are represented as a series of numbers separated by dots (e.g., 2.5.29.37).) (e.g., 2.5.29.19).
-
Add the extension's content in hexadecimal format.
-
To mark an extension as critical, check the checkbox to the left of the toggle
button.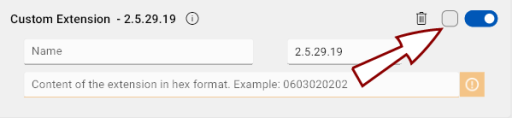
-
To remove an extension, click the trash bin icon
.
-
-
Click the Generate button.
The key with the generated certificate is now displayed in the respective slot tile.