Generating Certificate Signing Requests With Existing Keys
If you have a key stored on your token, you can generate corresponding certificate signing requests (CSRs) with it.
To generate a CSR using an existing key:
-
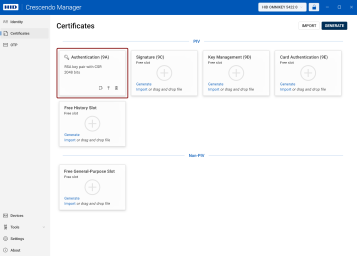
Go to the Certificates view in the left navigation pane.
-
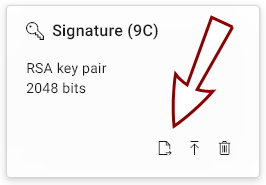
Click the Generate CSR icon
 on the slot holding the existing key.
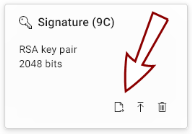
-
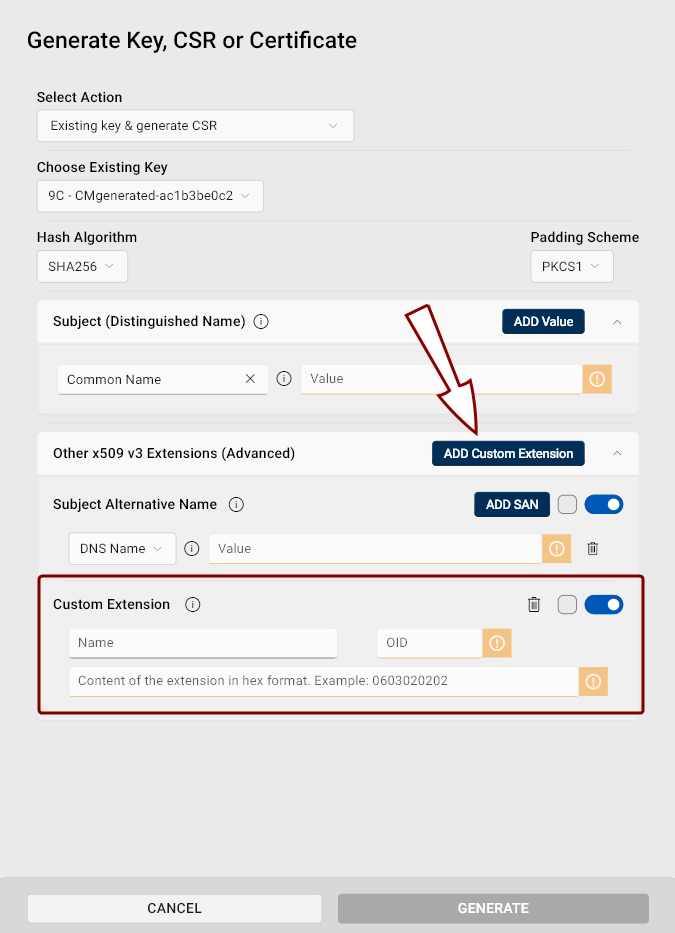
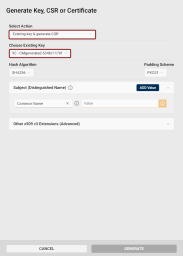
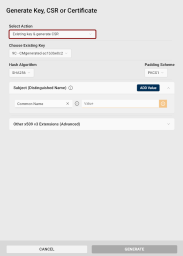
The Generate Key, CSR or Certificate dialog opens, with the Existing key & generate CSR generation action and the key stored in the respective slot pre-selected.
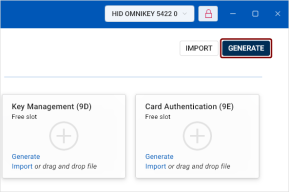
Alternatively, you can click the Generate button in the top-right corner of the Certificates view.
In the Generate dialog, select Existing Key & generate CSR from the Select action drop-down.
-
Choose Existing Key: Use this drop-down to select other than the pre-selected key to generate the CSR for.
-
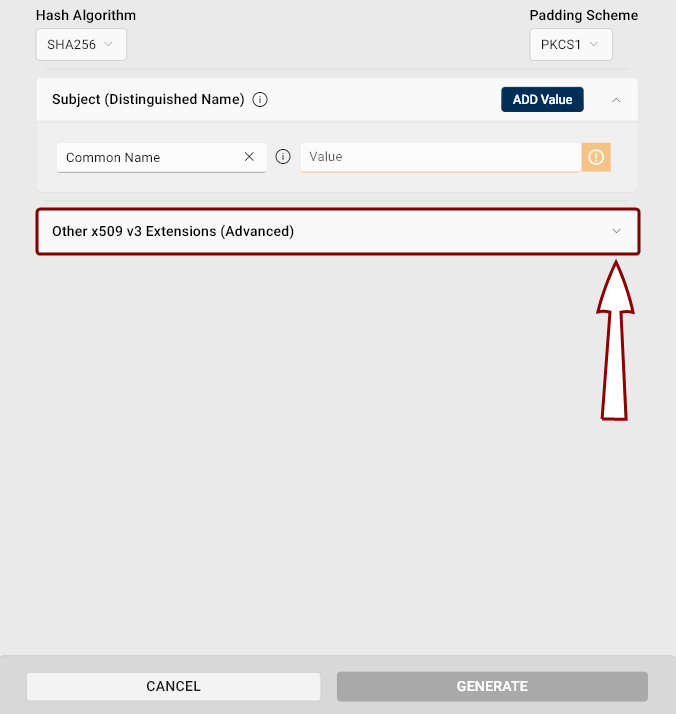
Hash Algorithm: Select the hash algorithm used to create a digital representation (hash) of the data within the CSR. This hash is used to create a digital signature that proves the integrity and authenticity of the CSR.
The available options are:
-
SHA1
-
SHA256 (default)
-
SHA384
-
SHA512
We recommend using SHA-256 (default) or higher.
-
-
Padding Scheme: If a RSA key type is selected, you can choose the padding A method used to add extra data to a hash before creating a digital signature with an RSA key to ensure that the resulting signature is unique and resistant to certain types of cryptographic attacks. scheme.
-
PKCS1 (Public Key Cryptography Standards #1)
-
PSS (Probabilistic Signature Scheme): PSS adds randomness to the padding process, making the signature more secure against certain types of cryptographic attacks.
Important: PSS is considered more secure, but PSS-signed certificates may not be supported by older systems.
-
-
Subject (Distinguished Name): Add at least one Subject Distinguished Name component for your CSR.
-
Common Name is selected as default, but you can delete the value by clicking the Clear icon
 and select another option from the drop-down list.
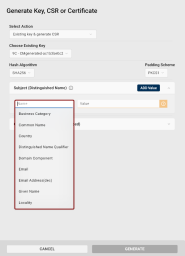
-
Alternatively, you can type the attribute's long or short name or OID directly into the field.
-
Click the Add Value button to include additional attributes of your Subject Distinguished Name in the CSR.
-
-
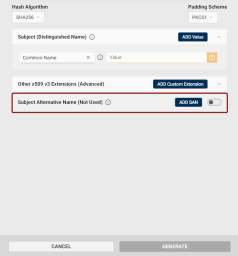
Other x509 v3 Extensions (Advanced): If you need x509 v3 extensions to be added to your CSR:
-
Click the Other x509 v3 Extensions (Advanced) dropdown button.

-
The Subject Alternative Name (SAN) extension section will be displayed.
(If you want to add a custom extension to your CSR, see point 9.)
-
Click the toggle button
 to enable SAN in your CSR.
 -
A checkbox will appear to the left of the toggle button. If checked, the extension will be marked as critical.

-
Click the Add SAN button for additional SAN entries. The number of SANs is not limited.
The available types of SANs are:
-
IP Address
-
DNS Name
-
Email
-
URI (Unique Resource Identifier)
-
UPN (User Principal Name)
Hover over the information icon to view example entries for each type.
-
-
-
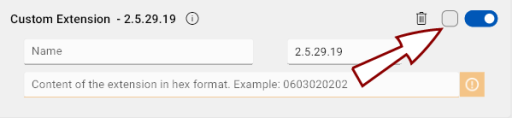
To add custom extensions to your certificate, click the Add Custom Extension button in the Other x509 v3 Extensions (Advanced) field.
-
The Custom Extension section appears in the dialog.

-
The Name field for the custom extension is for informational purposes only.
-
Enter the custom extension object identifier (OID Object identifier. Globally unique identifiers standardized by the International Telecommunication Union. OIDs are represented as a series of numbers separated by dots (e.g., 2.5.29.37).) (e.g., 2.5.29.19).
-
Add the extension content in hexadecimal format.
-
To mark an extension as critical, check the checkbox to the left of the toggle
button.
-
To remove an extension, click the trash bin icon
 .
.
-
-
Click the Generate button.
The generated CSR has been added to the key in the respective slot.