Assigning Security Officer Permissions
Within the DigitalPersona AD solution, the Security Officer, or other delegated user(s) or groups can be assigned the necessary permissions to supervise Attended Enrollment through the Attended Enrollment or HID DigitalPersona Enrollment applications.
Additionally the same or different user(s) or group(s) can be granted specific permission to:
-
Enroll and manage DigitalPersona credentials
-
Recover user passwords
-
Unlock user Windows accounts
-
Omit required credentials during Attended Enrollment
-
Import OTP token seed files
The following table lists the Windows permissions and properties which must assigned in order to enable each of the above functions:
| Permitted task | Windows permission/property |
|---|---|
|
Enroll/manage credentials |
Register/Delete Fingerprint (DigitalPersona) |
|
Recover user’s Windows password |
User Recovery (DigitalPersona) Reset Password |
|
Unlock account that is locked due to invalid DigitalPersona credentials |
Write dpLockout Time |
|
Omit required credentials |
Write dpOmitReasons |
|
Import hardware OTP token seed file |
Create dpOTPToken Objects Delete dpOTPToken Objects Write all properties |
Assigning Permissions
The following steps apply to all the available DigitalPersona permissions that can be assigned to Security Officers, except for the OTP Tokens permission, which is handled a bit differently and described Assigning the OTP Tokens Permission.
-
Launch the Active Directory Users and Computers snap-in.
-
From the View menu, select Users, Contacts, Groups, and Computers as containers and Advanced Features.
-
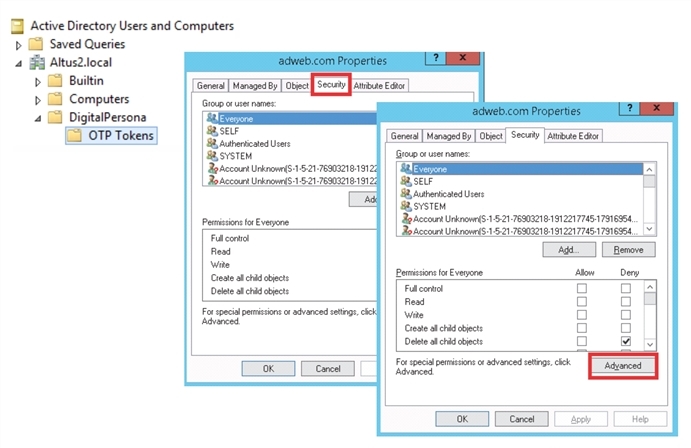
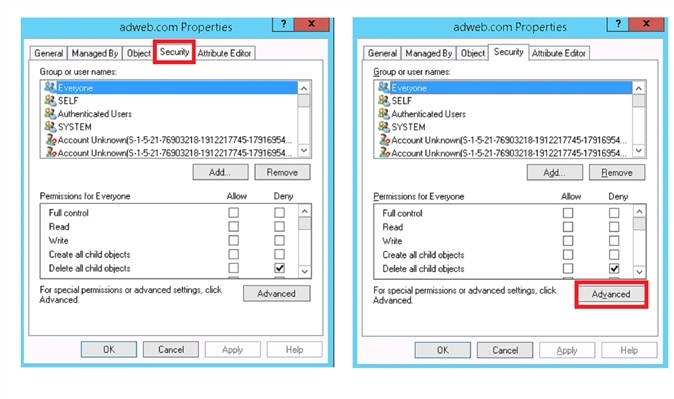
Right-click on the OU, group or user that you want to assign specific permission to and select Properties.
-
In the Properties dialog, click the Security tab.
-
Near the bottom of the dialog, click Advanced.
-
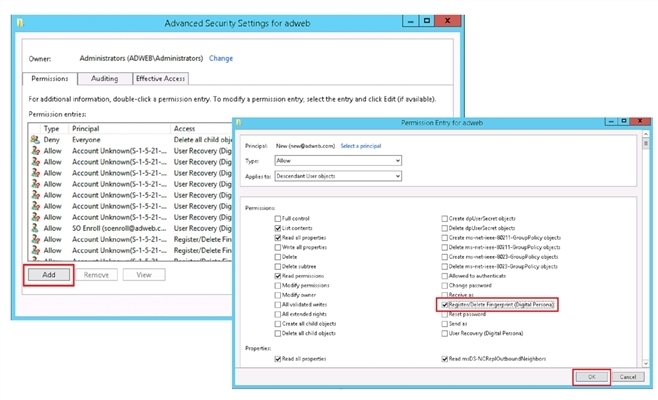
In the Advanced Security Settings dialog, click Add.
-
In the Permission Entry dialog, select a Principal, i.e. a user or group.
-
From the Applies to drop-down menu, select Descendant User Objects.
-
Select one or more of the following permission and properties that you want to assign to this Principal:
-
Register/Delete Fingerprint (DigitalPersona)
-
User Recovery (DigitalPersona) Reset Password
-
Write dpLockout Time
-
Write dpOmitReasons
-
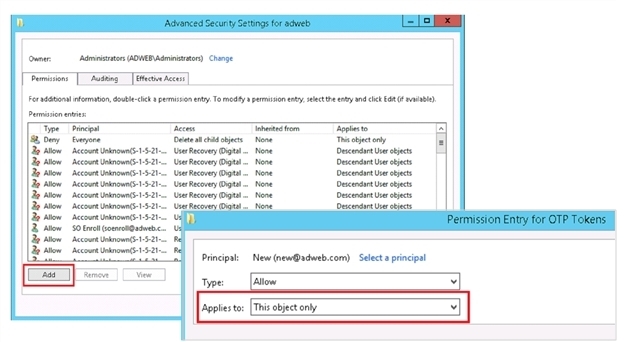
Assigning the OTP Tokens Permission
The following steps apply only to assigning the OTP Tokens permission, as is handled a bit differently those the other permissions described in this page.
-
Launch the Active Directory Users and Computers snap-in.
-
From the View menu, select Users, Contacts, Groups, and Computers as containers and Advanced Features.
-
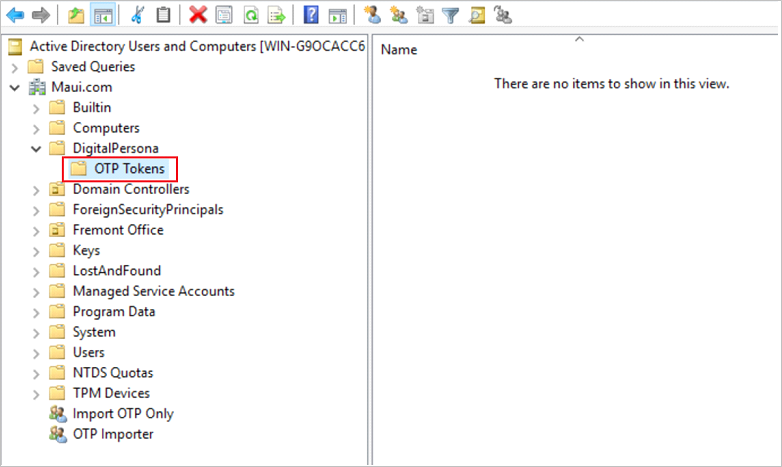
Expand the DigitalPersona node, right-click on OTP Tokens and select Properties.
-
In the Properties dialog, click the Security tab.
-
Near the bottom of the dialog, click Advanced.
-
In the Advanced Security Settings dialog, click Add.
-
In the Permission Entry dialog, select a Principal, i.e. a user or group.
-
From the Applies to drop-down menu, select This object only.
-
Select the following permissions:
-
Write all properties
-
Create dpOTPToken objects
-
Delete dpOTPToken objects
-


