Create and Configure Windows Server Virtual Machine
If you are using the DigitalPersona AD solution, you must deploy the DigitalPersona LDS solution to leverage the Microsoft Entra ID integration.
Next step is to create the a Microsoft Windows Server VM on Azure AD. This machine will be used later to deploy DigitalPersona LDS Server.
Deploying multiple (at least two for failover) DigitalPersona Servers is recommended so you may need repeat the previous step as many time as many DigitalPersona Servers as required.
If you already have Windows Servers VMs in your Azure AD environment, you can skip this step and proceed to Create and Configure Windows Server Virtual Machine.
An active Azure subscription.
An Azure Active Directory tenant associated with your subscription, either synchronized with an on-premises directory or a cloud-only directory.
An Azure Active Directory Domain Services managed domain enabled and configured in your Azure AD tenant.
A user account that's a part of the managed domain.
Make sure that Azure AD Connect password hash synchronization or self-service password reset has been performed so the account is able to sign in to managed domain.
Create a Virtual Network Subnet
Before creating VM on Azure you would need create a virtual network subnet.
By default, the Azure virtual network created with the managed domain contains a single virtual network subnet. This virtual network subnet should only be used by the Azure platform to provide managed domain services.
To create and use your own VMs in this Azure virtual network, create an additional virtual network subnet for VMs and application workloads:
-
In the Azure portal, select Home and then select All resources of your managed domain.
-
From the list of resources, choose the default virtual network, such as aadds-vnet.

-
In the left-hand menu of the virtual network window, select Address space.
The virtual network is created with a single address space of 10.0.0.0/24, which is used by the default subnet.
-
Add an additional IP address range to the virtual network.
The size of this address range and the actual IP address range to use depends on other network resources already deployed. The IP address range shouldn't overlap with any existing address ranges in your Azure or on-premises environment. Make sure that you size the IP address range large enough for the number of VMs you expect to deploy into the subnet.
In the following example, an additional IP address range of 10.0.2.0/24 is added.
-
When ready, select Save.
-
Next, in the left-hand menu of the virtual network window, select Subnets, then choose + Subnet to add a subnet.
-
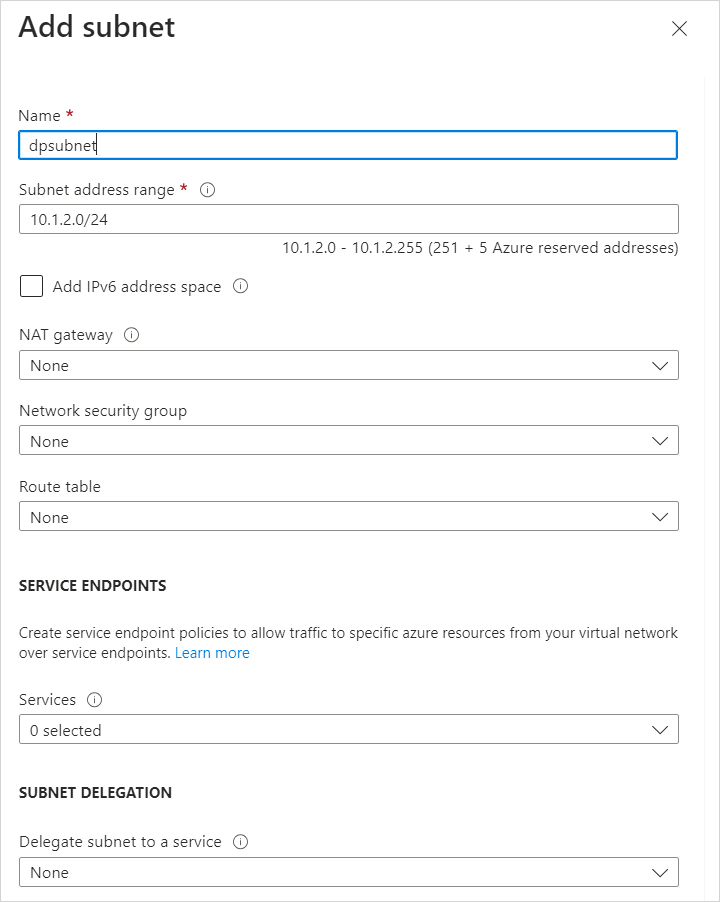
Enter a Name for the subnet, such as dpsubnet.
-
If needed, update the Address range if you want to use a subset of the IP address range configured for the virtual network in the previous steps.
-
For now, leave the defaults for options such as network security group, route table, service endpoints.
In the next image, a subnet named dpsubnet is created that uses the 10.0.2.0/24 IP address range.
-
When ready, select OK. It takes a few moments to create the virtual network subnet.
Note:When you create a VM that needs to use the managed domain, make sure you select this virtual network subnet. Do not create VMs in the default aadds-subnet.
If you select a different virtual network, there's no network connectivity and DNS resolution to reach the managed domain unless you configure virtual network peering.
Create Windows Server Virtual Machine
The next step is to create the VM.
-
From the Azure portal menu or from the Home page, select Virtual machines, click Add.
-
In the Basics window, configure the core settings for the virtual machine.
-
Chose the same Subscription and Resource group as you have in Domain Services.

-
Type a Virtual machine name (for example, dpmfaserver).

-
For Region choose appropriate Region, for example (US) West US.

-
Chose the appropriate Availability options.

-
For Image we would recommend Windows Server 2019 Datacenter although Windows Server 2016 Datacenter can also be used.

-
For Azure Spot instance choose No.

-
Select the size of your VM.
The Size of the VM will depend on how the DP Server will be used, how many users in Azure AD, etc. Here are some recommendations:
-
If fingerprint authentication is used and number of users needs to be authenticate is below 1K, we would recommend use at least 2 CPUs, 4 GB RAM machine.
-
If fingerprint authentication is used and number of users needs to be authenticate is between 1 and 10K, we would recommend use at least 4 CPUs, 8 GB RAM machine.
-
If fingerprint authentication is used and number of users needs to be authenticate is above 10K, we would recommend use at least 4CPUs, 16 GB RAM machine.
-
If fingerprint authentication is not used, a minimal VM configuration such as 1 CPU, 2 GB RAM can be used.
This example uses a basic VM with 1 CPU, 2 GB RAM.
-
-
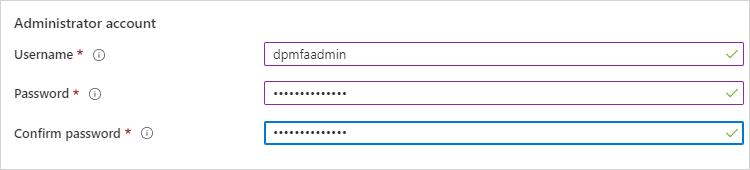
Create a Username and Password for the VM Administrator account.
-
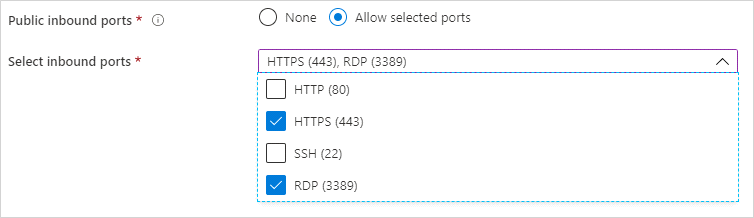
Under Public inbound ports, select Allow selected ports and choose RDP and HTTPS.
 Note: This deployment uses RDP to deploy DigitalPersona LDS Server. It does have some security risks, so you may choose to use Azure Bastion instead of RDP to manage and configure the DigitalPersona LDS Server. Use of Azure Bastion will require additional configuration and is not covered in this document.
HTTPS is required in order to use the DigitalPersona Web Proxy.
-
When done, select Next: Disks.
-
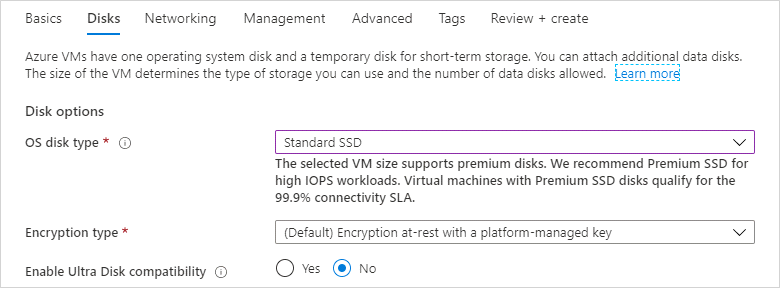
From the drop-down menu for OS disk type, choose Standard SSD, then select Next: Networking.
-
For Subnet choose the subnet you created in Create a Virtual Network Subnet.

-
For NIC network security group choose Basic and for Public inbound ports choose Allow selected ports. Selected inbounds ports requires HTTS and RDP.
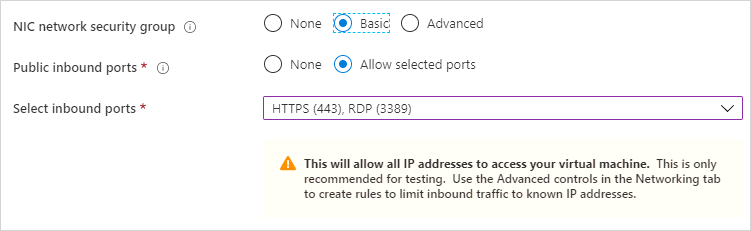 Note: For security reason Advanced security group can be selected. Then you can specify which computers’ IP addresses will be accepted for incoming traffic. Advanced configuration is not covered in this document.
 -
When done, select Next:Management.
For Management, it is recommended keeping the default configuration.
-
When done, select Next:Advanced.
For Advanced, it is recommended keeping the default configuration.
-
When done, select Next:Tag.
For Tag, it is recommended keeping the default configuration.
-
When done, select Next:Review + create.
-
Review your settings and click Create.
-
Creation of the VM from this point may take up to an hour. Wait until the process is finished before proceeding to the next step
Connect to the VM
There are multiple ways how to connect to a VM on Azure. Microsoft is currently recommending using Azure Bastion. However, we will be covering only RDP as the connection protocol.
-
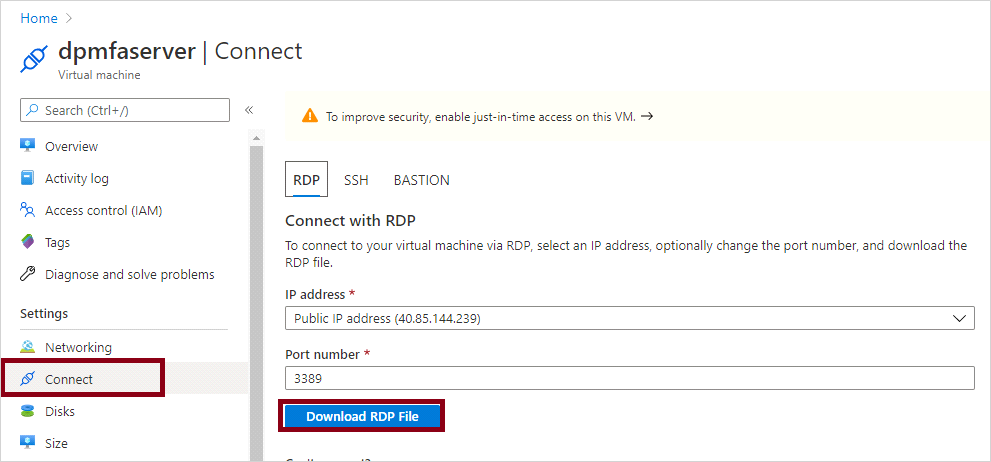
In the Overview pane for your VM, select Connect, select RDP and click on Download RDP File.
-
When RDP file successfully downloaded, save it in secure location.
-
Double-click on RDP file and click Connect.
-
Provide username and password created for the VM above.
-
Follow the instructions until you are successfully connected to the VM desktop.
Join the VM to the Azure Managed Domain
With the VM created and a web-based RDP connection established, you can now join the Windows Server virtual machine to your Azure managed domain. This process is the same as a computer connecting to a regular on-premises Active Directory Domain Services domain.
-
If Server Manager doesn't open by default when you sign in to the VM, select the Start menu, then choose Server Manager.
-
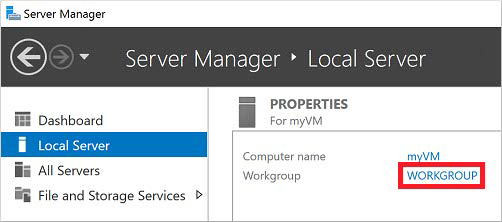
In the left pane of the Server Manager window, select Local Server. Under Properties in the right-hand pane, choose Workgroup.
-
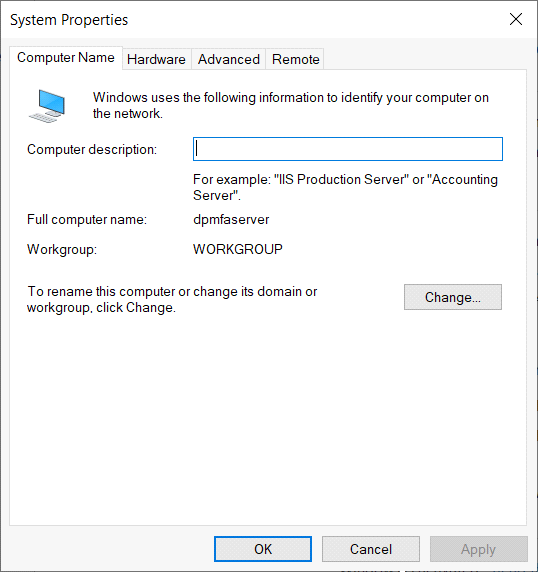
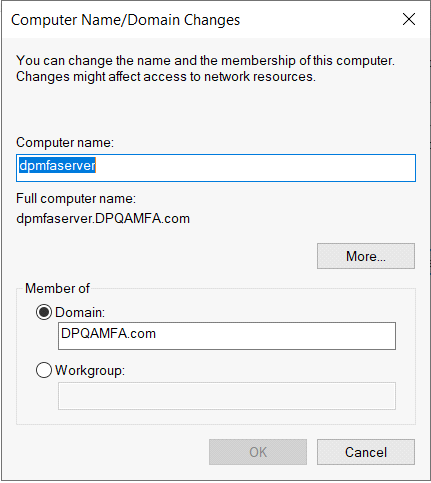
In the System Properties window, select Change to join the managed domain.
-
In the Domain input field, specify the name of your managed domain, such as aaddscontoso.com, then select OK.
-
Enter your domain credentials to join the domain.
Use the credentials for a user that's a part of the managed domain.
The account must be part of the managed domain or Azure AD tenant - accounts from external directories associated with your Azure AD tenant cannot correctly authenticate during the domain-join process. Account credentials can be specified in one of the following ways:
-
UPN format (recommended) - Enter the user principal name (UPN) suffix for the user account, as configured in Azure AD. For example, the UPN suffix of the user klozin would be klozin@qamfacom.onmicrosoft.com. There are a couple of common use-cases where the UPN format can be used reliably to sign in to the domain rather than the SAMAccountName format:
-
If a user's UPN prefix is long, such as deehasareallylongname, the SAMAccountName may be auto-generated.
-
If multiple users have the same UPN prefix in your Azure AD tenant, such as dee, their SAMAccountName format might be auto-generated.
-
-
SAMAccountName format - Enter the account name in the SAMAccountName format. For example, the SAMAccountName of user jsmith would be dptestmfa\jsmith.
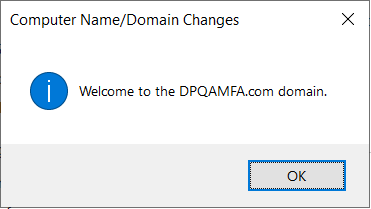
It takes a few seconds to join to the managed domain. When complete, the following message welcomes you to the domain.
-
-
To complete the process of joining to the managed domain, restart the VM.


