Add Server Roles and Features
Before installing DigitalPersona LDS Server, there are a few roles and features that need to be added to the default installation of Windows Server.
To add the Windows Server roles and features necessary to support installation of DigitalPersona LDS Server:
-
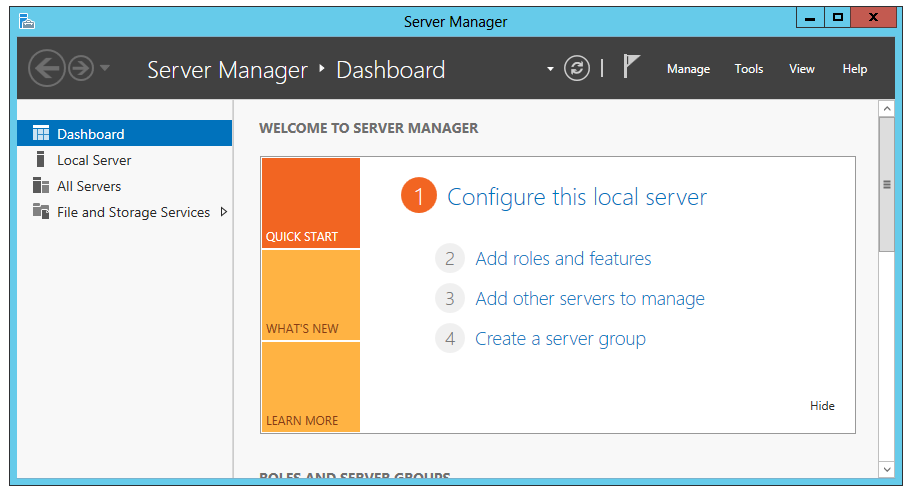
In Windows Server, open the Server Manager and select Dashboard.
-
Under Configure this local server, click Add roles and features.
-
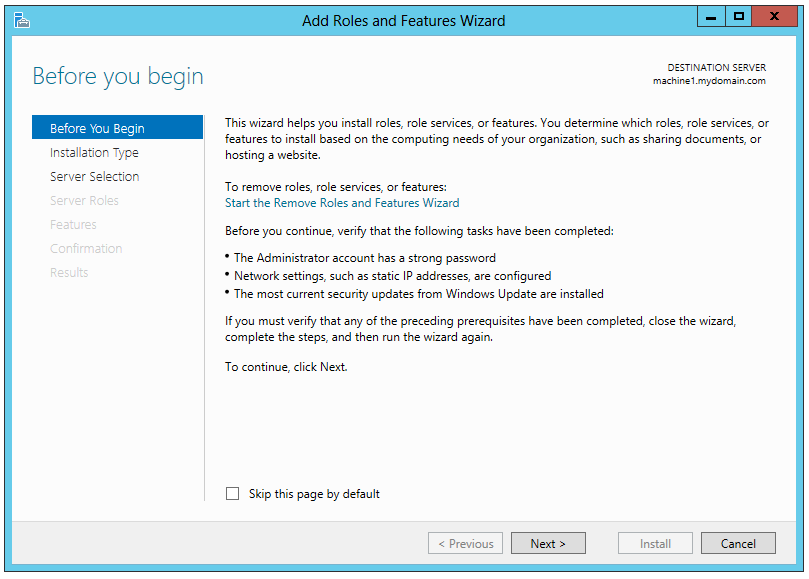
On the Before you begin page of the Add Roles and Features Wizard, verify that you have completed the prerequisite tasks before continuing. Then click Next.
-
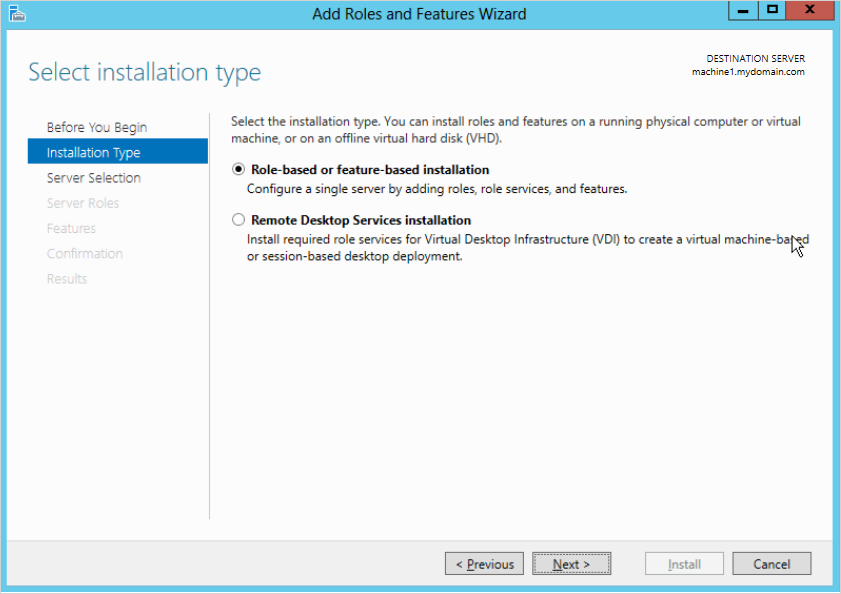
On the Select installation type page, select Role-based or feature-based installation. Then click Next.
-
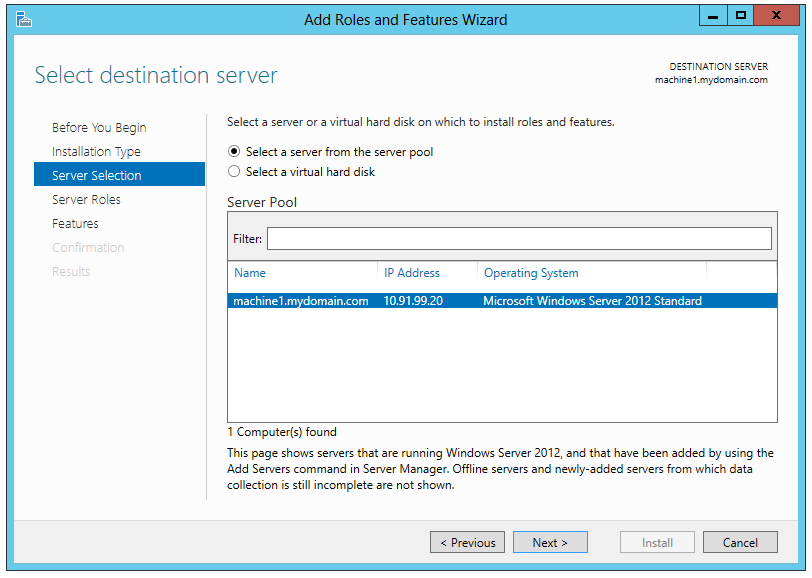
On the Select destination server page, choose Select a server from the server pool. Then click Next.
-
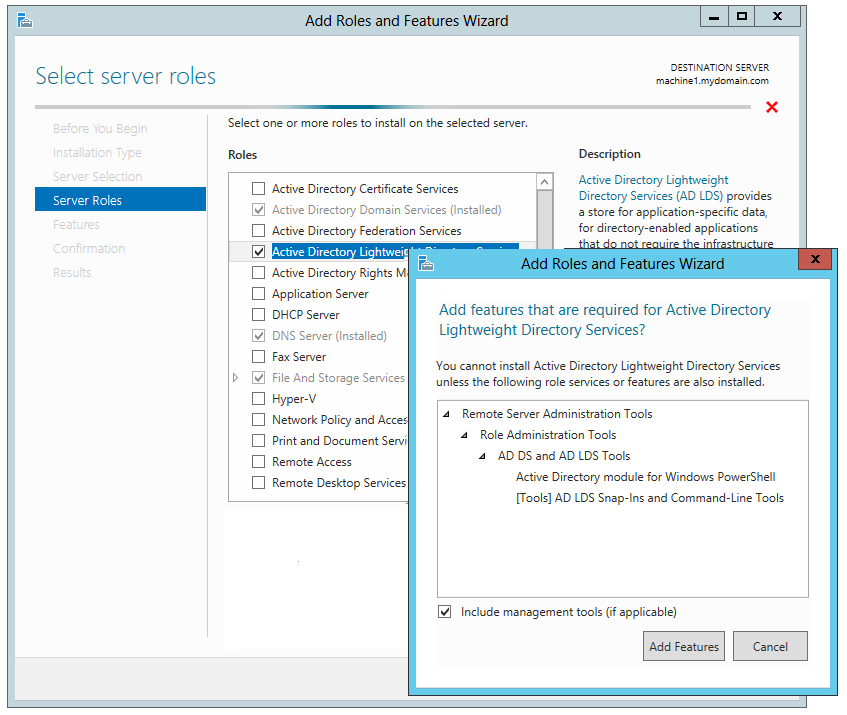
On the Select server roles page, in addition to the roles selected by default, ensure that the Active Directory Lightweight Directory Services role is included.
Selecting this role will pop up a dialog for additional features required for AD LDS.
Click Add Features.
-
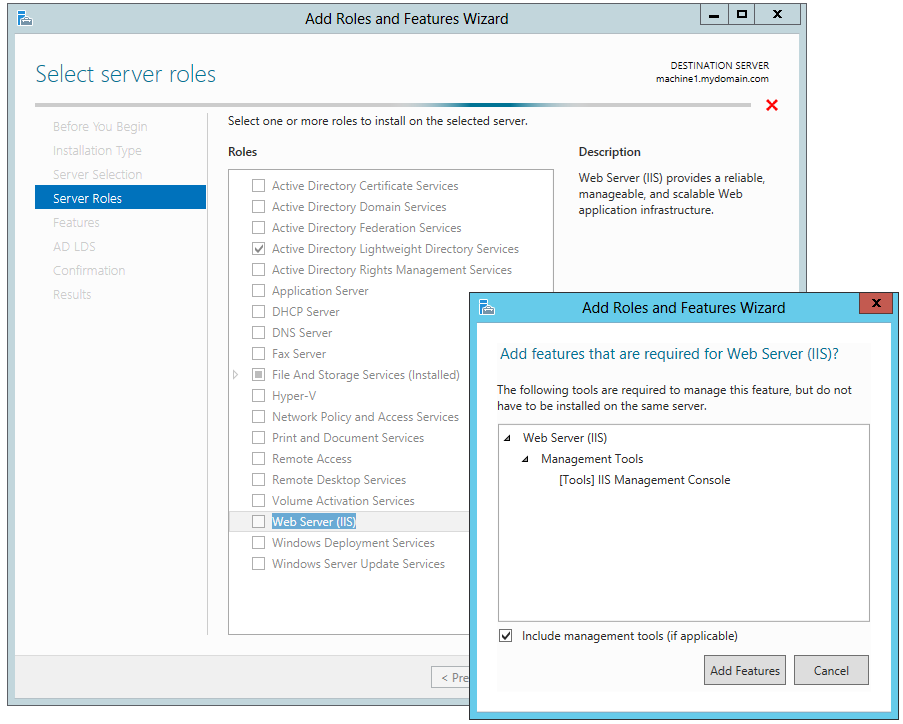
If you are planning to also install the Web Administration Console, make sure to select Web Server (IIS) and any required management features. Then click Next.
-
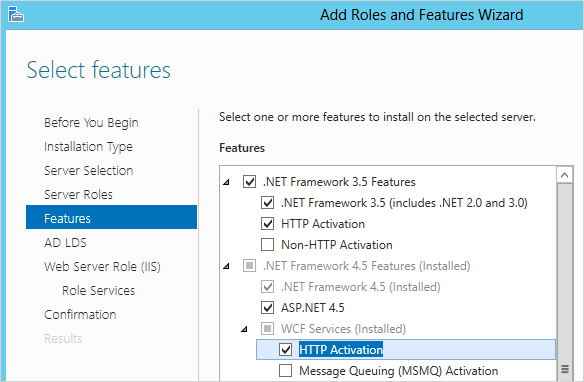
On the Select features page, in addition to the features selected by default, ensure that the features illustrated below are selected:
-
.NET Framework 4.5 Features, including HTTP Activation
Click Add Features as requested.
-
-
Then click Next.
-
The following page simply explains how to create an AD LDS instance, by using the AD LDS Setup Wizard, and how to remove the AD LDS role through the Windows Control Panel. Click Next.
-
If installing the Web Server Role (IIS), click Next on the Web Server Role (IIS) page, which explains IIS features.

-
Click Install.
-
The Installation Progress page displays a bar indicating the approximate progress of the installation process.
Note: You can close the wizard (by clicking the Close (X) button) without interrupting the installation, and open it again to view progress by clicking Notifications and then Task Details in the Server Manager Dashboard Command Bar.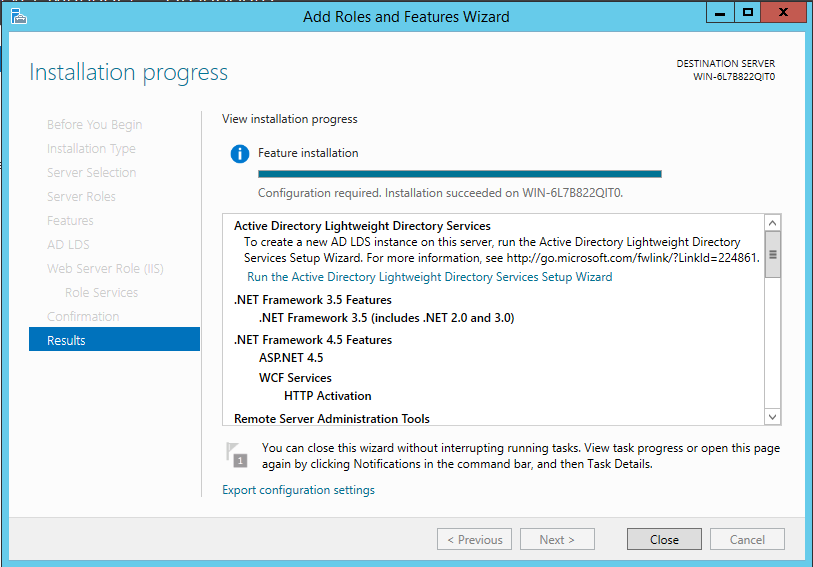
-
Upon completion of the installation, you can choose to run the Active Directory Lightweight Directory Services Setup Wizard from the link provided, or close the wizard and follow the instructions in the next section to run the wizard.
An automatic refresh will also be performed upon closing the Add Roles and Features Wizard.


