Deploying DigitalPersona LDS as an External Authentication Method (EAM)
You can configure Microsoft Entra ID to allow user authentication with an authentication factor offered by the DigitalPersona Identity Provider (IdP).
This extends authentication capabilities by adding authentication methods supported by DigitalPersona LDS but not natively supported by Microsoft Entra ID such as contactless cards or fingerprints.
This feature is implemented by integrating the DigitalPersona Identity Provider with Microsoft Entra ID using OpenID Connect.
User Experience
-
After you enter your username and password to access a Microsoft 365 website or application, the new Approve with DigitalPersona option is available in the authentication flow.
-
When you select the option, you are redirected to the DigitalPersona IdP.
-
The IdP proposes your credentials from the authentication policy that can satisfy the Microsoft Entra ID request (usually “something you have” or “something you are”).
-
After successfully authenticating in the IdP, you are redirected to the requested Microsoft resource.
Deployment Overview
There are two integration scenarios:
-
On-premises with DigitalPersona LDS and Microsoft Entra ID in a hybrid environment
Users are managed on-premises and synchronized with the cloud service. For this scenario, you should consider using federation deployment.
For further details, see Configuring Microsoft Entra ID Federation with the DigitalPersona IdP.
-
Cloud-based on a Microsoft Azure virtual machine with DigitalPersona LDS and Microsoft Entra Domain Services
Users are managed in the Microsoft Entra Admin Center.
For further details, see Configuring DigitalPersona and Cloud-Native Microsoft Entra ID.
Guidelines for Microsoft Entra ID deployment:
-
Microsoft Entra ID Domain Services and the DigitalPersona WMC Server must be in the same region
-
Create Microsoft Entra ID Domain Services in a new resource group
-
Create an IP range and subnet for the DigitalPersona WMC Server in the new network
-
Create the DigitalPersona WMC Server, selecting the second subnet and the Microsoft Entra ID network
-
Remember that the Microsoft Entra ID-to-AD sync occurs once in a 10-30 minute interval
-
Do not forget to join the server to the Microsoft Entra AD
-
Edit the “hosts” file to redirect the DNS names for DigitalPersona WMC to 127.0.0.1
Configuring Microsoft Entra ID
Add a New Application
-
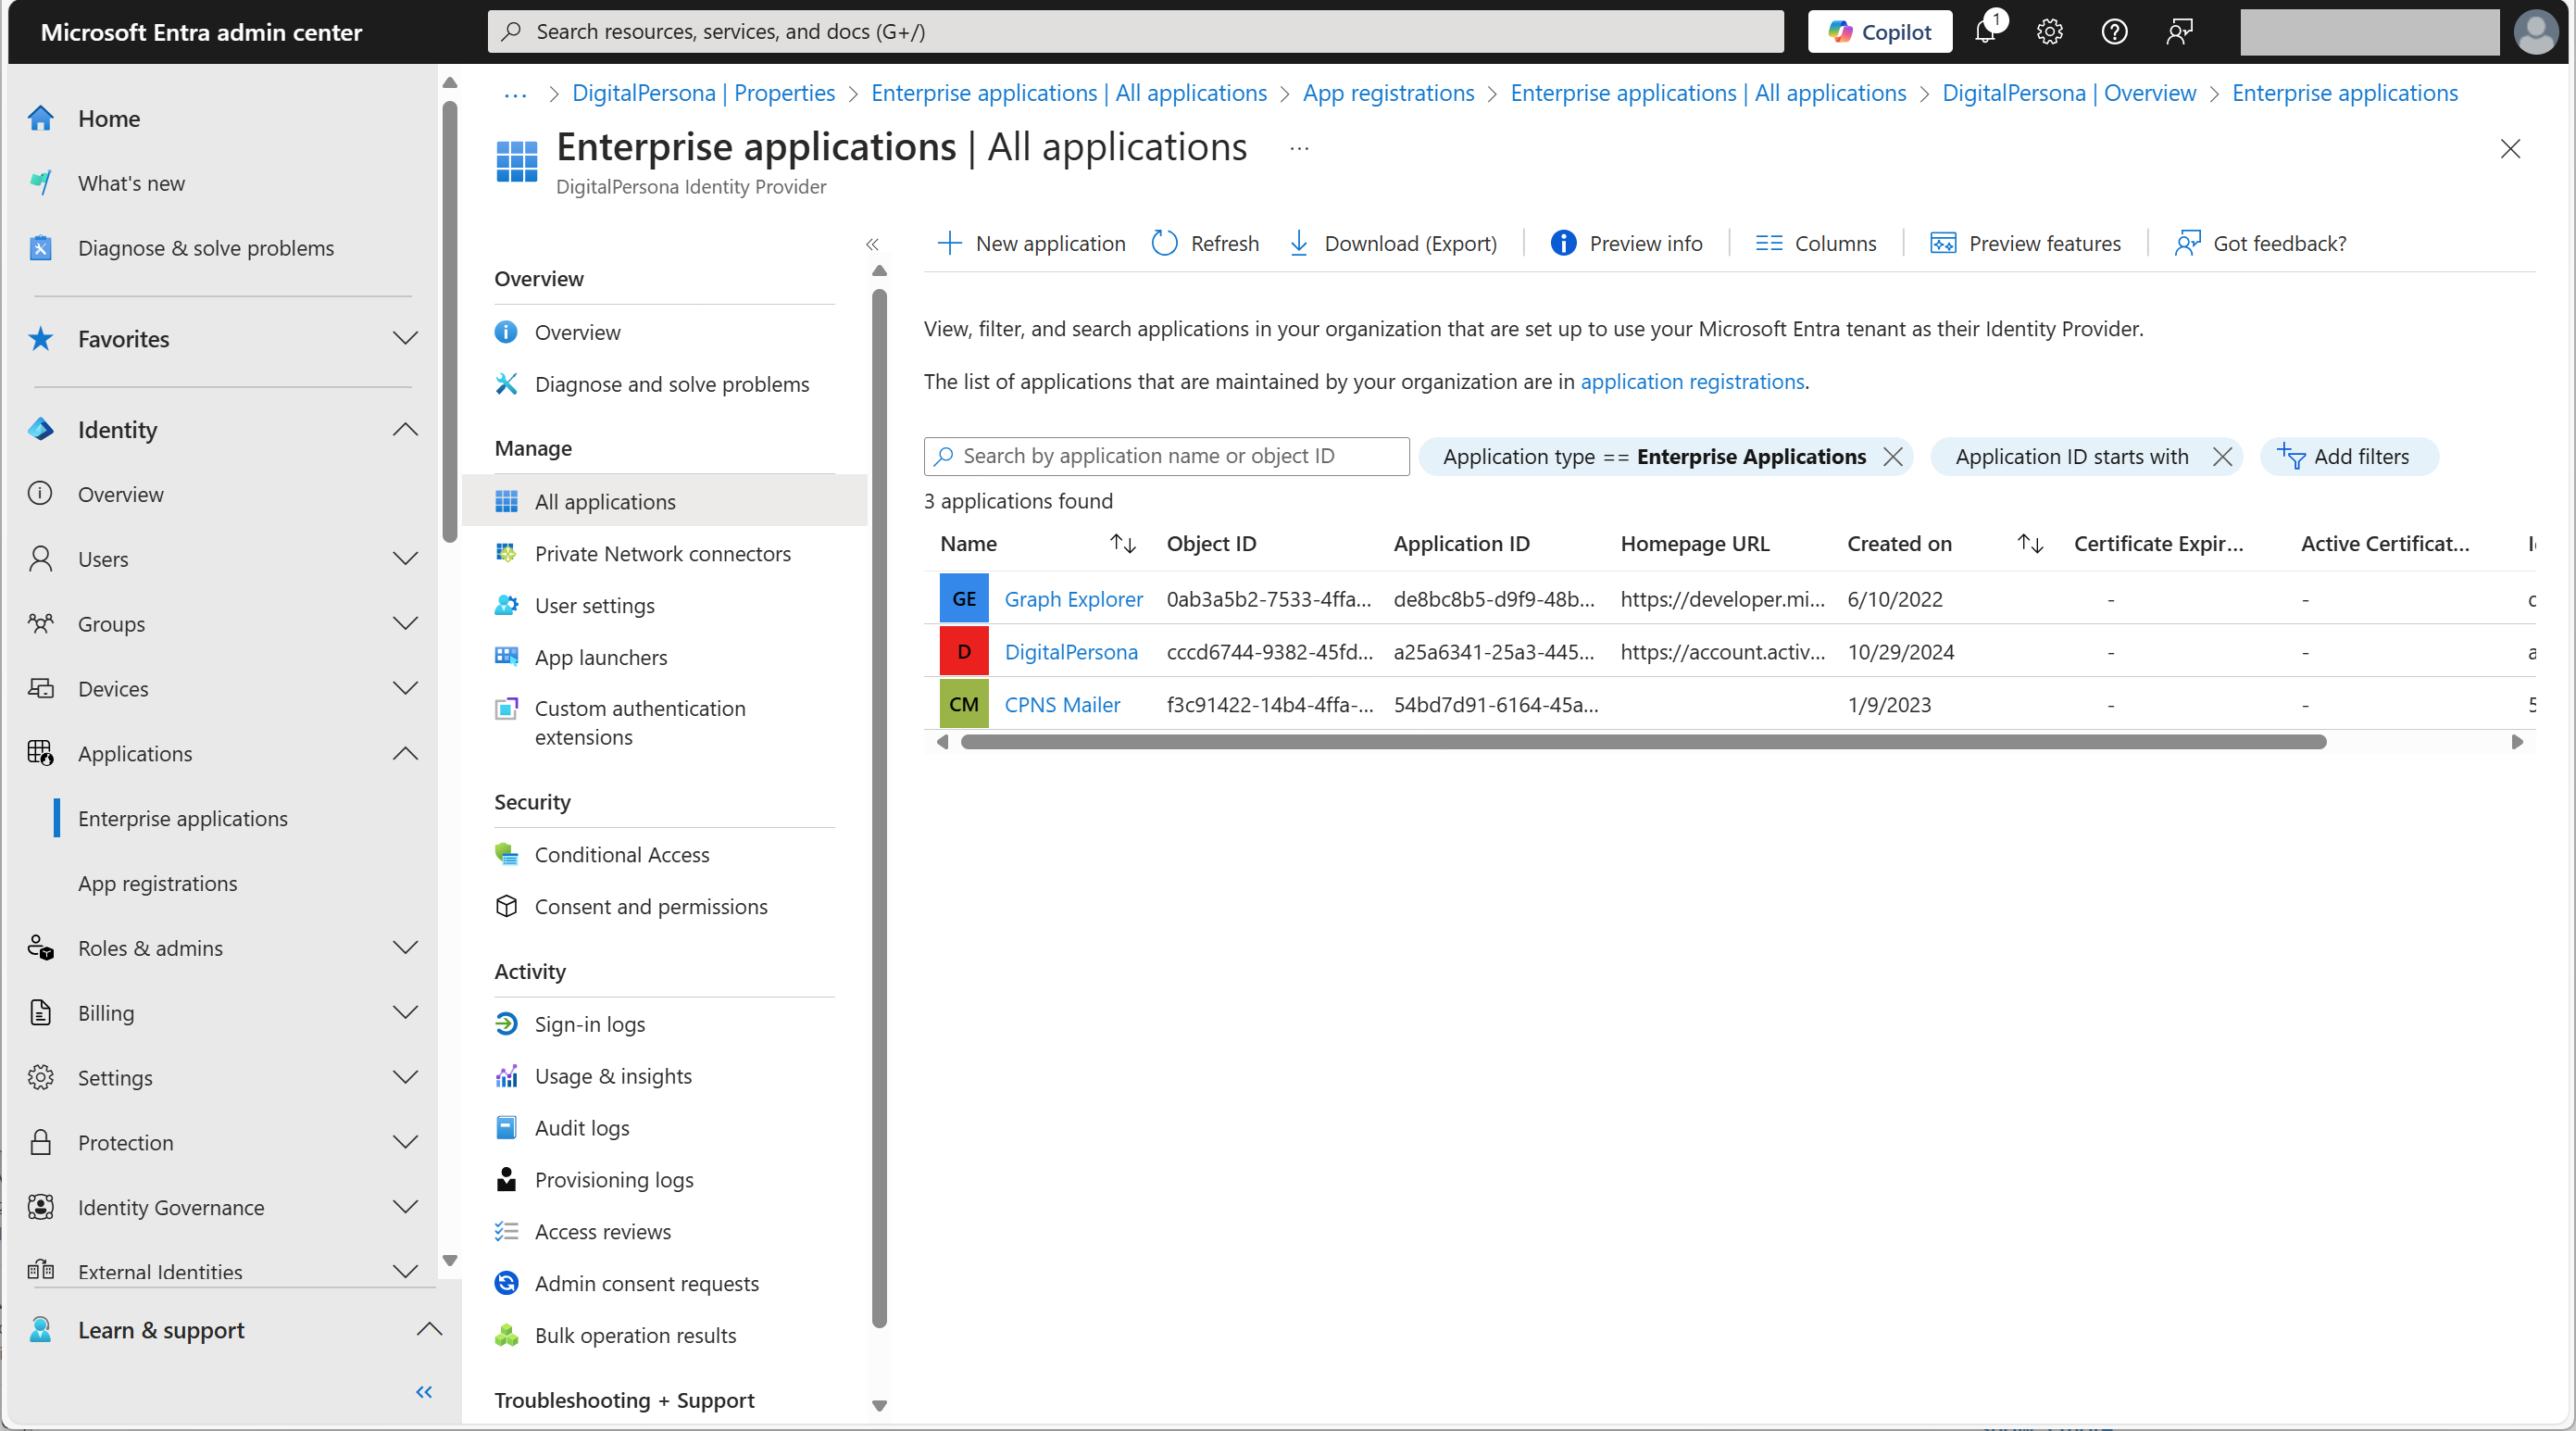
In the Microsoft Entra Admin Center, expand Identity and then Applications in the left menu, and select Enterprise Applications.
-
Click New Application and create a new application called DigitalPersona.
-
Go to the Properties page for the new DigitalPersona application and configure the following parameters:
-
Assignment required - No
-
Visible to users - No

-
-
Under Applications in the left menu, select App Registrations.
-
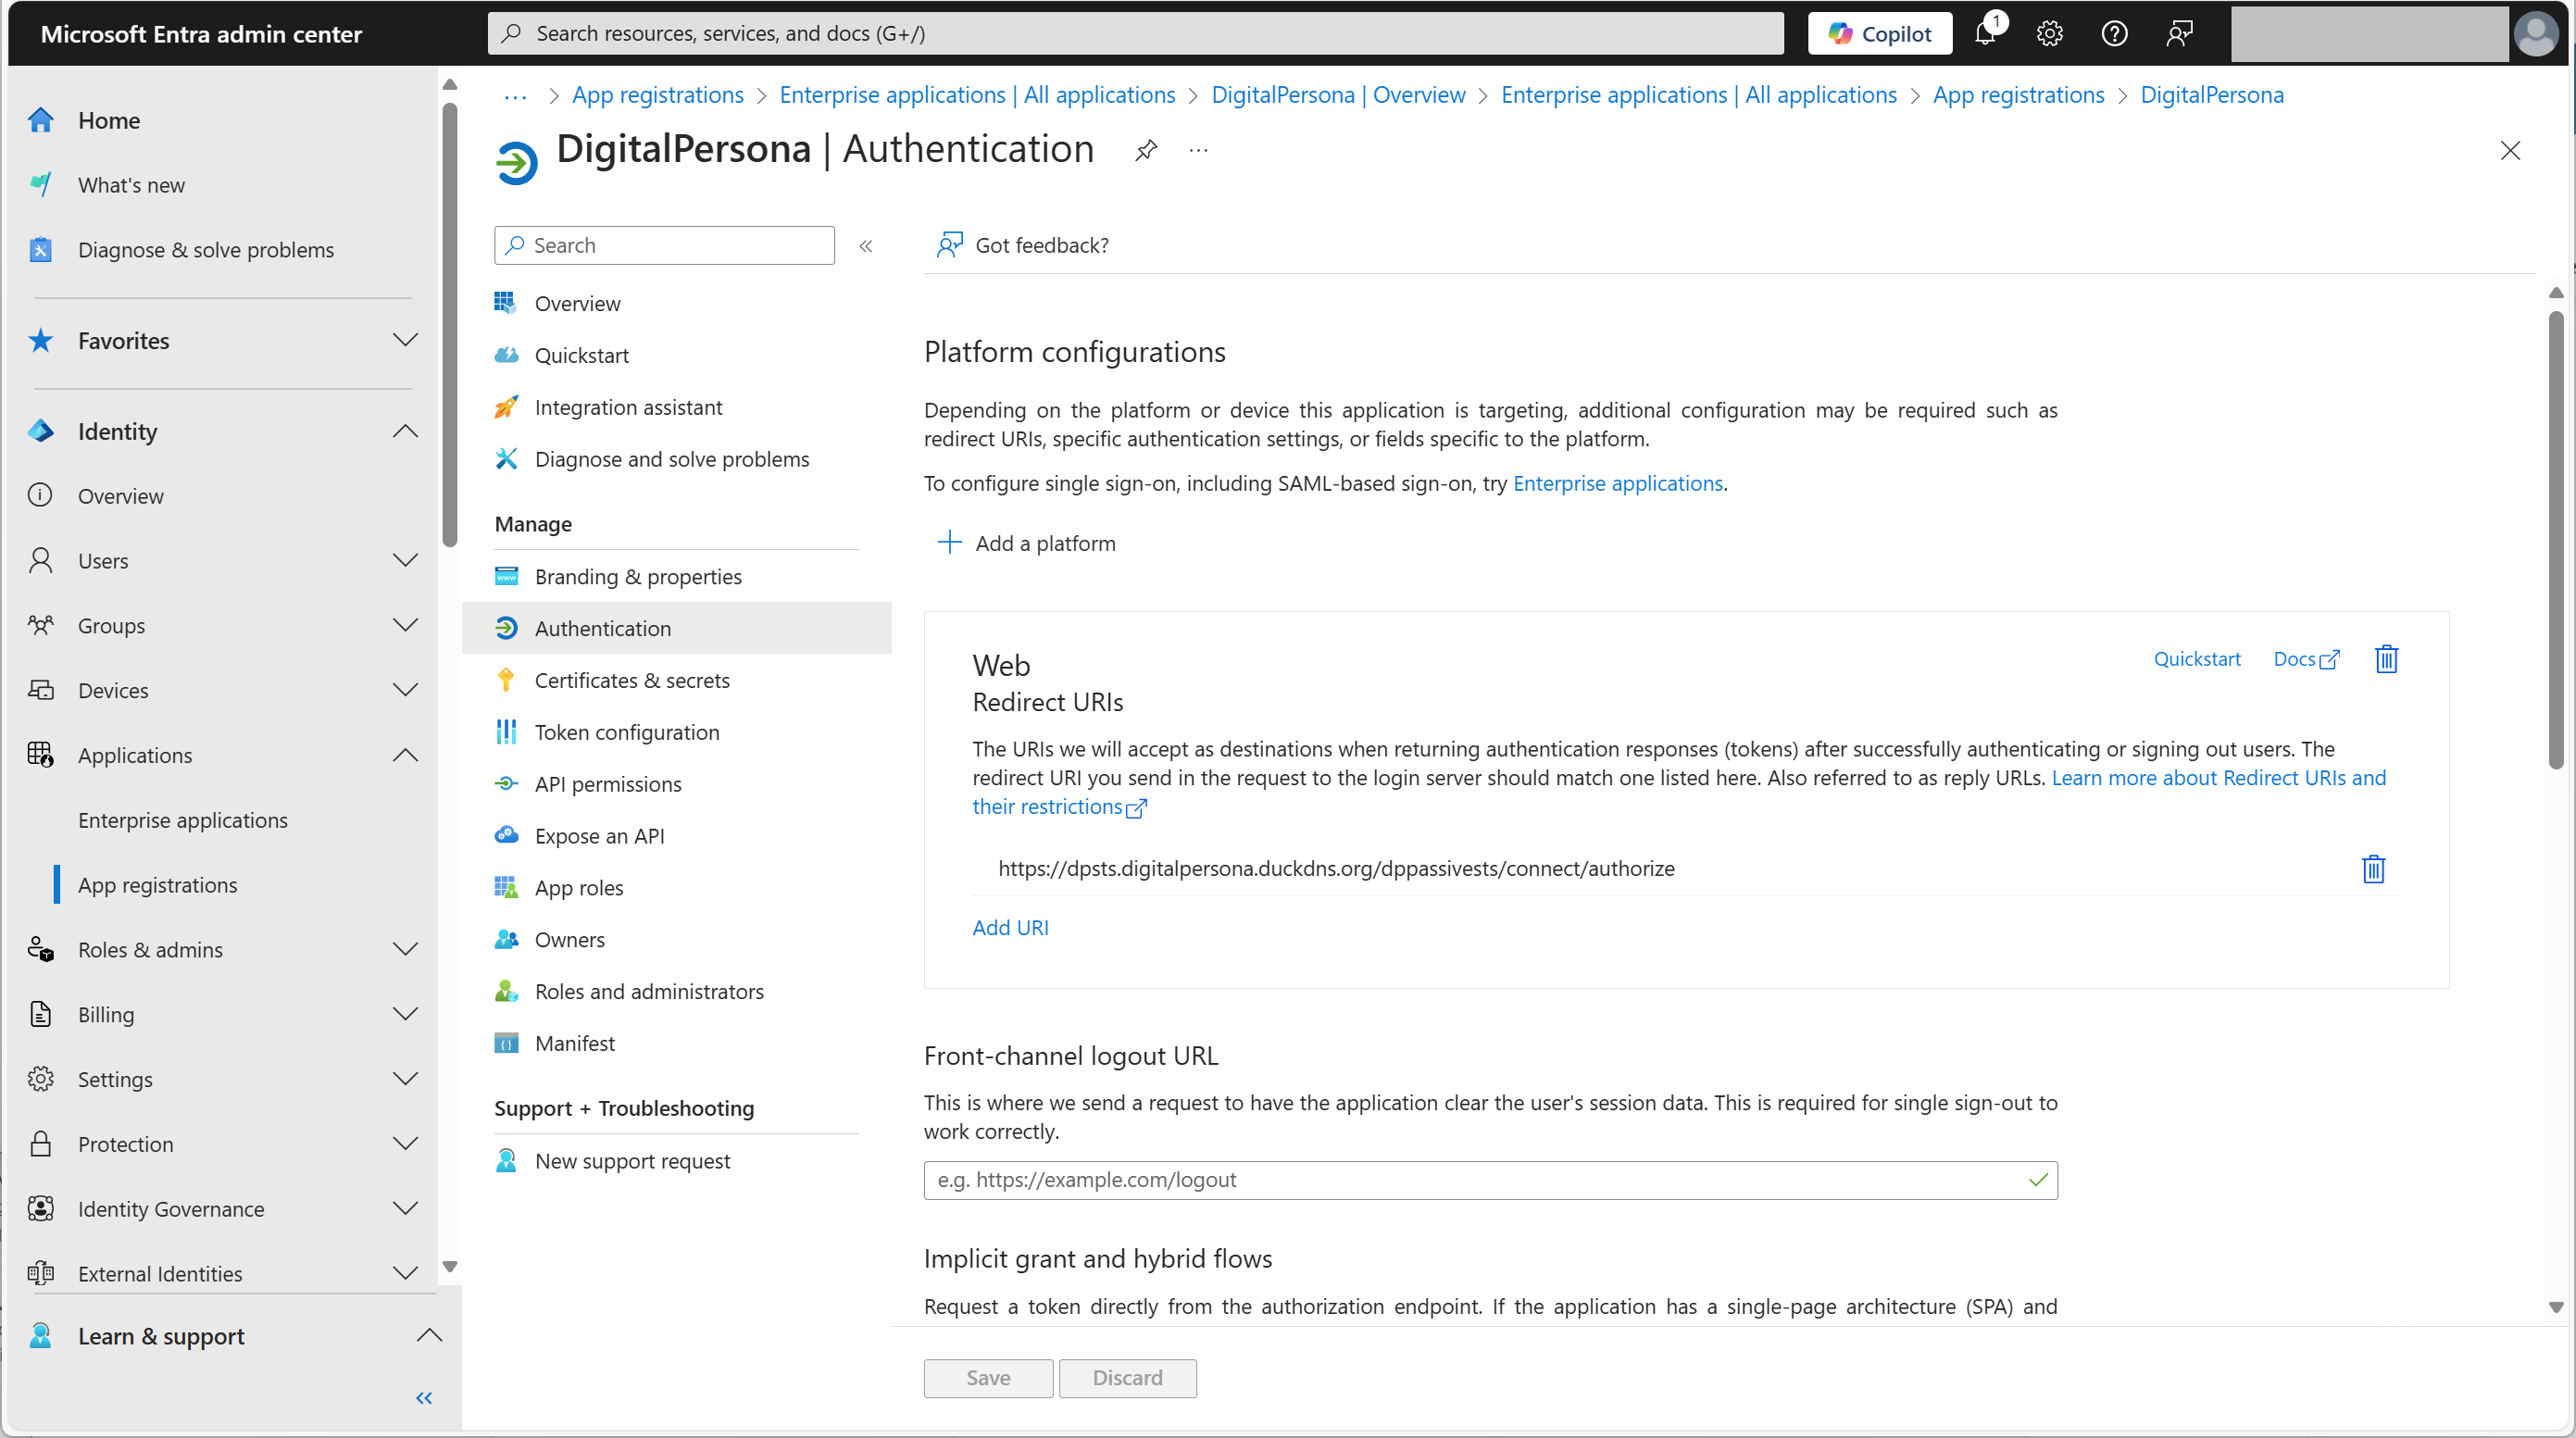
Select the DigitalPersona application and, in the Manage menu, select Authentication.
-
Click Add a platform and configure the DigitalPersona platform with the following values:
-
Type - Web
-
Redirect URI - enter the URI for the DigitalPersona Identity Provider where Microsoft Entra ID will redirect the users
For example, https://idp.contoso.com/dppassivests/connect/authorize
-
-
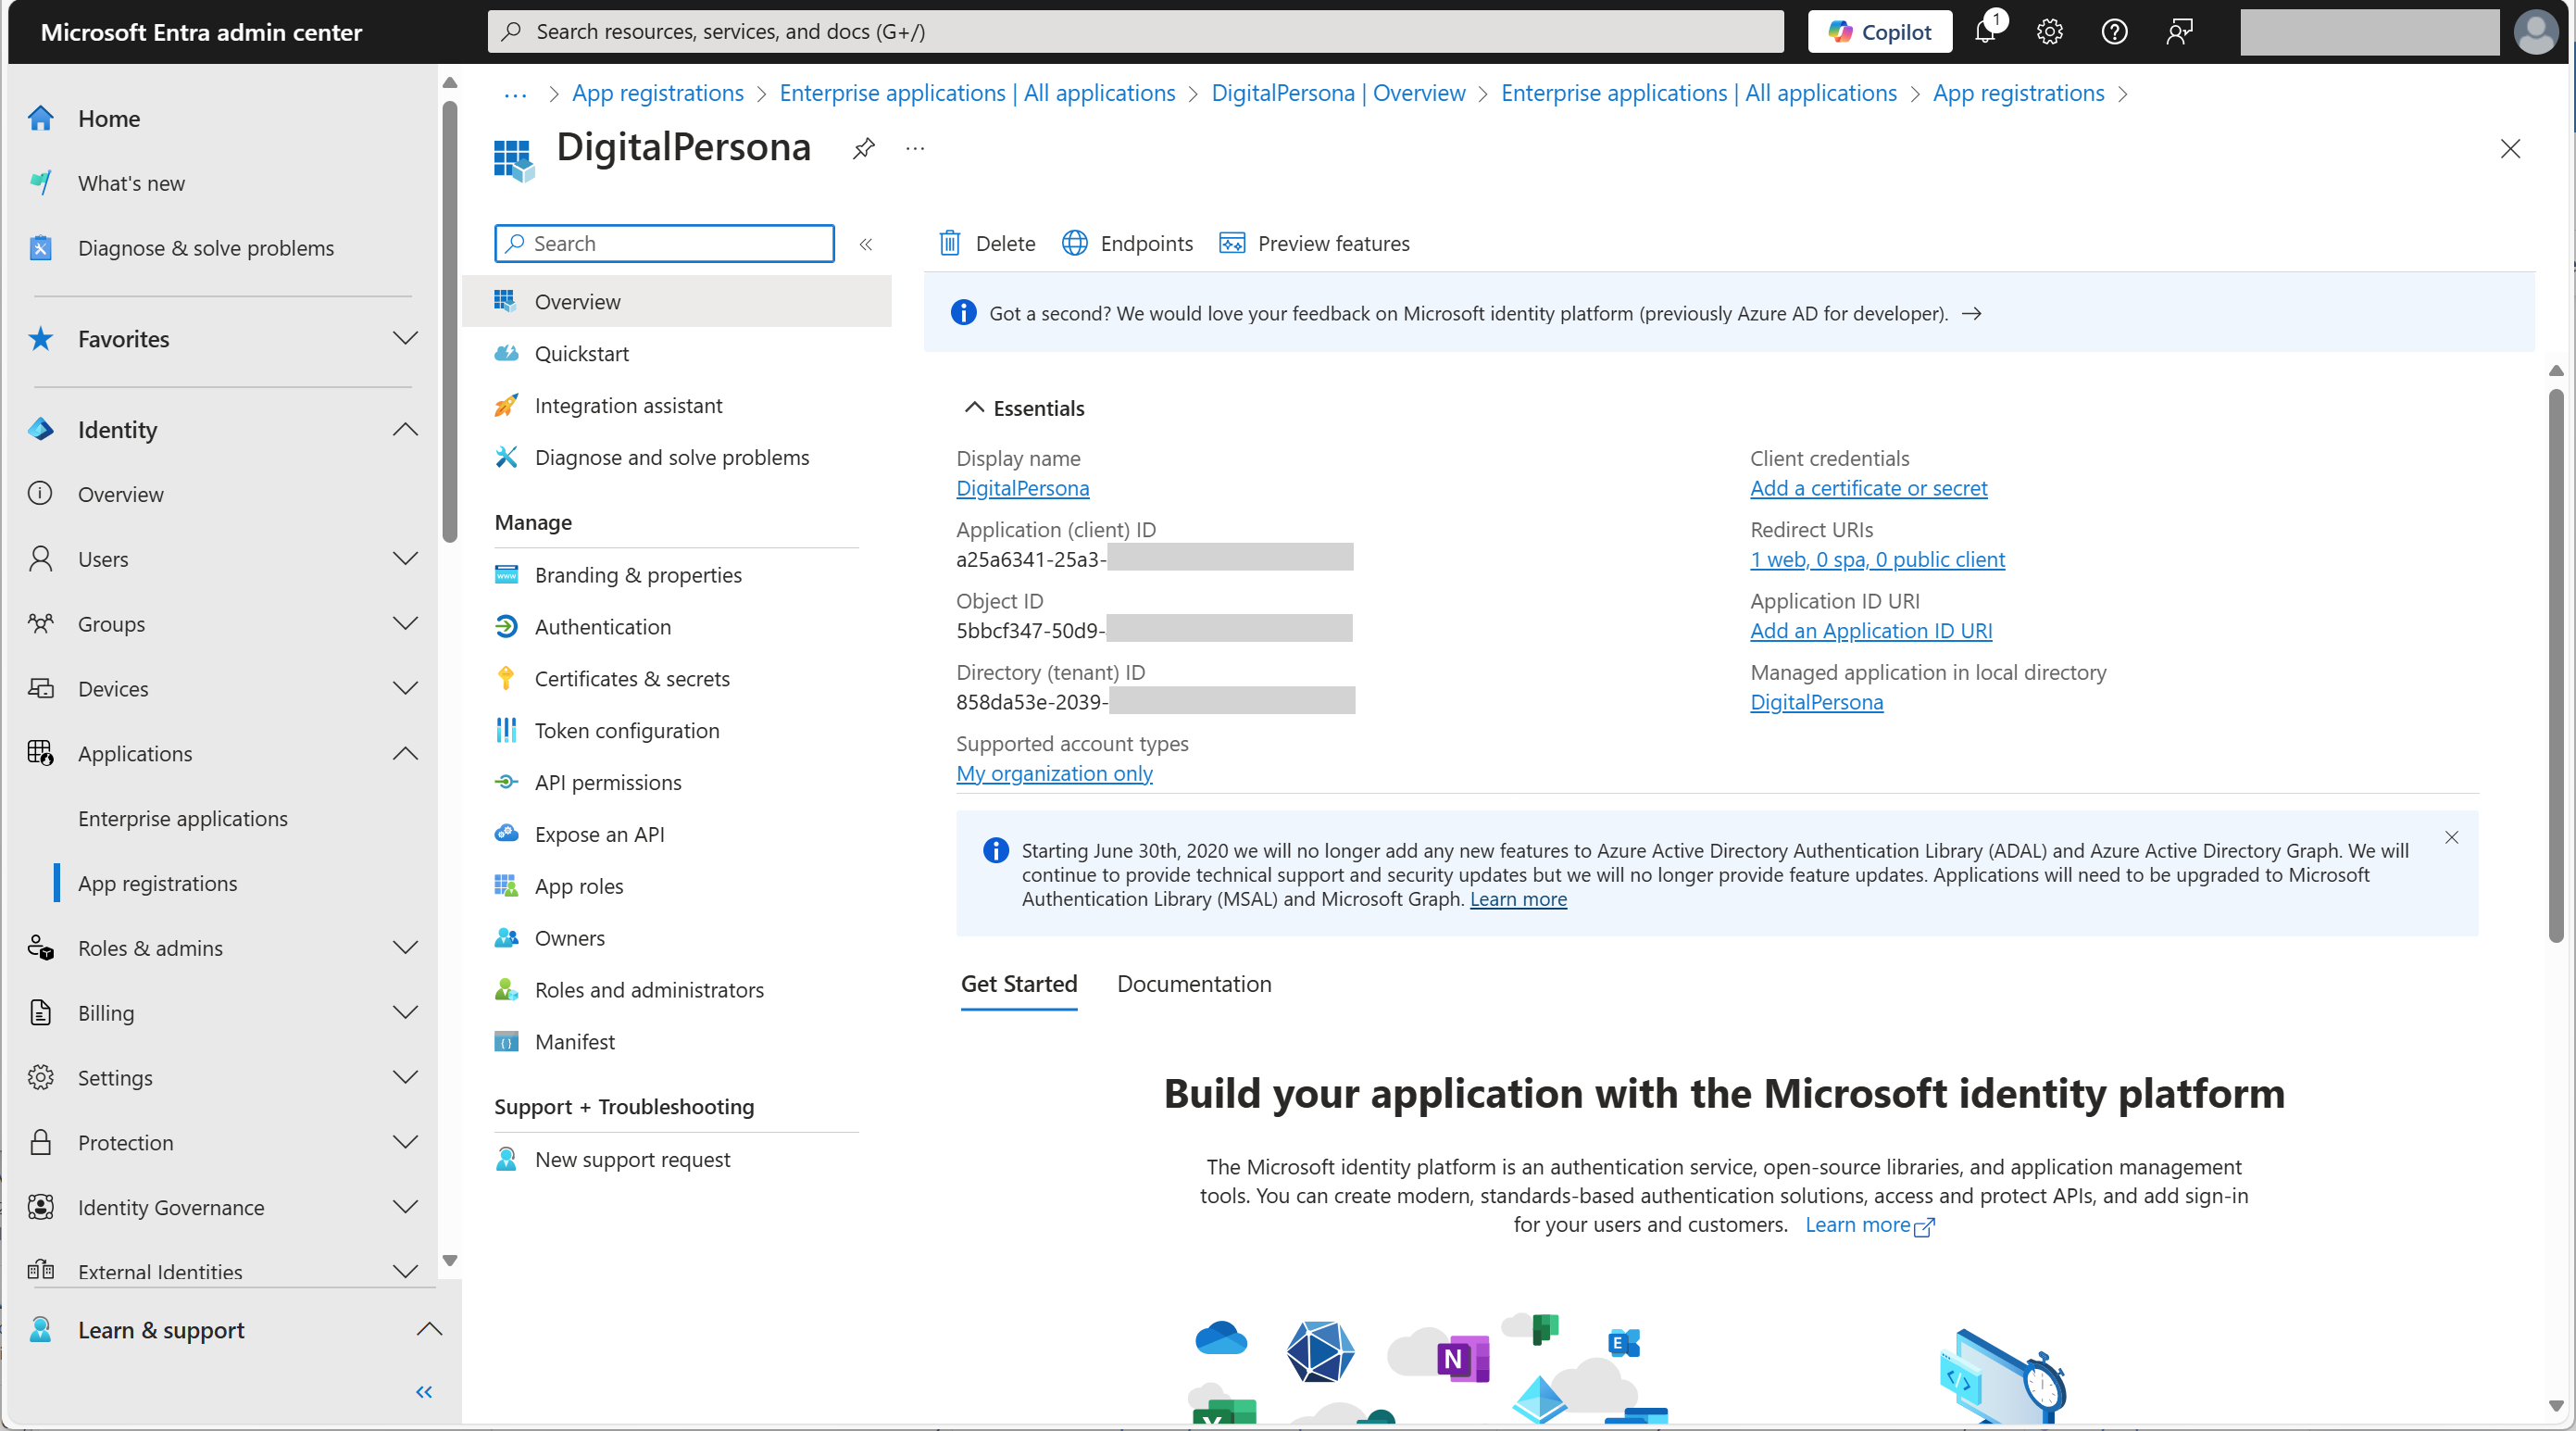
In the same DigitalPersona application page, select Overview.
-
Make a note of the Application (client) ID and Directory (tenant) ID as they will be required later.
Add an External Provider
-
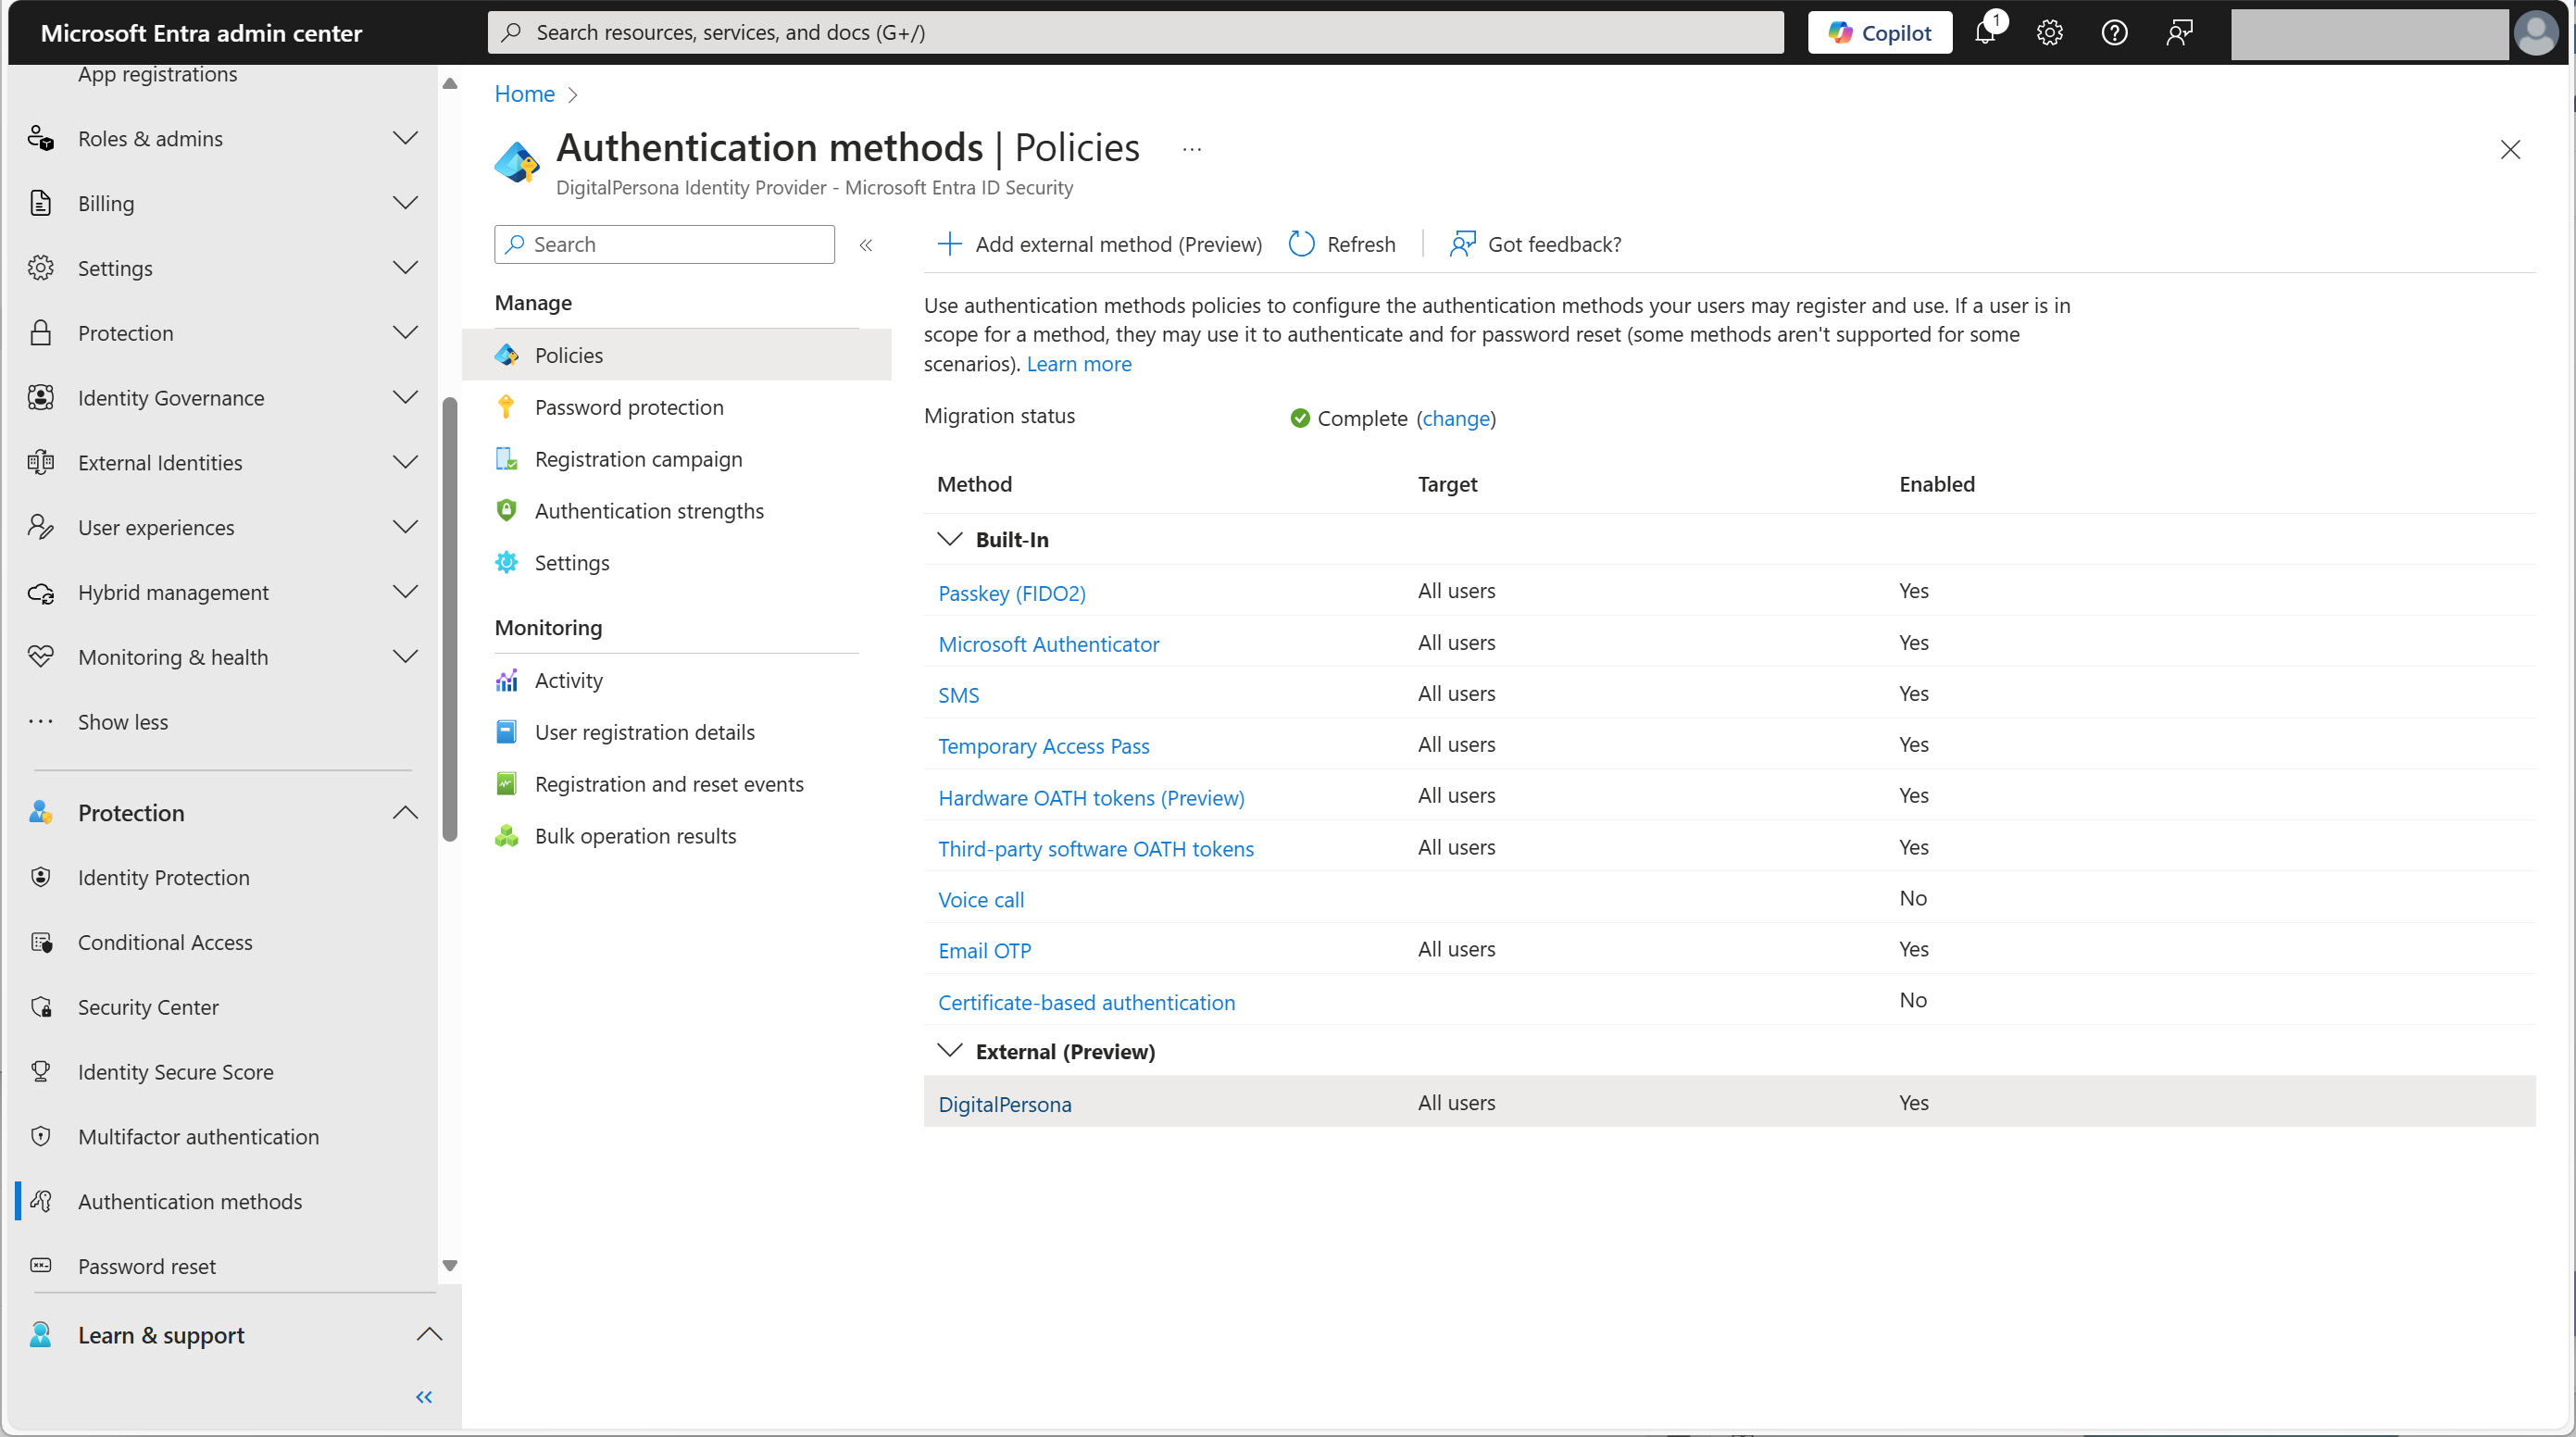
In the Microsoft Entra Admin Center, expand Protection in the left menu and select Authentication Methods.
-
Click Add external method.
-
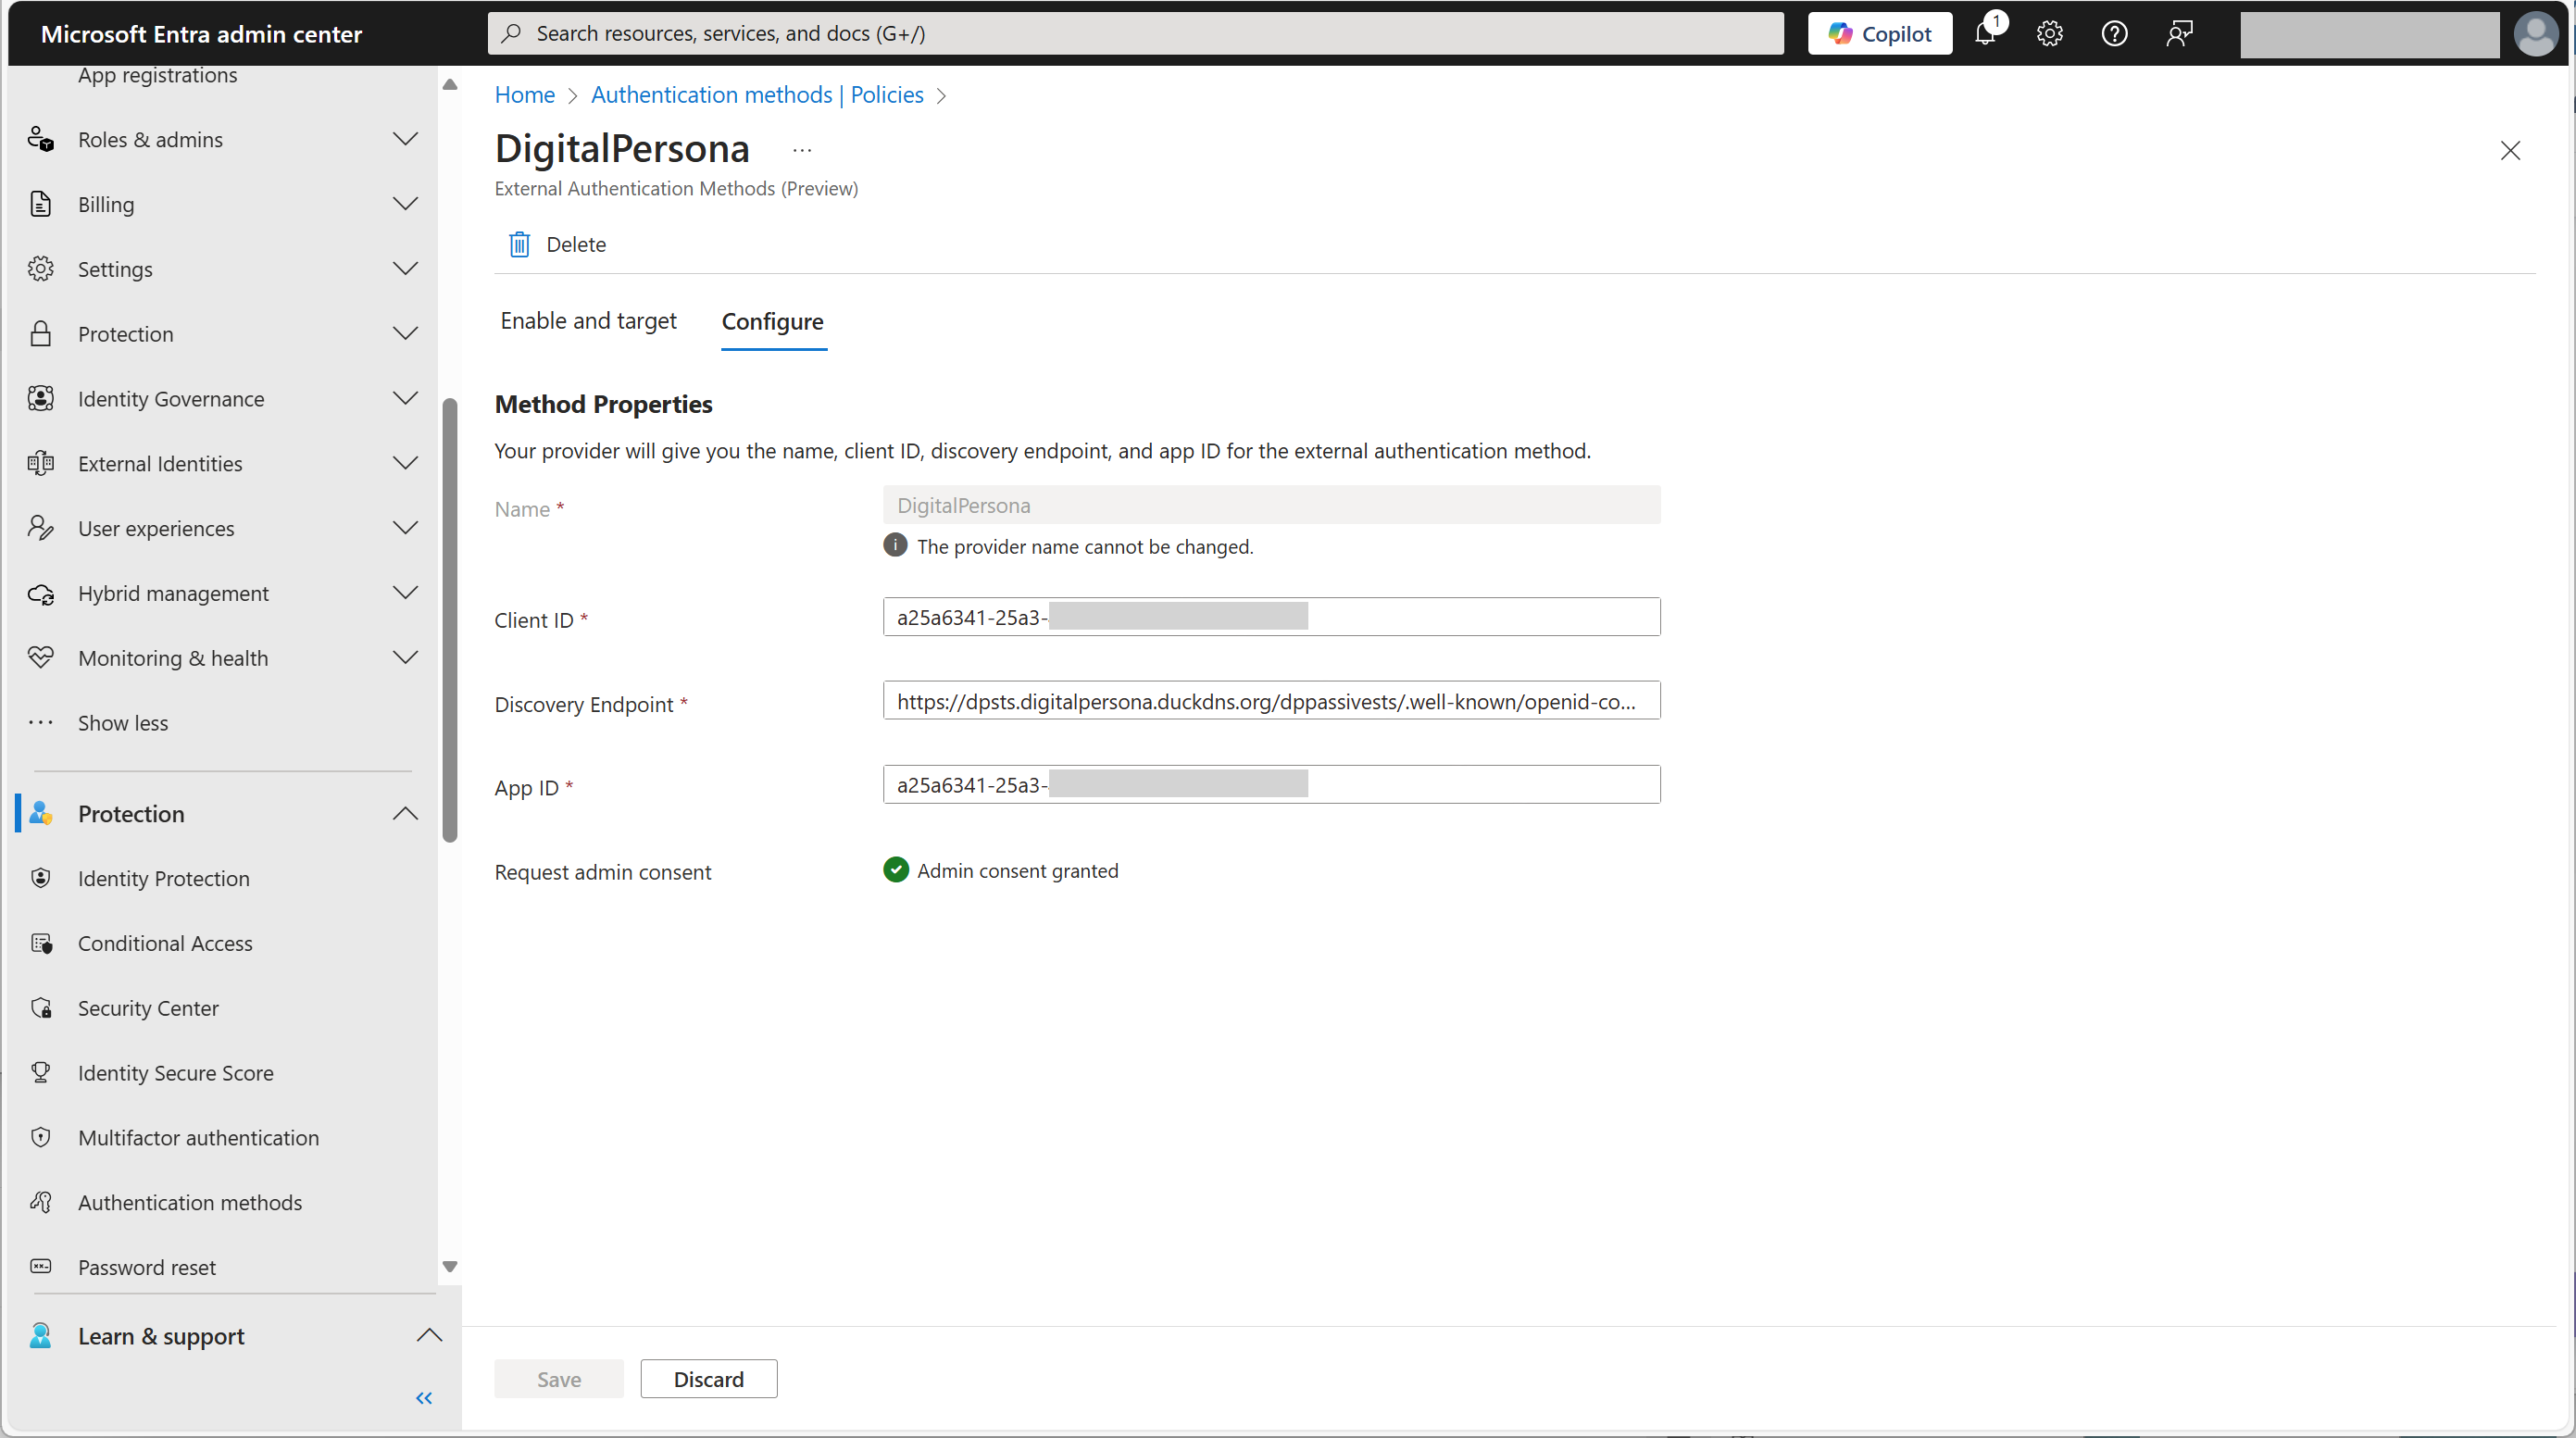
Select the Configure tab and create a new method with the following parameters:
-
Name - DigitalPersona
-
Client ID - the Application (client) ID value obtained when you created the application above
-
Discovery Endpoint - enter the OpenID Connect (OIDC) discovery endpoint for the DigitalPersona server
For example, https://idp.contoso.com/dppassivests/.well-known/openid-configuration
-
App ID - the Application (client) ID value obtained when you created the application above
-
-
Request and grant admin consent.
-
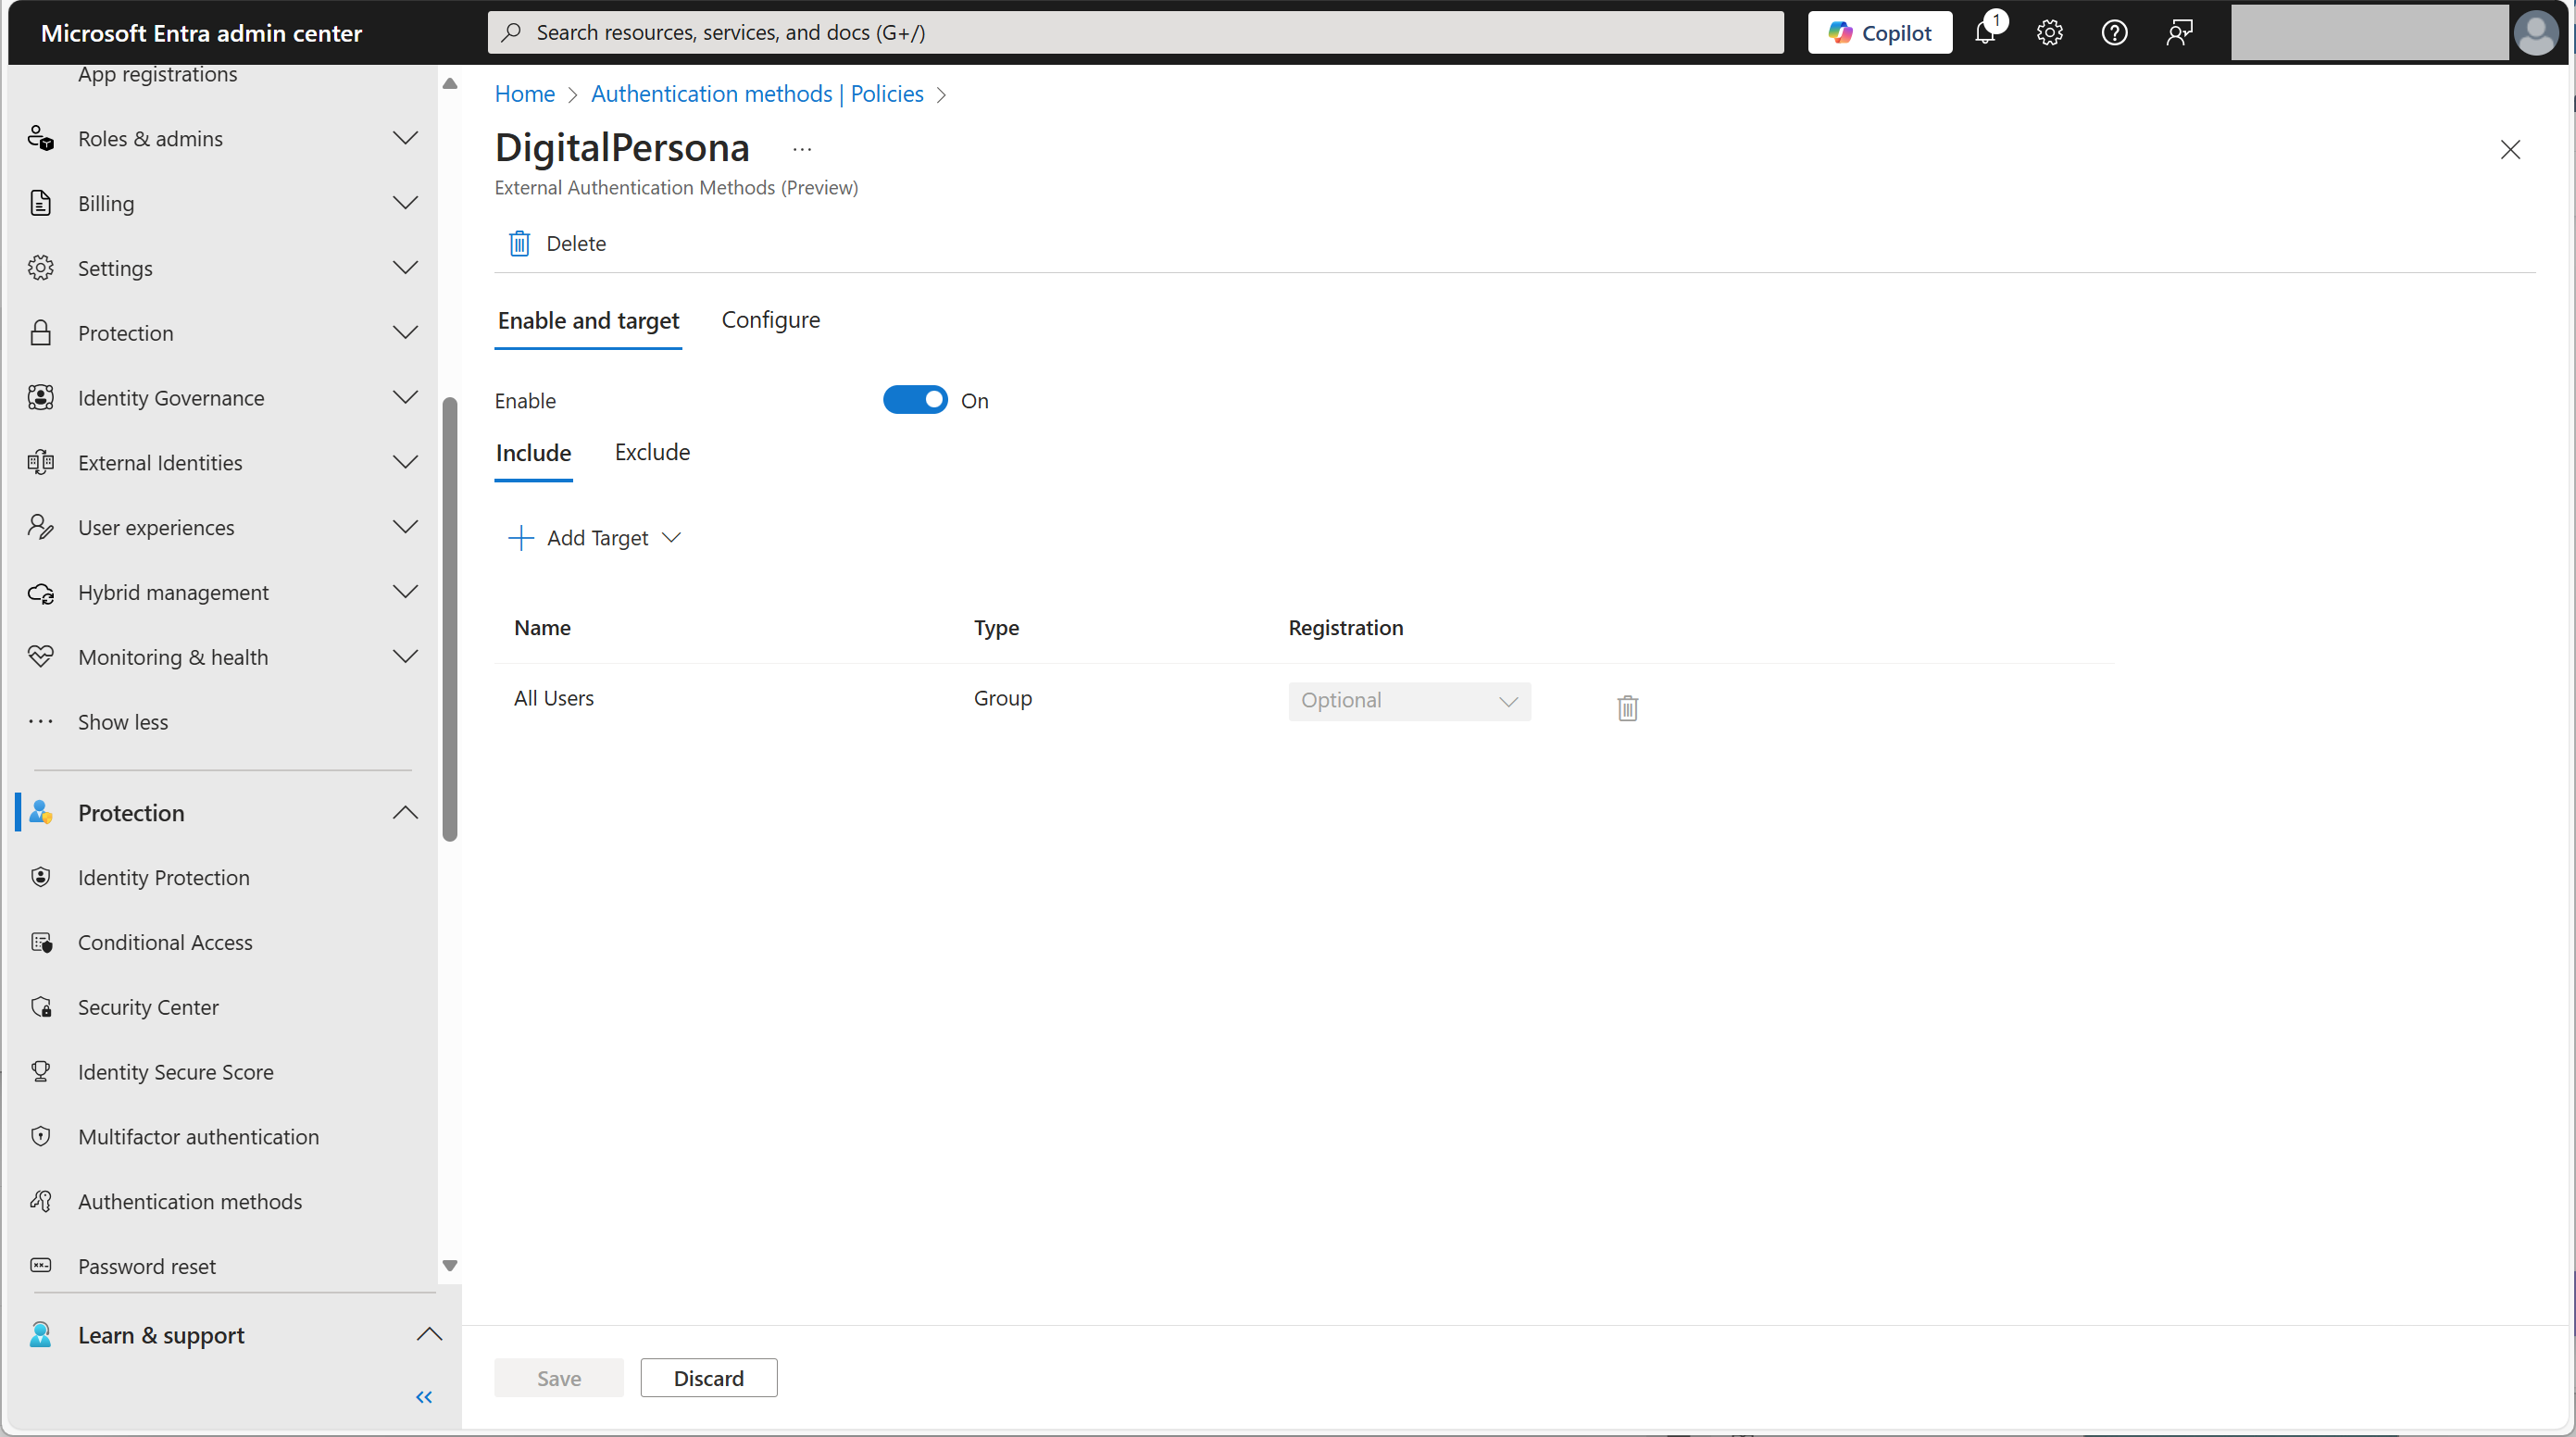
Select the Enable and Target tab and toggle Enable to On.
Add a Multi-factor Authentication Policy
-
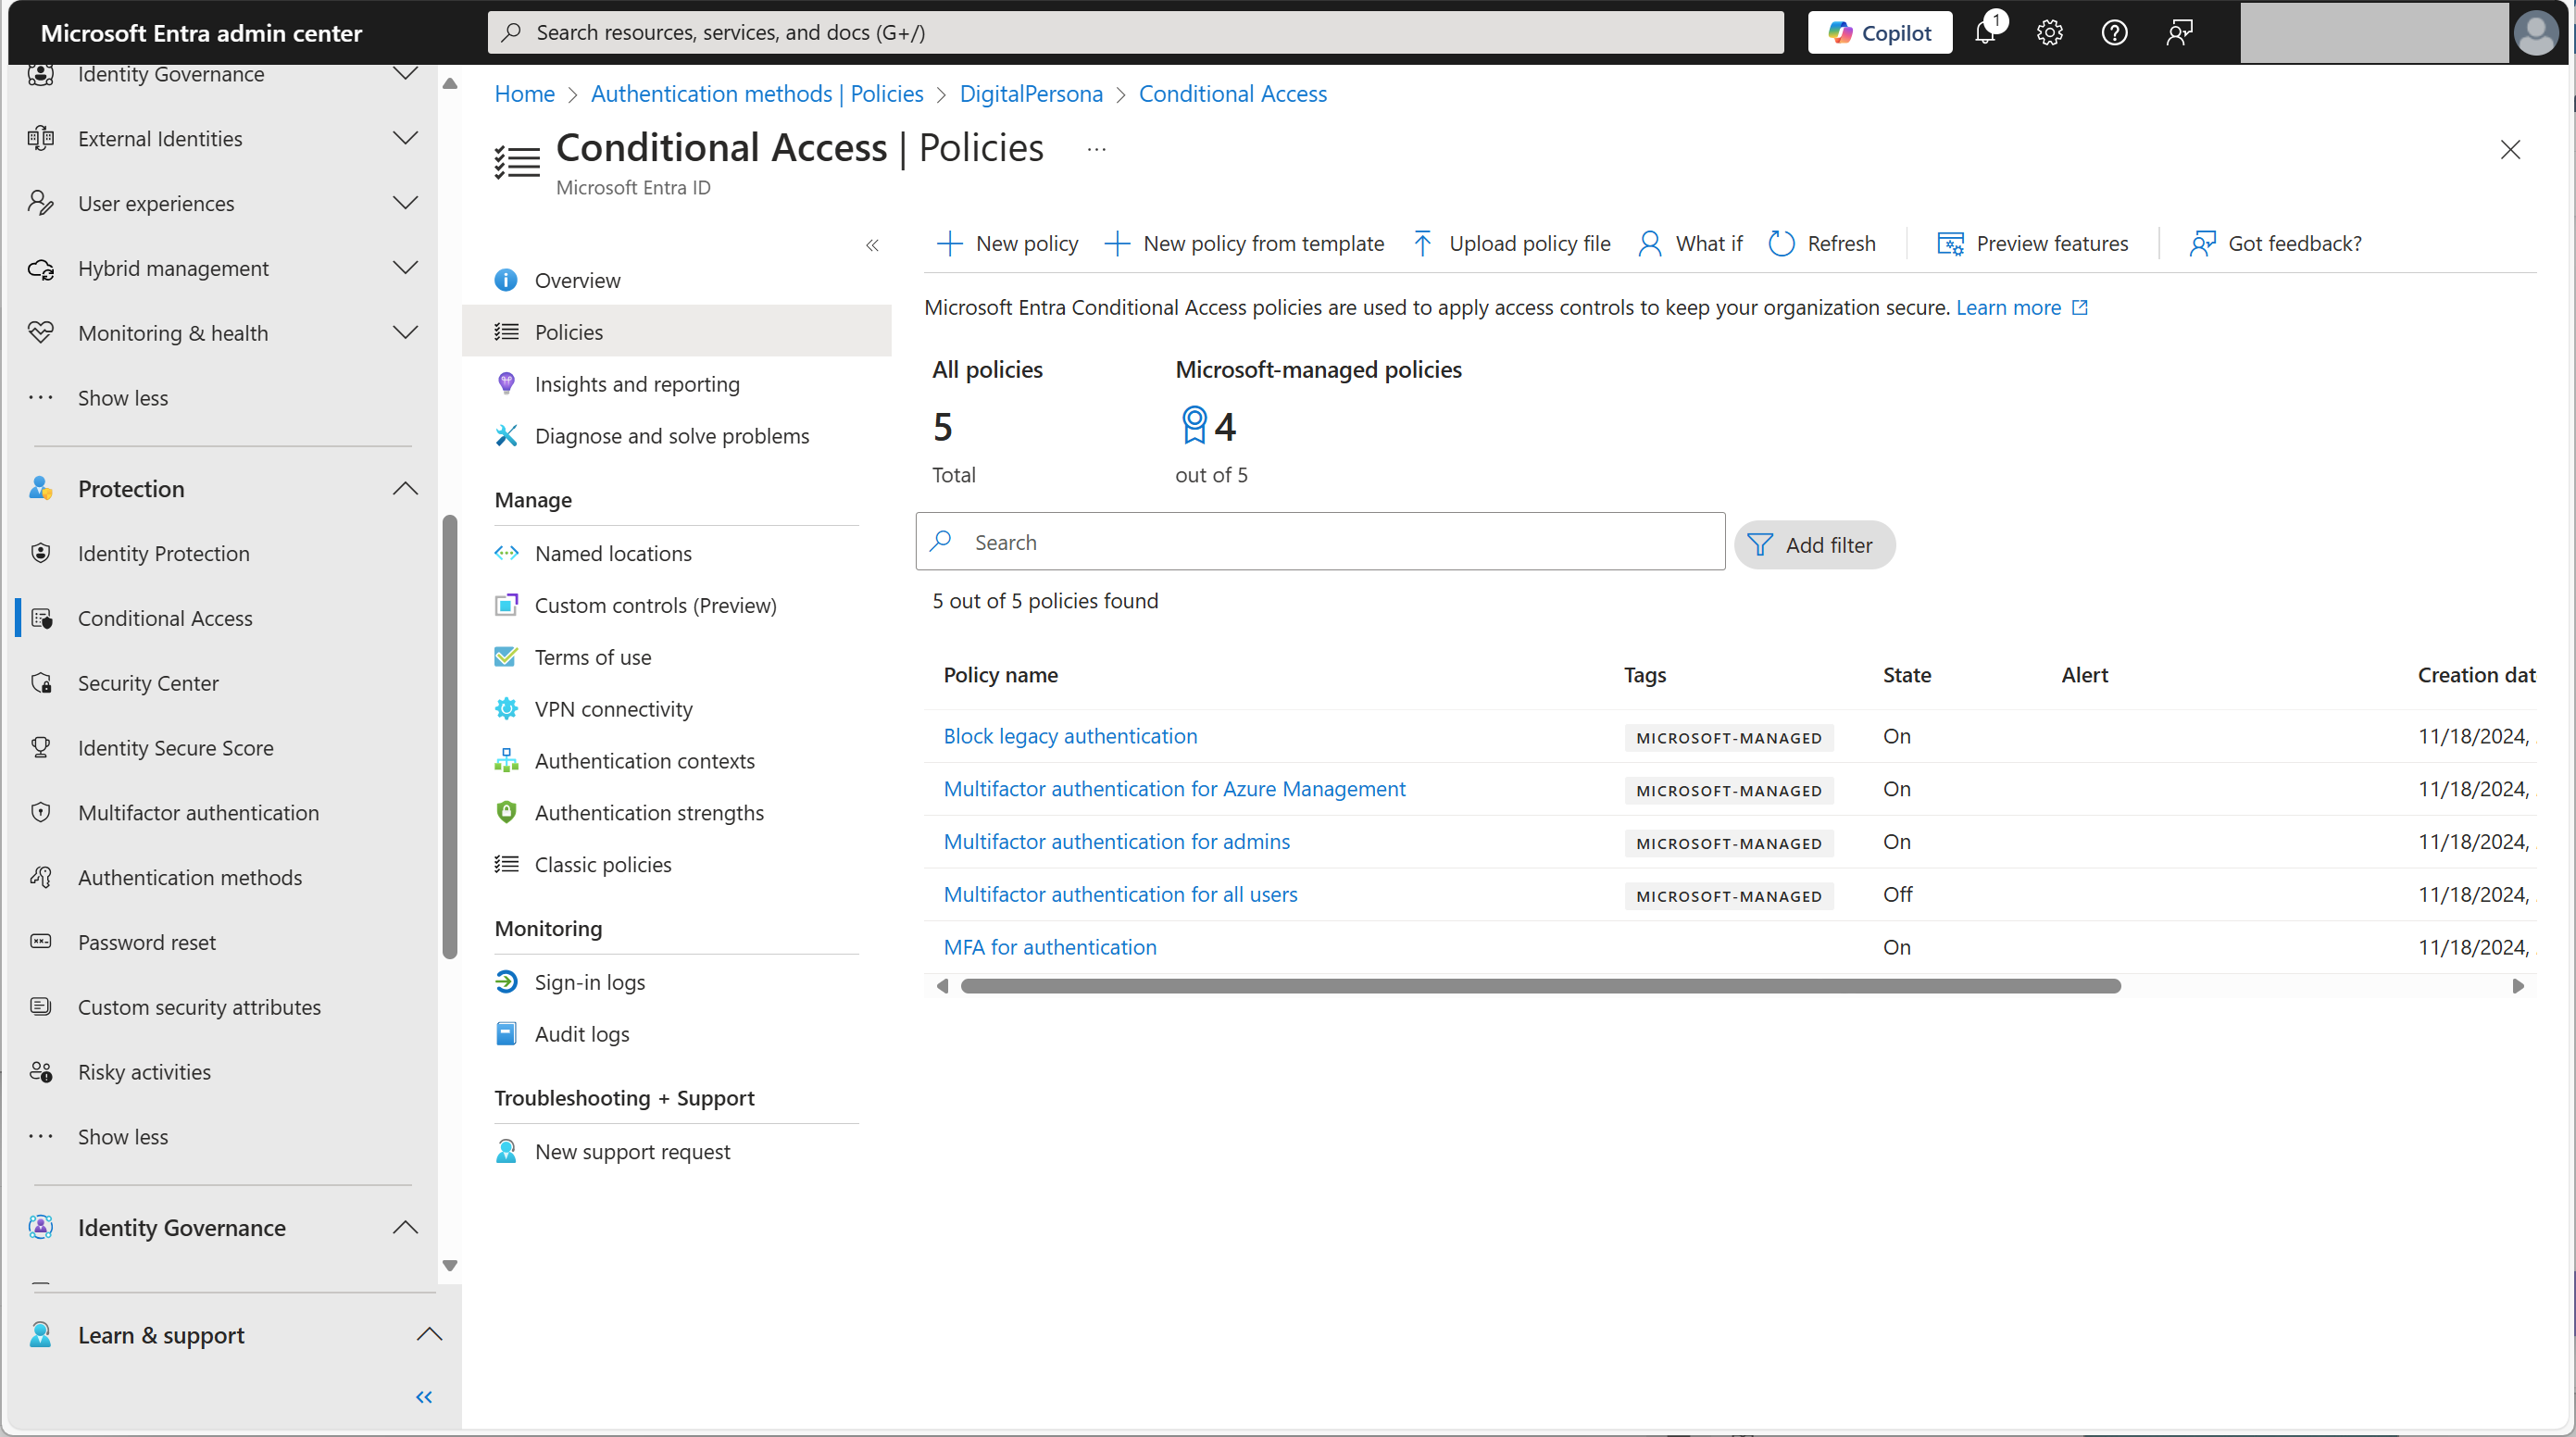
In the Microsoft Entra Admin Center, expand Protection in the left menu and select Conditional Access.
-
Click New policy and add a new conditional access policy.
-
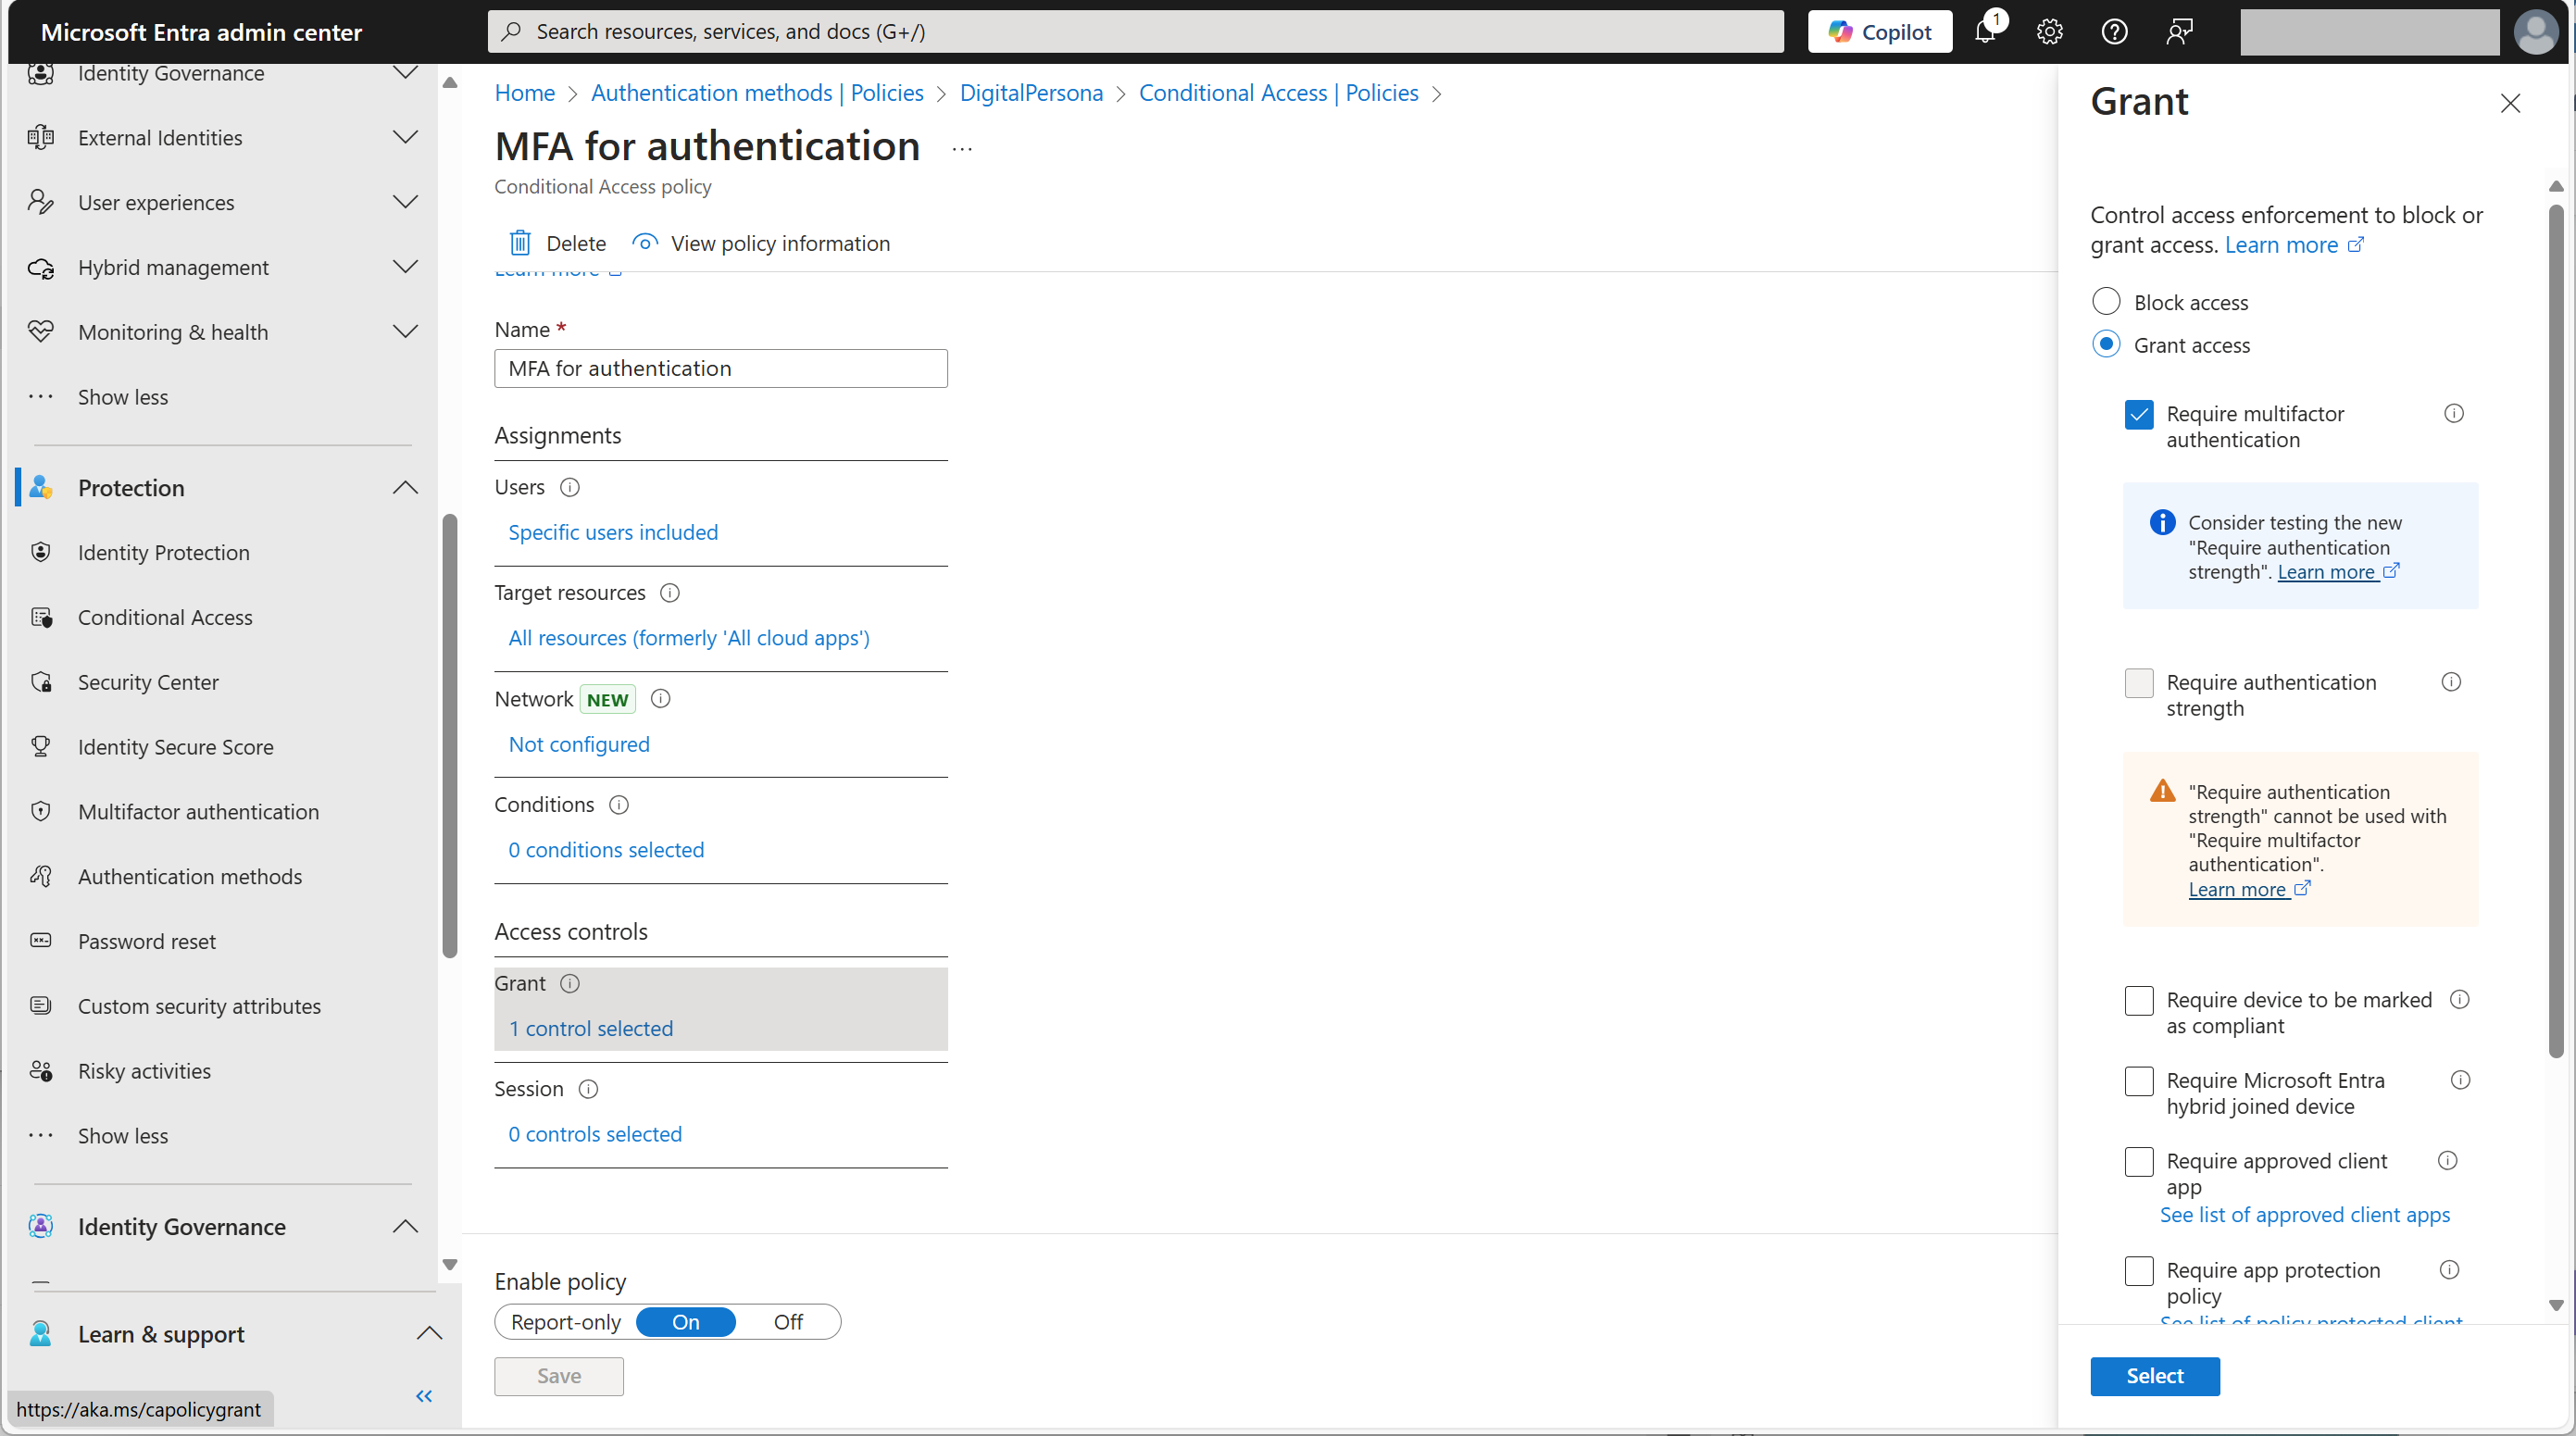
Under Access controls, click Grant and select Require multifactor authentication.
-
Specify the Users and Target resources.
-
Toggle Enable policy to On.
Configuring the DigitalPersona LDS Identity Provider
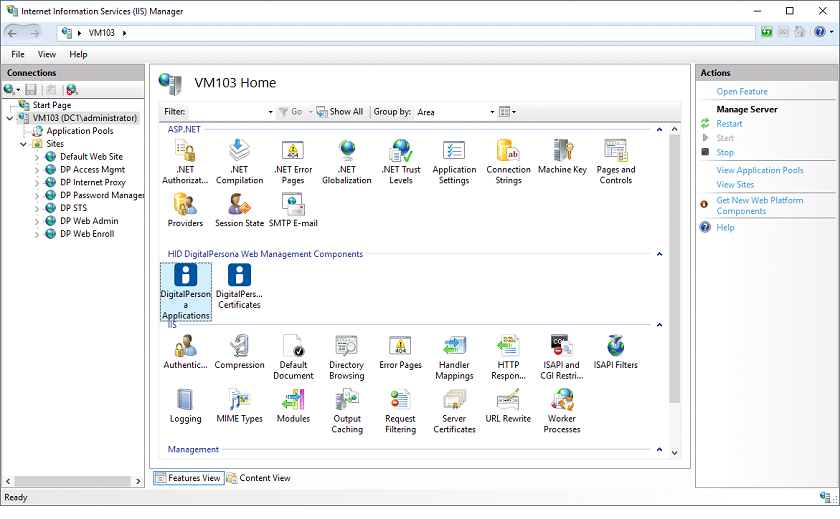
Using the Microsoft Information Services (IIS) Manager, configure the DigitalPersona Identity Server through the DigitalPersona Configuration IIS Plugin.
-
Launch the Microsoft Information Services (IIS) Manager and go to the HID DigitalPersona Web Management Components section.
-
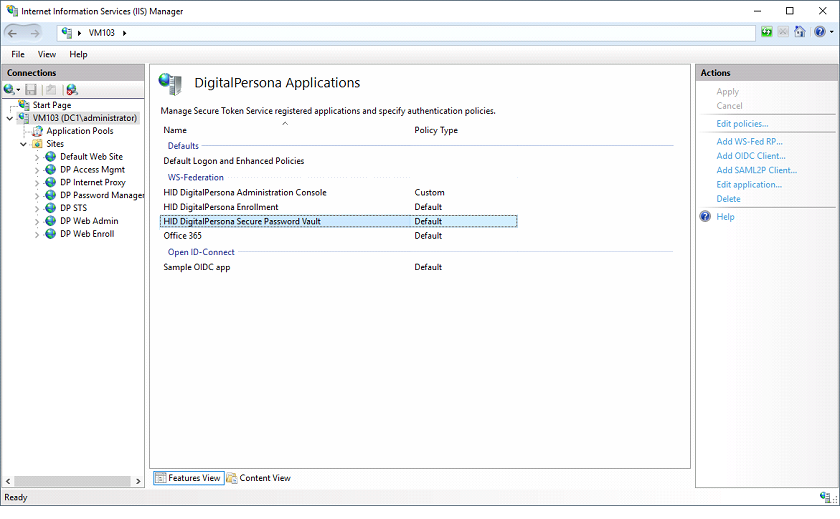
Select DigitalPersona Applications.
-
Under Actions in the right menu, click New OIDC Client.
-
Create the client with the following parameters:
-
Name - Microsoft
-
Flow - Implicit
-
Client ID - the Application (client) ID value obtained when you created the application above
-
Client Secret - any (for example, none)
-
Redirect URL - https://login.microsoftonline.com/common/federation/externalauthprovider
For details of the redirect Uniform Resource Identifiers (URIs) including that for governments, see Microsoft Entra multifactor authentication external method provider reference (Preview) | Microsoft Learn
-
Issuer for id_token_hint - https://login.microsoftonline.com/<TENANT-ID>/v2.0
For example, https://login.microsoftonline.com/858dh53e-5839-471f-bb6d-83dafbc60f6e/v2.0
-
The authentication policy for the created OIDC client MUST include at least one "possession" or "inherence" credential
Multifactor authentication is not supported for Entra EAM clients when both authentication factors are belong to DigitalPersona
The DigitalPersona WMC server must have access to Internet to verify signature of incoming requests


