Integrating with Microsoft SharePoint
The following sections describe how to implement identity federation from DigitalPersona Identity Provider (IdP) to Microsoft® SharePoint®.
On-premise SSL enabled Microsoft SharePoint Server 2013, Microsoft SharePoint Server 2016, or Microsoft SharePoint Server 2019
HID DigitalPersona Server and HID DigitalPersona Web Management Components version 2.2 or later
Configure the SharePoint Relying Party in DigitalPersona STS
-
Open the IIS Plugin configuration tool and navigate to the Applications tab.
-
Click the Add WS Fed RP link.
-
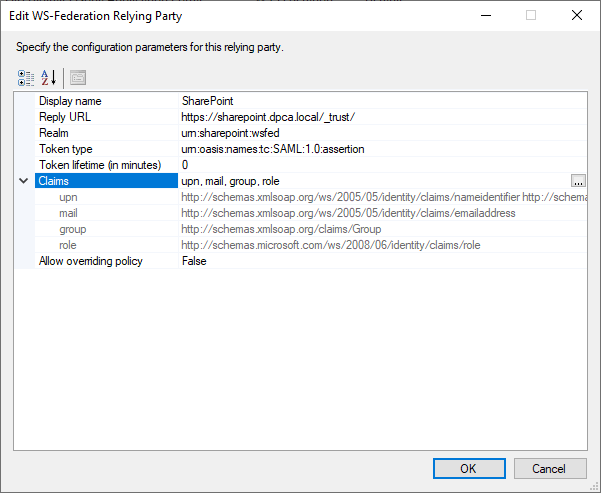
In the Edit WS-Federation Relying Party dialog box, specify the following values:
-
Display name - "SharePoint"
-
Reply URL - https://<sharepoint.dpca.local>/_trust/
-
Replace "<sharepoint.dpca.local>" with the name of your SharePoint host
-
Realm - "urn:sharepoint:wsfed"
-
Claims:
upn: http://schemas.xmlsoap.org/ws/2005/05/identity/claims/nameidentifier http://schemas.xmlsoap.org/ws/2005/05/identity/claims/upn
mail: http://schemas.xmlsoap.org/ws/2005/05/identity/claims/emailaddress
group: http://schemas.xmlsoap.org/claims/Group
role: http://schemas.microsoft.com/ws/2008/06/identity/claims/role
-
-
Apply the changes.
Configure the Trusted Identity Provider in the SharePoint Server
-
Copy the following lines of code into a new PowerShell script file.
Copy#Download the Token Signing Certificate from DP STS metadata
$url = "https://dpcaserver.dpca.local/dppassivests/.well-known/jwks"
$jwks = Invoke-WebRequest $url | ConvertFrom-Json
$encodedCert = $jwks.keys[0].x5c[0]
$binaryCert = [System.Convert]::FromBase64String($encodedCert)
$cert = [System.Security.Cryptography.X509Certificates.X509Certificate2]::new($binaryCert)
#Name of Trusted Identity Provider in SharePoint
$stsname = "DigitalPersona STS"
#Description of Trusted Identity Provider in SharePoint
$stsdesc = "HID DigitalPersona Security Token Service"
#Realm ID in SharePoint
$stsrealm = "urn:sharepoint:wsfed"
#DP STS WS-Federation Endpoint.
$signinurl = "https://dpcaserver.dpca.local/dppassivests/wsfed"
#Importing Token Signing Certificate into SharePoint.
New-SPTrustedRootAuthority -Name "DigitalPersona Token Signing" -Certificate $cert
# Defining incoming Claim Types. Can be multiple incoming claim types.
$m1 = New-SPClaimTypeMapping -IncomingClaimType "http://schemas.xmlsoap.org/ws/2005/05/identity/claims/upn" -IncomingClaimTypeDisplayName "upn" -SameAsIncoming
$m2 = New-SPClaimTypeMapping -IncomingClaimType "http://schemas.xmlsoap.org/ws/2005/05/identity/claims/emailaddress" -IncomingClaimTypeDisplayName "mail" -SameAsIncoming
$m3 = New-SPClaimTypeMapping -IncomingClaimType "http://schemas.xmlsoap.org/claims/Group" -IncomingClaimTypeDisplayName "group" -SameAsIncoming
$m4 = New-SPClaimTypeMapping -IncomingClaimType "http://schemas.microsoft.com/ws/2008/06/identity/claims/role" -IncomingClaimTypeDisplayName "role" -SameAsIncoming
# Creating Trusted Identity Provider
New-SPTrustedIdentityTokenIssuer -Name $stsname -Description $stsdesc -Realm $stsrealm -ImportTrustCertificate $cert -ClaimsMappings $m1,$m2,$m3,$m4 -SignInUrl $signinurl -IdentifierClaim $m1.InputClaimType
-
Replace dpcaserver.dpca.local with the name of your DigitalPersona STS host (there are two occurrences in the script).
-
Save the script file.
-
Open SharePoint Management Shell on the SharePoint server and execute the script created above.
Assign the Trusted Identity Provider to the SharePoint Web Application
-
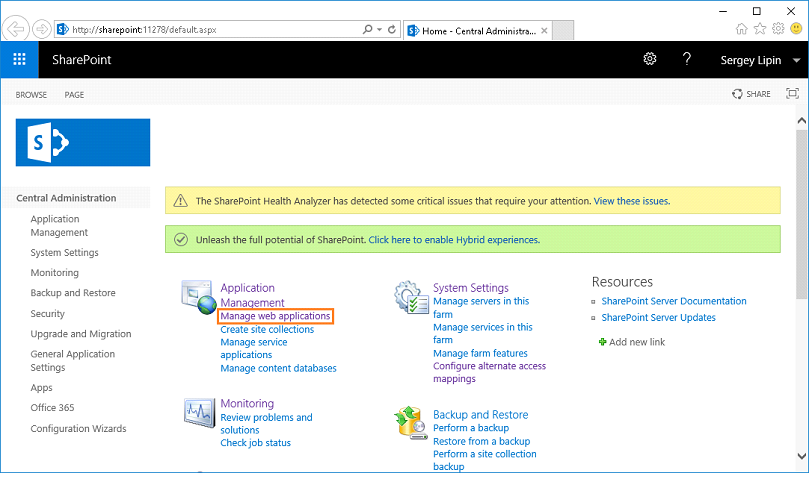
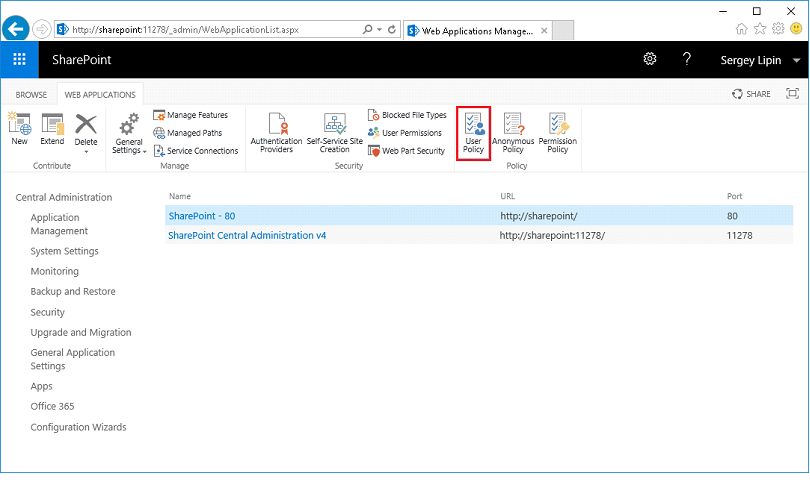
Open the SharePoint Central Administration console and navigate to Manage web applications:
-
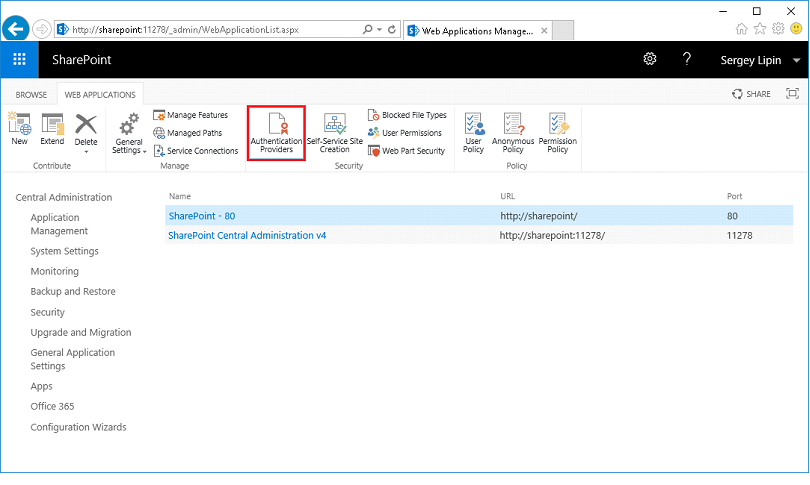
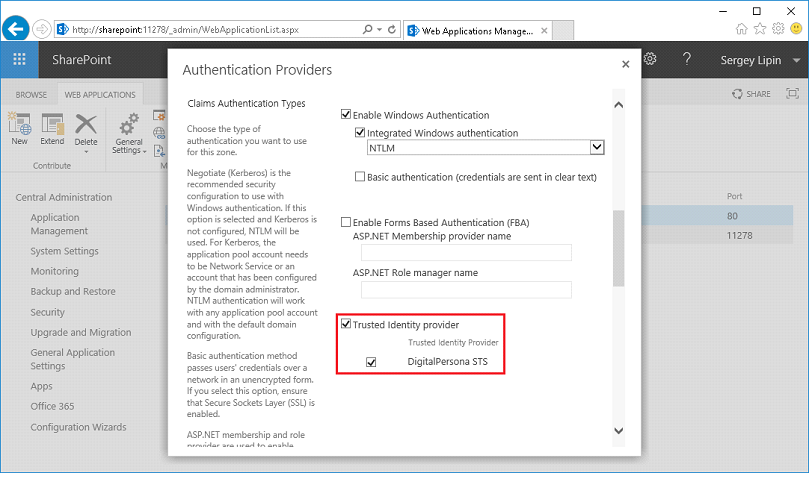
Select the desired SSL enabled web application in the list and click Authentication Providers:
-
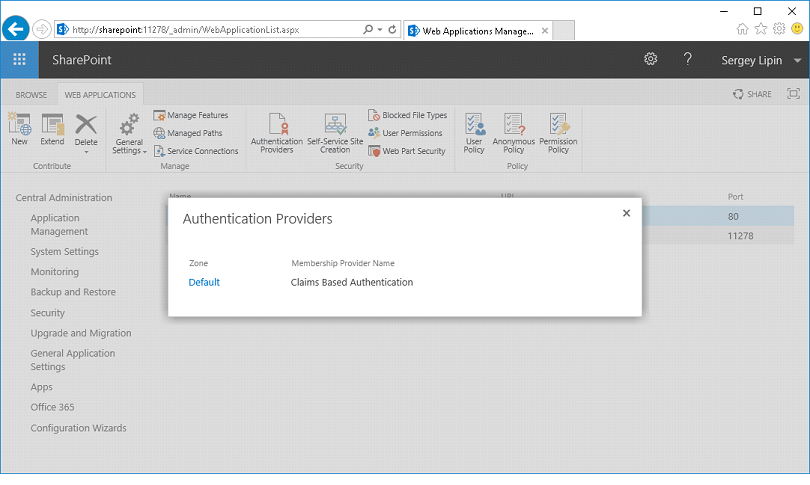
Click the desired zone.
-
Scroll down to Claims Authentication Types and enable Trusted Identity Provider and DigitalPersona STS.
-
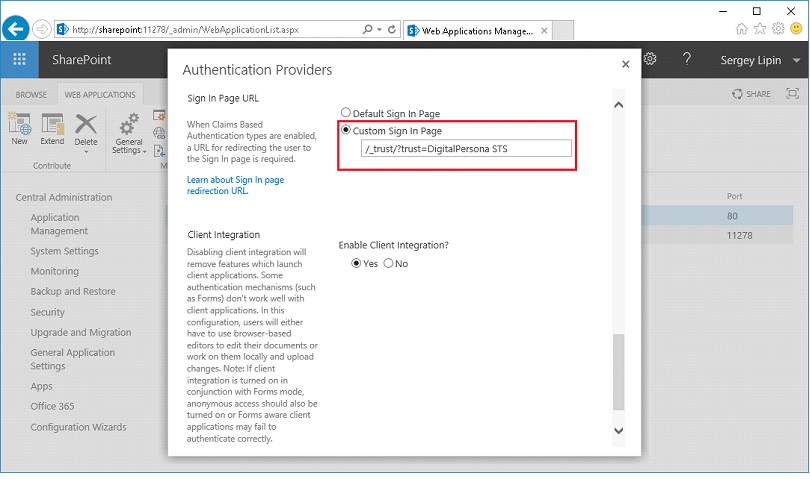
Continue to scroll until you see Sign In Page URL. Select Custom Sign In Page and enter the following text:
/_trust/?trust=DigitalPersona STS
-
Click Save.
Configure Access to the SharePoint Web Application
-
On the Manage Web Applications screen, select the web application that has the DigitalPersona STS authentication provider configured and click User Policy.
-
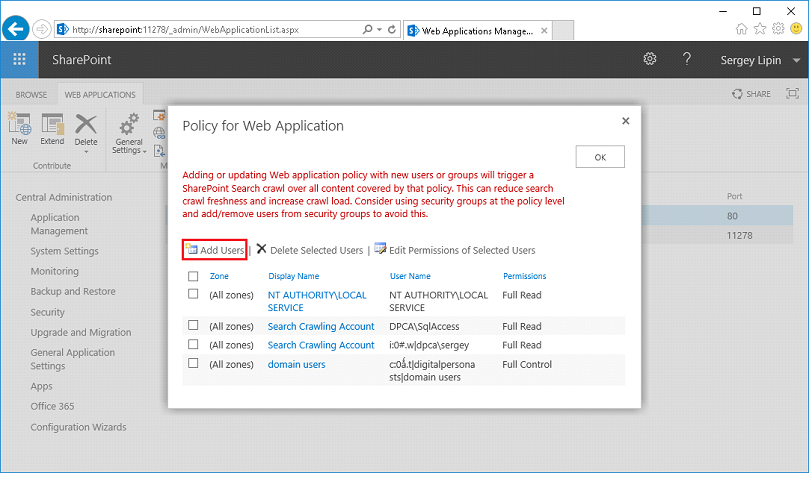
Click Add Users.
-
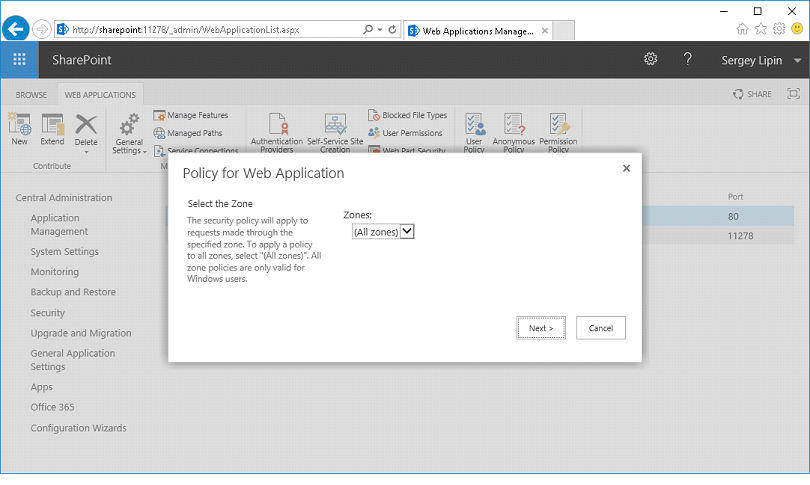
Select the appropriate zone or select the default All Zones. Click Next.
-
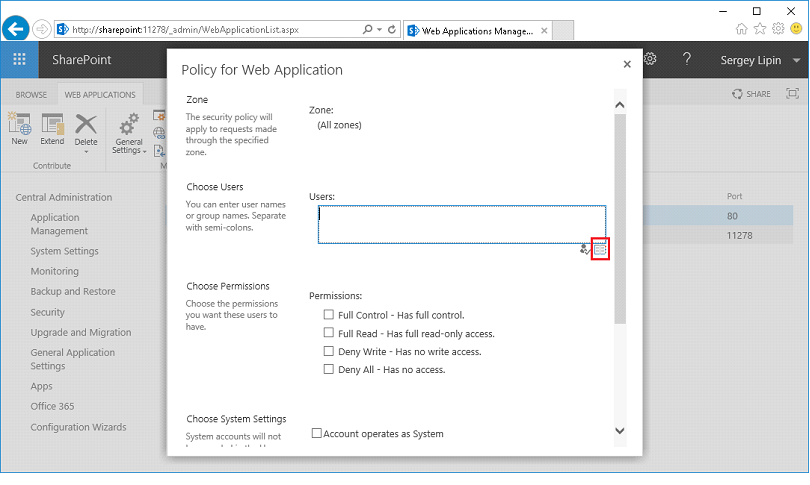
Click the people picker (book) icon.
-
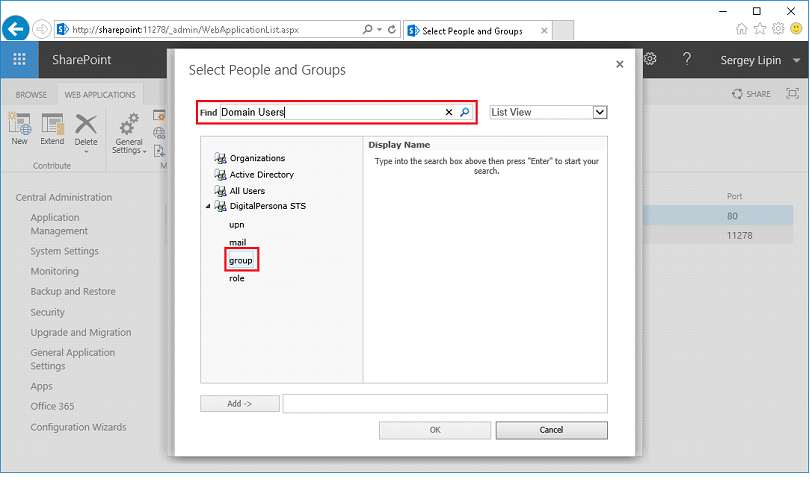
Select the desired claim under DigitalPersona STS in the left frame and enter a group or account name to grant access to in the Find text box at the top.
-
Press Enter, click Add, and then click OK.
-
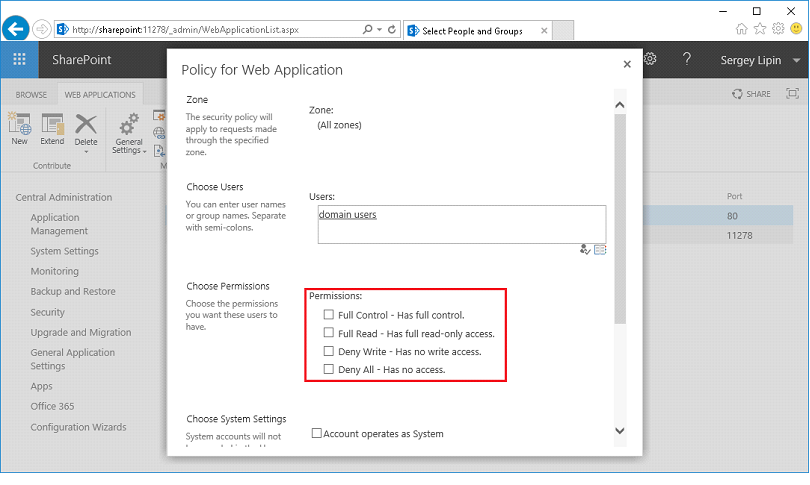
Select any Permissions you want the user or group to have.
-
Click Finish to return to the Policy for Web Application dialog.
-
Click OK.


