Installing and Customizing ActivClient Setup Using the Installation Wizard
You can install ActivClient interactively through a graphical user interface (GUI).
To install ActivClient with the Installation Wizard:
-
Locate the ActivClient MSI installer in the ActivClient product folder of the distribution package and double-click it.
Alternatively, you can
 run the MSI installer from the command line or PowerShell.
The setup detects the platform type and launches the relevant ActivClient installation wizard.
-
On the Welcome page, click Next.
-
Accept the license agreement and click Next.
-
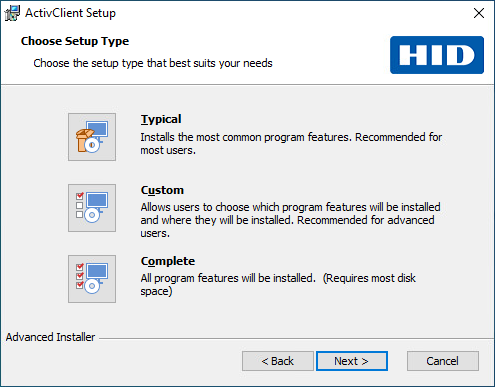
In the Choose Setup Type dialog:
-
Leave the setup type as Typical (default setting) and click Next for a typical installation.
-
Select Custom and click Next
 to choose manually which features you wish to install.
 -
Select Complete for installing all available program features.
-
-
Click Install.
-
The Setup Progress page is displayed. The progress might take several minutes.
-
If the required Visual C++ Redistributable packages are not already installed, the ActivClient installer will prompt for User Account Control (UAC) and install them automatically.
-
Once the setup is complete, click Finish.
Post-Installation Steps
-
Restart Workstation:
It is recommended to restart your workstation after successful installation of ActivClient to make sure all the services are active and operative.
-
Smart Card Readers:
-
The security device reader that you use requires a reader driver. This driver might be present in your Microsoft Windows system, or you might need to install it. Contact your reader vendor for information.
-
If you use an HID Global OMNIKEY® reader, and if the reader is not recognized automatically, or if the driver is not installed by Microsoft Windows Update, the drivers are available for download from HID Global’s website.
-
