Deploying the ActivClient Setup
This section explains how to deploy ActivClient once you have customized the HID ActivClient setup.
Deploying ActivClient with MSI
The standard HID ActivClient deployment method consists in running the ActivClient .MSI installer.
The ActivClient setup uses MSI, the current standard in Windows. Most Enterprise Management products support MSI technology. Therefore, if you are using or planning to use a product that is MSI compatible (such as Tivoli or Novadigm), this product will likely work with ActivClient.
Deploying Using Microsoft System Center Configuration Manager
As an administrator, you can remotely install ActivClient for a set of users or computers using Microsoft System Center Configuration Manager (SCCM).
This reduces the total cost of ownership of ActivClient because administrators are not required to perform installation in person at every workstation. Also, users do not require instructions on how to install the product, thereby eliminating on-site installation support and associated help desk calls.
Deploying Using Active Directory Push
As an administrator you can remotely install ActivClient to a set of users or computers using the automated software push capabilities in Microsoft Windows Server Active Directory.
This reduces the total cost of ownership of ActivClient because administrators are not required to perform installation in person at every workstation. Also, users do not require instructions on how to install the product, thereby eliminating on-site installation support and associated help desk calls.
The following table lists the tasks associated with distributing ActivClient in the order they are to be performed and where to find information about each task:
| Task | Task Description | See |
|---|---|---|
|
1 |
Create a shared network folder as a distribution point. |
|
|
2 |
Limit deployment to a predefined user population and distribute the package containing ActivClient to computers. |
|
|
3 |
Test the package. |
|
|
4 |
Redeploy a package. |
Create a Distribution Point
-
Log on to the server computer as an administrator.
-
Create a shared network folder in which to place an ActivClient .msi installer for each ActivClient edition to be deployed.
-
Set permissions on the shared network folder to allow access to the distribution point.
-
Copy the ActivClient .msi installer to the distribution point.
Assign the Package
The package to be deployed must be assigned to a group of computers (an Active Directory Organizational Unit, or OU) on which the package is to be installed.
For deployment, follow these steps:
-
On the domain controller, start the Server Manager, and expand the Features node.
-
In the Group Policy Management node, expand Forest and Domains and then select the domain containing the organizational unit(s) to which you want to deploy ActivClient.
-
Depending on the scope of the deployment, right-click on the domain or OU and select Create a GPO in this domain and Link it here (or edit an existing GPO).
-
In the Group Policy Management Editor, expand Computer Configuration, then Policies and then Software Settings.
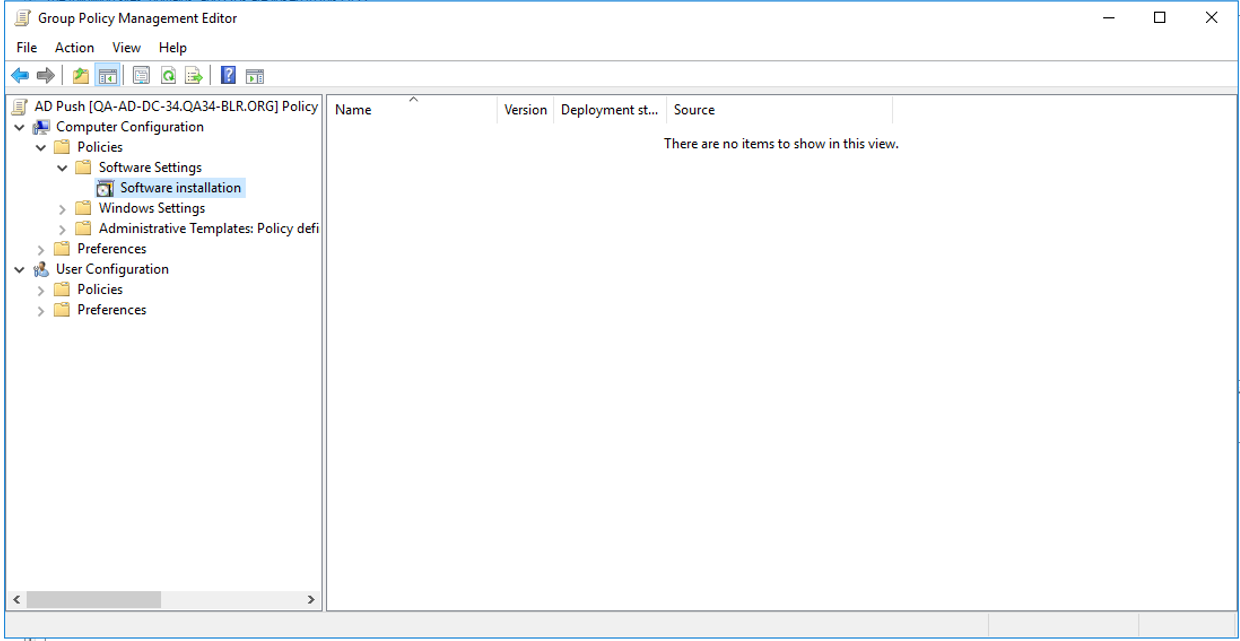
-
Right-click on Software Installation point to New, and select Package.
-
In the Open dialog box, in the File name field, enter the full Universal Naming Convention (UNC) path to the shared folder that contains the MSI package you want to deploy.
-
Do not browse to the location. Make sure that you use the UNC path to the shared folder.
-
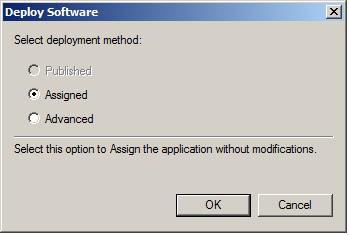
It is mandatory that the package is assigned to a computer, as opposed to assigning it to a user.
-
Select the package and click Open.
-
Select Assigned and click OK.
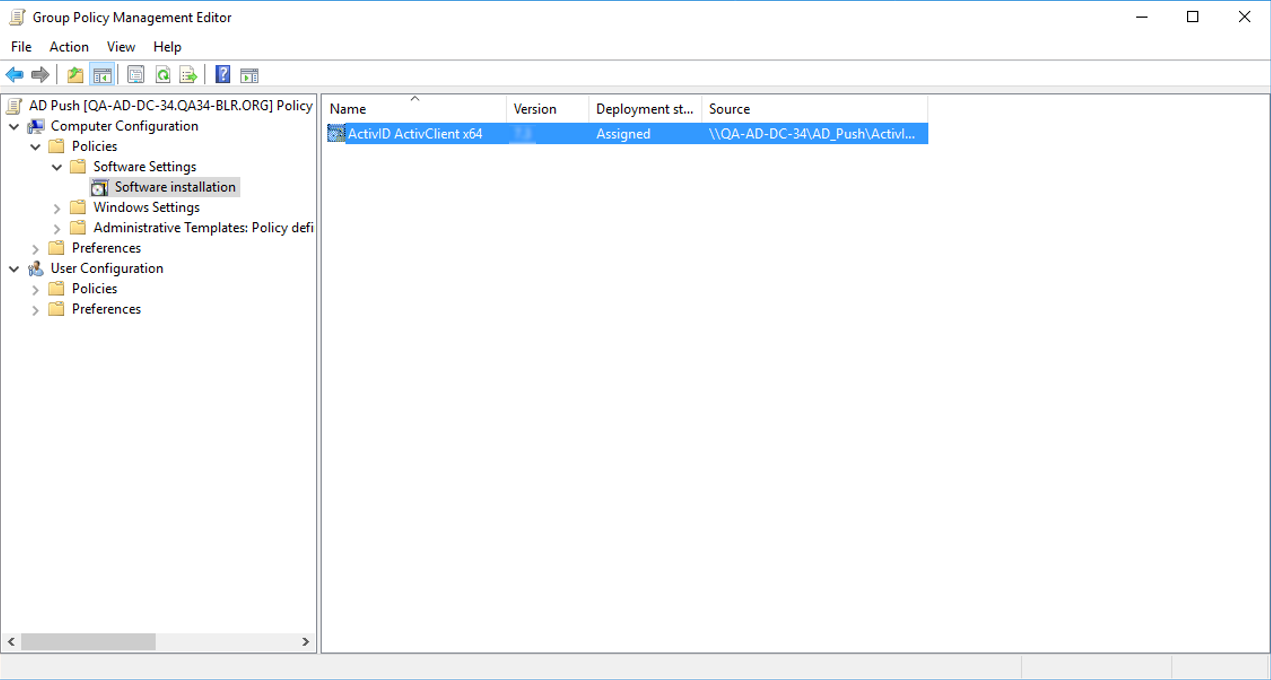
The package is listed in the right pane of the Software installation window.
-
Close the console window.
When the client computer starts, the managed software package is automatically installed.
Test the Package
To validate the package, you can force package installation on a computer from the target Organizational Unit (OU) and verify that the installation has completed successfully. To do so:
-
Log on to a computer that is part of the target OU.
-
From the Start menu, point to Settings, and select Control Panel.
-
Double-click Programs and Features, and then click Install a Program from the Network.
-
Select the ActivClient edition that you published, then click Add.
The package is validated as ActivClient is installed.
-
Click OK, and then click Close.
Note:If error 1274 (Group Policy installation failed) occurs, enable the following policy:
Computer Configuration > Administrative Templates > System > Logon > Always wait for the network at computer startup and logon
This ensures that the Group Policy is applied correctly during startup.
Redeploy the Package
In some cases, you might want to redeploy a package. For example, you can use the redeploy function to upgrade to a more recent version.
Use the following procedure to redeploy a package:
-
In the Group Policy Management Editor, return to the Software installation container that you created above.
-
Right--click the package, point to All Tasks, and select Redeploy application.
-
When prompted to accept that the application will be installed everywhere it is already installed, click Yes.
-
Close the console window.