Issue Your Device
-
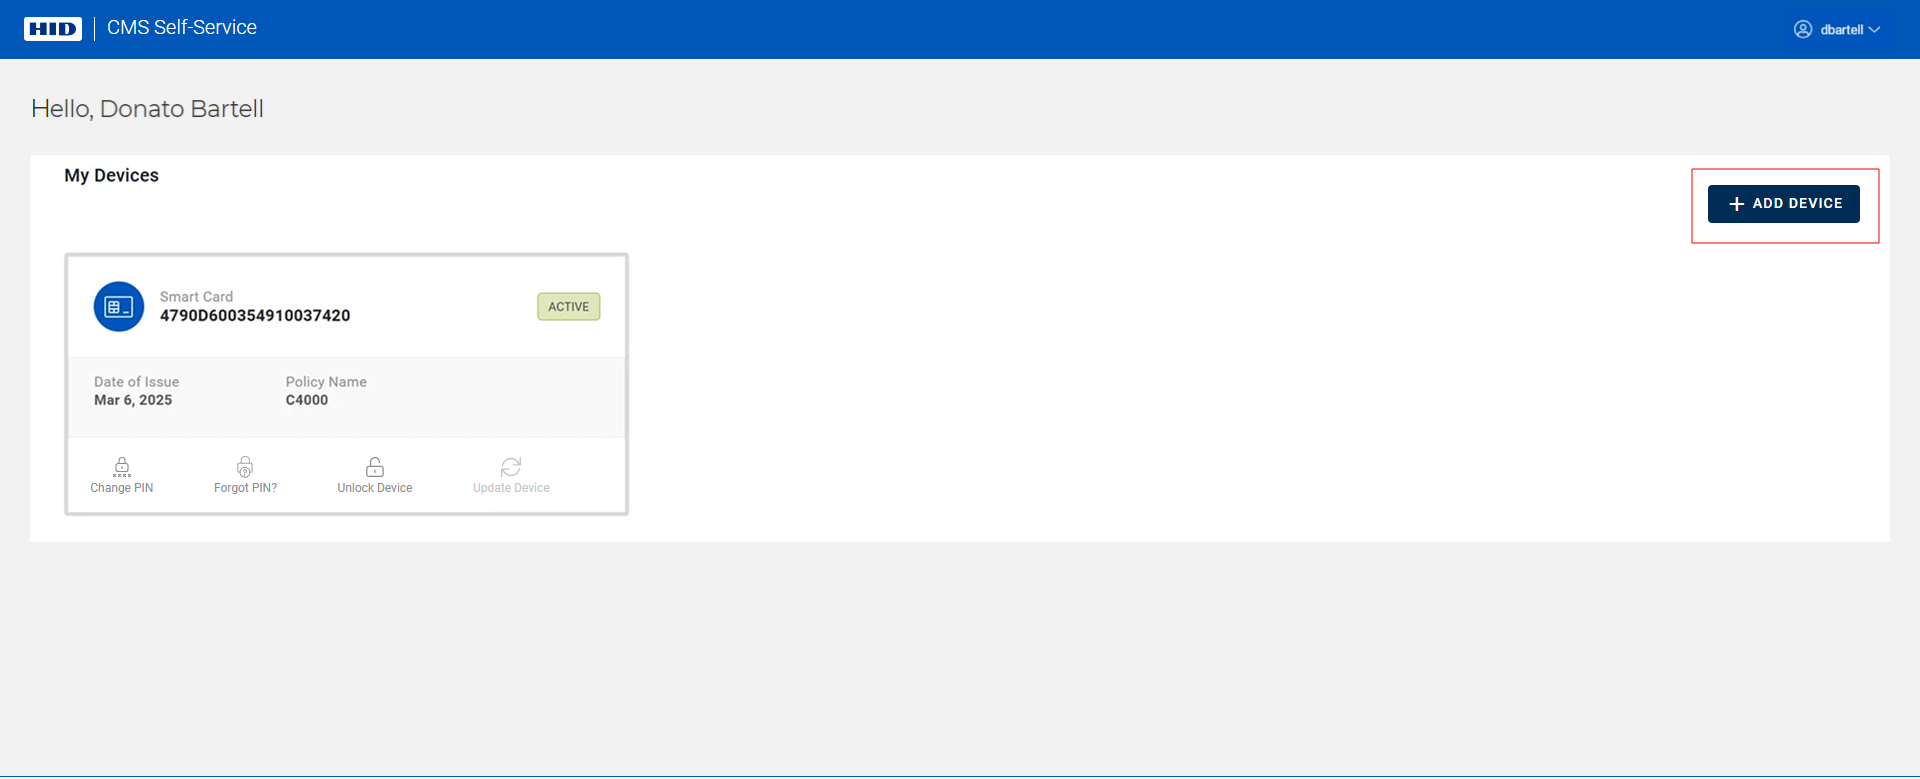
Connect the device you want to issue and click on Add Device:
-
Checks are performed to verify that the ActivID CMS Web Browser extension and HID CMS Client are installed.
Note: Refer to Troubleshooting if these checks are not successful. -
A check is then performed to detect your device:
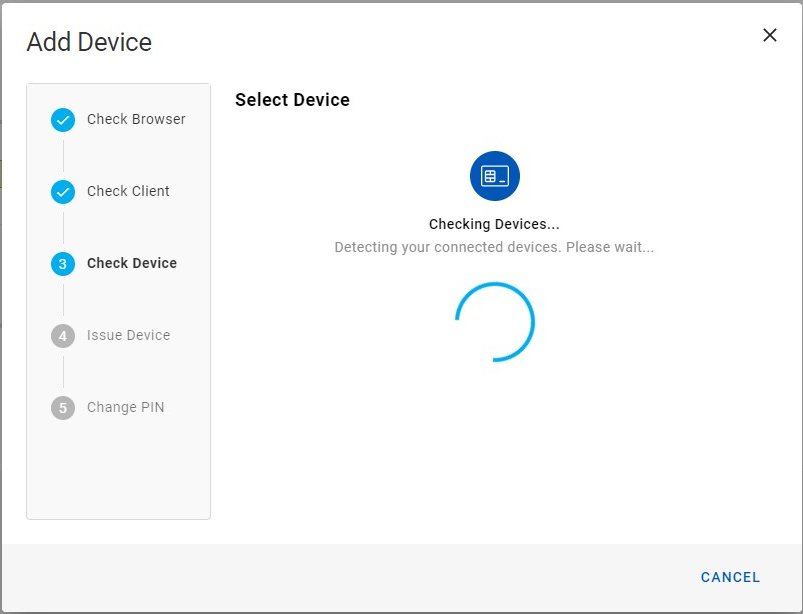 Note: This check searches only for available and compatible devices (for example, a device that is not yet issued).
If your device is detected, the next step begins automatically.
Important:
-
If no device is detected, you are prompted to connect your device and hit Refresh:
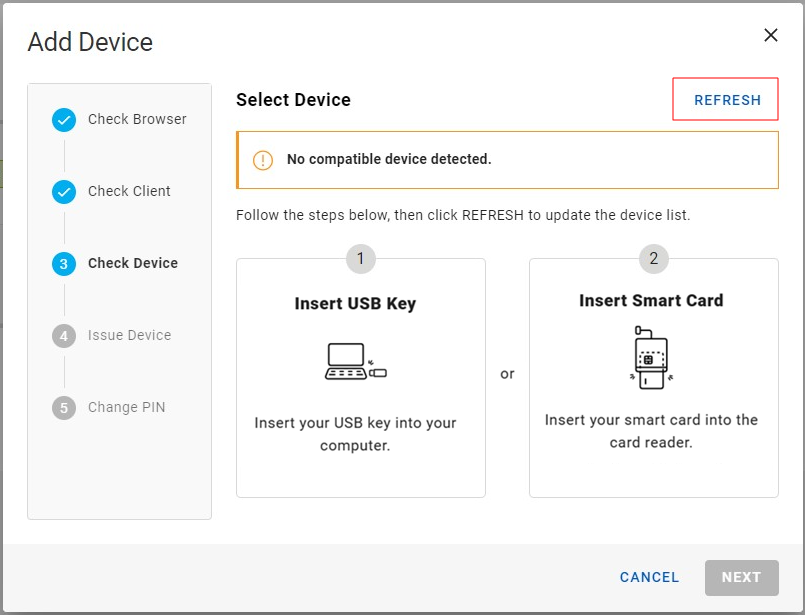
Once your device is detected, issuance is started automatically.
-
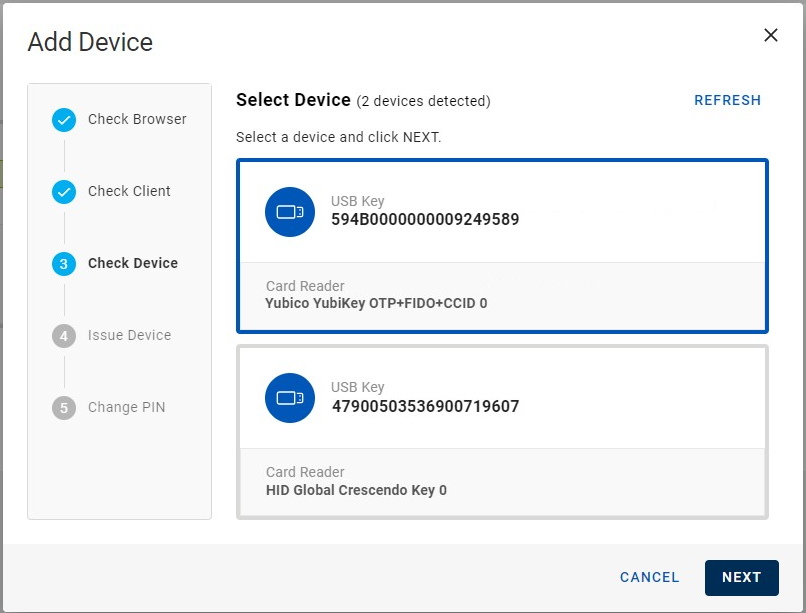
If more than one device is detected, you must select the device you want to issue, and click Next:
-
-
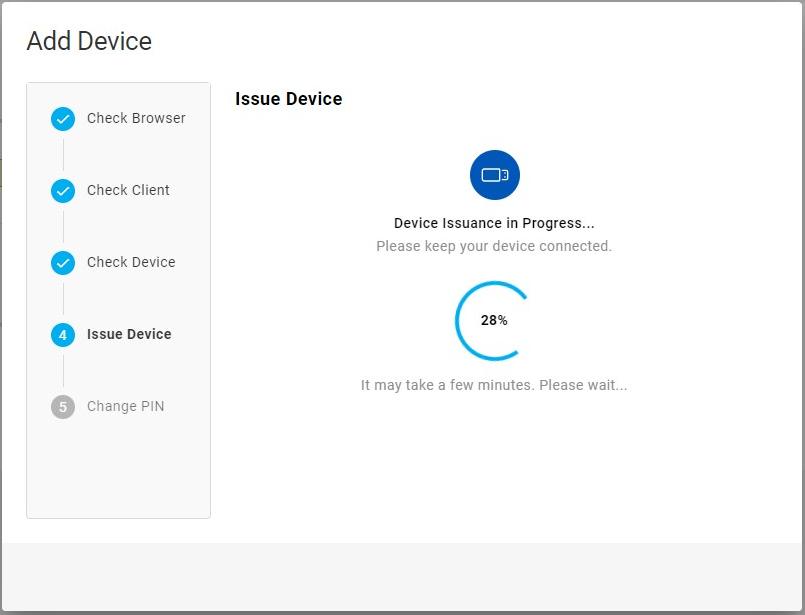
The device is issued:
 Important: During the issuance, the following message may be displayed:
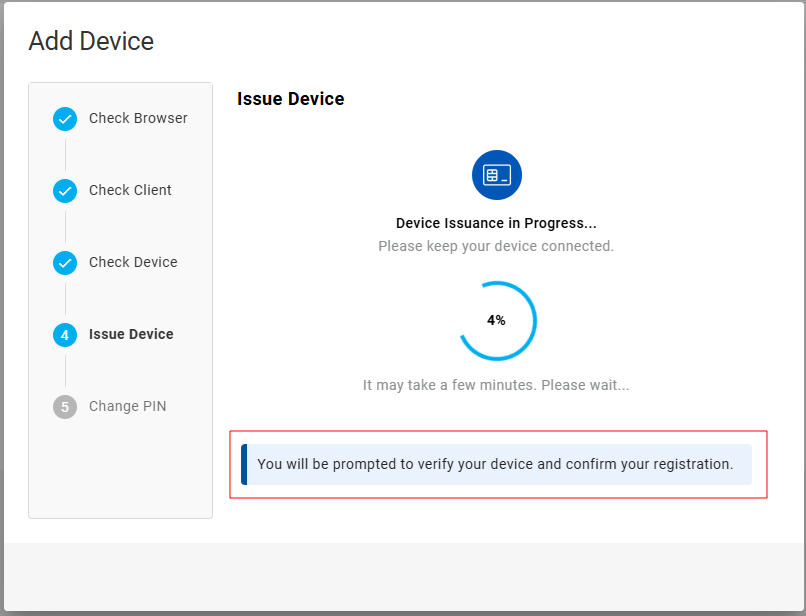
You should follow the instructions in the dialog boxes that are displayed. If you do not complete this process, the issuance will fail. (For details, see Particularities Concerning FIDO Applications).Note: Refer to Troubleshooting if the issuance fails. -
After the device is issued, you are prompted to change the PIN:
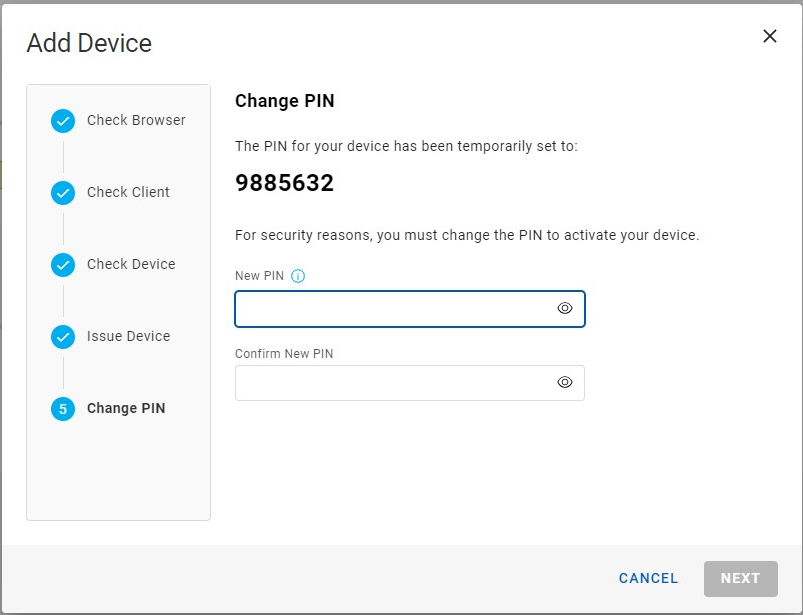
Important: If you do not change the PIN, your device is not activated and is shown on your My Devices page as . You cannot activate or use this device until it has been activated by an operator using the Operator Portal. Note: When the device is activated by the operator, it will still have its initial PIN.
 -
Enter and confirm your new PIN, then click Next. The device is then activated:
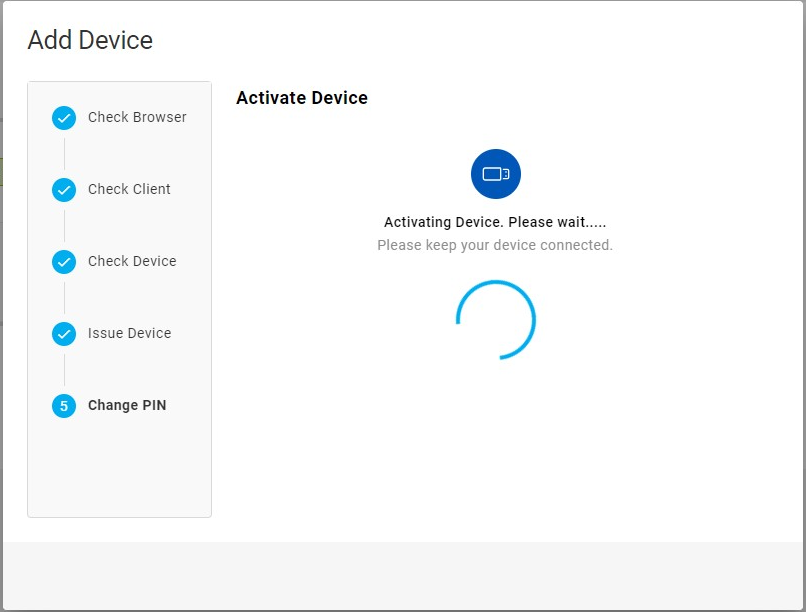
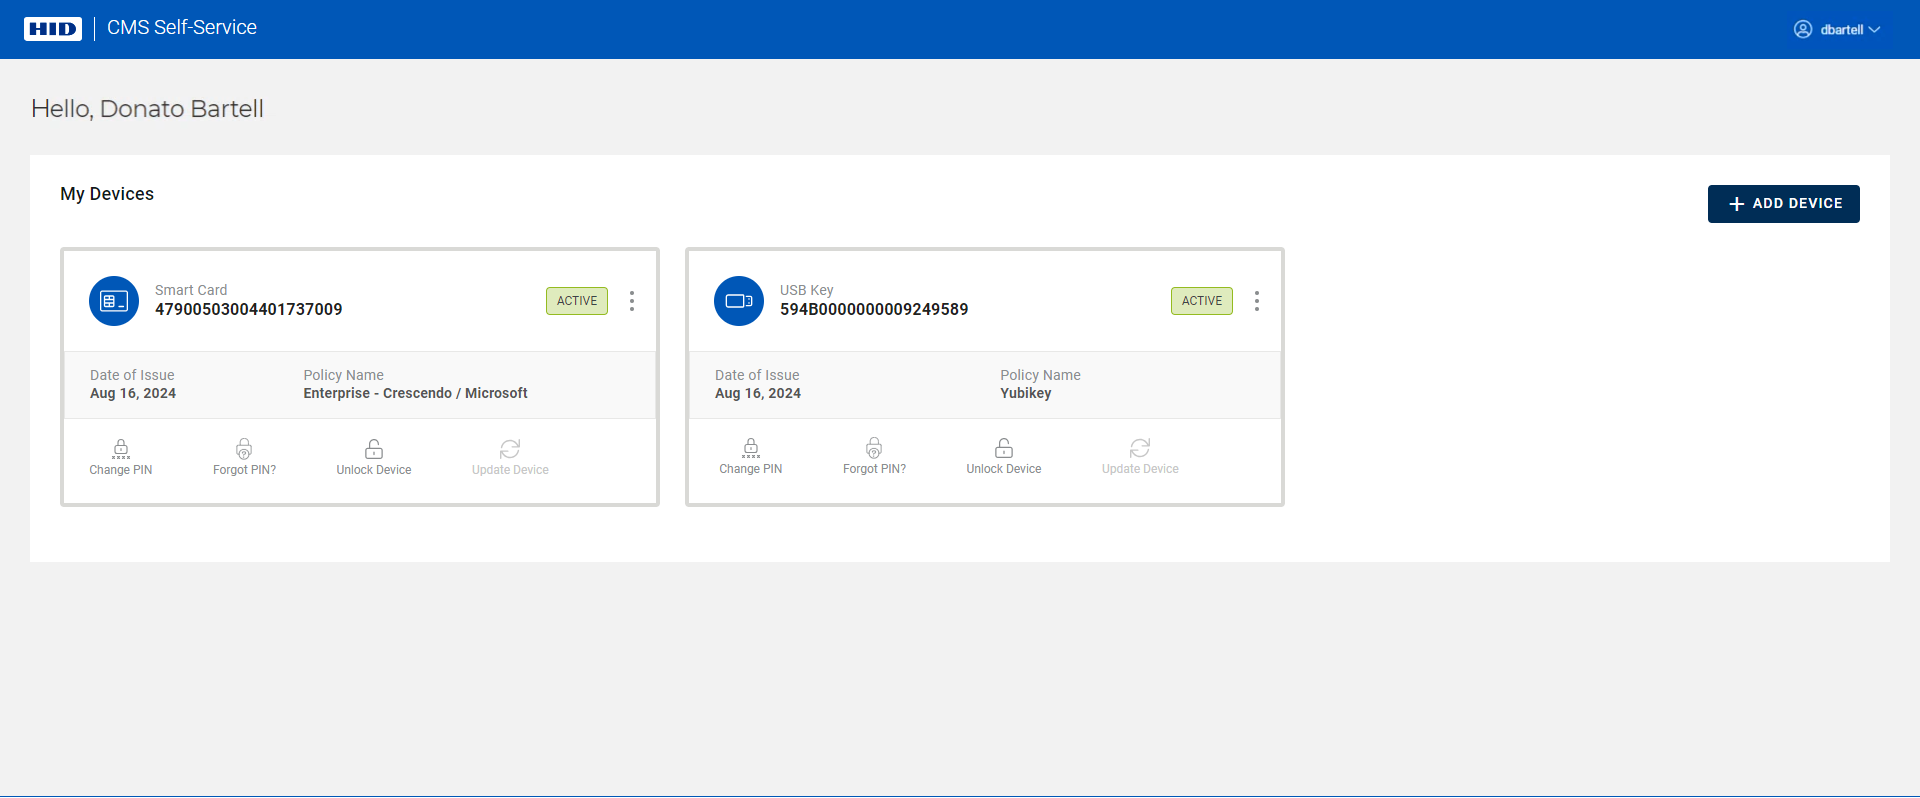
After your device is activated, the Add Device dialog box closes automatically. Your My Devices page now displays details about the newly-issued device:
Particularities Concerning FIDO Applications
If your device contains a FIDO application that uses an Entra ID passkey-enabled service, you will be prompted by Microsoft Windows to register the passkey. You will enter or set your FIDO application PIN during the passkey registration with Entra ID. This takes place during the issuance of your device (before setting the device PIN).
Depending on your device and its configuration:
-
If the FIDO application PIN is not shared, you are prompted to set your FIDO application PIN. This PIN can be the same as the device PIN you provide to HID CMS at the end of the issuance.
Note: You may choose to have different PINs, just remember to use the right PIN in the right context: the FIDO application PIN for passkey authentication with Entra ID, and the device PIN for all the other HID CMS scenarios.
-
If the FIDO application PIN is shared, HID CMS displays a temporary PIN that you must use to register your passkey with Entra ID.
Note: This temporary PIN is automatically copied to the clipboard and you just need to paste it (using Ctrl+V) when prompted by the Microsoft Windows passkey registration pop-ups. You do not need to remember this temporary PIN.At the end of the issuance, HID CMS asks you to enter your definitive device PIN. This same PIN will also be used for passkey authentication with Entra ID.


