Additional Fields - Visitors Profile
Summary Overview
The Additional Fields – Visitors Profile feature in HID Visitor Manager allows organizations to collect and store supplementary visitor information, such as Emergency Contact, Country of Birth, and Country of Citizenship— as part of the visitor’s profile.
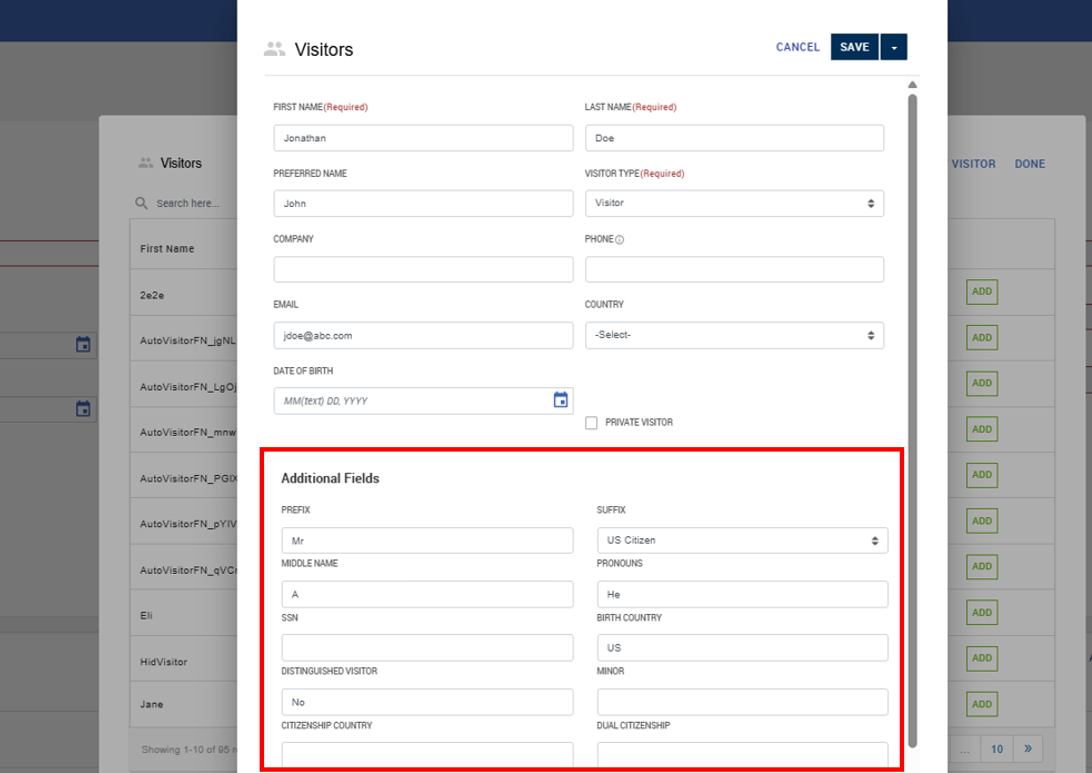
When this feature is enabled, hosts can enter this information during the pre-registration process. Information collected in the Additional Fields for the Visitors Profile will remain associated with the visitor’s profile for future reference unless manually updated. These additional fields are visible to all approvers in the approval workflow, enabling them to make informed decisions.
This document outlines how to enable and configure Additional Fields in the Visitors Profile, and how to set the system to print these fields on a visitor badge. Once the additional fields are configured, the hosts can provide the necessary visitor information during pre-registration, which can not only be used while approving tasks but also appears in the visitor record for future use.
*For Additional Fields that capture information specific to a visit that does not stay associated with a visitor's profile (e.g., noting that the visitor brought their own steel toed boots and helmet), see documentation for Additional Fields - Visitors Check-In.
NOTE:
-
Admin users can add up to 20 text fields (including dropdown and text fields) and 5 date fields.
-
The field name length is restricted to a maximum of 500 characters.
Prerequisites
-
The user must be logged in as Visitor Administrator.
Enable Additional Fields Feature
Follow the procedure below to enable Additional Fields:
-
Open the App Launcher
-
Navigate to the Admin application > Master Data.
-
In the Master Data search bar, search for PIAM Module Configuration Parameters. Click the dropdown.
-
A new search bar will appear (under PIAM Module Configuration Parameters). Click the “Search” bar and type ENABLE_CUSTOM_FIELDS.
-
The Value column for ENABLE_CUSTOM_FIELDS displays 0, meaning Additional Fields are not enabled. To enable, click directly on “ENABLE_CUSTOM_FIELDS” and change the Value Field to 1. Click SAVE.
-
The application will refresh. To verify Additional Fields is enabled, you should now see a 1 in the Value Column. (0 indicates disabled, 1 indicates enabled).
Configure Additional Fields for Visitors (Profile)
This section explains how to add additional fields for capturing additional visitor information while registering the (new) visitor. These fields allow additional information to be recorded for the visitor record beyond the standard data points.
-
Log in to the HID Visitor Manager Application as a Visitor Administrator.
-
Navigate to App Launcher > Admin module.
-
Click on the Additional Fields tab in the left navigation panel.
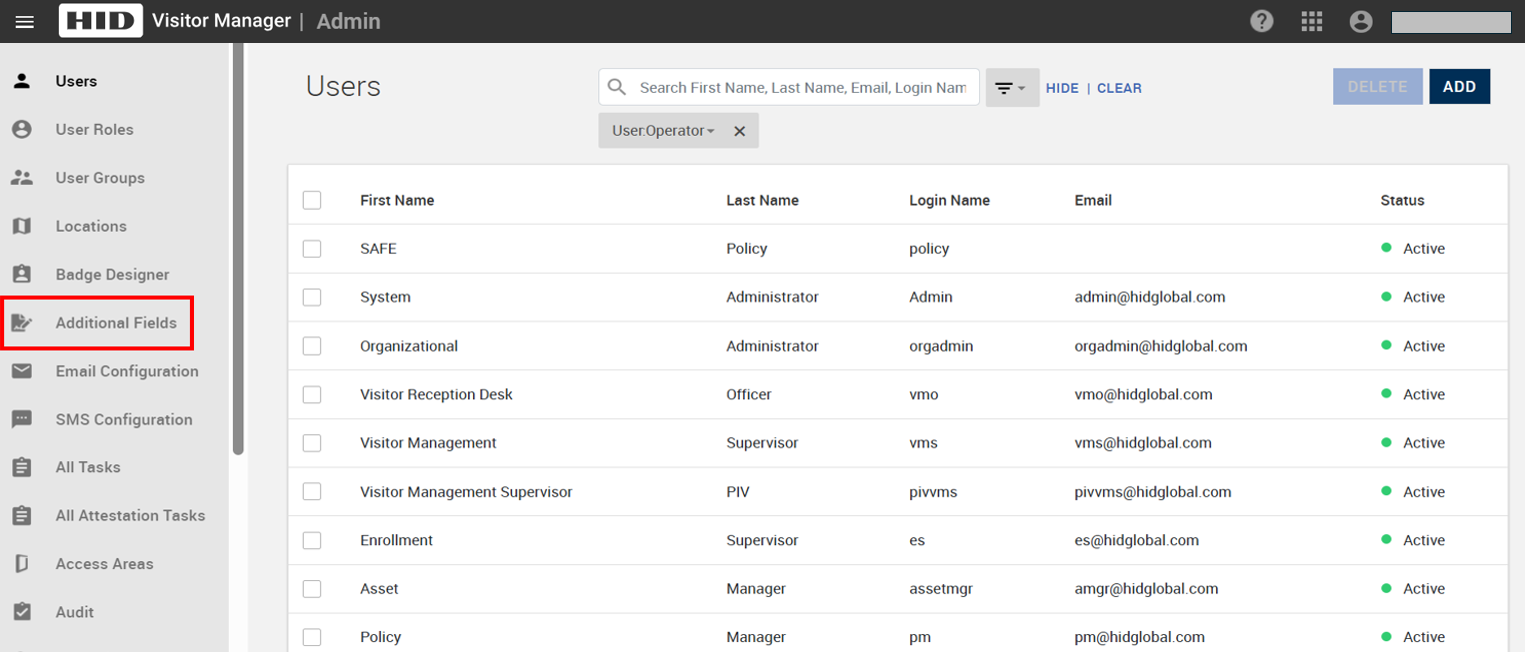
-
Adding a New Field
-
Click the ADD button to add an additional field.
-
Enter a name for the new field.
-
From the Applies To field, select Visitor Profile.
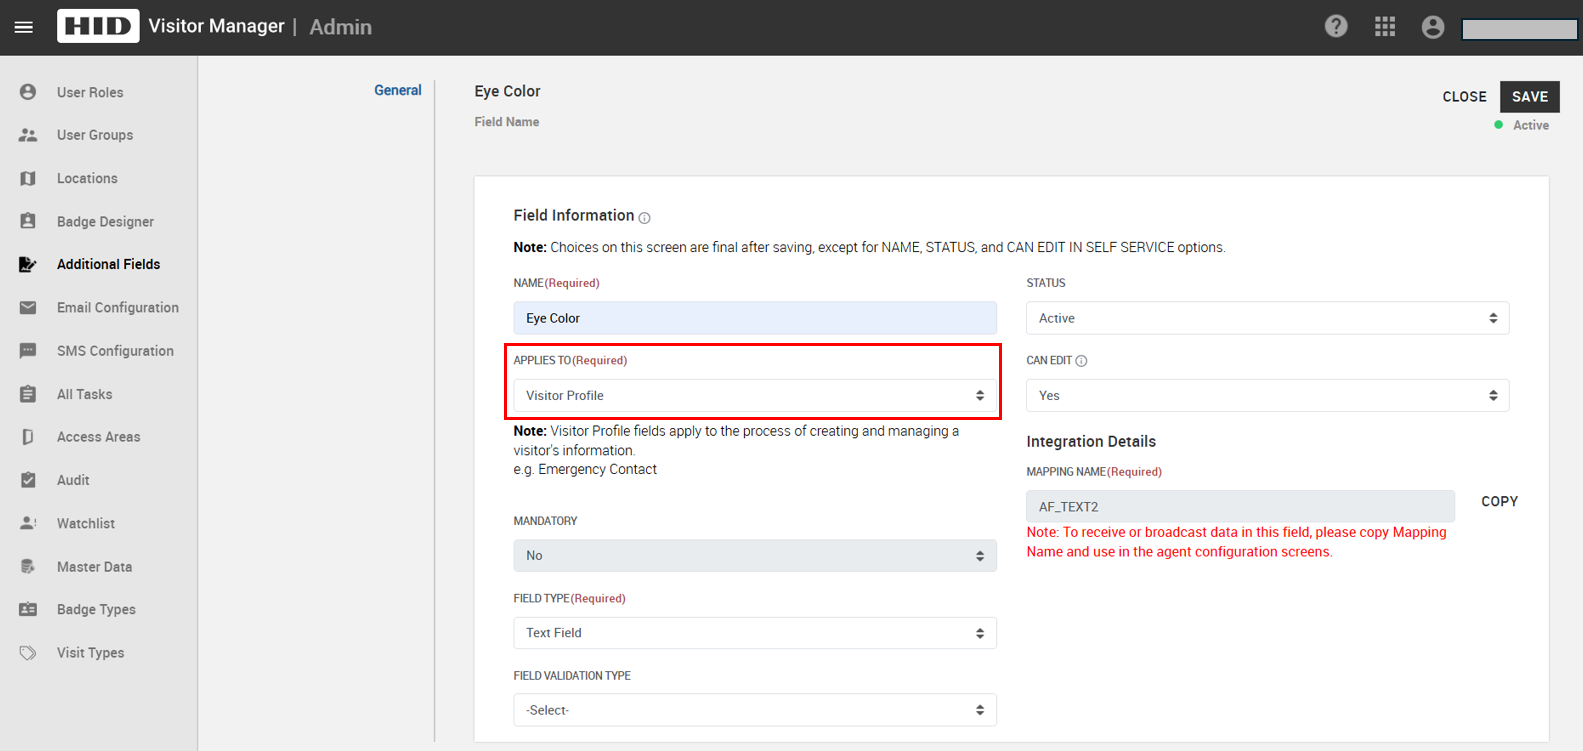
-
Change the status of the Additional Field to Active. If the status is inactive, the field will be hidden from the Visitor record.
-
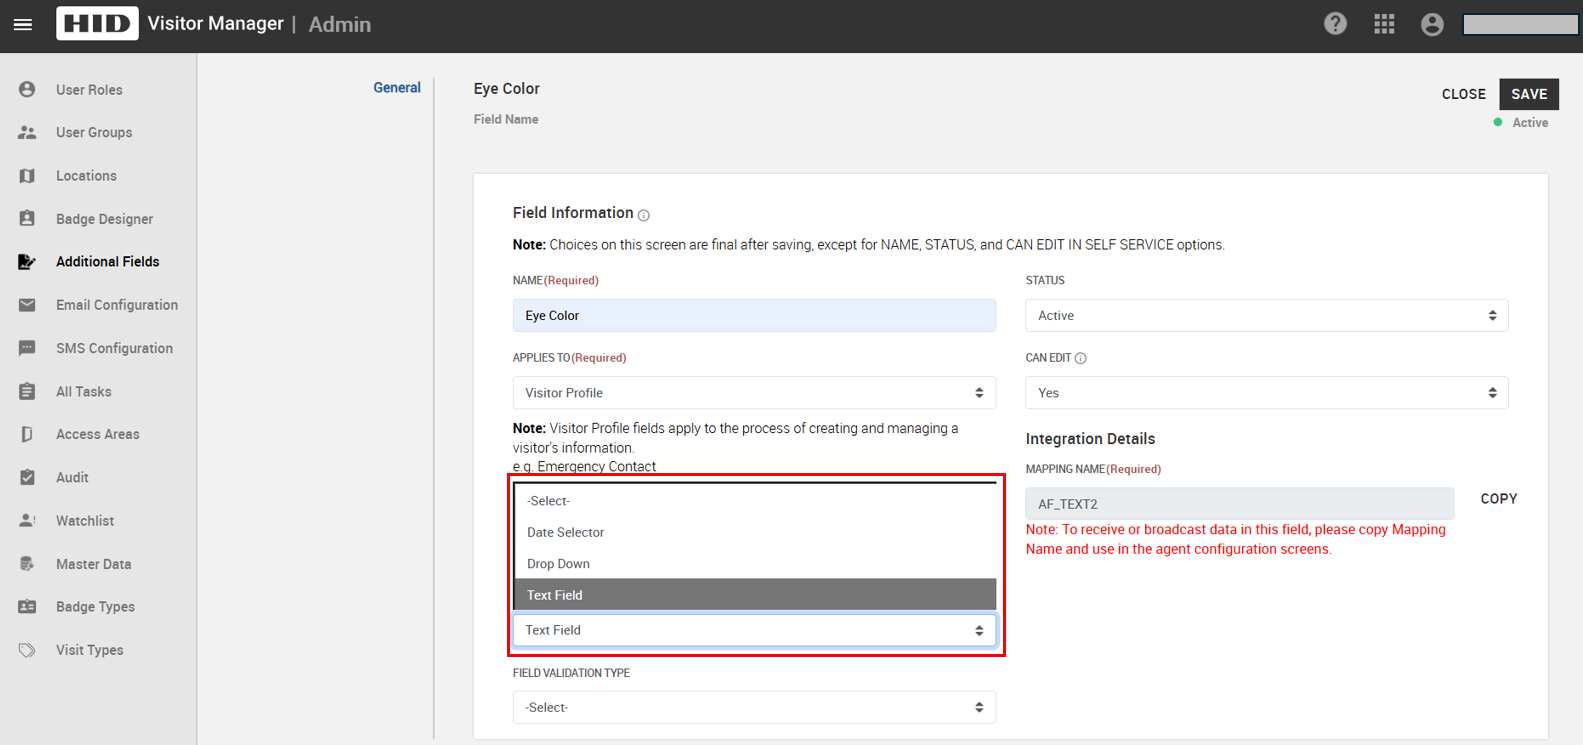
Select the Field Type from the dropdown menu. Choose from Date Selector, Drop Down, or Text Field.
-
Date Selector: Select this option if the additional information to be captured is in the date format.
-
Drop Down: Options for drop
-down must be separated by semicolons (;). -
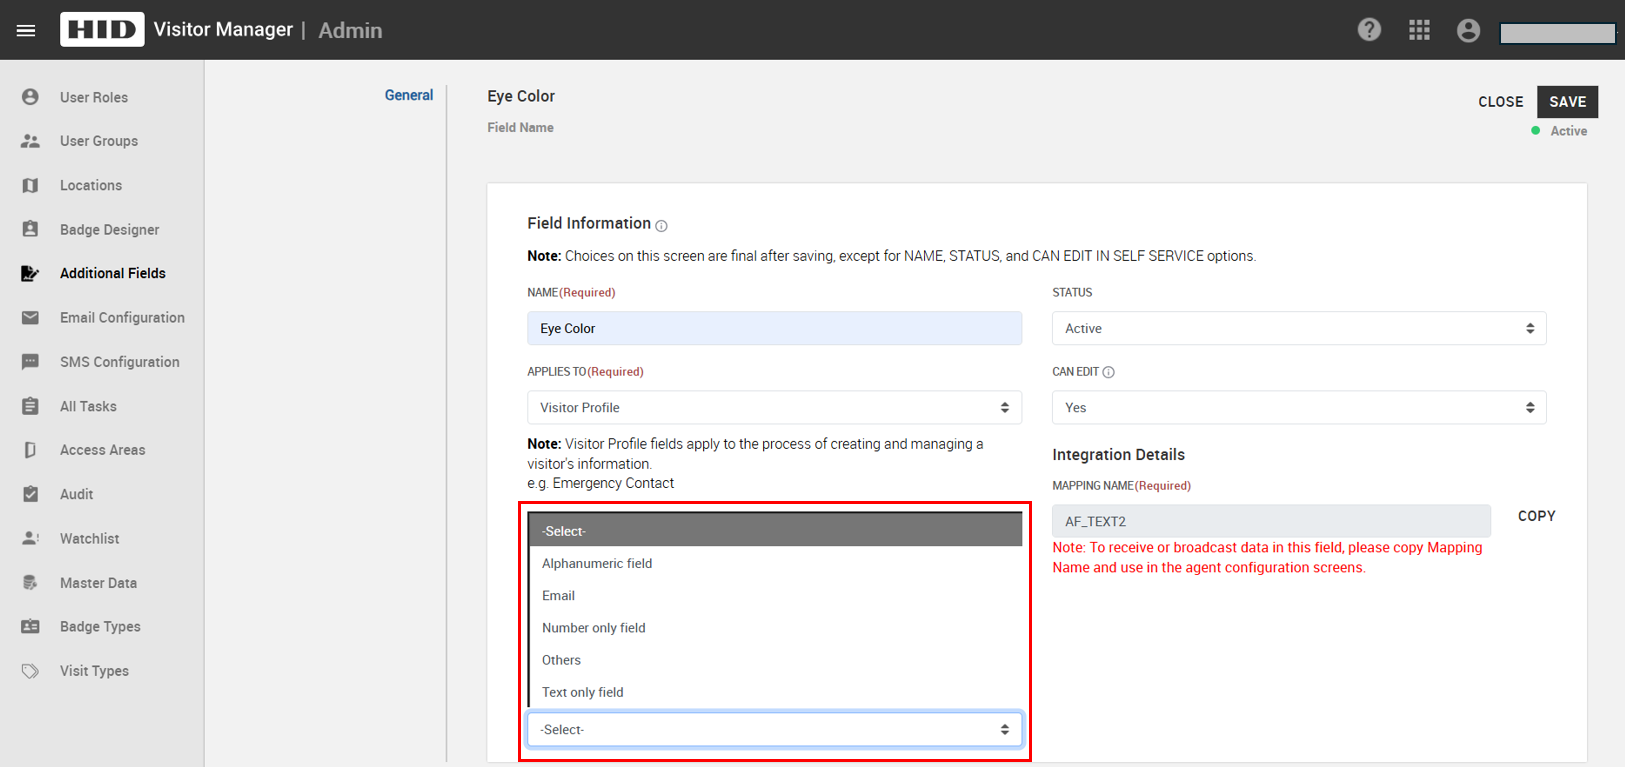
Text Field: Select a Field Validation Type to add validation to the text field. Leaving this blank creates a text field with no validation.
-
-
NOTE:
-
When the status of the field is active, the host can enter specific information while adding a new visitor during visit pre-registration.
-
Once the host enters the information, it becomes available for the approvers to review as part of the already configured approval process and visit-specific conditions.
Approval task options include: Visit Access Request, Visit Location Request, Visit Location Approval, Security Check -
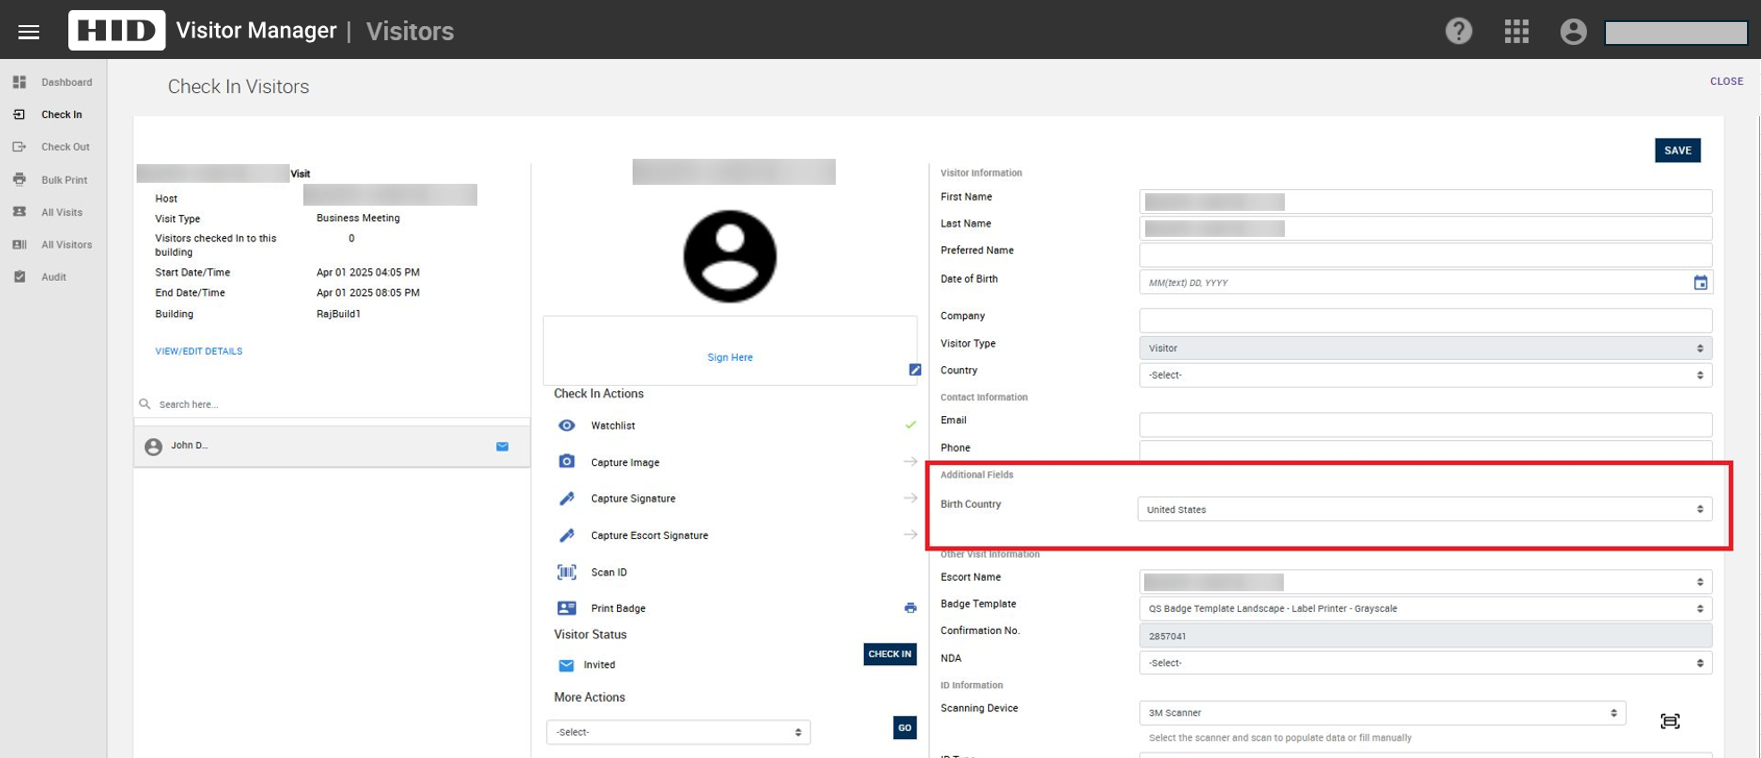
This information is also available for the Visitor Reception Desk Officer (VMO) at check-in.
Print Additional Field for Visitors (Profile) on a Badge
Follow the steps below to configure a badge to print the information captured about the visitor in the additional fields.
-
Navigate to the App Launcher > Admin module.
-
Click on Master Data in the left navigation panel.
-
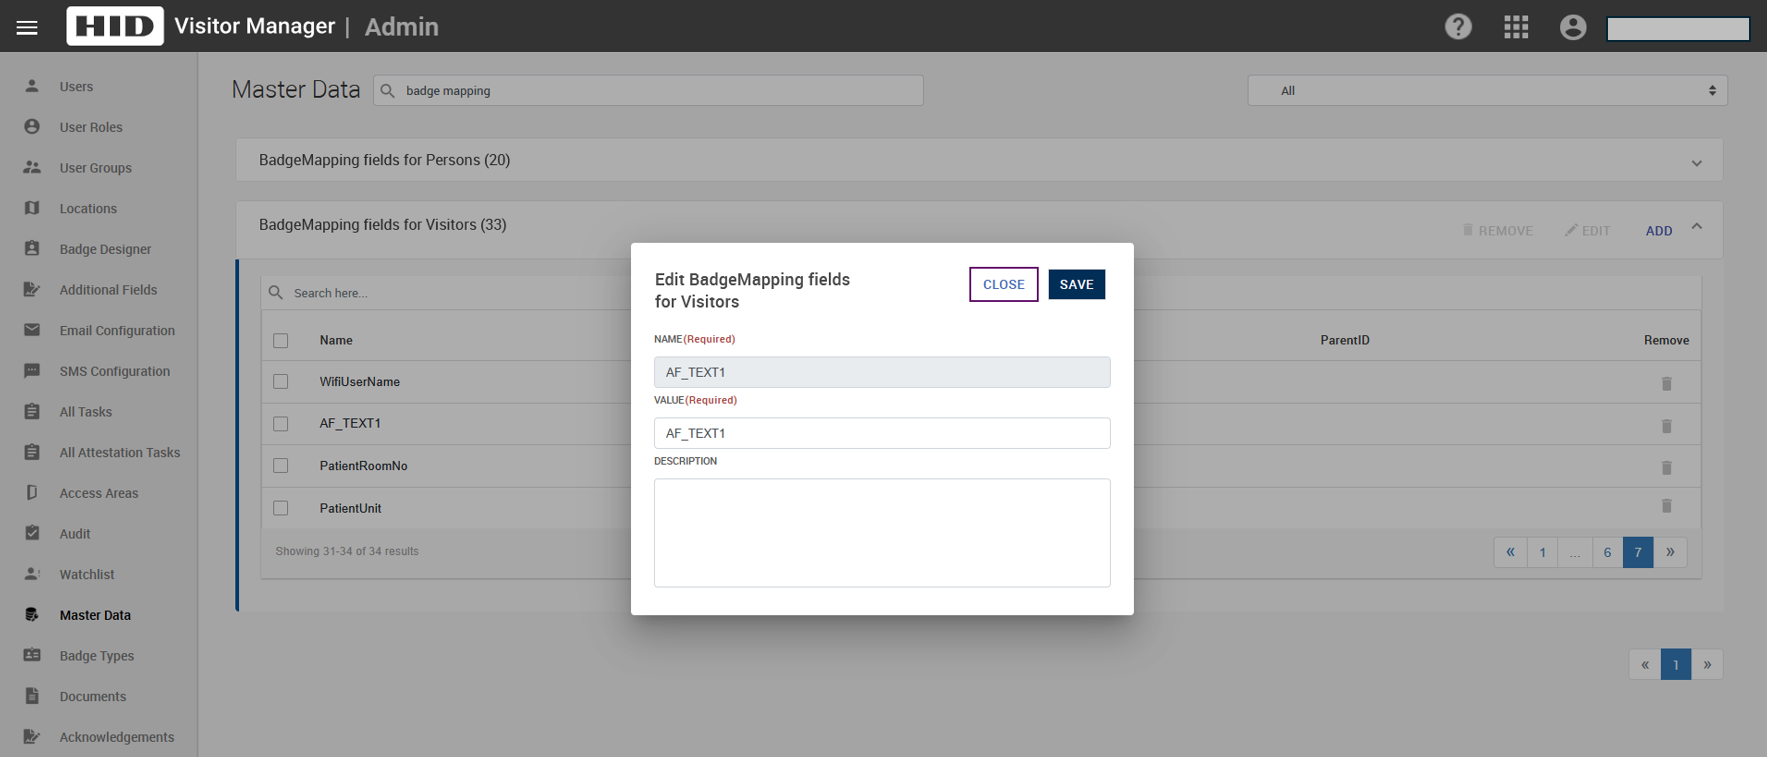
Search forBadgeMapping fields for Visitors. Click to expand the section.
-
Click on the ADD button to add a new master data option using the previously created mapping name of the Additional Field to be printed.
-
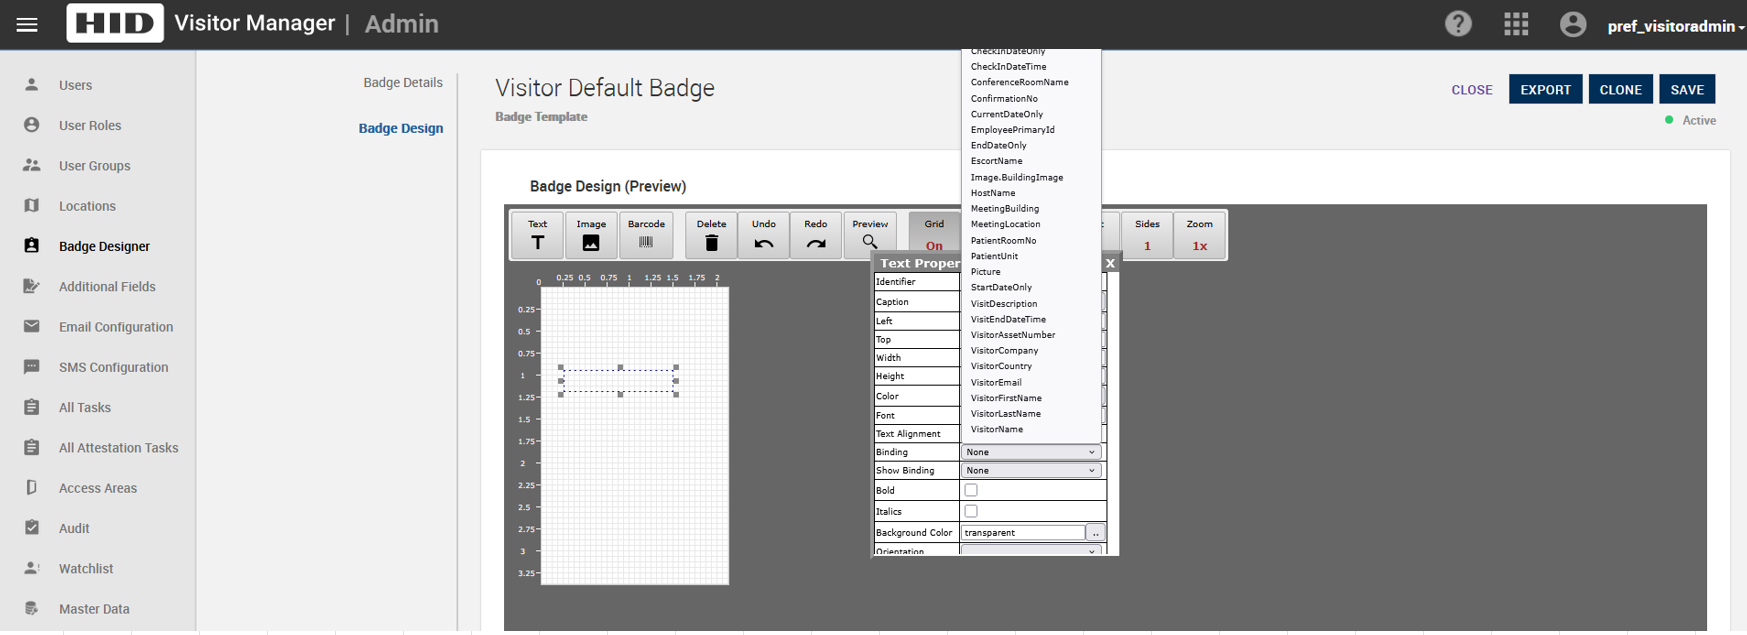
Now, in the Admin module, navigate to the Badge Designer and select the badge on which the information has to be printed. In the binding dropdown, select the newly added master data value.
-
Once the mapping is completed, click SAVE. This information will be available to be printed on the badge.


